Wondering how to convert JPG to SVG for Cricut projects or use in Cricut’s Design Space? There are a lot of different ways, and today I’m going to show you two easy methods!
How to convert JPG to SVG for Cricut crafts
Hey guys! Time for a Cricut post today—yay. I am going to be showing you guys two of my favorite ways to convert JPG or PNG files to SVG files for Cricut projects.
There are a ton of different ways to convert image files to SVG files, and these are just two of them. If I sound like I’m speaking a different language, here’s a quick overview of what some of these terms mean.
JPG, PNG, and SVG: What’s the difference?
JPG (or JPEG) and PNG are simply different types of image files. They can typically be identified by the file extension at the end of an image’s file name (for example, Image.png). JPG stands for Joint Photography Group and is a file type commonly used for web images.
That’s because JPG files are smaller and slightly lower quality. Typically this doesn’t compromise the image—it just allows it to load faster on websites and devices. PNG stands for Portable Network Graphics and is another common type of image on the web.
However, PNG files are usually larger and higher quality. That means that they are better for printing and not as good for use on the web. Since they are larger, they can load slower. PNGs also allow you to have a transparent background.
An SVG file, however, is a graphic file. It stands for Scalable Vector Graphic, and it is required for your Cricut cutting machine. You can upload SVG files straight into Cricut Design Space, or you can use upload images and convert them to SVGs with varying levels of success (more on that in a bit).
SVG files allow your Cricut to “read” where it needs to perform different activities (for example, where to cut). In Cricut world, a lot of times you’ll just hear “SVG” files referred to as “cut files.”
Getting your feet wet with Cricut? Check out my detailed Cricut machine comparison post looking at the Cricut Joy, Cricut Explore Air 2, and Cricut Maker! I also have a tutorial guide for the EasyPress 2 and an overview of how to use the Cricut Mug Press.
Option #1: How to convert JPG to SVG using free web-based software
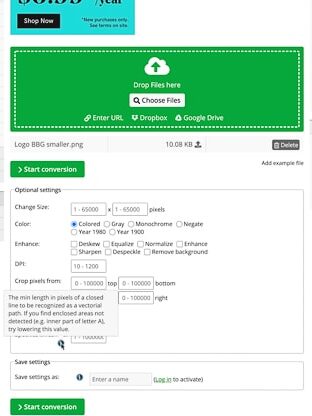
So how do you convert JPG or PNG to SVG? There are a ton of ways, but I am going to share a free and simple resource with you that meets 95% of my needs! It’s a website called Online-Convert.com, and it has resources for converting loads of file types.
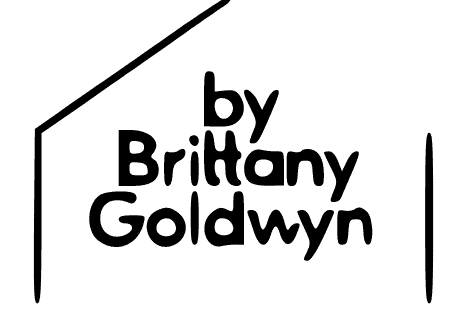
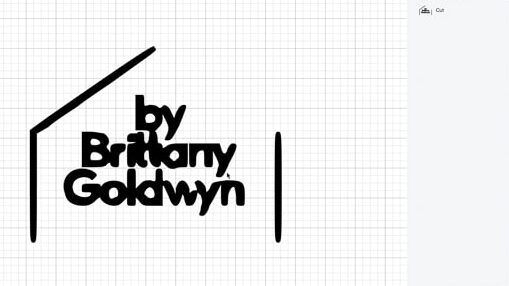
There are many websites like this one. All are probably about the same in terms of features and usability. I’m going to use a JPG version of my blog’s logo to show you guys how these work.
I realize these screen captures are kind of hard to see, but hopefully they will at least give you an idea of how easy this is. For the full experience, definitely check out the video I made about this conversion process too.

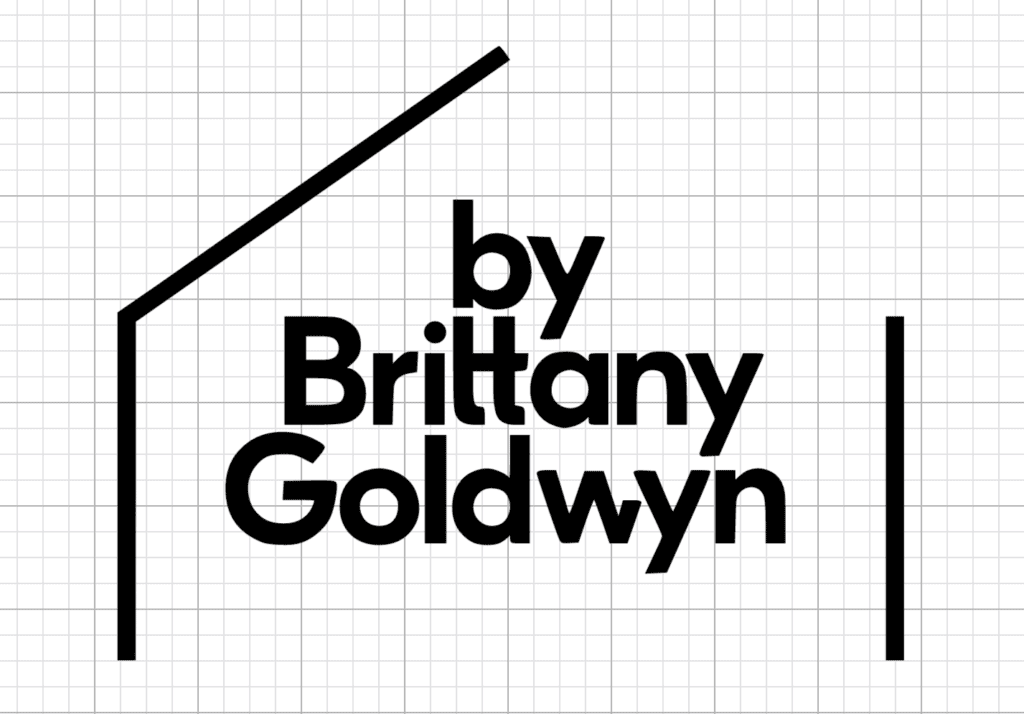

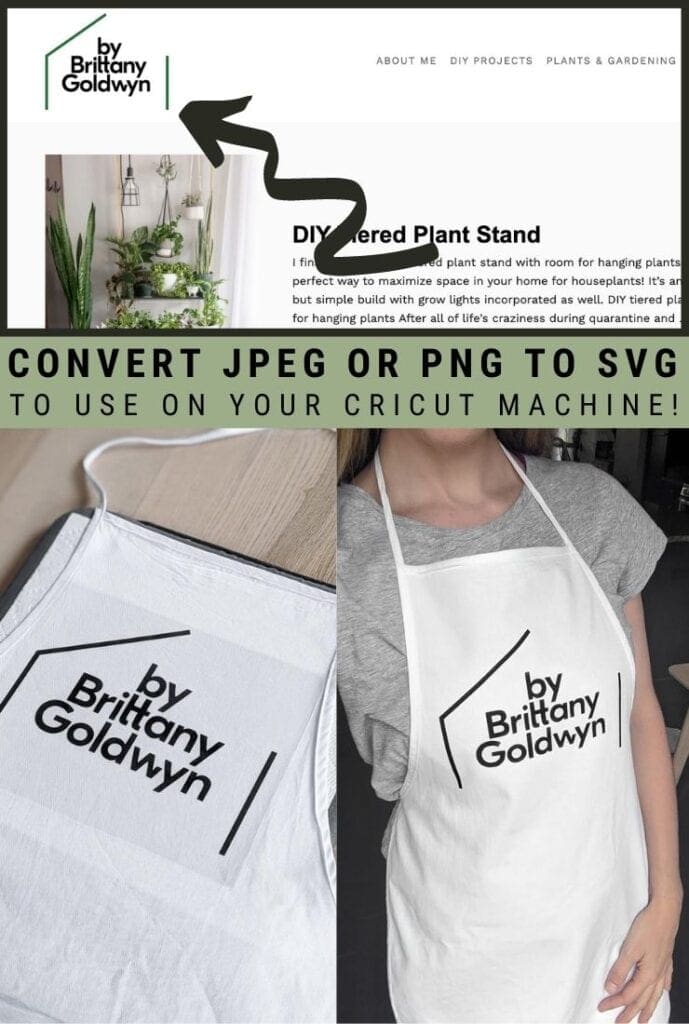
As you can see, it does a really good job. You can mess with the settings to help you achieve a better outcome if you have a slightly more complex image. This is perfect for simpler images like my logo. I’m planning to upload this into Cricut’s Design Space to cut it out of iron-on vinyl for a crafting apron. And this file will do just the trick!
But what about smaller image files?
However, what if your image is smaller, lower quality, or has less contrast between the different color and lines? Well, the free solution won’t work as well. It’s free, so we can’t complain too much, can we?
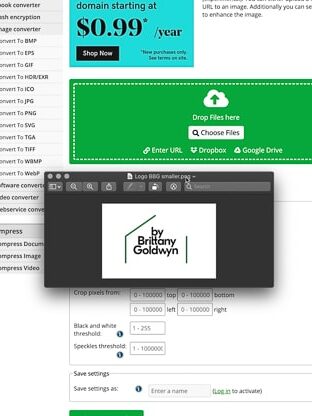
But I want to show you how the website worked on a smaller version of my logo. After I uploaded it and ran it through the conversion from JPG to SVG, I ended up with this. (This is without changing any of the settings.)


Yikes. That is definitely not going to look good on my apron! So this file probably isn’t going to work with this image convertor. However, I want to flag one feature that has helped me with some of my past conversions: speckles threshold.
If you scroll down in the image settings (before converting it), there is a field for “speckles threshold.” This is the minimum length in pixels for a closed line to be recognized during conversion.
So, for example, if you try to convert a JPG file of the letter “A,” you might find that it doesn’t detect and outline the little triangle in the A. You need to lower your speckles threshold.
The lowest threshold for this free software is “8,” so I usually just pop that in as a first stab to see if it helps. I’d say 75% of the time it fixes the issues with not detecting certain spots in an image. However, in this case, this is what I got.
Almost certainly because it was a smaller, lower-quality image to begin with. Lowering the speckles threshold helped, but it still kinda looks bad. Not nearly as crisp as my logo is.

What images are best?
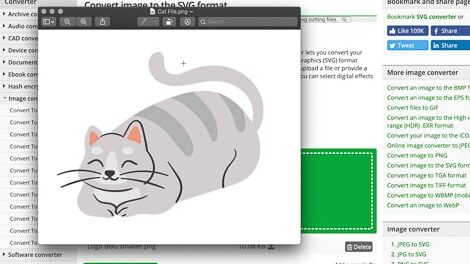
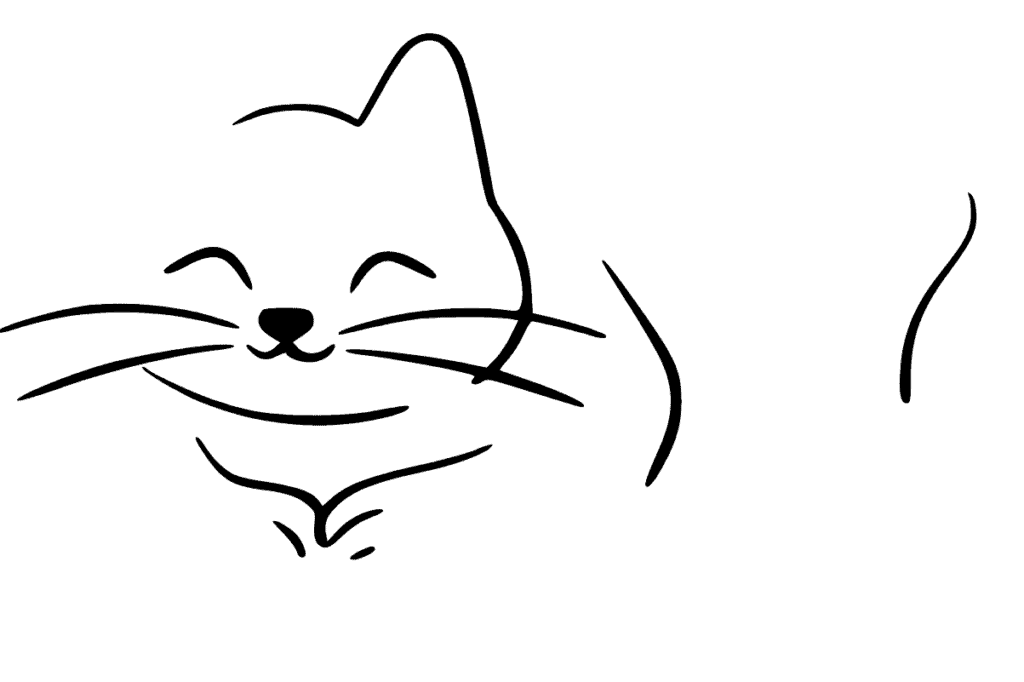
When using software like this, it’s also best to use simple, high contrast images with clear delineation between colors and clear lines. Let me show you what I mean with this picture of a cat. See what happened when I ran it through the software? Not good! I mean, unless you want an abstract cat.


Using Canva’s Image Converter to Convert to SVG
Another resource to check out is Canva’s Image Converter tool. I am a Canva user for my websites, for personal projects, and for my day job. I love Canva! It’s super user-friendly, and many features are free.
However, if you pay for a Pro membership, you can upload images and convert them to SVG format. While this isn’t free, Canva is a reputable and less buggy resource than some of the free websites out there. So if you’re converting lots of files, it’s worth it.
Option #2: How to convert JPG to SVG for Cricut using Design Space
Alright, the second way to convert a JPG or PNG to SVG for use in Cricut is by doing so directly in Cricut’s Design Space software. The software is free, and you need it to use your Cricut anyway, so you already have it if you’re a Cricut crafter.
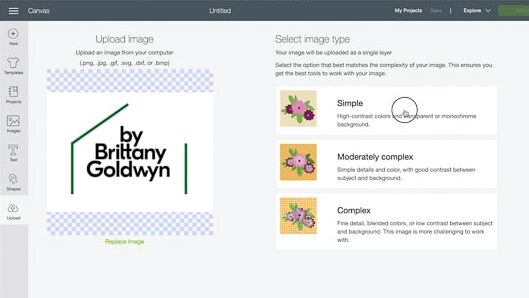
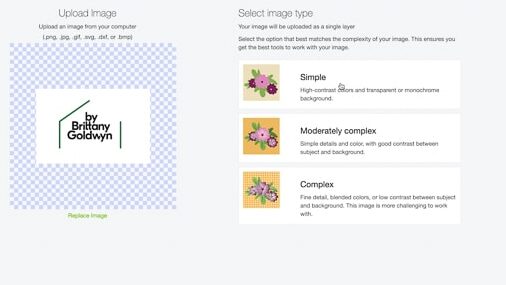
Step 1: In Design Space, click “Upload” on the left-hand sidebar. Then upload your JPG or PNG image. It will look something like this. Choose an image complexity based on the descriptions Cricut gives. I chose “simple” for mine and it did a pretty good job.

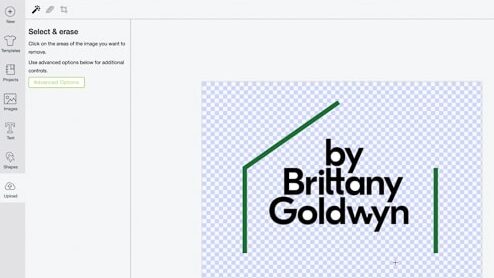
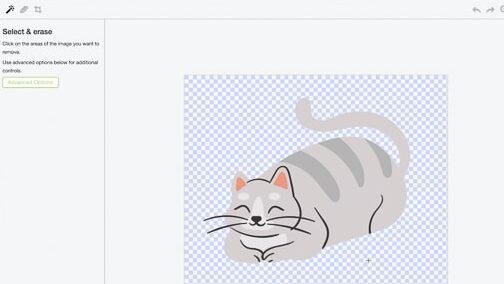
Step 2: It will then direct you to an editing screen where you’ll have three editing options: the magic eraser, an eraser brush, and a cropping tool. In the image below, I’ve used the magic eraser to click the white background to remove it. It removed almost all of the white background at once because it was able to “reach” all of it with one click.
Notice that it didn’t remove the white background on the areas inside of the letters like the B, a, etc. For those, I had to click each enclosed area individually to remove the white.
If you have an image that you want to remove large areas of but it doesn’t have great color differentiation, you can use the eraser too and increase its size. Decrease its size to do more fine-tuning.

Print-then-cut vs. cut in Design Space
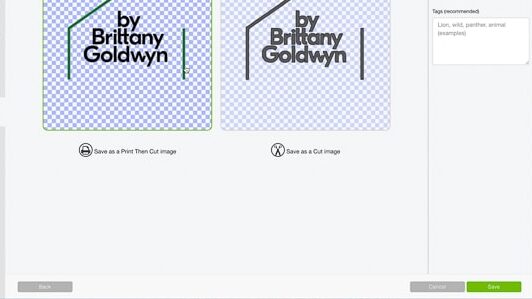
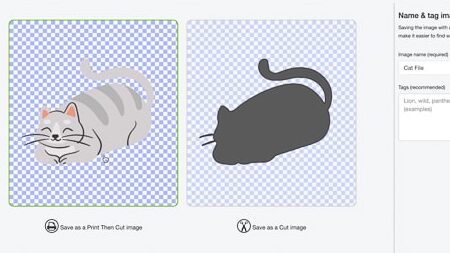
Step 3: When you’re done removing the parts of your image that you don’t want, you’ll have the choice to select a print-then-cut image or a cut image. As you can see below, the print-then-cut image retains the color because you’ll use this to print and then cut it out. For example, if you were making stickers on your Cricut.
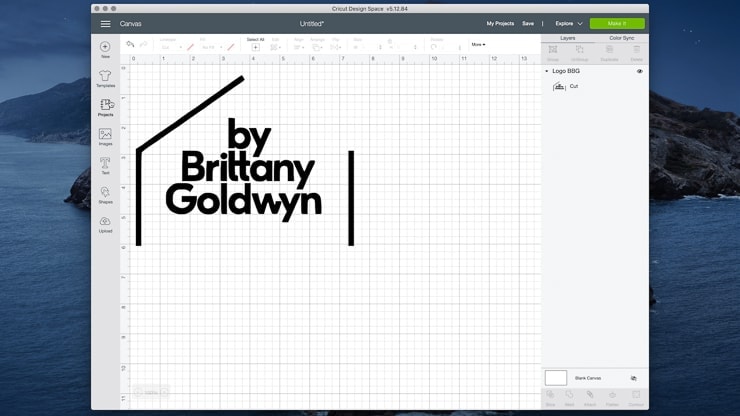
The cut image is what I want for my project, though. I don’t care that the color is gone because I’m going to be using it to cut my logo out of iron-on vinyl anyway. I can cut it out of whatever color vinyl I want. So I clicked that option and then save! The new file appeared on my Design Space canvas.


Since I showed you guys what a difference image size and quality made for the converter website, I want to show you the Design Space differences too. When I tried this same process using the smaller version of my logo, the result was similarly unimpressive.


And trying the cat image…
And then here’s how Design Space fared with the cat image. As you can see, I was able to easily remove the background of the image wit one click, meaning it’s a perfect candidate for print then cut in Design Space! However, the lack of clear lines and differentiation in the coloring meant it just turned into a cat blob with the “save as a cut file” option.


Limitations of converting in Design Space
One of the limitations to be aware of when converting files in Design Space is that you can’t save them off. You can save them for future use in Design Space—and you can even share them with others in Design Space.
But you can’t save them off and email them like you would be able to do with an actual SVG file. This isn’t a big deal at all if your ultimate goal is using the file to make a Cricut project.
For more Cricut tips and tricks, check out my post on how to slice text and objects in Design Space, how to layer iron-on vinyl, how to use the Maker’s knife blade to cut wood, and how to use the Maker’s debossing and engraving tips.
Final cut file and apron
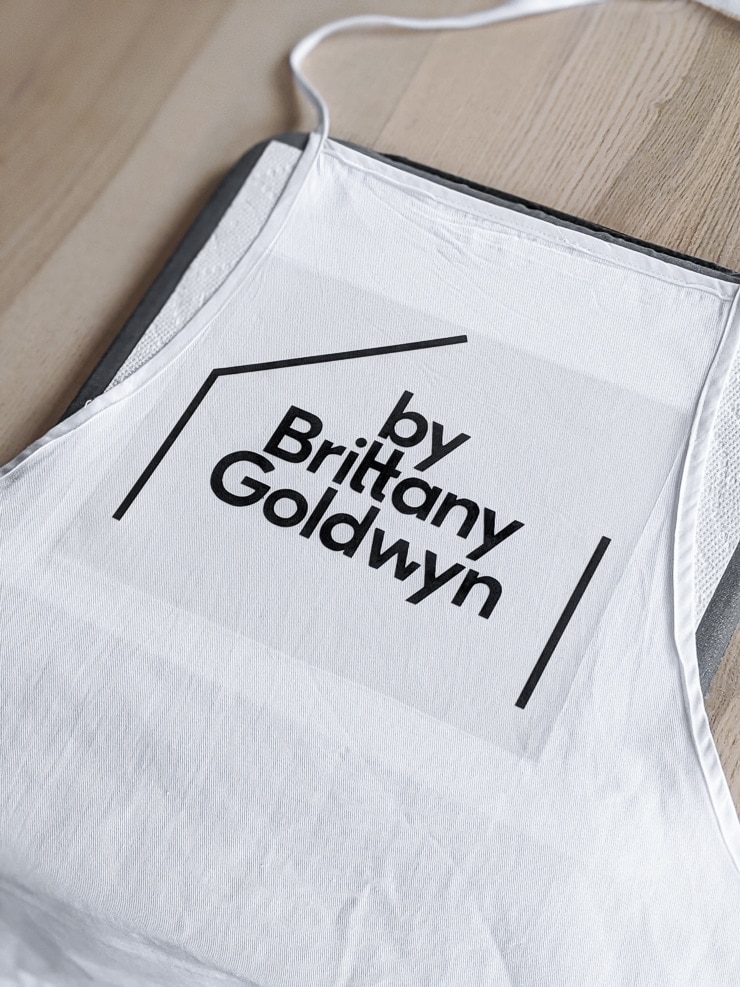
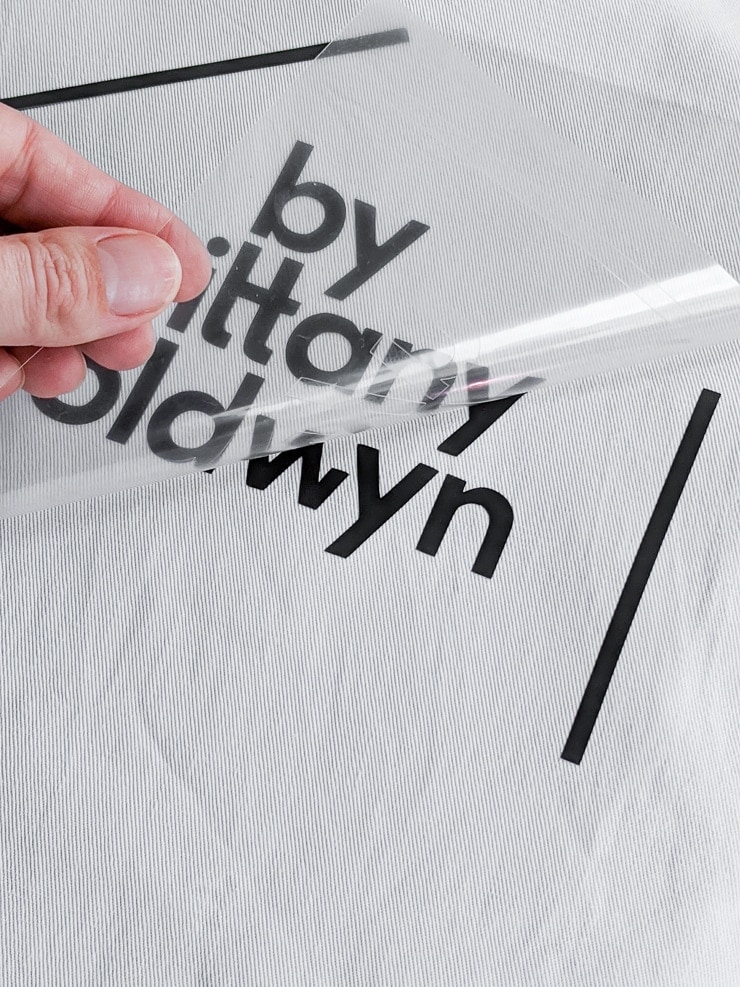
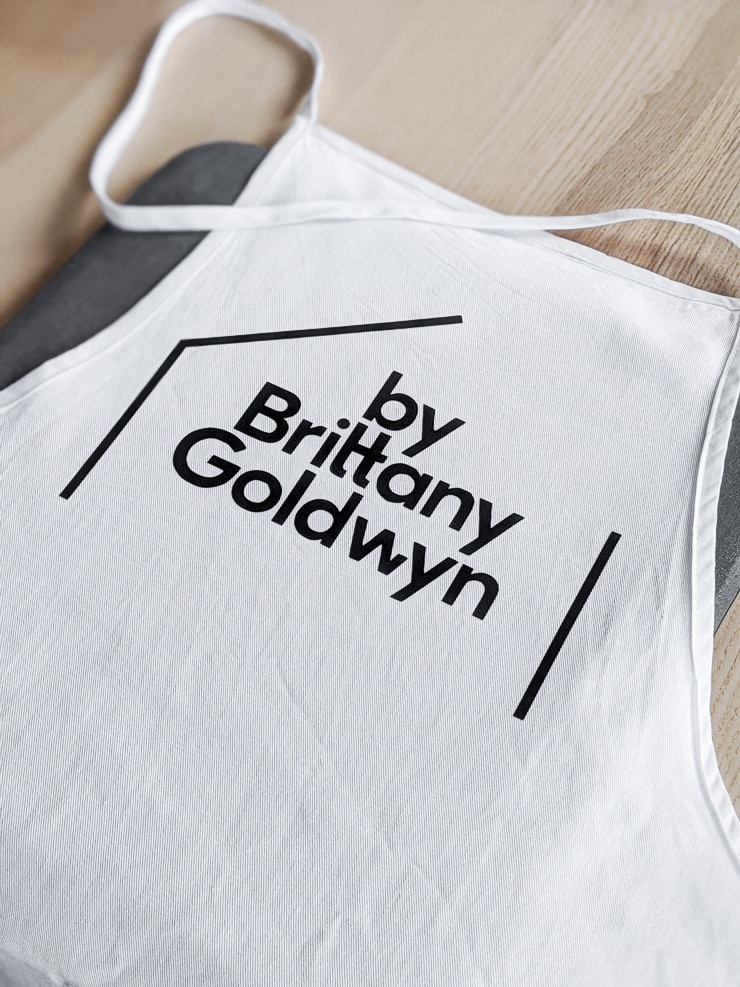
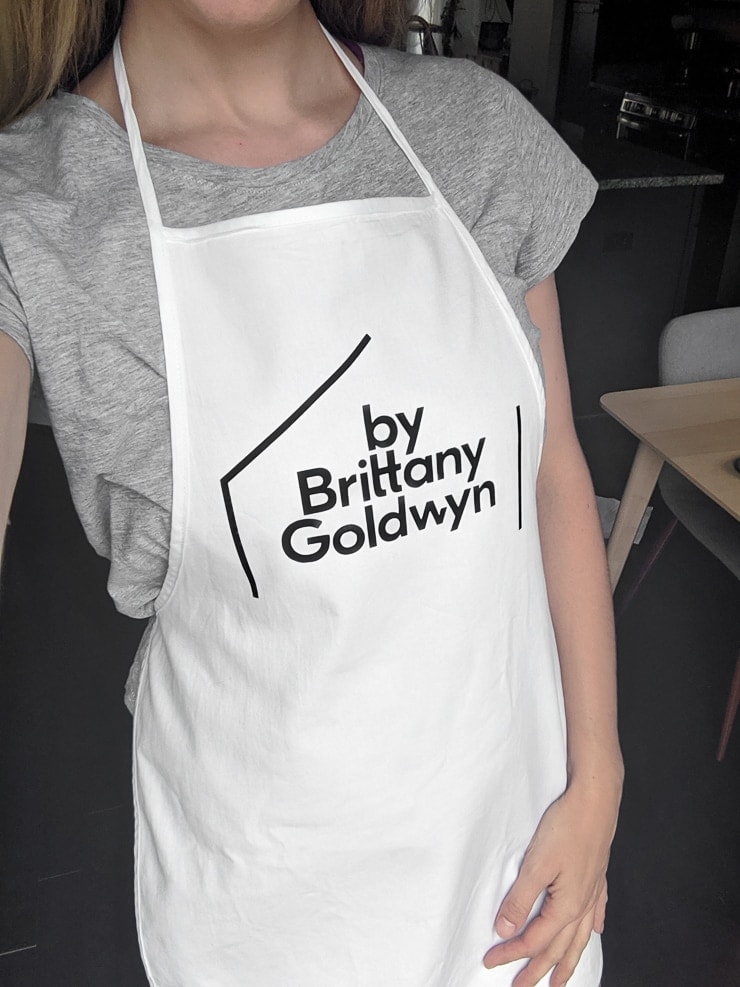
After I compared the files, I ended up liking the converted version of my logo from the converter website. The difference was slight, but the lines were just slightly more crisp. Since I wanted to do black iron-on on a white apron, I went with that one.
The design cut beautifully on my Cricut Explore Air 2 using black Everyday Iron-on material, and it looks lovely transferred to the apron! I can’t wait to wear this when I’m doing crafting or woodworking tutorial videos. Not only will it protect my clothes, but I’ll look professional doing it!


An important note on copyrights and licenses…
Now that you know how to convert a JPG or PNG file to SVG for your Cricut crafting, remember that you should only be doing it for images you have the legal rights to use. For example, it would definitely not be kosher to find an image of a Disney character, convert it to an SVG, and start selling t-shirts with them on it.
You don’t own the copyright to the image, and Disney is notoriously strict on who they license their content to. It’s simply not worth the risk.
Look for free images that come with a personal or commercial license if you’re just making projects for yourself. However, if you’re using files to make things that you’ll be selling or putting on a money-making website, definitely read the commercial use license closely to ensure that you can alter images and reproduce them in another format. Stay legal, folks!
Pin my tips about how to convert JPG to SVG for Cricut crafts: