This post shares details about cutting leather with the Cricut Maker and Explore Air 2! It includes details on cutting garment leather, tooling leather, Cricut brand genuine and metallic leather, faux leather, and more. Learn all about the different blades and techniques you need to ensure your Cricut leather cutting project is a success!
Are you looking for information about cutting leather with the Cricut Maker or with the Explore Air 2? You’re in luck! Because today I am sharing all about how to do it. Including info about the different blades you might need and the different types of leather you can cut.
It can be a little overwhelming to sort through all of the information out there. So, much like I did with my post on how to use the Cricut Maker’s knife blade to cut wood, I’m doing a deep-dive for you guys on the tools Cricut has to cut leather, faux leather, metallic leather, and more!

First up: cutting real leather. There are three different types of real leather you can cut. Garment leather, tooling leather, and Cricut brand genuine/metallic leather. If you’re cutting garment or tooling leather, you’ll need to use the Cricut Maker because you’ll need the knife blade. However, Cricut brand genuine/metallic leather can be cut on either machine, depending, because you can use the Explore Air 2’s deep point blade.

Let’s talk about garment and tooling leather first. What are the differences between the two? Garment leather is treated with softeners, so it’s often softer and more flexible than other types of leather. If your leather is dyed, it’s probably garment leather. When purchasing garment leather, look for uniform pieces that are smooth and will adhere well to the Cricut mat. You can check craft stores or specialty leather stores for garment leather.
Tooling leather, on the other hand, is typically tanned and less flexible than garment leather. This isn’t hard to find, but it isn’t as easily accessible as garment leather. Check online or in a leather specialty store for tooling leather you can use for crafts.
 DIY LEATHER POUCH BY LEMON THISTLE
Want more info on working with Cricut materials? See my guide to cutting chipboard with Cricut machines, my tips for working with holographic mosaic vinyl, and my roundup of awesome wood and chipboard projects you can make on a Cricut machine.
Here are the different thicknesses you can cut with the Cricut Maker knife blade:
- 2–3 ounce
- 4–5 ounce
- 6–7 ounce (tooling leather only)
The largest size of garment or tooling leather that you can cut with your Cricut Maker is 10.5” by 11.5” or 10.5” by 23.5” depending on the mat you use. Cuts should be no smaller than ¾” by ¾” though, and cuts should not be narrower than the diameter of a pencil.
That means that, like cutting wood on your machine, very intricate designs are probably not the best idea. If you choose to try cutting a design with a more intricate pattern, monitor the project while your machine is cutting it. If any small pieces pop out, make sure to remove them immediately so they don’t mess up your cut.
 DIY FAUX LEATHER KEYCHAINS BY THRIFTY & THRIVING
Whether you’re using garment or tooling leather for your project, conserve material by cutting it down to the size you need for your project. Use a purple StrongGrip mat to cut both of these leathers. And make sure to place the smooth size of the leather face down on the mat. If your design needs mirrored, don’t forget to mirror it!
Cricut recommends using a brayer to create a firm bond between the leather and mat, but I didn’t do that because I don’t have a brayer. I simply rolled my hands over the surface of the leather to encourage a solid bond. Then I used tape to paint all four edges of the leather down onto the mat. I used scotch tape—painter’s tape is recommended, though.
If your leather piece is wrinkled and needs flattened before cutting, you can wet the leather piece down on its unfinished side and place it between two towels. Then apply pressure from above using a stack of books. Make sure the leather dries completely before cutting it on the machine, though.
Before cutting, make sure you move your machine’s white star rolls all the way to the right so they don’t interfere with or imprint anything on your leather. The star wheels are there to help keep materials in place while your machine is cutting them. However, since leather is a thicker material, the wheels aren’t necessary and actually might mess with your project.

Unlike thinner materials like vinyl and paper, your machine cuts leather by taking multiple “passes” of your design. Each pass cuts a bit deeper until the design is done and completely cut out. When I made my hair bows, it took many passes for my machine to cut all of the bow’s pieces out.
When your machine is getting ready to cut your design, Design Space will calculate how long it things the cut will take based on the material, blade, and design. You’ll then see a projection on your screen with a time estimation. As well as an estimation of the number of passes your project will likely require.
While your Cricut Maker is cutting garment or tooling leather, you can monitor the completion progress on your screen. You should also monitor the project completion in real time. Make sure you remove any stray pieces that your blade cuts out. If you want to pause your machine to check your cut, you can do so. But generally Cricut’s estimations of the number of passes is accurate!
Before you offload your cut from the machine, make sure to check that your blade has been able to cut all of the way through. Design Space will prompt you to check so you don’t forget. If you need to do another pass on your design, you can press the Cricut symbol on your machine. If your design is completely cut out, you can offload your mat. Don’t be alarmed if you see marks from your knife blade on your mat. This is totally normal.
 DIY LEATHER CORD KEEPER BY TODAY’S CREATIVE LIFE
If the edges of your cut design are really rough, you might need to replace your blade with a fresh one. A dull blade can lead to rough-cut edges. If your leather is moving while you cut it, your mat might be at the end of its life. Does your machine continue to stall in the same area? I’ve had this happen with the knife blade and chipboard—so frustrating, I get it!
It might be a rough spot in the material, or there might be debris from the cutting process in the way. Pause the cut and clean up the material (without offloading it) to see if this helps. If it’s just a spot in the material you can’t get through, unfortunately you might have to start over with a new piece. 🙁

See my post, “Which Cricut Should I Buy?” for a detailed review and comparison of the Cricut Maker, Cricut Explore Air 2, and Cricut Joy machines. Also check out my tips for how to convert files into .SVG cut files for use in Cricut’s Design Space!
Now let’s talk about how to cut Cricut brand Genuine Leather, which you can cut using a Maker or an Explore machine. One nice thing about the Cricut Genuine Leather is that it comes in small packages with a few pre-cut sheets of leather. This leads to less waste and less leftover after small projects.
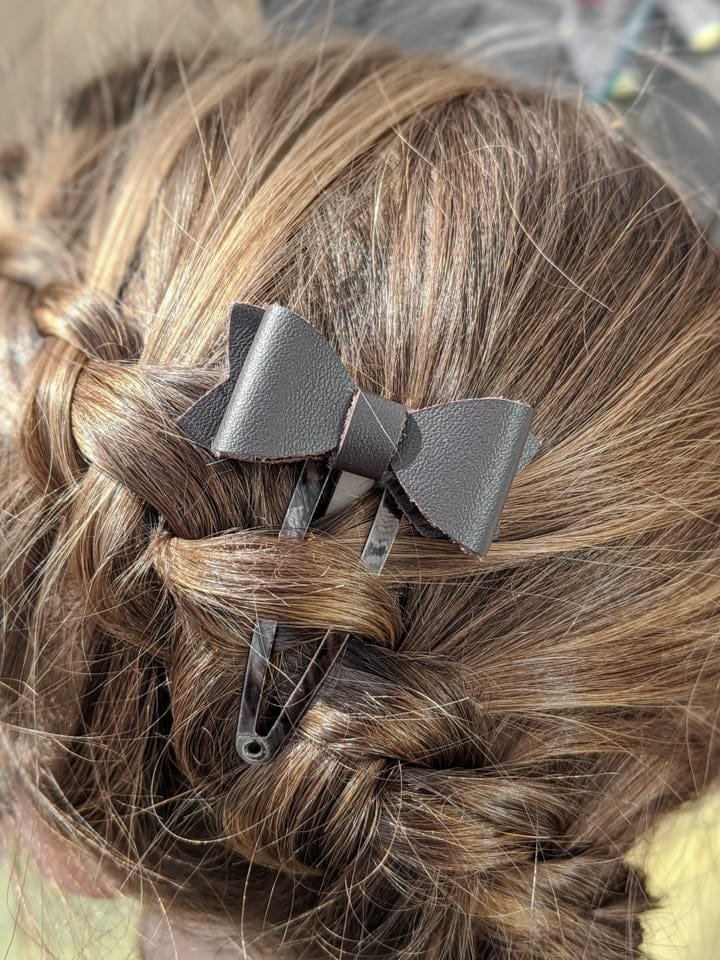
I used the Cricut brand Genuine Leather in dark brown for the cute little hair bows I made. I used one sheet for each of the bows, but you could probably tweak the layout of the pieces and get two out of each piece.


As with other heavier materials, you can get the best results by using a fresh, sharp blade and a cutting mat free of debris. You’ll use your purple StrongGrip mat for cutting Cricut Genuine Leather as well. To cut this leather, you adhere it to the mat face down. It’s very clear which side of the leather is the “good” side, so that’s an easy one.
I ensured it was adhered firmly to my mat by using a scraper tool (the kind usually used for vinyl). I simply ran it over the piece, pressing it down into the mat. You’ll also need to move the star wheels all the way out of the way to the right when using this type of leather. Same reasoning—it’s thicker, and the star wheels could lead to imprints on the design you’re cutting.

You’ll use a deep point blade on both the Maker and Explore machines. The deep point blade can cut leather up to 6 ounces. (Note: I didn’t find it officially recommended anywhere, but I did end up cutting my Cricut brand leather with my knife blade on the Maker because I didn’t have a fresh deep point blade around. It was fine!)
When you’re ready to cut, you need to tell your Cricut what type of leather you’re using. If you’re cutting on a maker, you’ll simply select “Browse All Materials” and select “Genuine Leather.” It will have the Cricut symbol next to it. On an Explore machine you’ll turn the dial to “Custom” first. Then in Design Space, select “Browse all Materials” and “Genuine Leather.”
Your cut will take a bit of time to complete. When it’s done, don’t offload the mat. Make sure to check that the blade has cut all the way through. If it hasn’t, you can do another pass at the design. You can actually do as many passes as you need to; you’ll tell Design Space to complete them one at a time.


The steps for cutting Cricut brand Metallic Leather are pretty much the same as cutting the Cricut brand Genuine leather.
- Start with a clean largely free of debris and a fresh, sharp deep point blade.
- Place the metallic leather face down on the mat and create a firm bond using a brayer or a scraper to apply pressure.
- Move star wheels all the way to the right to prevent them from creating unwanted imprints on your project.
- For Maker: Select “Browse All Materials” and choose “Metallic Leather” in Design Space. For Explore: Turn the machine’s dial to “Custom” first. Then choose “Browse All Materials” and choose “Metallic Leather.”
- When the cut is done, make sure it has cut all the way through before offloading the mat. You can tell Design Space to take another pass if you need to!
 DIY METALLIC LEATHER PASSPORT HOLDER BY LEMON THISTLE
Want more Cricut? Check out my post about my DIY Cricut stands, my complete guide to using the Cricut EasyPress, and my tips about using the EasyPress Mini and tips for using iron on with wood!
I am well aware that leather isn’t for everyone! That’s okay. Whether it’s a personal choice due to it being an animal product or simply the cost, the Cricut Maker and Explore Air 2 can both cut faux leather as well. There are just a few differences when cutting the Cricut brand Faux Leather.
Like the other leathers, it goes face down on the mat. However, since it’s lighter weight, you can just use a green StandardGrip mat and a regular fine-point blade. Not a deep point blade or a knife blade. Yay.
To tell your machine that you’re cutting Cricut Faux Leather, on an Explore Air 2 machine, turn the machine’s dial to custom and then select “Faux Leather (Paper Thin).” On a Maker machine, go to “Browse All Materials” and select “Faux Leather (Paper Thin).”
 DIY METALLIC LEATHER JOURNAL COVER BY BROOKLYN BERRY DESIGNS
Pin my tips about Cutting Leather With the Cricut Maker & Explore Air 2!


0 Comments