Wondering how to throw a birthday party for your cat? I spent way too much time making party decorations for my cat’s birthday, and I’m sharing all about how I used my Cricut machine to make them! Because if you don’t go over the top for your pets, can you even call yourself a pet parent? This post is sponsored by Cricut; it first appeared on bybrittanygoldwyn.com and is syndicated here.
How to throw a birthday party for a cat—4 fun DIYs!
Alright so if this is your first time at my blog, I have to make sure I get this out there now: I love my cats. They are both rescue cats from Washington Animal Rescue League (now the Humane Rescue Alliance). We got Henry from a WARL adoption van parked on 14th street in DC, and we got Blanche about 8 months later from the shelter itself.
She is our special baby girl. I wrote about her health issues in this post about her stomatitis a few years ago. She was pretty much sick in one way or the other from birth to 3, but she has been doing great the last few years.
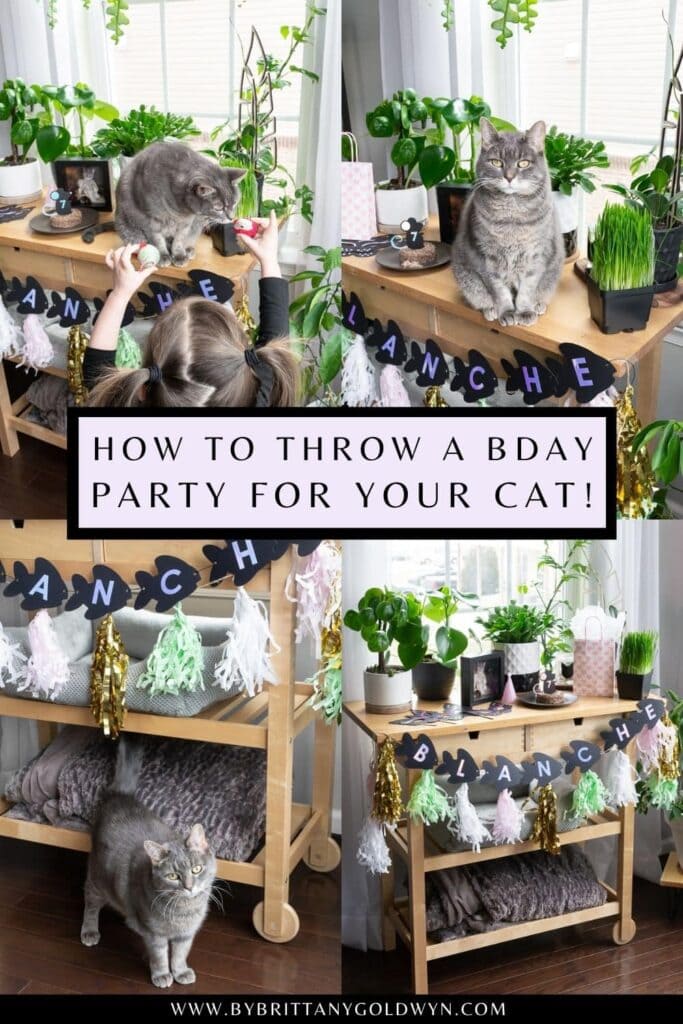
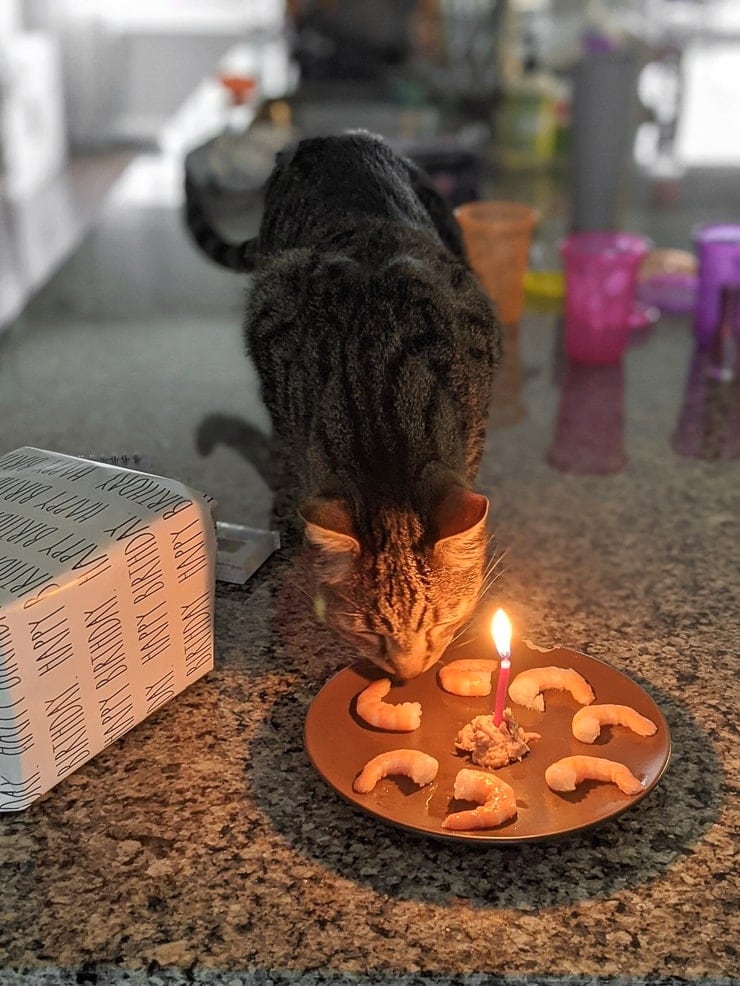
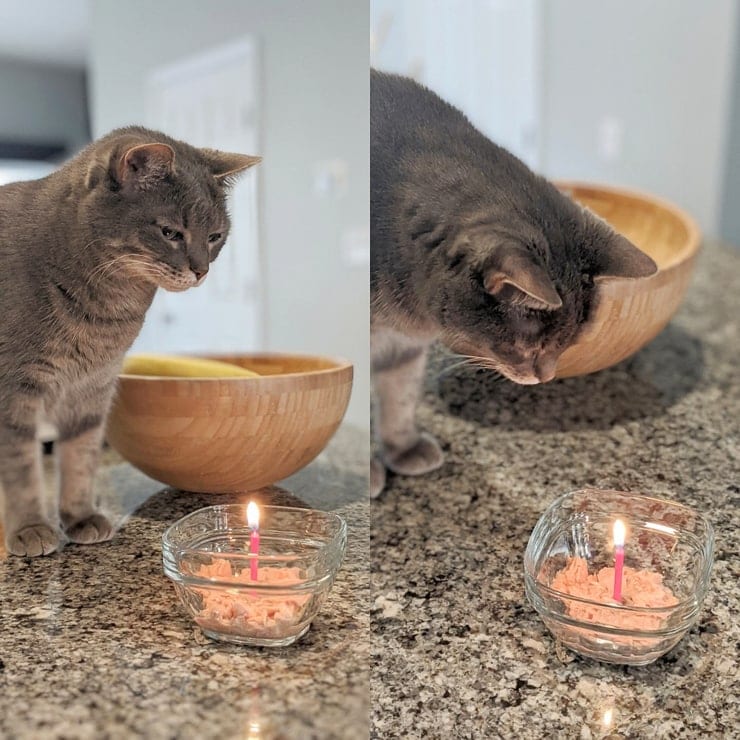
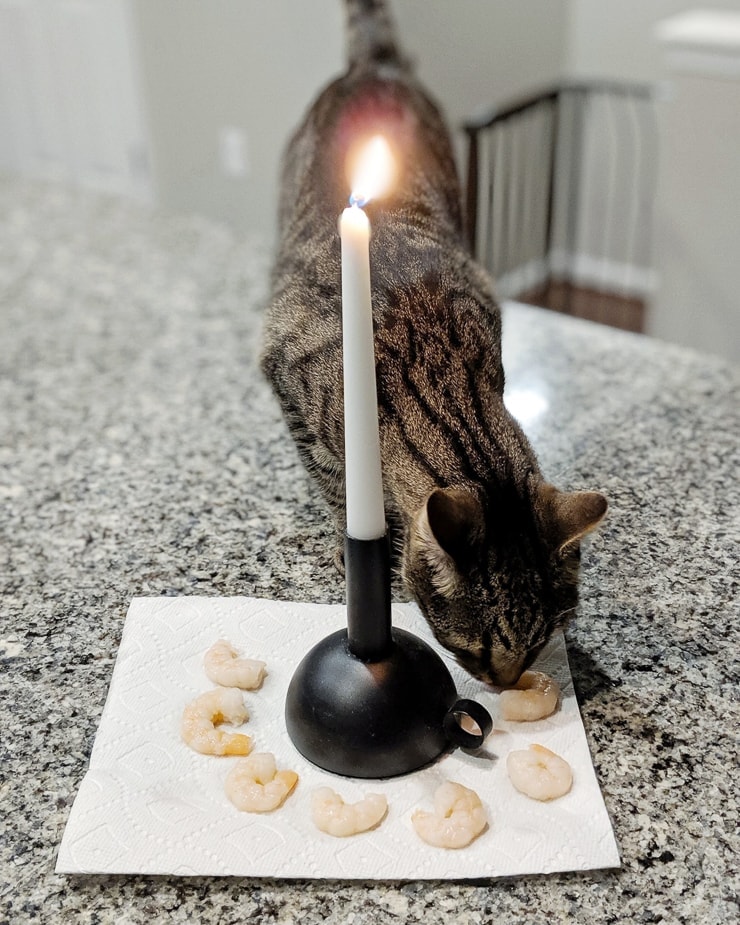
I have done quite a few posts with cat DIYs—our DIY cat condo using Ikea tables, DIY cat tree made of real branches, little catnip treats, DIY cat house side table, and simple DIY cat scratching post. And we do something special for each kitty on their birthday every year. Here are a few pics of years past:


4 DIYs to help you throw a birthday party for a cat
Now that you all think I’m insane, I should tell you that this post takes cat birthday parties to a totally different level. Because today I’m sharing 4 Cricut crafts to help you throw a birthday party for your cat! Because really, cats deserve parties.
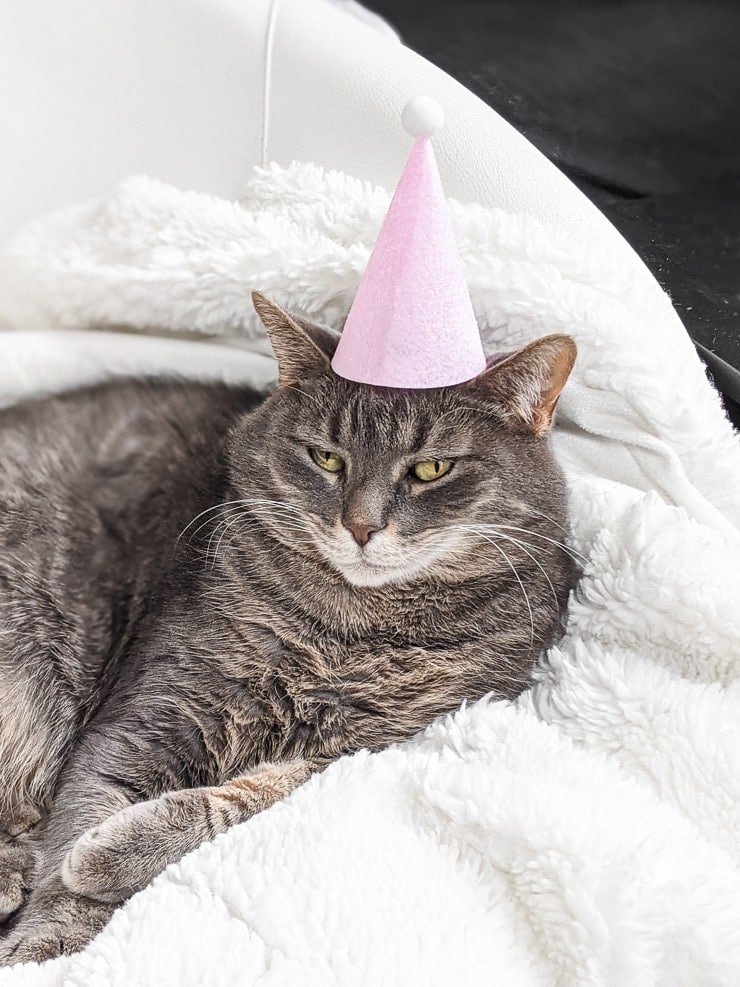
DIY #1: How do I make a party hat for my cat?
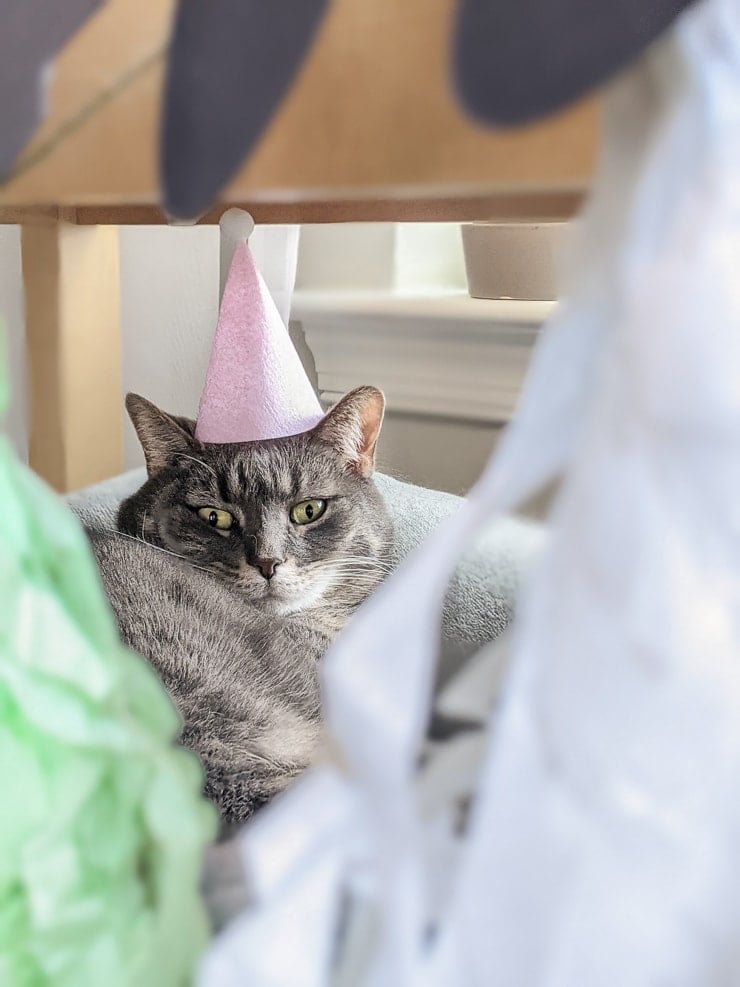
What party is complete without a party hat? You can make an easy party hat for your kitty using felt. Cricut’s felt is a great way to make a party hat because it’s a bit stiffer than regular felt. I used some I had left over from making rugs for R’s dollhouse.
Here’s what you need:
- File #MCC22F0E in Design Space, or check out the project with all of the cat party DIYs already on the canvas here (make sure you’re logged in to Design Space)
- Cricut Maker or Explore Air 2
- Cricut felt
- Cutting mat
- Fabric glue
- A poof ball
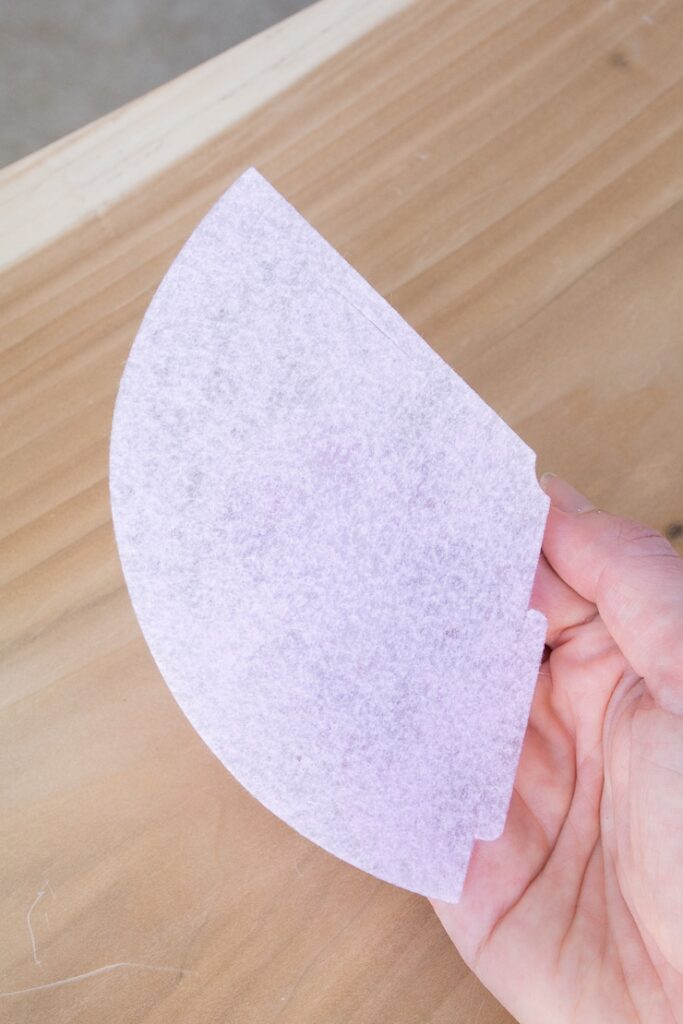
Step 1: Cut the felt
First put felt on the cutting mat and cut it out with your Cricut. The template can be scaled down to cat-size. I scaled mine down to about 3.5 inches by about 5.5 inches. This template is also nice because it cuts out a slit and a flap you can use to create the party hat cone.
When cutting felt, I also like to use a bit of painter’s tape to hold it in place. This isn’t always necessary and depends a lot on how sticky your mat is. But if you want to get some more use out of your mat, this is a great trick!


Step 2: Glue the fabric into the slit
I did not feel like the flap and slit were strong enough to hold by themselves, so I added a bit of fabric glue. This is optional depending on how sturdy you want the hat to be and the material you use. You probably wouldn’t need glue with a paper hat.
Step 3: Glue a poof ball on
And finally I grabbed a poof ball from my daughter’s craft drawer and glued that on top! I didn’t add elastic to the hat because, let’s be honest, that probably would have freaked Blanche out. Instead, I let her get nice and comfy and sat it on her head.
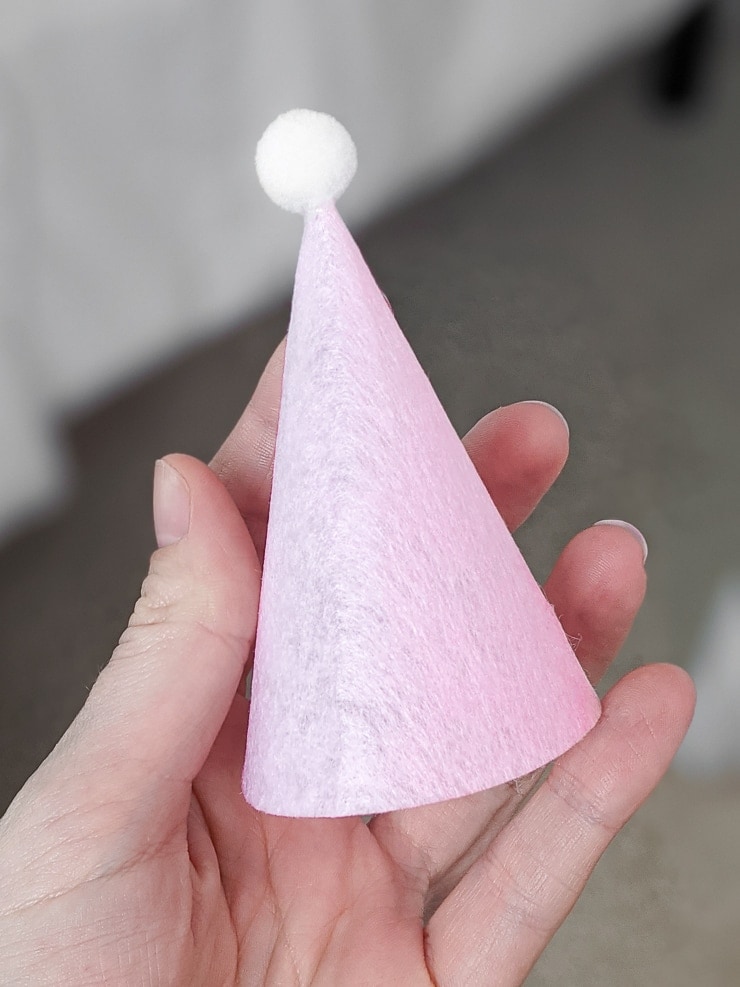

Blanche’s finished party hat
I’m going to be honest—Henry would have never let this happen. He HATES when we put things on him. But Blanche? She’ll sit with things on her for an absurd amount of time. Recently R “decorated” Blanche while she was laying on the couch by covering her in stickers.

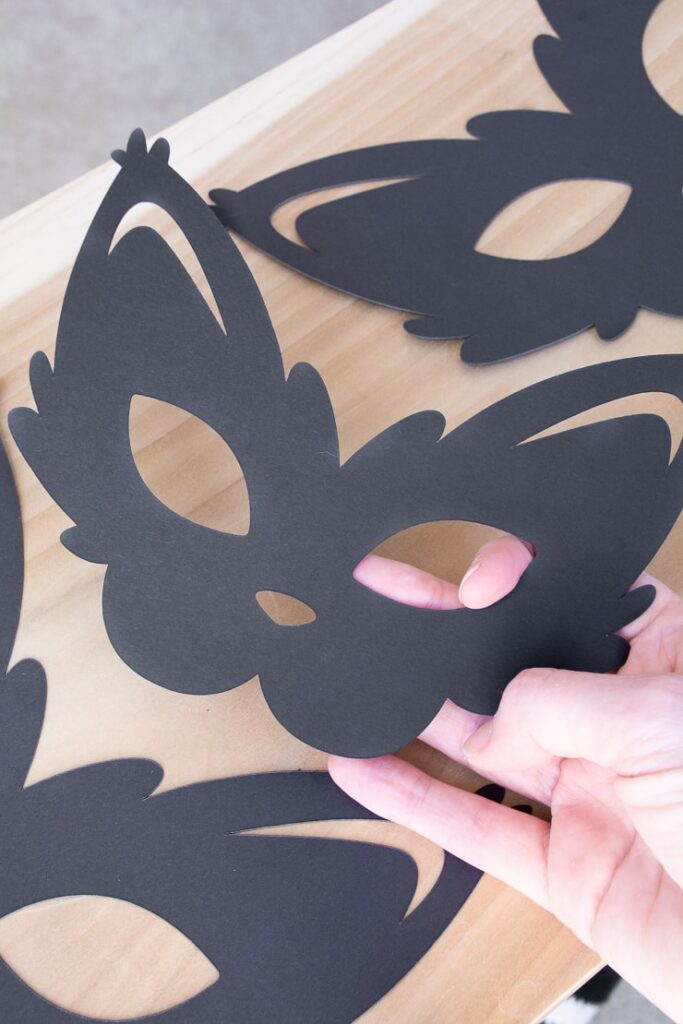
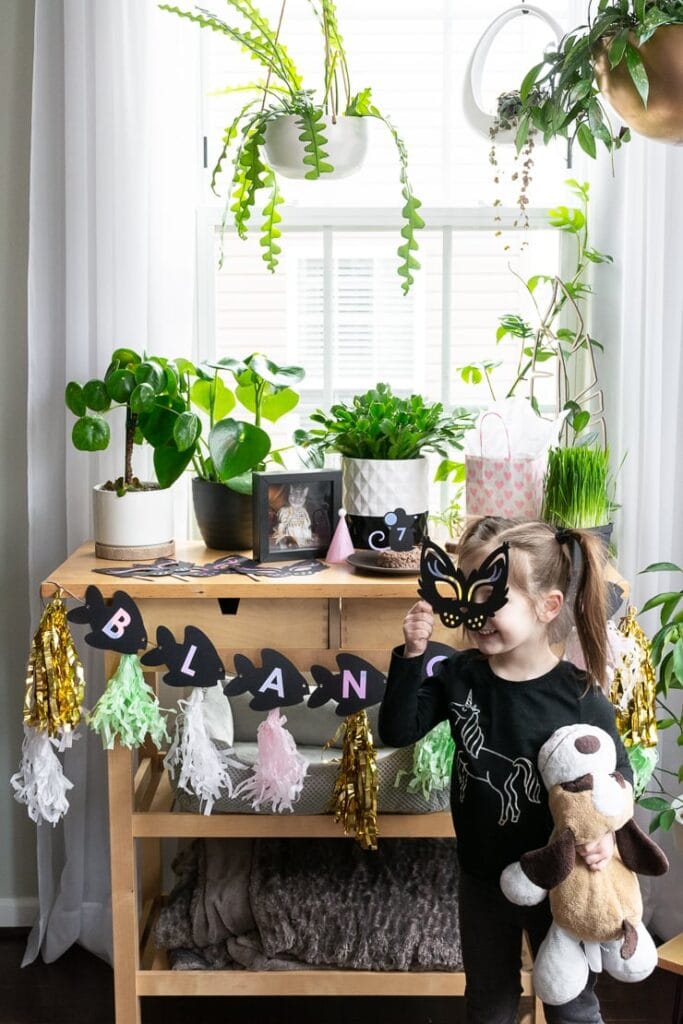
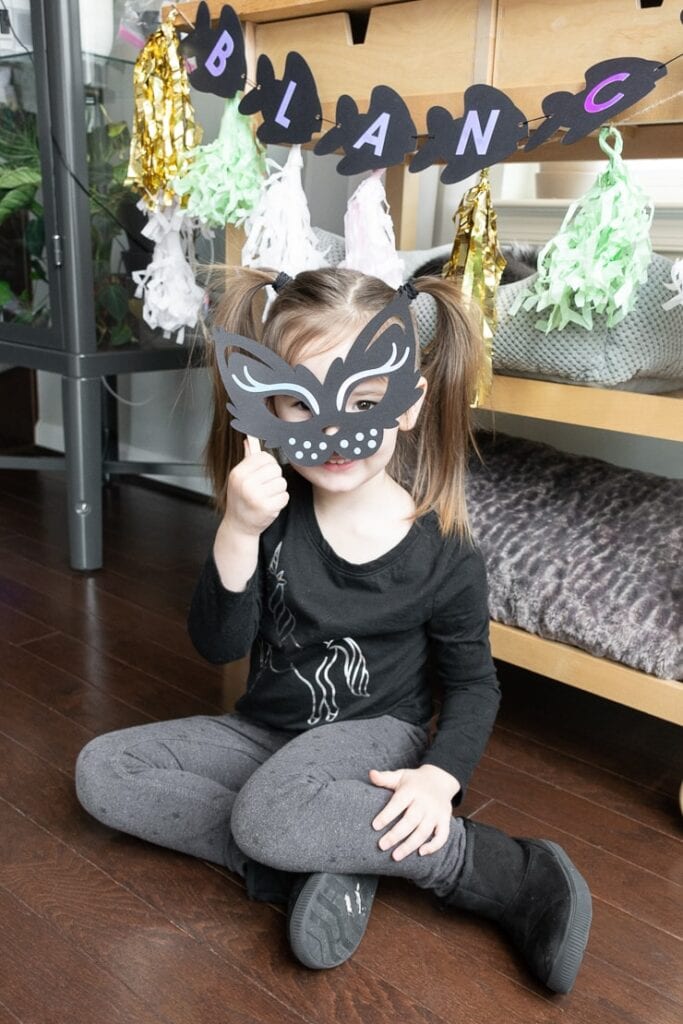
DIY #2: How to make cat masks
The next DIY is about how to make cat masks—the party kind, not the kind we’re all wearing these days. I really made these for R. She has a little jungle animal mask set that she loves, and she has been asking to make a cat mask for a while.
Here’s what you need:
- Grab the design by opening up this Design Space link with all of the cat party DIYs
- Cricut Maker or Explore Air 2
- Cutting mat
- Black Kraft Board
- Holographic adhesive vinyl, Opal
- Transfer tape
- Popsicle sticks and glue
Step 1: Cut the masks out
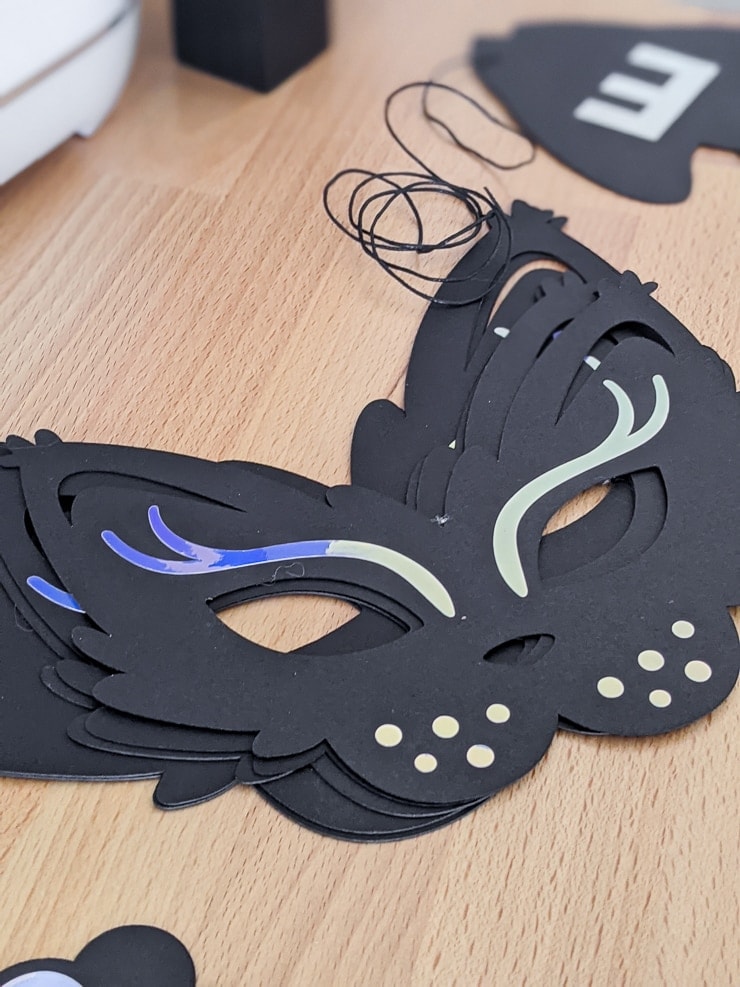
Use your machine to cut out the shape of the mask in black kraft board. I love kraft board because it’s much more substantial than paper, so it’s great for crafts like these. I even used it instead of wood for some of the trim in R’s dollhouse.


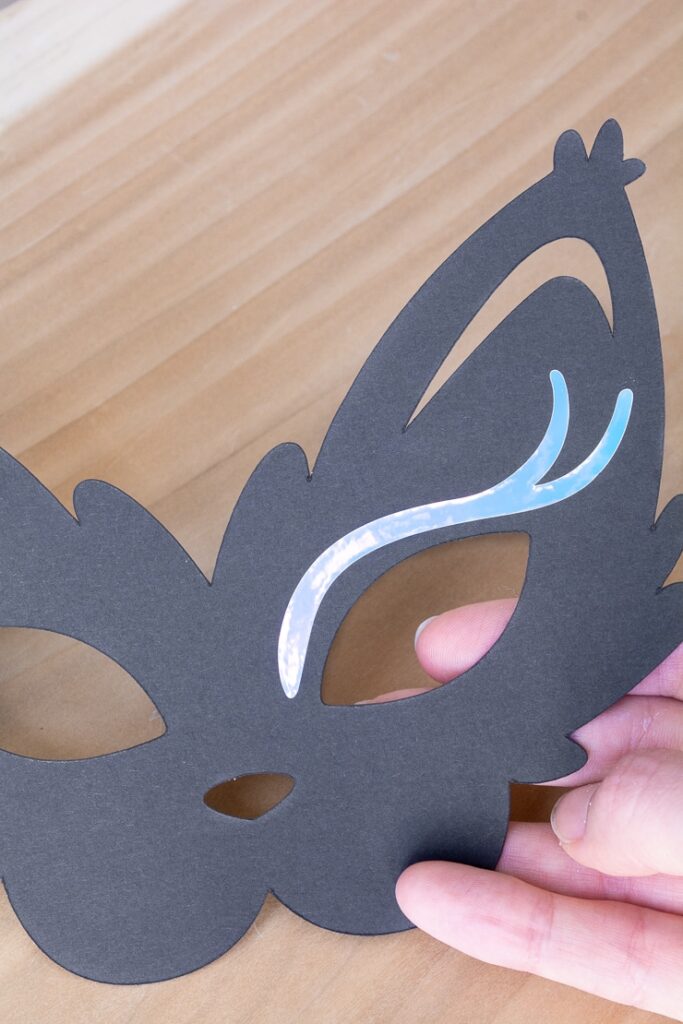
Step 2: Cut the cat lashes and dots out
The next step is to cut the lashes and whisker dots out using holographic vinyl. I love the contrast between the pink/purple/blue holographic material and the matte black. I did not use transfer tape for the lashes, but I did use it for the whisker dots.

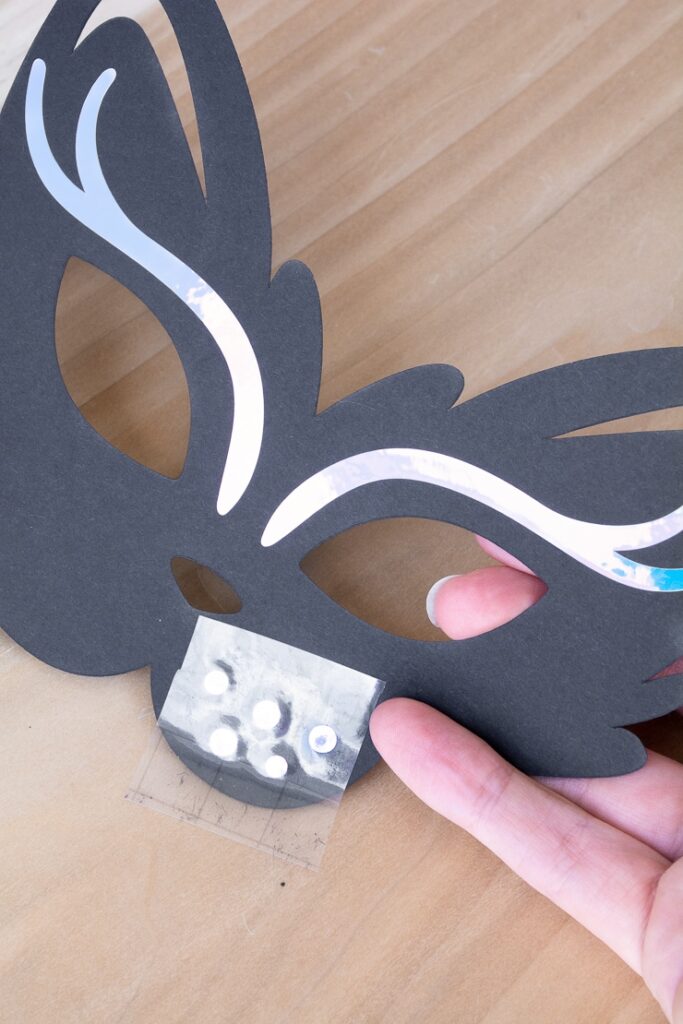

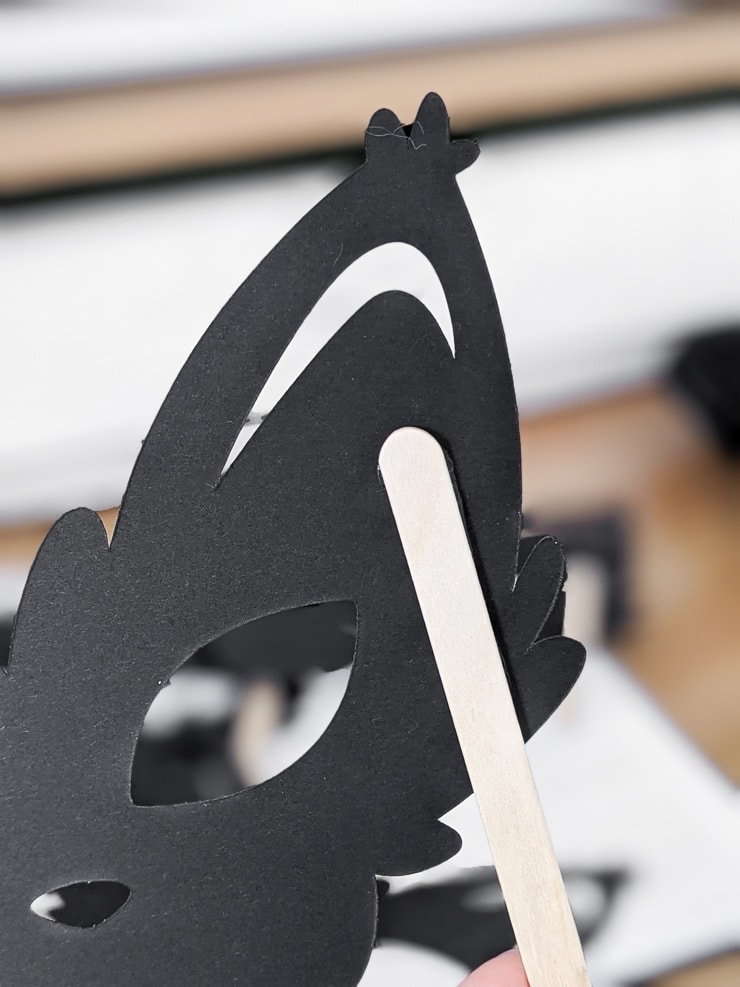
Step 3: Glue a popsicle sticks on
I opted to glue a popsicle stick on instead of using elastic. I just glued the popsicle stick onto the back-right side of each mask. If you’d prefer to do elastic, make sure to add two tiny circles into the mask in Design Space so the machine can cut the elastic holes for you!


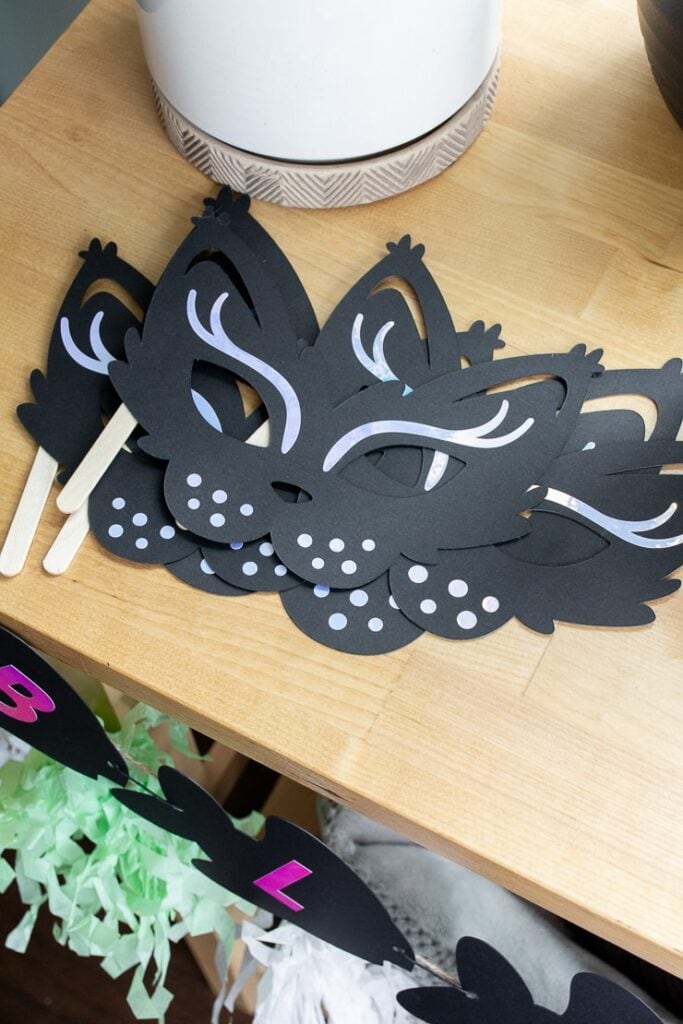
Finished cat party masks
And here are the finished masks! I can tell that R is going to be playing with these for a while. 🙂 No word yet on what Blanche thinks of them, but I’m guessing she thinks it’s weird. I would definitely think it were weird if I showed up to a party and my cats were all wearing human masks.


Want more party inspiration? Check out my post about how to make a balloon garland, as well as how to make scrapbook paper and yarn pom-pom party hats!
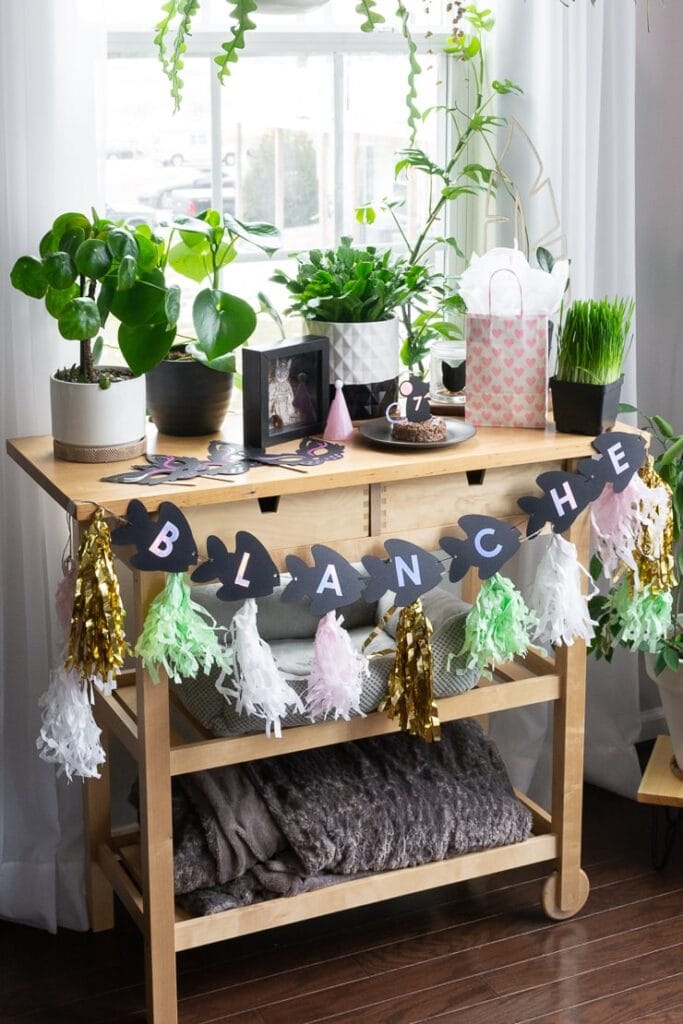
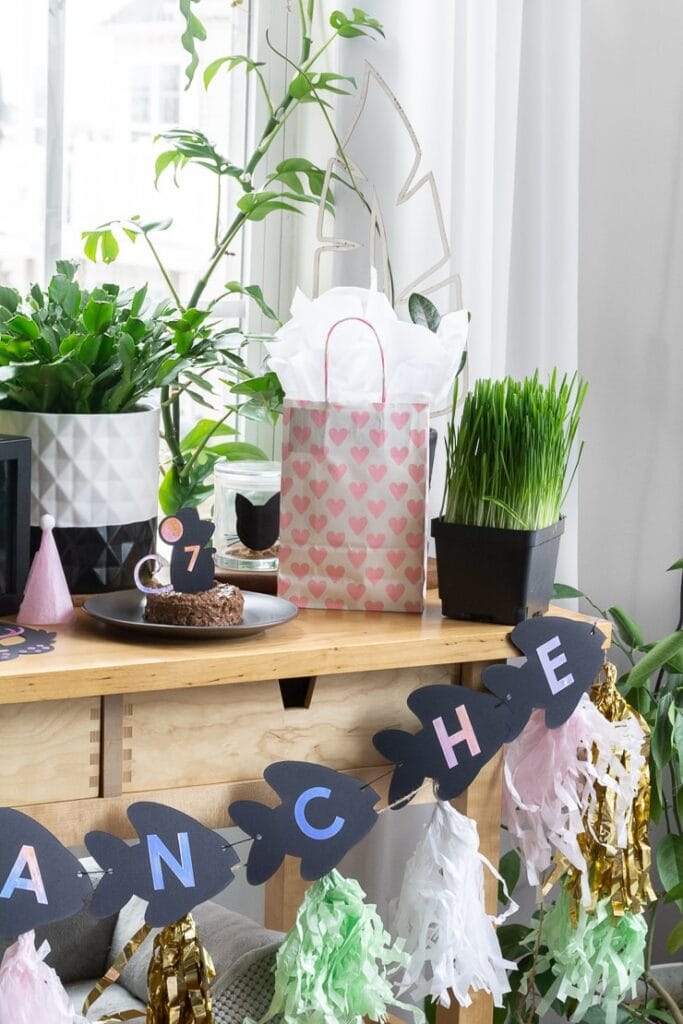
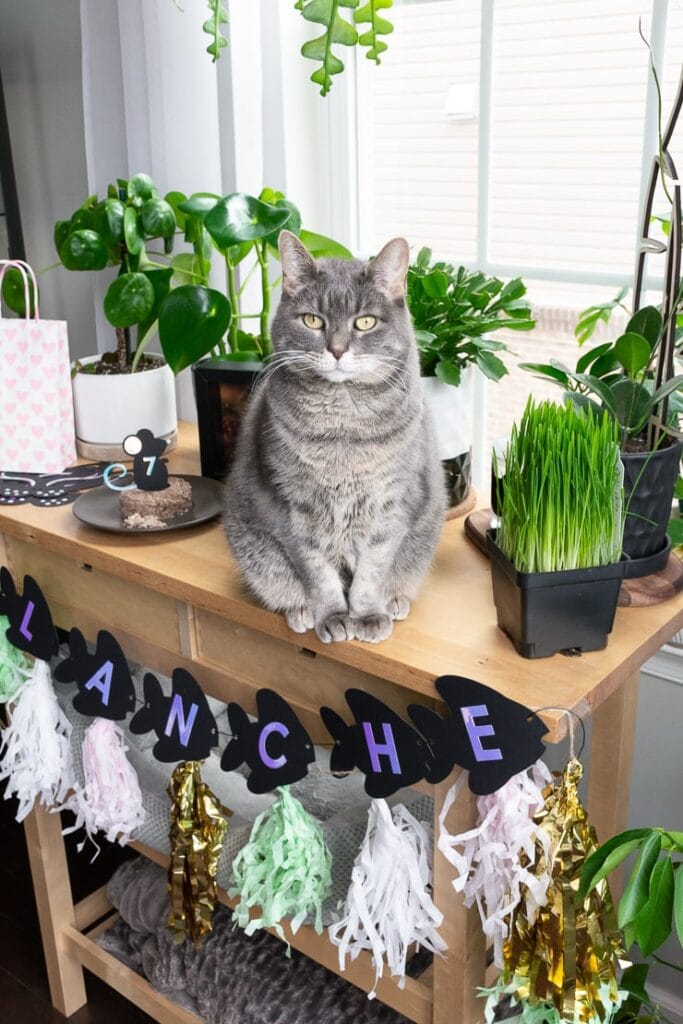
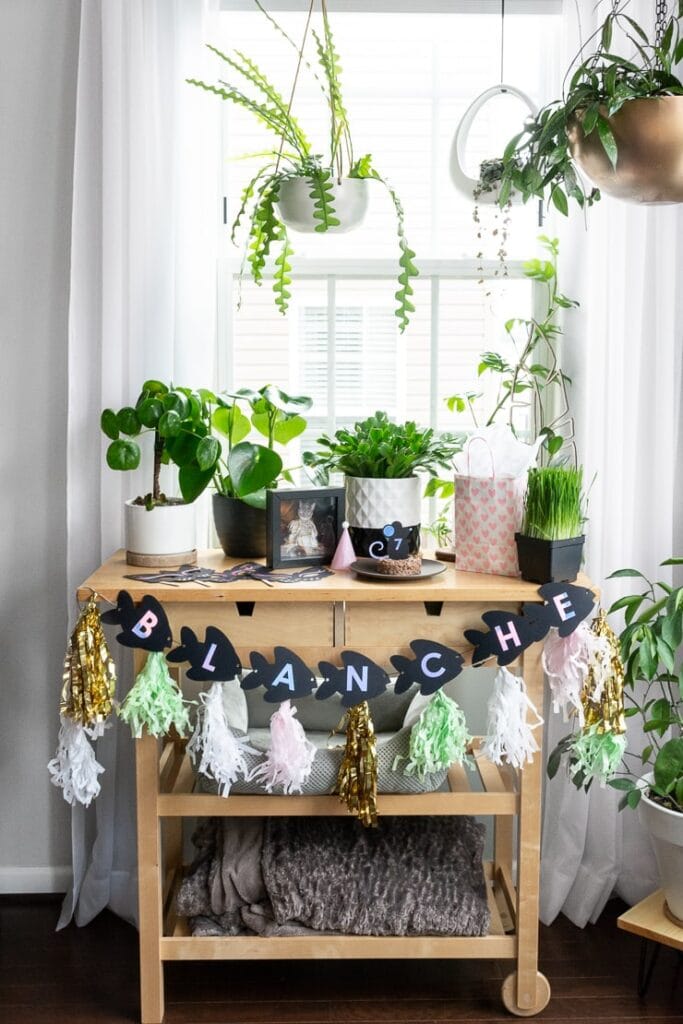
DIY #3: DIY party banner for a cat birthday party
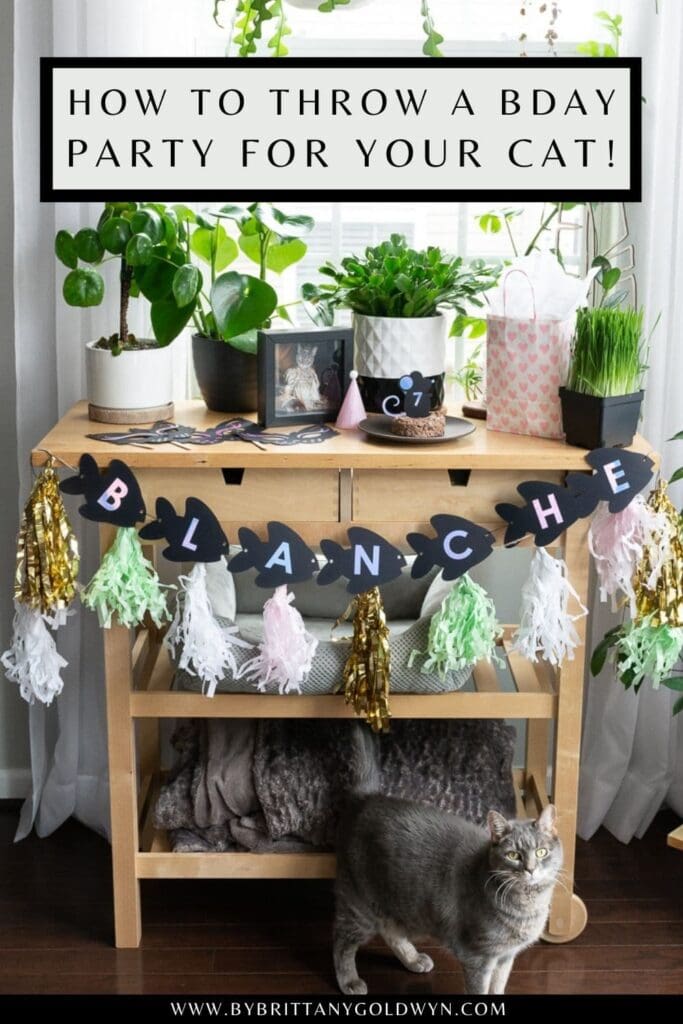
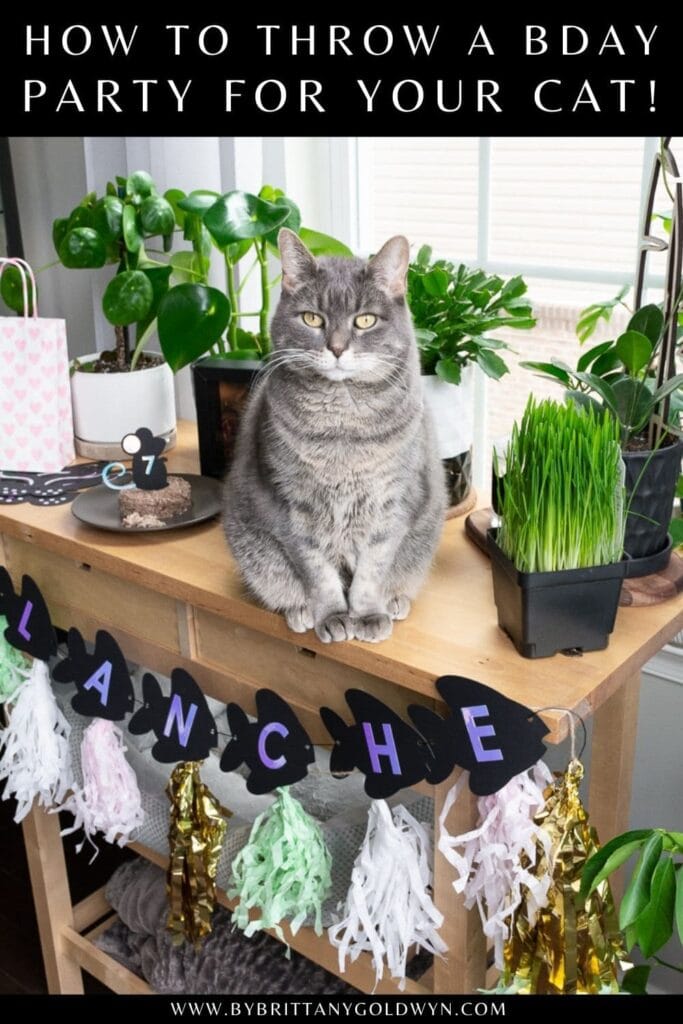
The third DIY of the bunch is Blanche’s adorable party banner. Can she read? No. Do I care? Also no. Let’s be honest, most of this is for my daughter anyway, and she was simply delighted with the banner! This one coordinates nicely with the masks.
Here’s what you need:
- See the Design Space project here; the font is Rubber Ducky
- Cricut Maker or Explore Air 2
- Cutting mat
- Black Kraft Board
- Holographic adhesive vinyl, Opal
- Black string
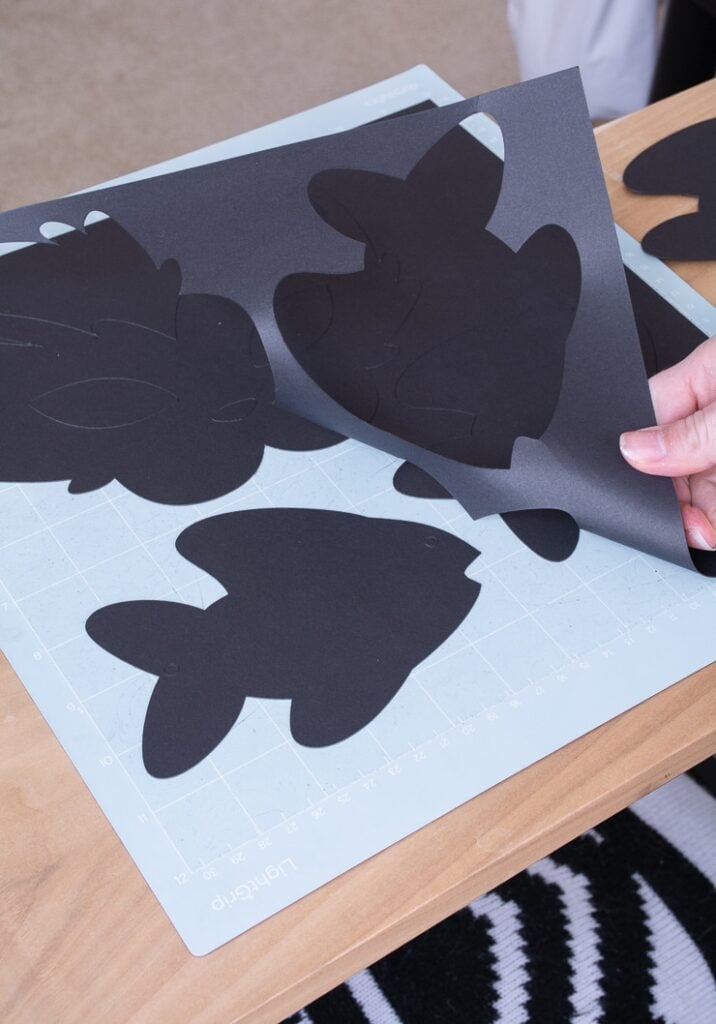
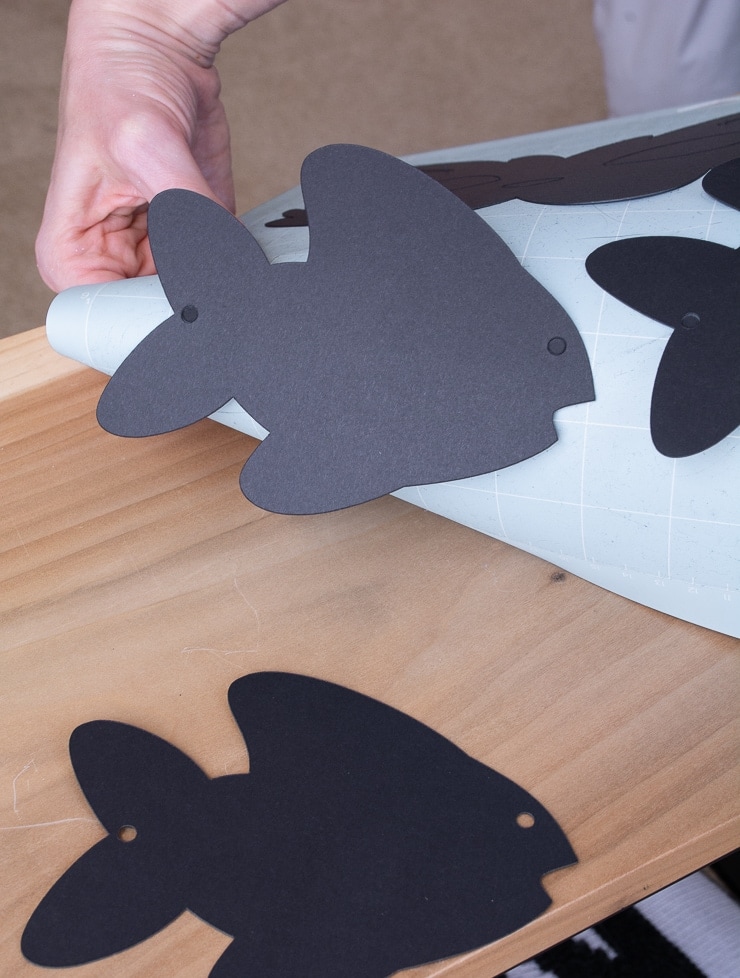
Step 1: Cut the fish pieces
I spent way too long looking for the perfect fish shape in Design Space. And I think I found it! Isn’t is cute? I sized the fish to be about 5.8 inches wide to ensure the letters were big enough to read easily. Adding in the circles for the holes means that stringing this up is really easy, too.
When removing items like these, especially kraft board, I don’t peel the cut item off of the mat. This can result in it bending and warping a bit. Instead, I pull off the negative material (first photo below). Then I curl the mat itself away from the cut material and let it slowly pop off (second photo below).


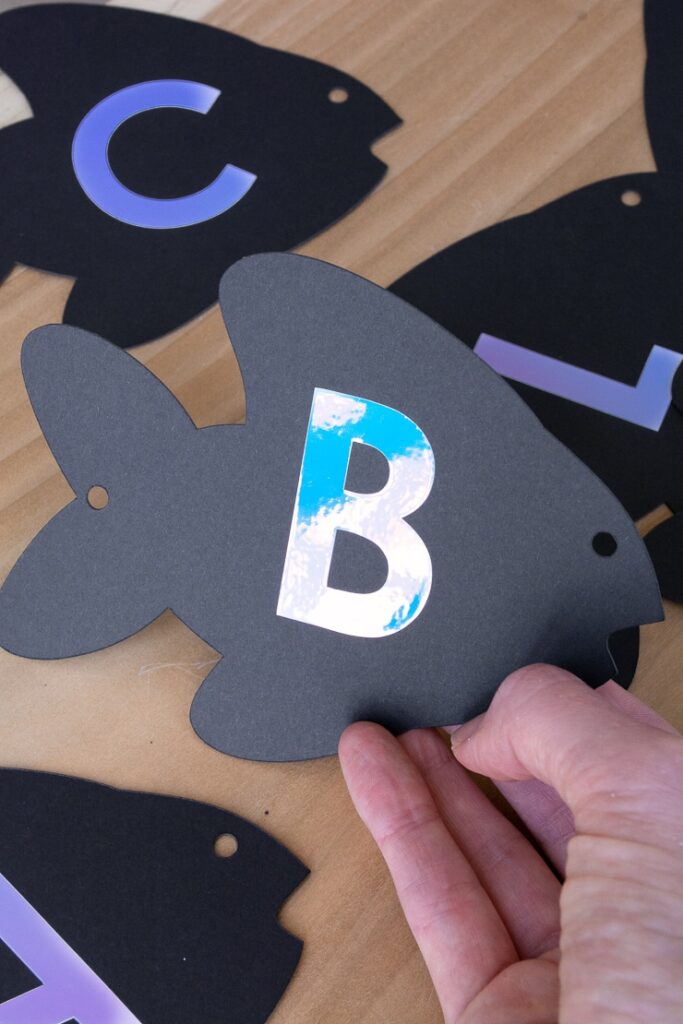
Step 2: Cut and apply the holographic vinyl
Next cut out the letters for your cat’s name. I used the font “Rubber Ducky” in Design Space. I did not need transfer tape to apply these—just put them on like stickers.

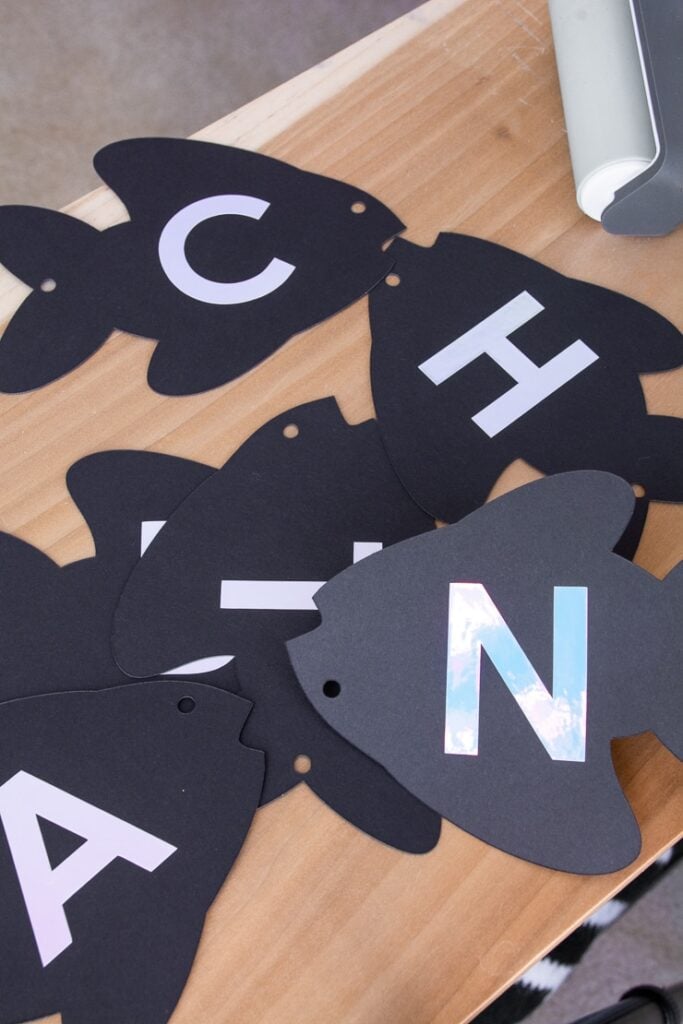

Step 3: String and hang
Next string some twine through the holes in each of the fish shapes and hang! It’s adorable. I paired it with a little tassel banner I saved from R’s 3rd birthday. 🙂


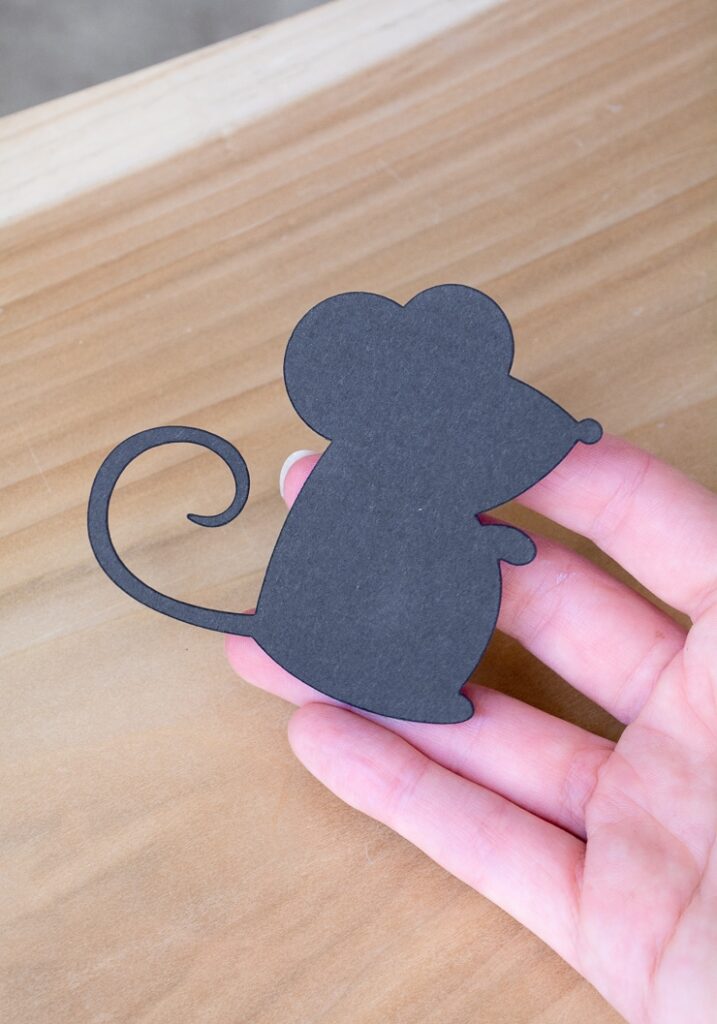
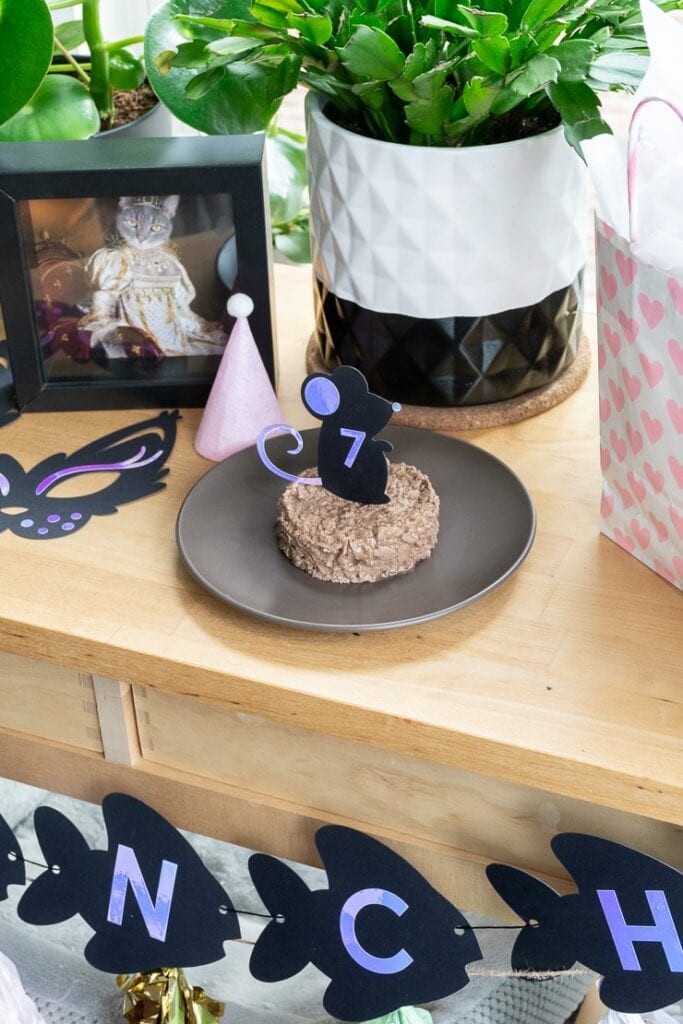
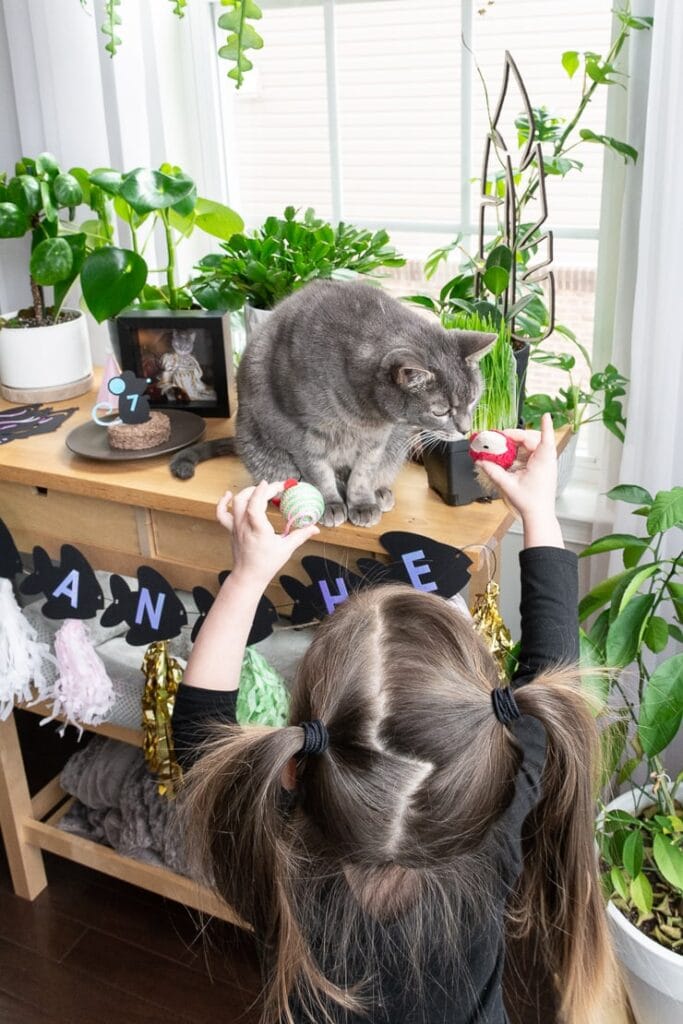
DIY #4: DIY cake topper for your cat’s birthday party
And finally, what’s a party without a cake? In this case it’s a little cat food “cake,” but I had to add a cake topper. And it’s a mouse! It’s so cute! Here’s how to make it. (By the way, here are two other cake toppers I’ve made for human cakes: DIY cake topper using the Cricut Maker and DIY wooden painted cake topper for a first birthday party.)
Here’s what you need:
- See the Design Space project here along with the other cat birthday party ideas
- Cricut Maker or Explore Air 2
- Cutting mat
- Black Kraft Board
- Holographic adhesive vinyl, Opal
- Tooth pick and glue
Step 1: Cut the base shape out of kraft board
First cut the base shape of the mouse out of black kraft board. This is the same process as the cat mask and the fish banner—you can use either the Maker or the Explore Air 2. This material is quickly becoming one of my favorites. I am not super in to paper crafting, but this material is so versatile.

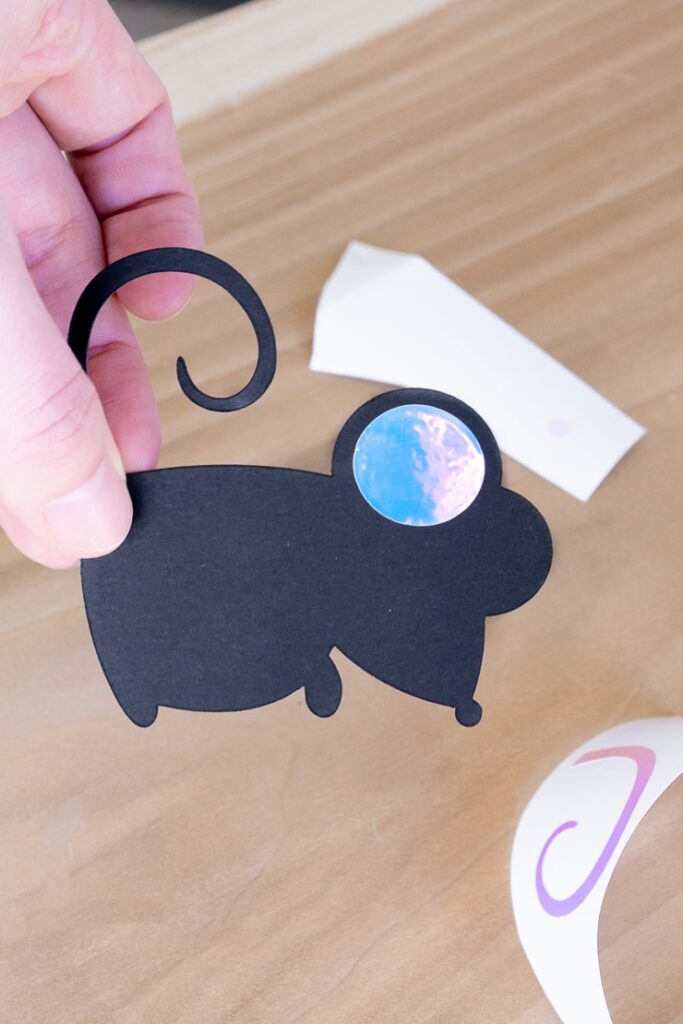
Step 2: Cut and apply holographic accents
Next cut out the holographic vinyl accents: the ear, nose, and tail. I applied all of these by hand and did not use transfer tape. The tail was a bit tricky, but it’s okay—it doesn’t have to be totally perfect. I also added the “7” because that’s how old my biggest girl is going to be!

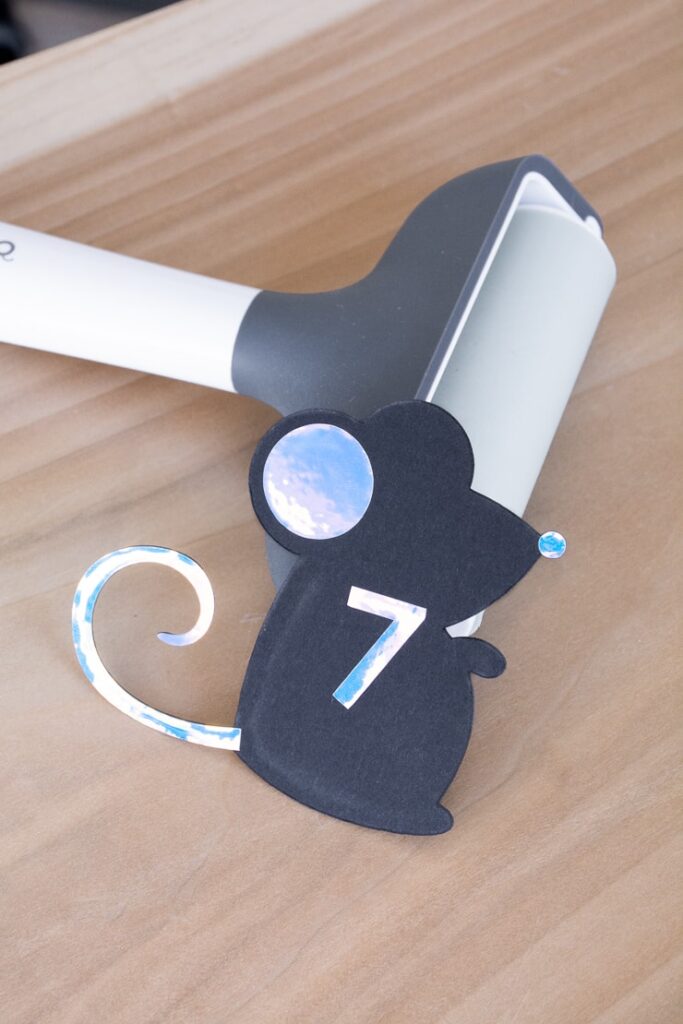

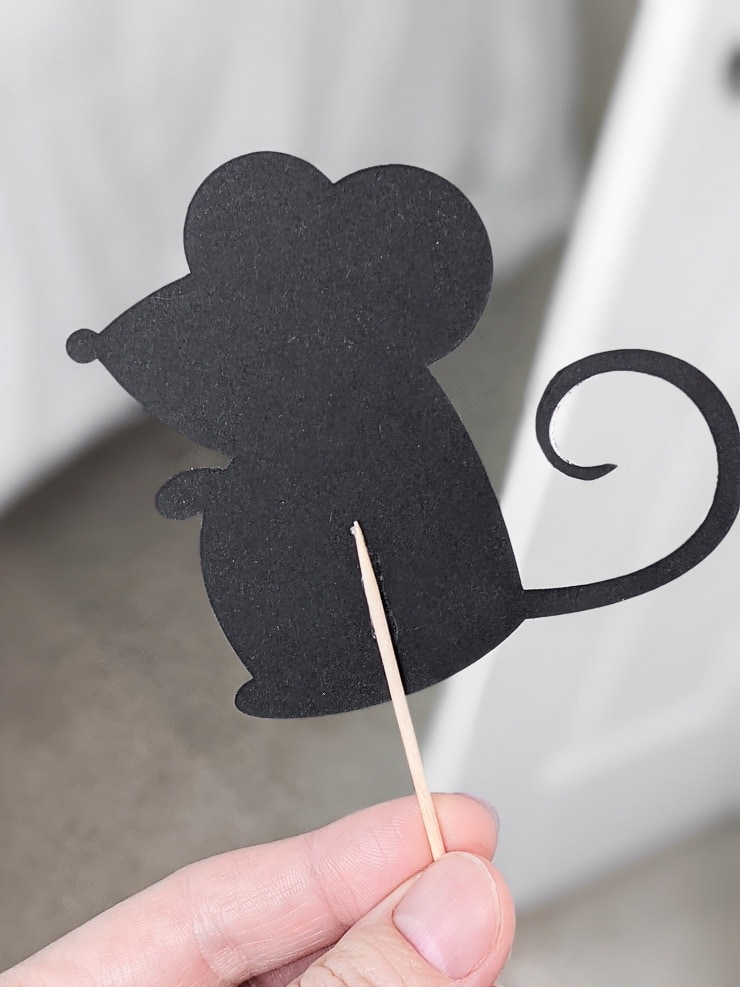
Step 3: Add toothpick to the cake topper
Use a bit of glue and add the toothpick to the back of the mouse cake topper. This is enough to stick it down into the top of some cat food.

And here’s the finished DIY cake topper for my cat’s birthday!
Guys…isn’t this adorable? Since Blanche is on a prescription food and will NOT eat wet food, I forgot how bad this stuff smells! I was hoping that getting the really gross flaky tuna food would be appealing for her since she loves canned tuna, but Henry mostly chowed down on it. Lucky Henry.

It’s party time!
One Saturday when Mike was working, we decided to have BB’s “birthday party.” Since we don’t know when her or Henry’s real birthdays are, we just kind of ballpark it. I mean, they’re cats. R loved it all, though—especially the masks!


Pin these DIYs about how to throw a birthday party for a cat!