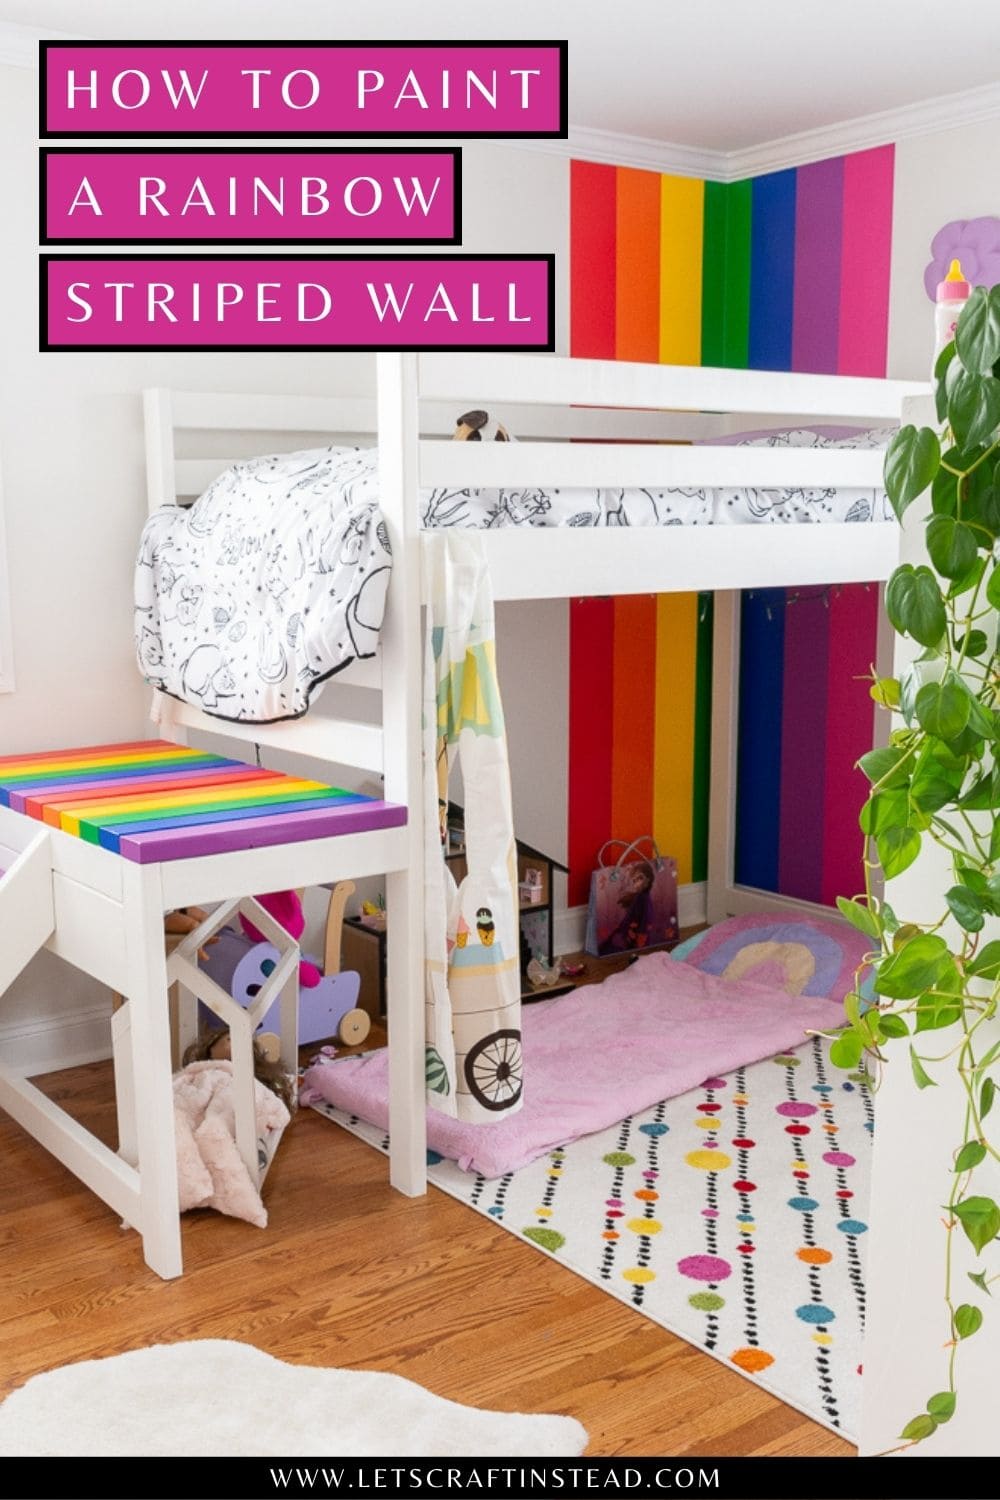
Adding a painted accent wall is the perfect way to dress up a plain room without too much effort. Learn how to paint a rainbow striped wall to bring some cheer to any room!
Learn how to paint a rainbow striped wall!
It’s been a while since I’ve done a paint project. That’s what being in a house that’s mostly done means…not a lot of projects! But today I am sharing a project I completed recently—and one that is WAY out of my comfort zone.
Because it has a lot of color, and that’s something I typically don’t play around with much—at least on walls. Today’s post is all about how to paint a rainbow striped wall as the perfect accent piece in any room! A kids room, in this case.
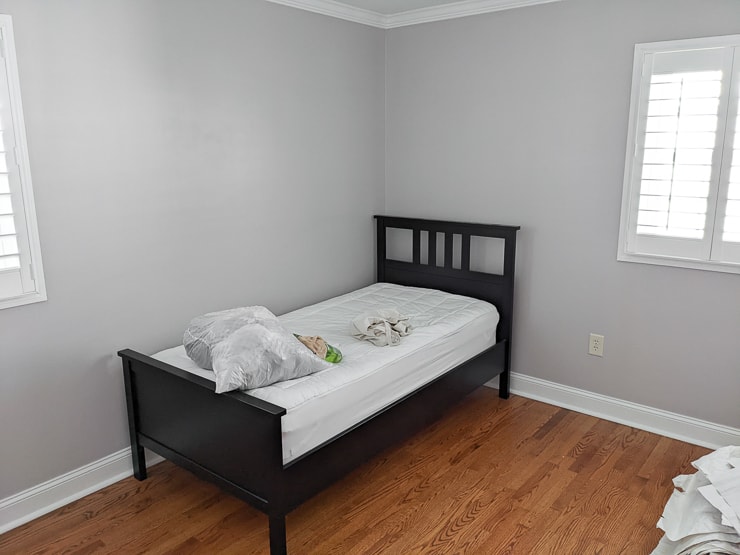
This is the room before…the first order of business was to paint the walls with white as the base. I used Behr’s Silky White, and it’s a beautiful slightly warm white.

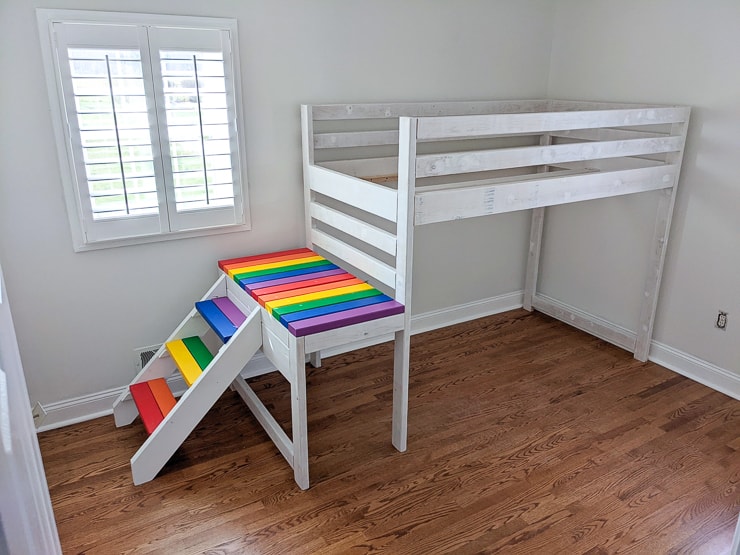
And then this is the room painted with the rainbow loft bed mostly painted. (The body just had patching and primer at this point, and it needed a few coats of white paint to clean it up.)
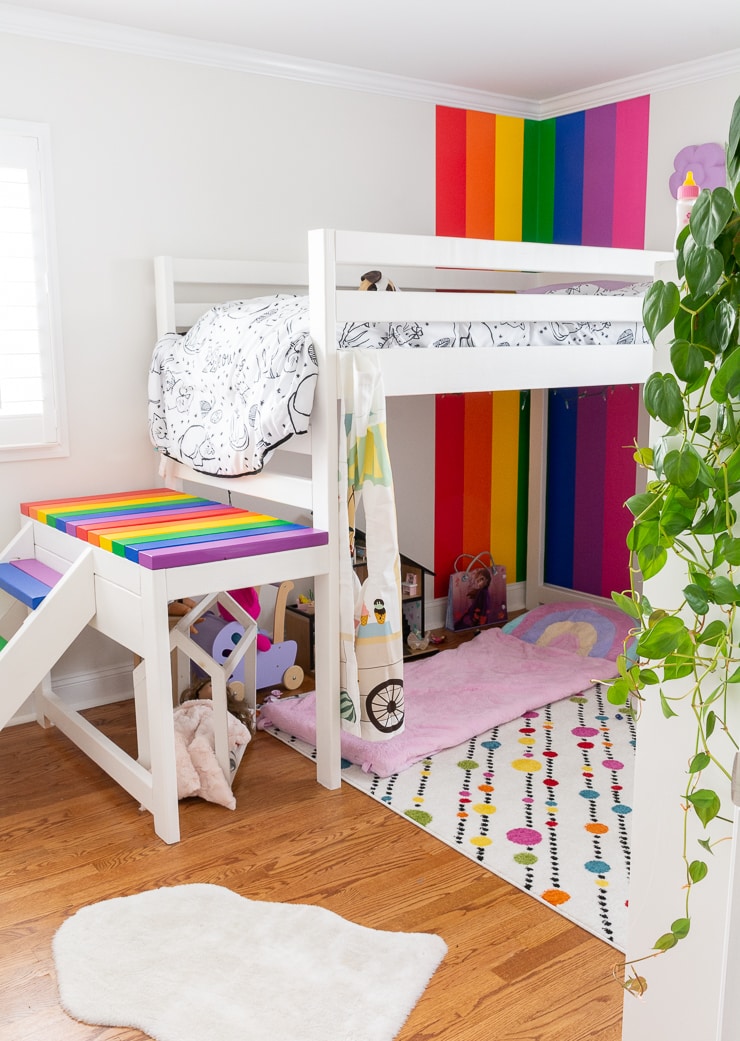
I thought a rainbow wall in the corner opposite of the rainbow stairs and loft bed platform would be the perfect balance. And I was so right…but you’ll have to wait to see the final room!!

Here’s what I used:
- Behr paints in the following colors, eggshell finish: Whip Lash (red), Emergency Zone (orange), Laser Lemon (yellow), Paradise of Greenery (green), Beacon Blue (blue), Chakra (violet), and Beauty Queen (magenta)
- FrogTape
- Small roller and paint brushes
- Measuring tape or yardstick and pencil
And here’s how to paint a rainbow striped wall!
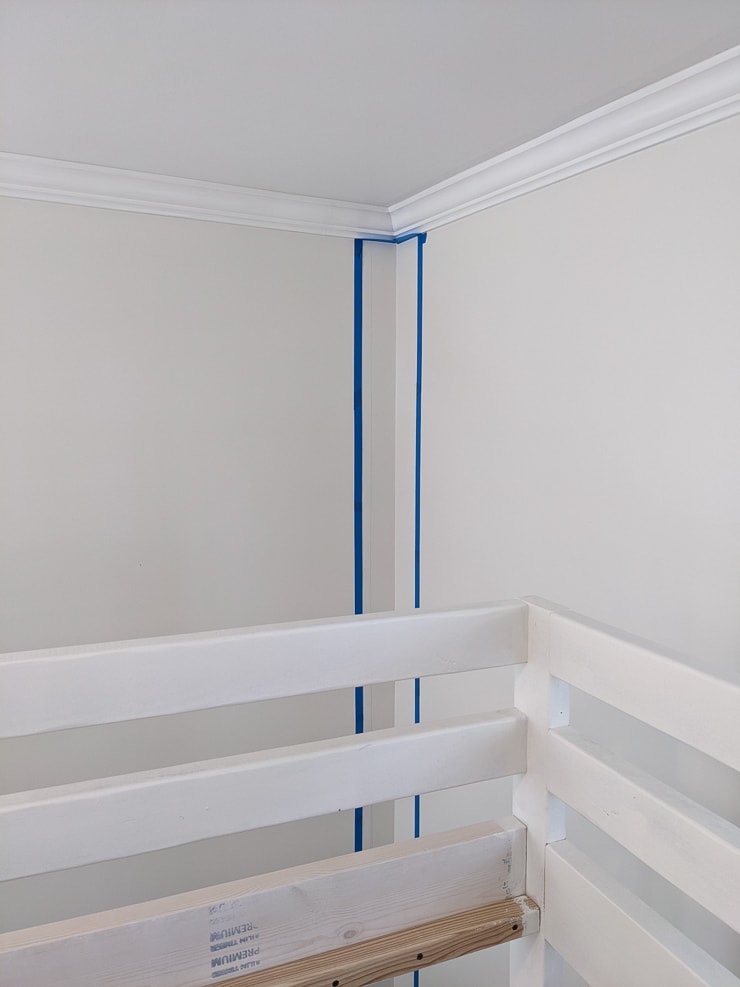
Step 1: Map out the wall
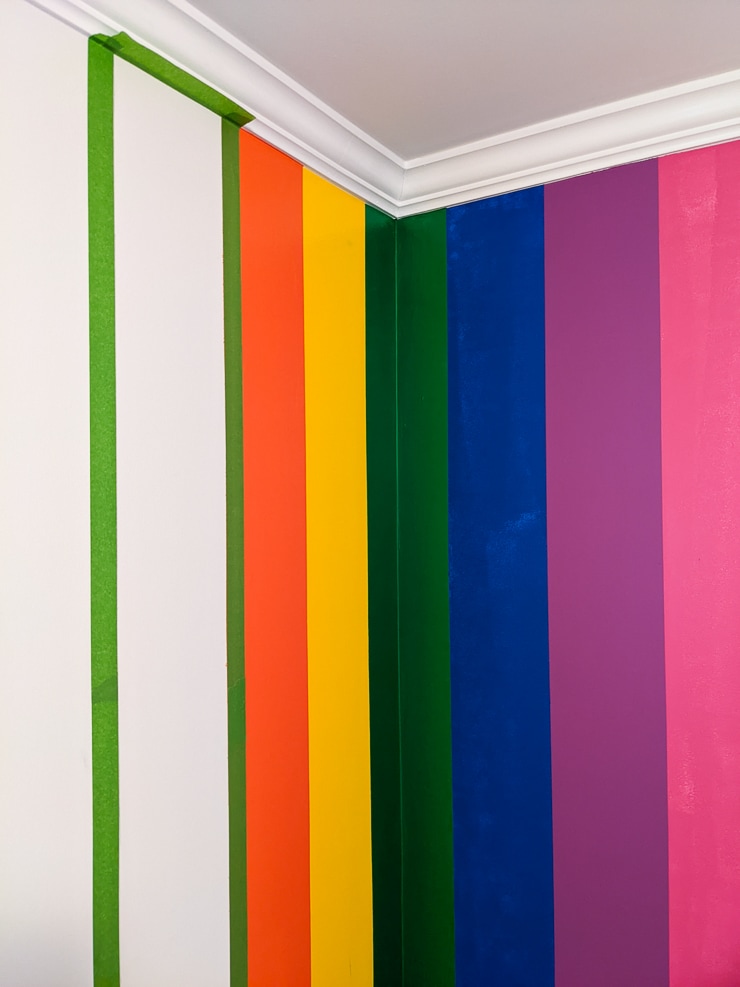
I decided to do the rainbow-striped wall in a corner of the bedroom using floor-to-ceiling vertical stripes. And instead of using the seven traditional rainbow colors, I ditched indigo and added magenta on the end of the rainbow. I wanted seven colors so I could center one in the corner and then have three on either side—all of these are Behr paints:
- Whip Lash (red)
- Emergency Zone (orange)
- Laser Lemon (yellow)
- Paradise of Greenery (green)
- Beacon Blue (blue)
- Chakra (violet)
- Beauty Queen (magenta)
I chose eggshell finish for all of the paints, and a sample size jar of each color was more than enough. I had leftover paint even after painting all of the stairs and slats on the bed. Maybe I’ll finish it up with a wall art piece, too 🙂
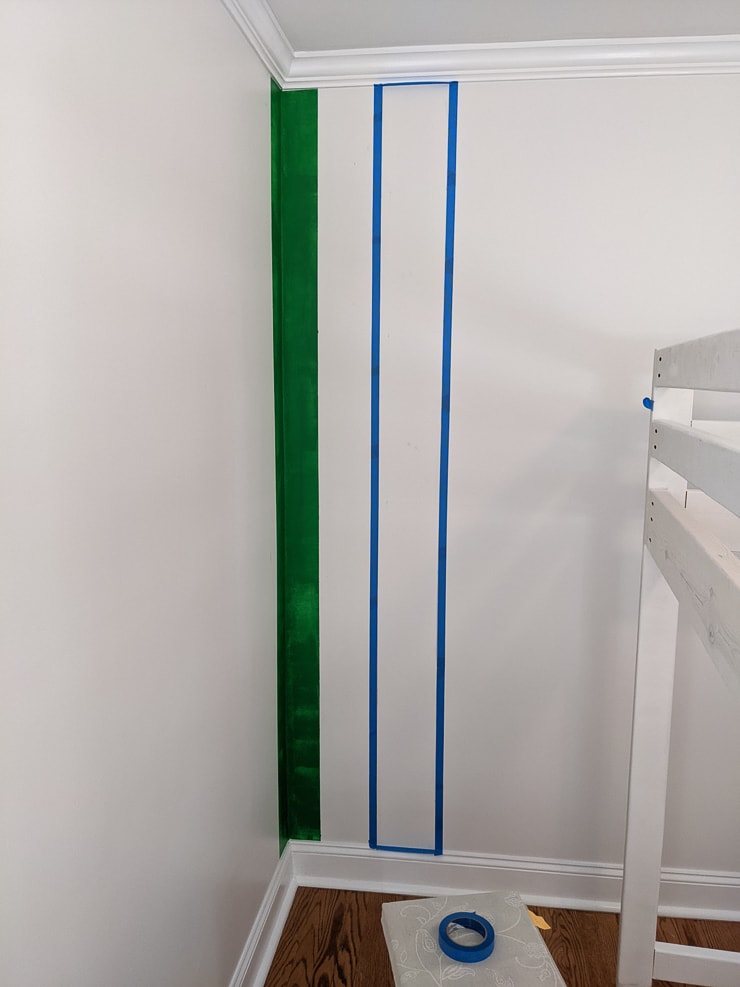
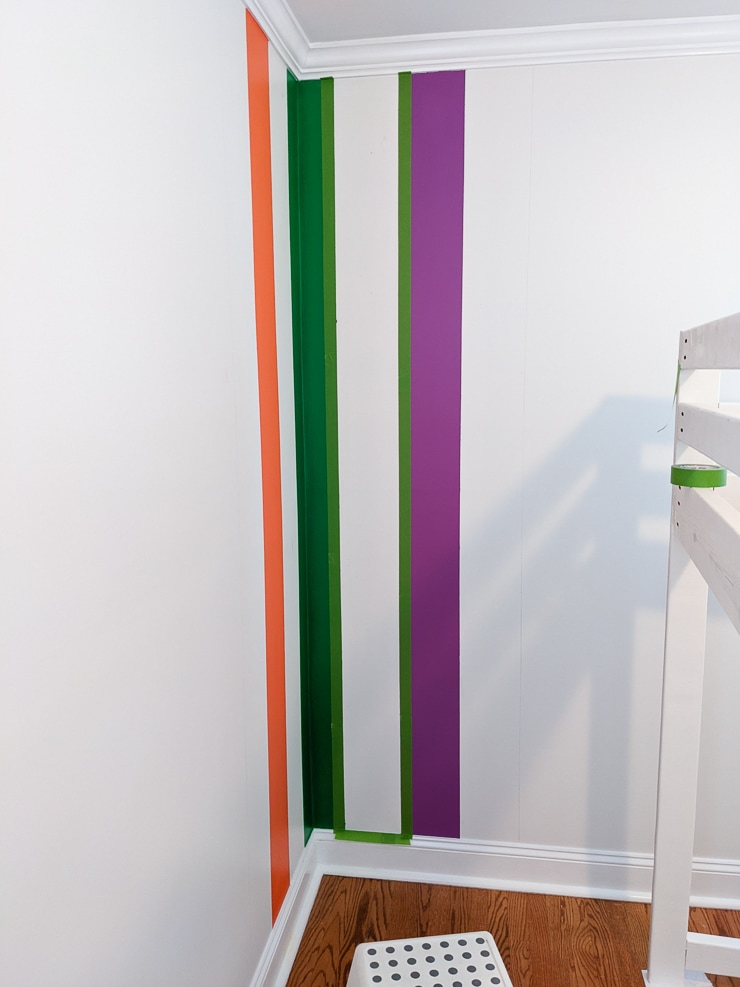
I decided to make the center stripe, the green stripe, 8 inches wide. Since the corner makes it look a bit smaller, I would then make each of the six remaining strikes 7 inches wide. So let’s get started with the first stripe!
I measured and marked 4 inches out from either side of the corner. To get a straight line, you can use a level. Or simply measure 4 inches at multiple points and use something like a yardstick to connect them in a straight line.

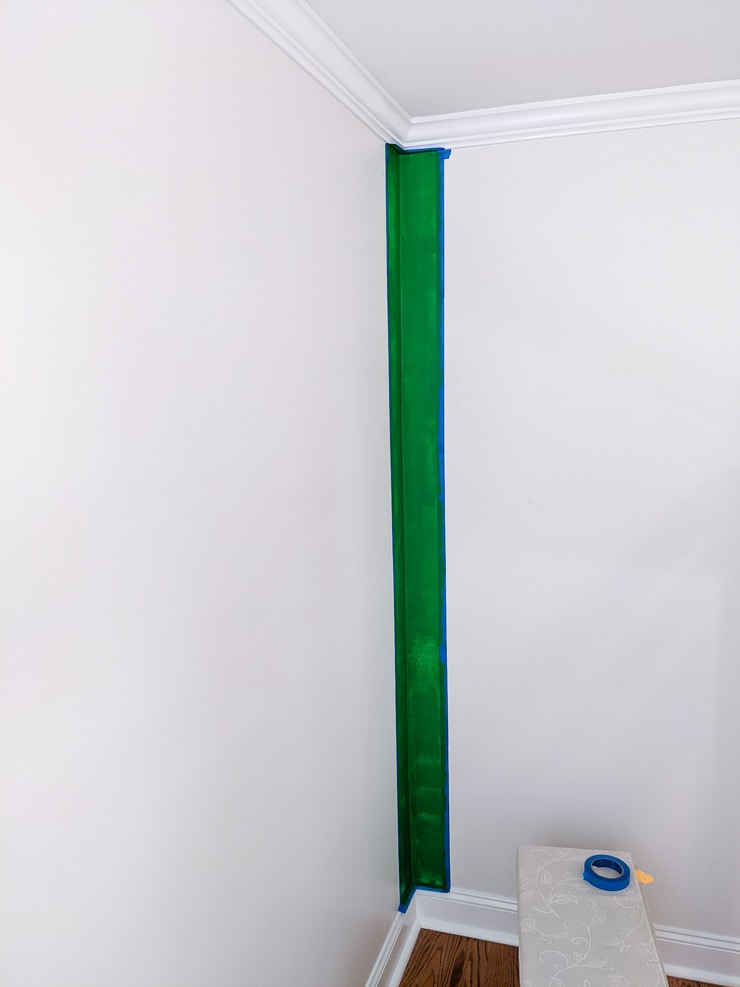
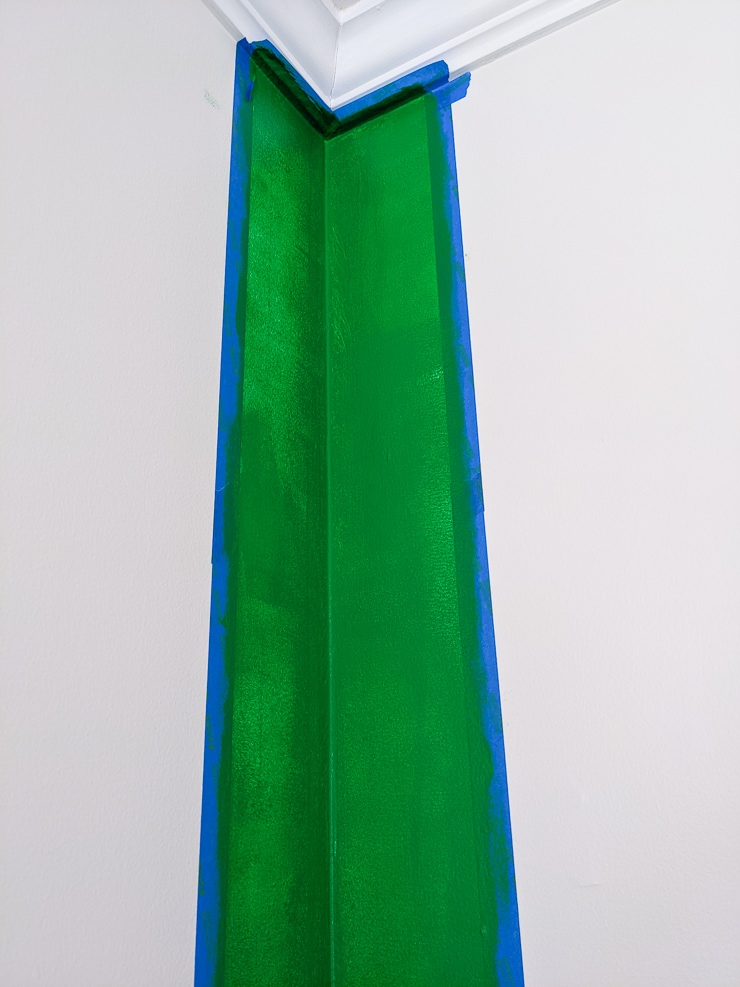
Step 2: Add tape and begin painting
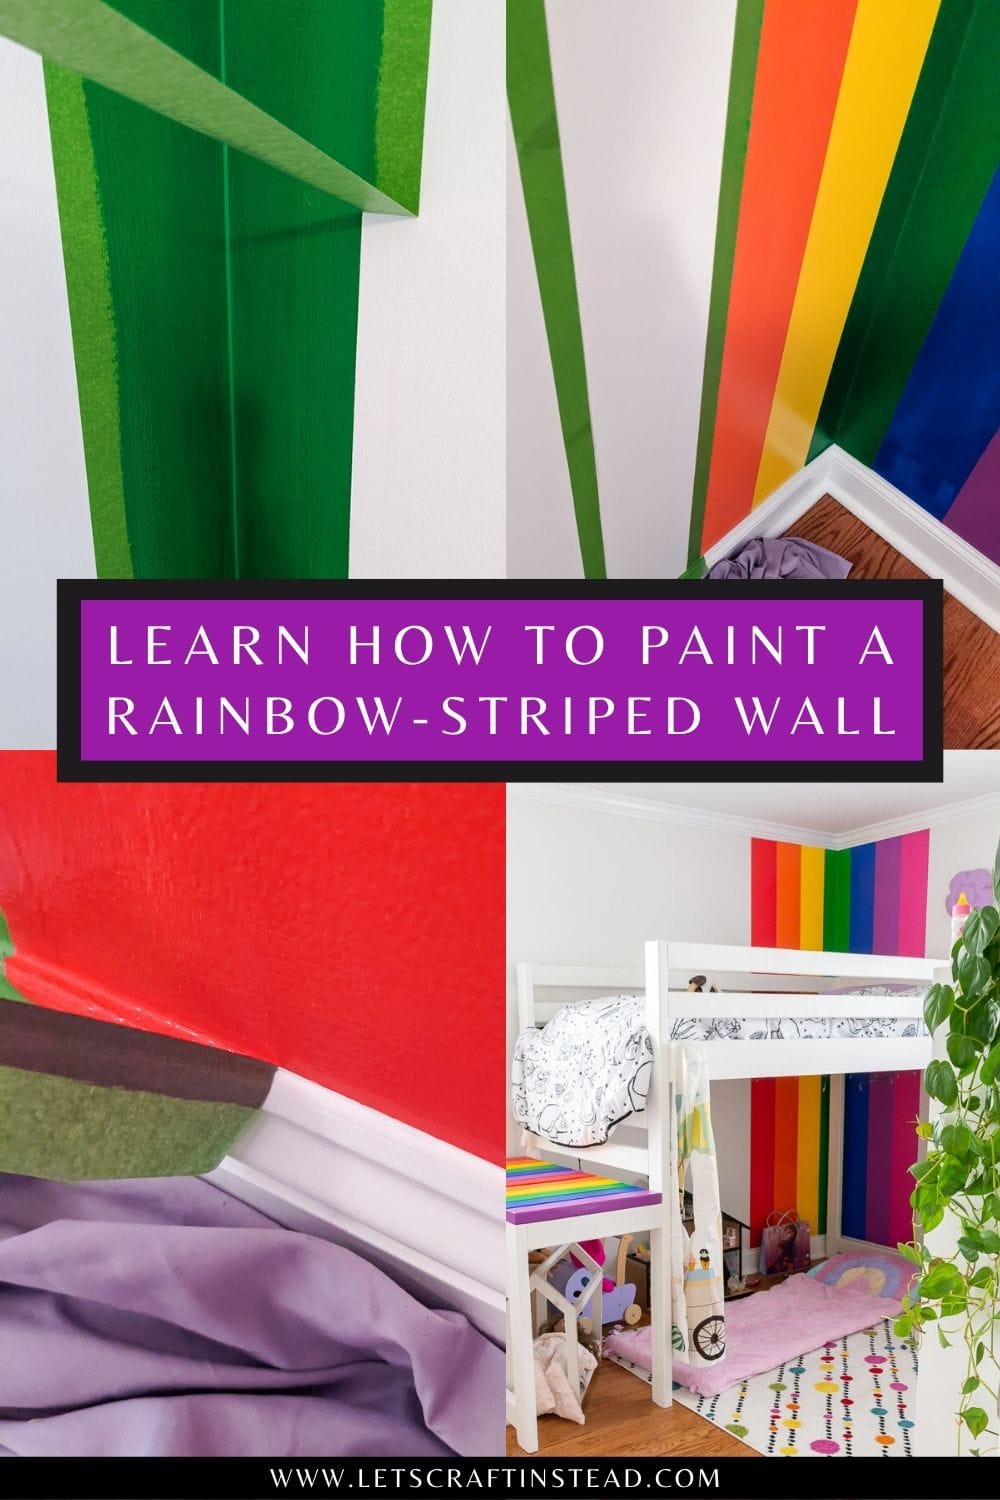
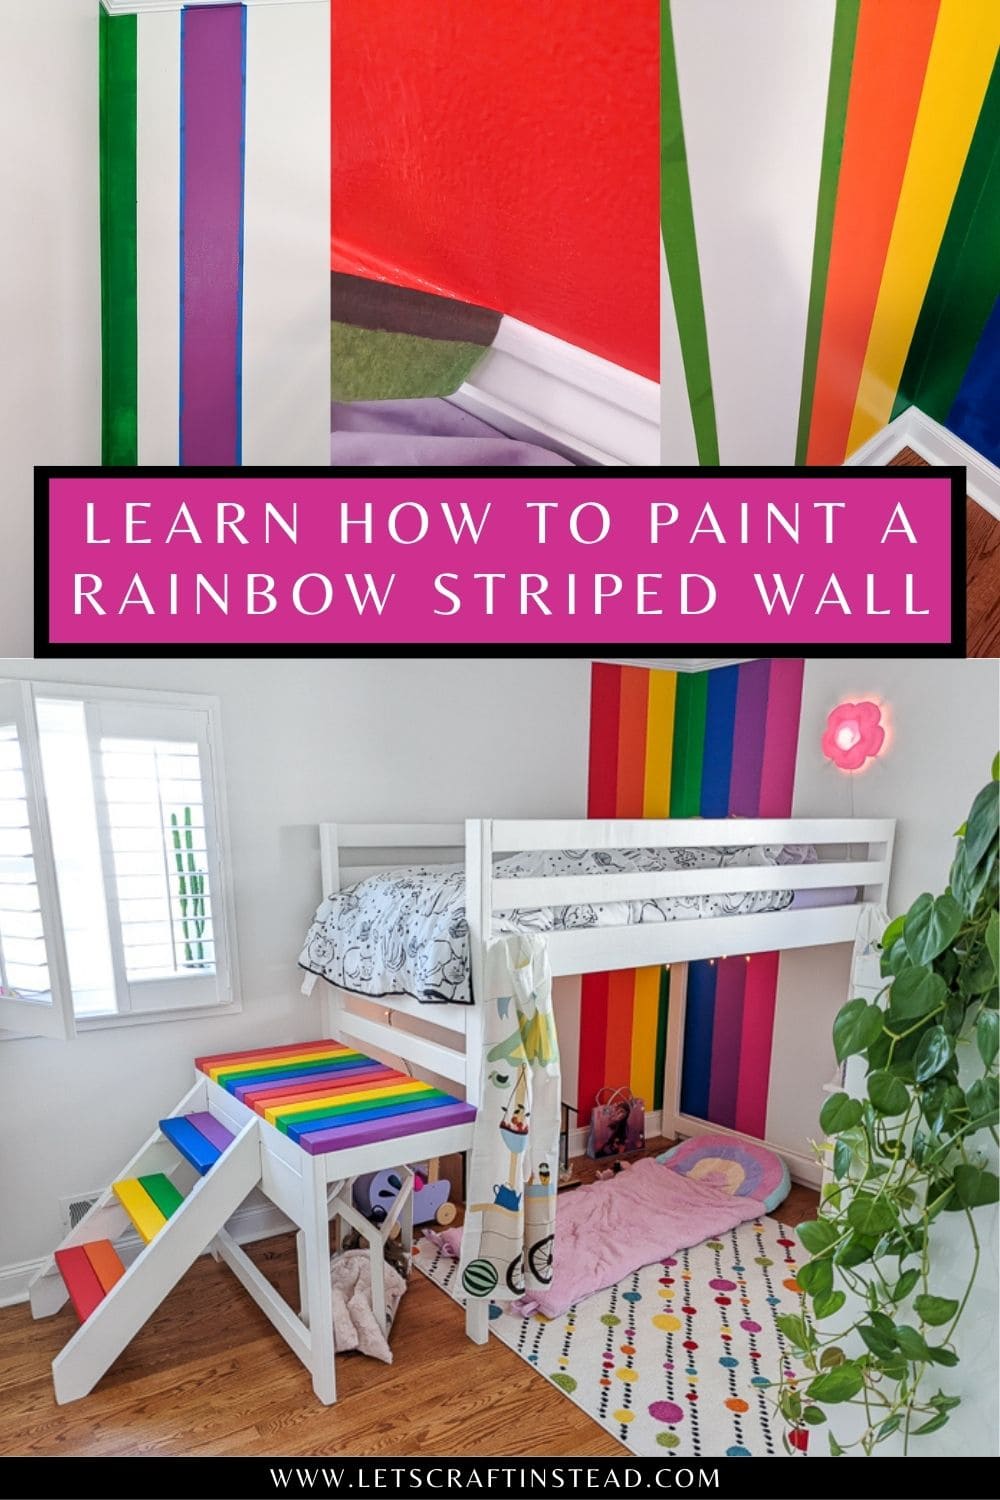
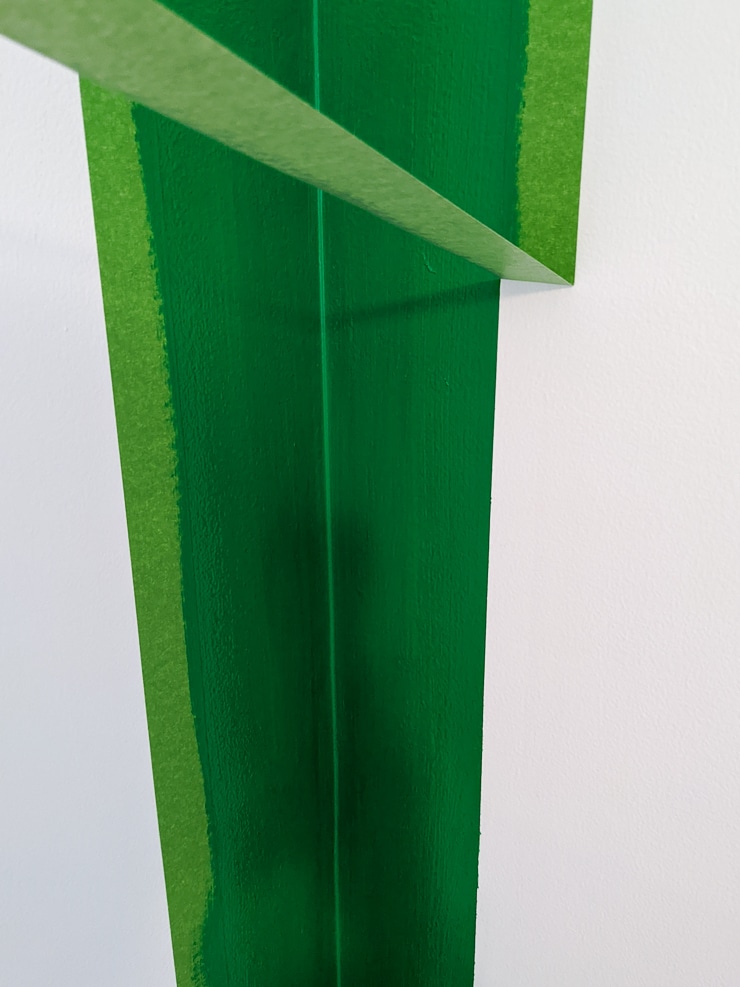
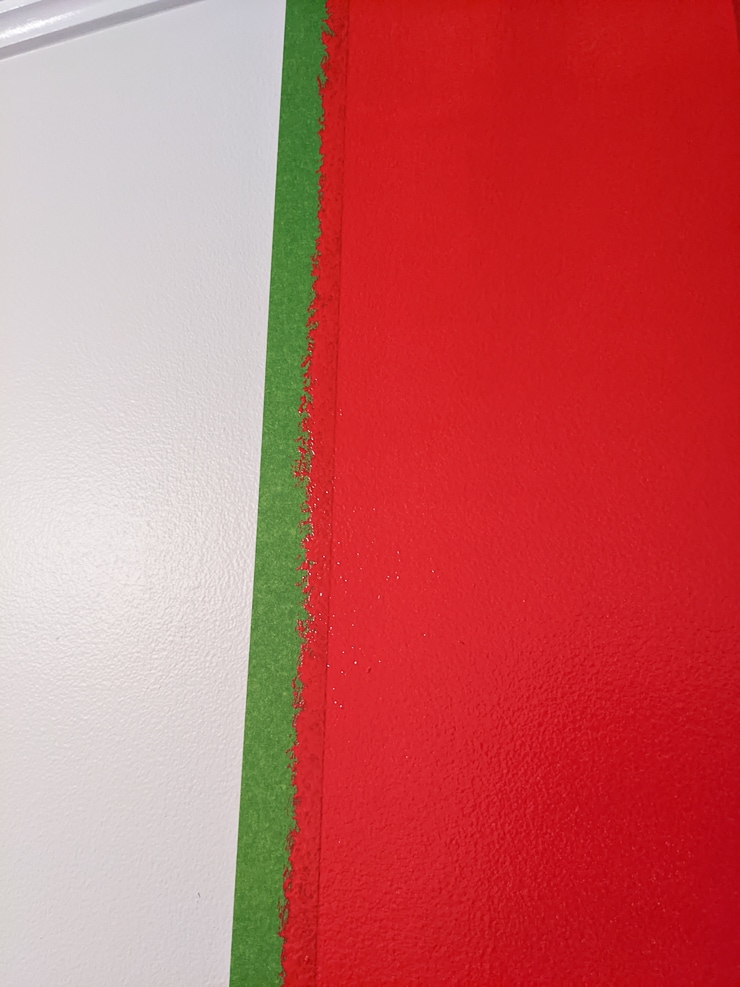
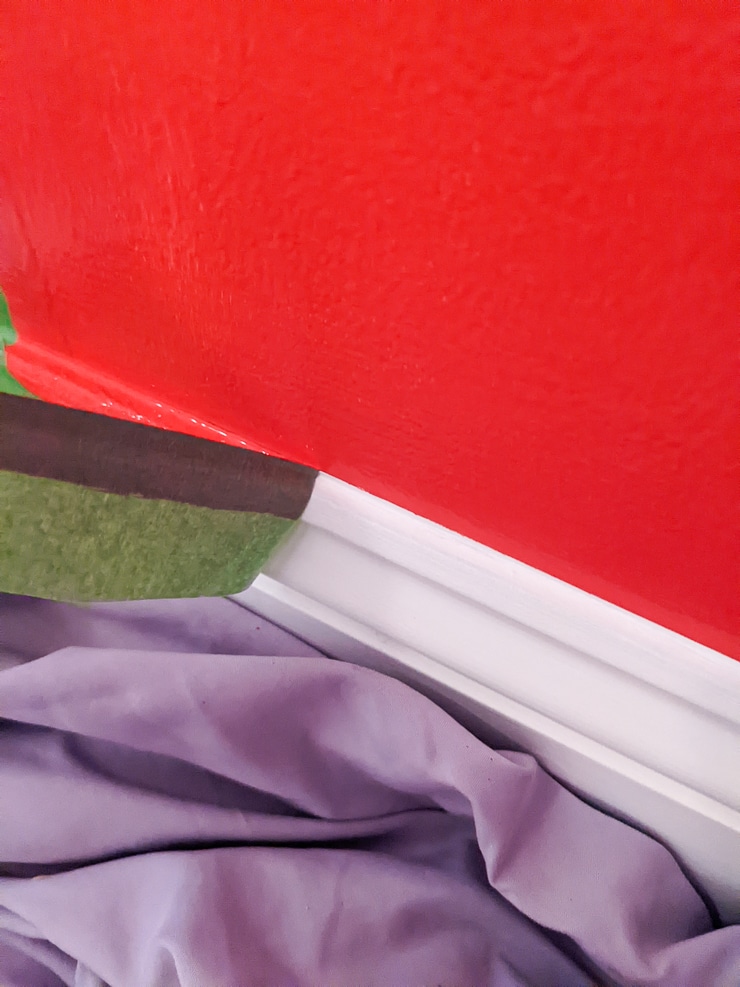
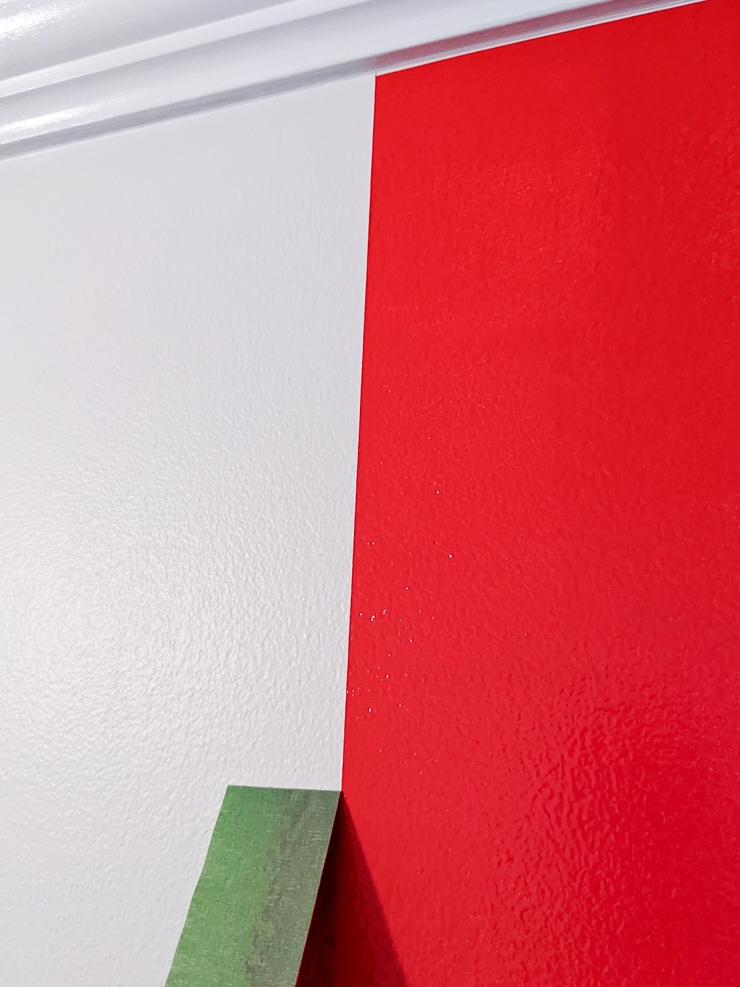
I then added painter’s tape along the pencil lines, as well as along the top and bottom trim. And a note on the painter’s tape…Scotch Blue did not do the job! I used it for the first few stripes, but I ended up having to do a tone of touchups.
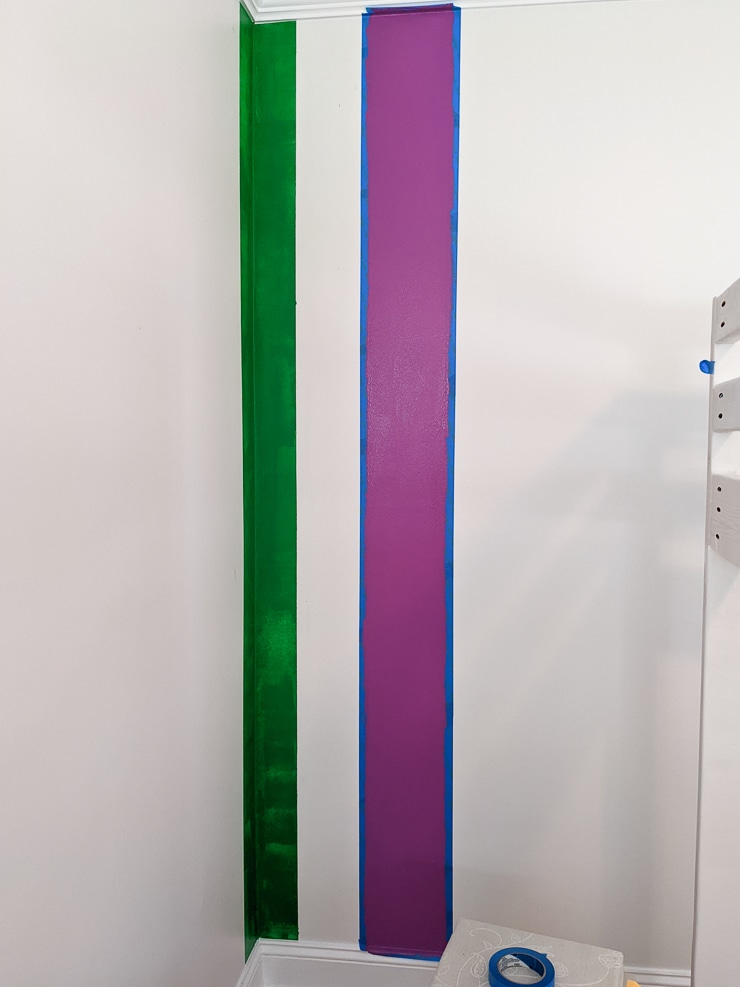
When I switched to FrogTape, I got the super crisp lines that I really wanted. Perfect! So let’s talk how I painted the colors. First up in the order was green. I used a small brush and a small roller to paint in the green as evenly as I could—but I knew these bright colors would need two coats!
I removed the tape almost immediately, right after I painted in the stripe. This is something I always do when painting with painter’s tape to help keep the lines crisp. If you let the paint dry partially, pulling the tape up might pull some paint with it.
Tip: Have a trash bag ready for the tape, because the combo of tape and wet paint is messy!


Step 3: Paint in the remaining alternate colors
Once the tape was off the green, I measured and marked 7 inches to the left and right of the stripe. Then another 7 inches from those marks. This gave me the measurements for where to add the tape for the next stripes.
I wanted to maximize my time, so I painted three colors first. Then once they were completely dry, I painted the remaining four alternate colors. But let’s not get ahead of ourselves. Here’s what I did after green…violet and orange.


Want more rainbows? Check out my tutorial for How to Make a Rainbow Balloon Arch, my 21 free printable Rainbow Quotes for Kids, and my tutorial for How to Make Rainbow Homemade Bath Salts!
Step 4: Paint the second coat on
Before I moved on to the alternate colors of red, yellow, blue, and magenta, I waited for the first coats of paint to dry, reapplied the tape, and painted in the second coat.


Step 5: Repeat the two-coat painting process on the alternate colors
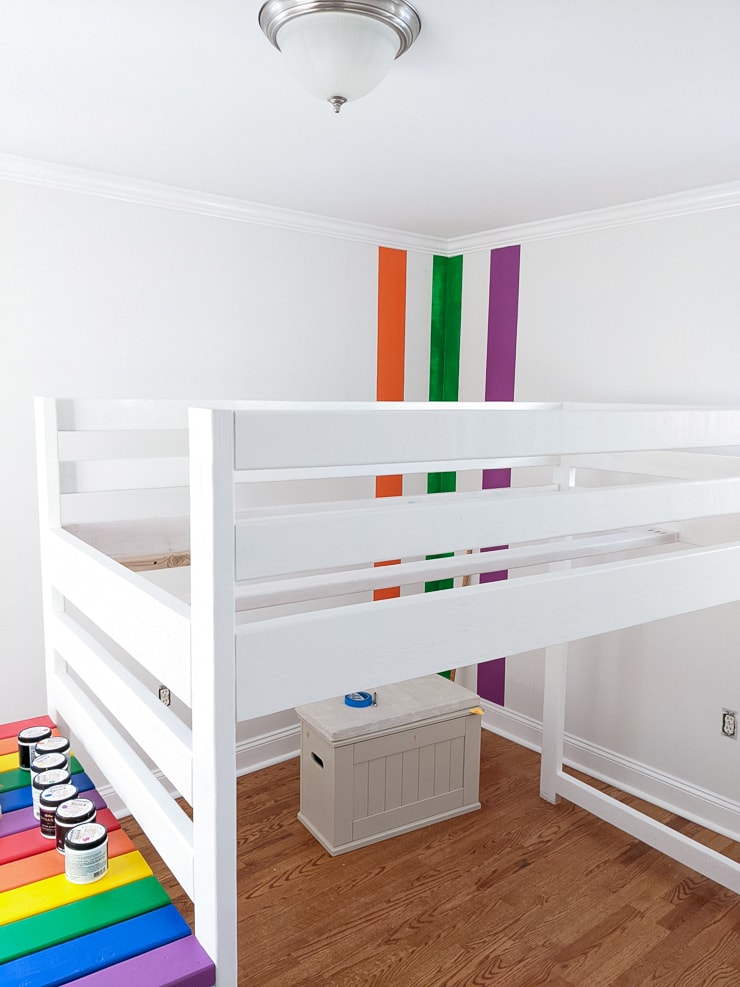
Next I started on the alternate colors: red, yellow, blue, and magenta. I could REALLY see the vision coming together now…I just hoped all of the other colors looked as good as the orange, green, and purple did!


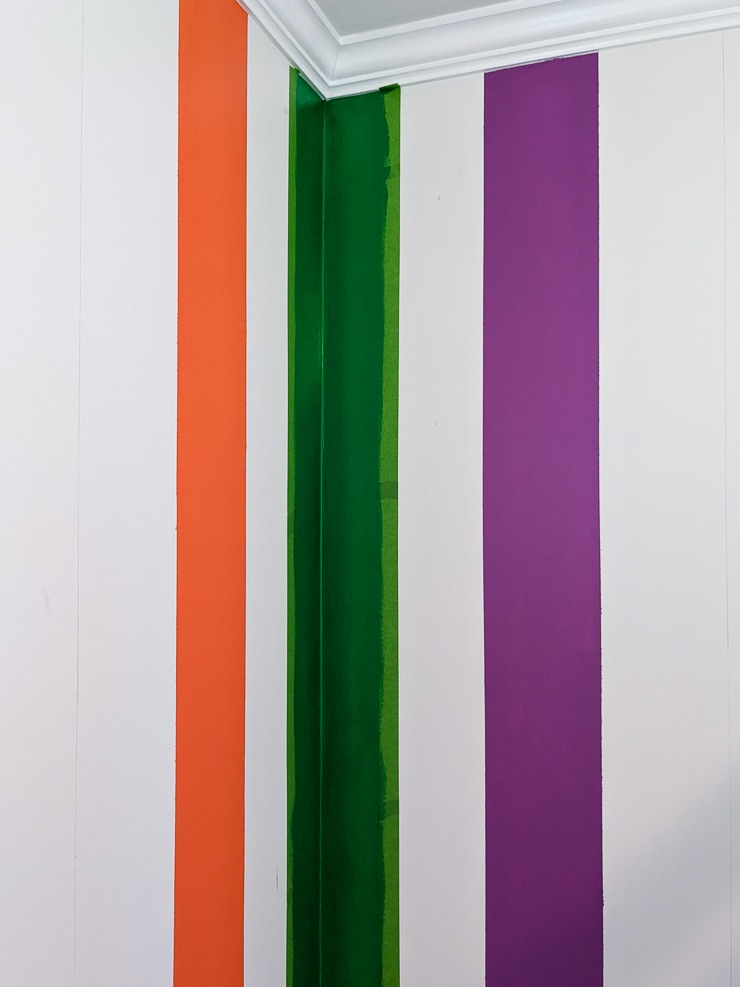
And here’s the finished wall right after I finished painting the second coat on the alternate colors. The paint was still wet in this picture, but it looked GREAT! I couldn’t wait to get the bed in place and add everything else to see how it came together.
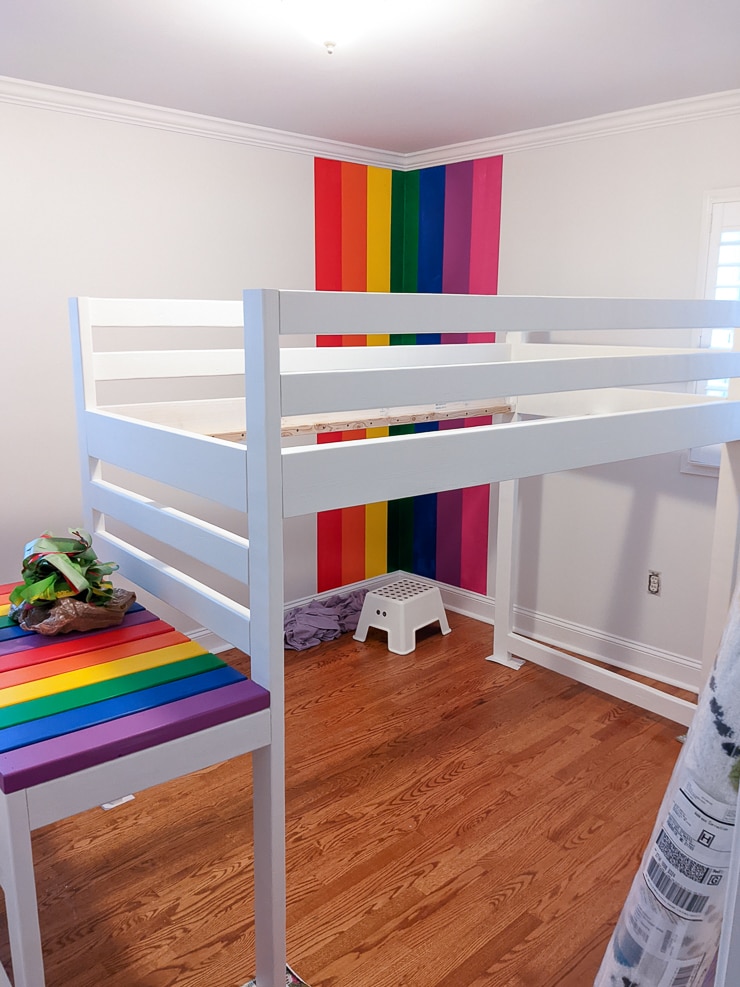

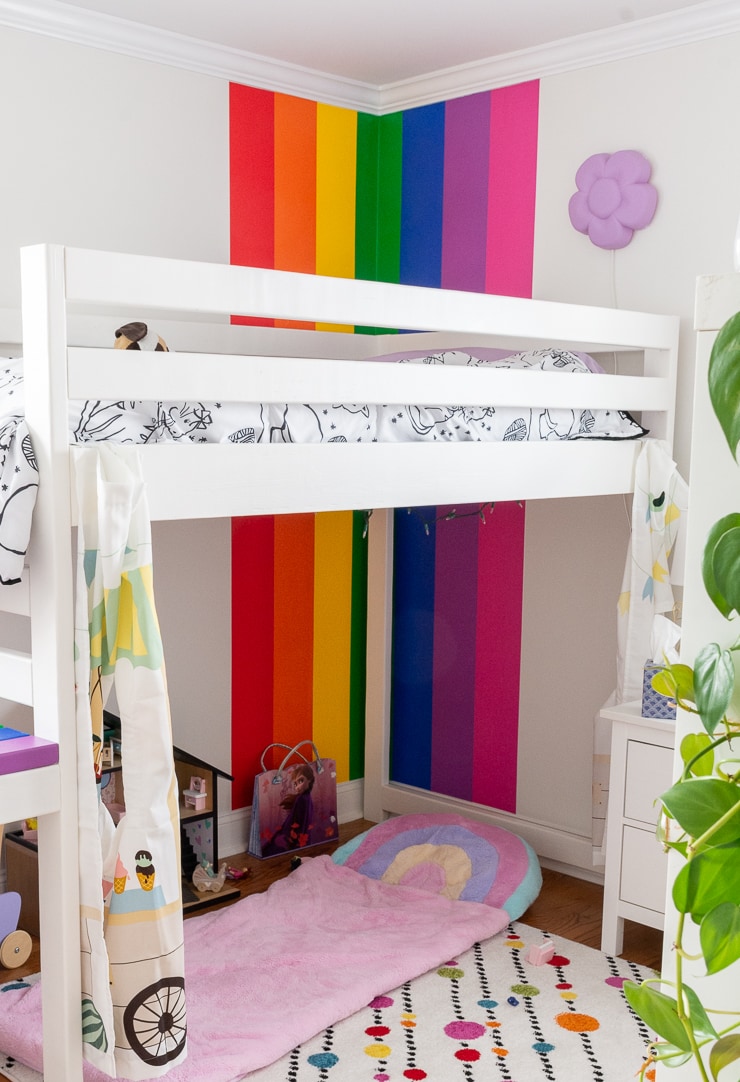
And here is the finished painted rainbow stripe wall!
And here it is! After I took these pictures, I couldn’t stop looking at them. The wall looks SO good! I swear it looks even better in person, too. For such a small room, it has a lot to offer. The bold rainbow wall is the perfect complement to the rainbow stairs and slats on the loft bed.
I hope this inspires you to paint a rainbow stripe wall somewhere in your home. Just remember to have patience. All of that painting, taping, and re-taping gets old pretty fast. But man was it worth it!!!


Pin my post about how to paint a rainbow striped wall!