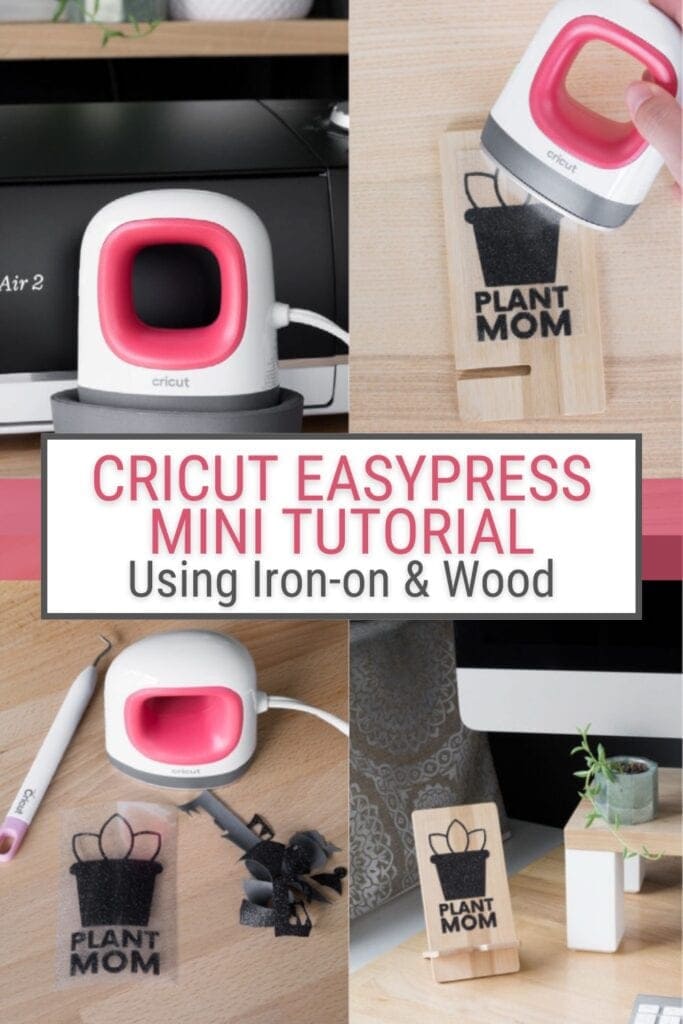
This post shares a detailed tutorial on using the new Cricut EasyPress Mini, the newest addition to the Cricut EasyPress family! Plus a full review. I’m also chatting about using iron-on material with wood and how the EasyPress Mini (and the whole EasyPress family) makes projects like these easier than a traditional household iron. This post was sponsored by Cricut and originally appeared on bybrittanygoldwyn.com.
Cricut EasyPress Mini Tutorial & Using Glitter Iron-On With Wood
Hey gang! It’s some for another Cricut product tutorial and project. If you remember my post all about the EasyPress 2, you’ll know I’m a massive fan. I love how it makes heat transfer and iron-on projects effortless. And how much more professional it makes the result. In that post I shared a heat transfer project on a tote bag, which is pretty big. So the larger EasyPress was a great fit for it.
But I have done some smaller heat press projects that are a bit more frustrating to use the EasyPress on. For example, cute little zippered pouches. Since you want an even distribution of heat, the smaller surface area of the pouch and the zipper and seams make it a more challenging project. Until the Cricut EasyPress Mini!
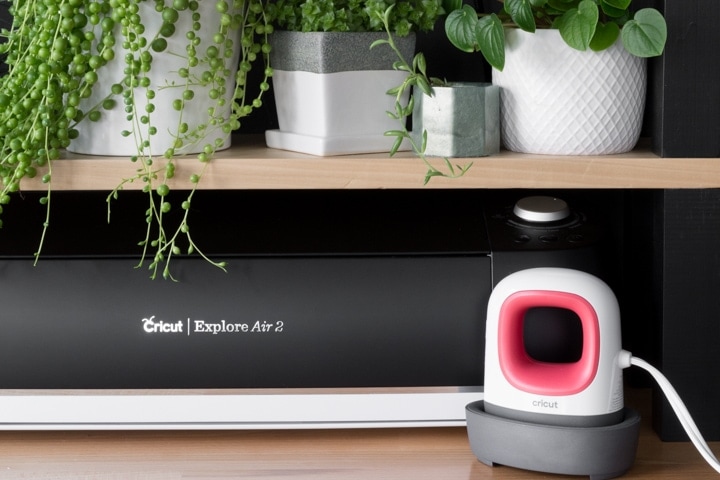

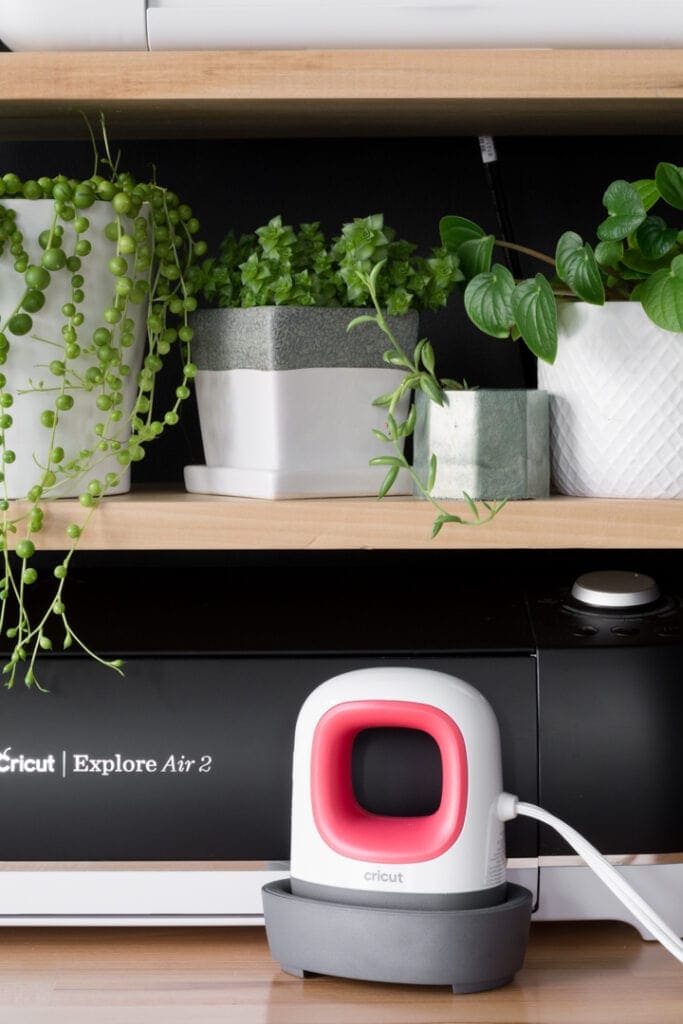
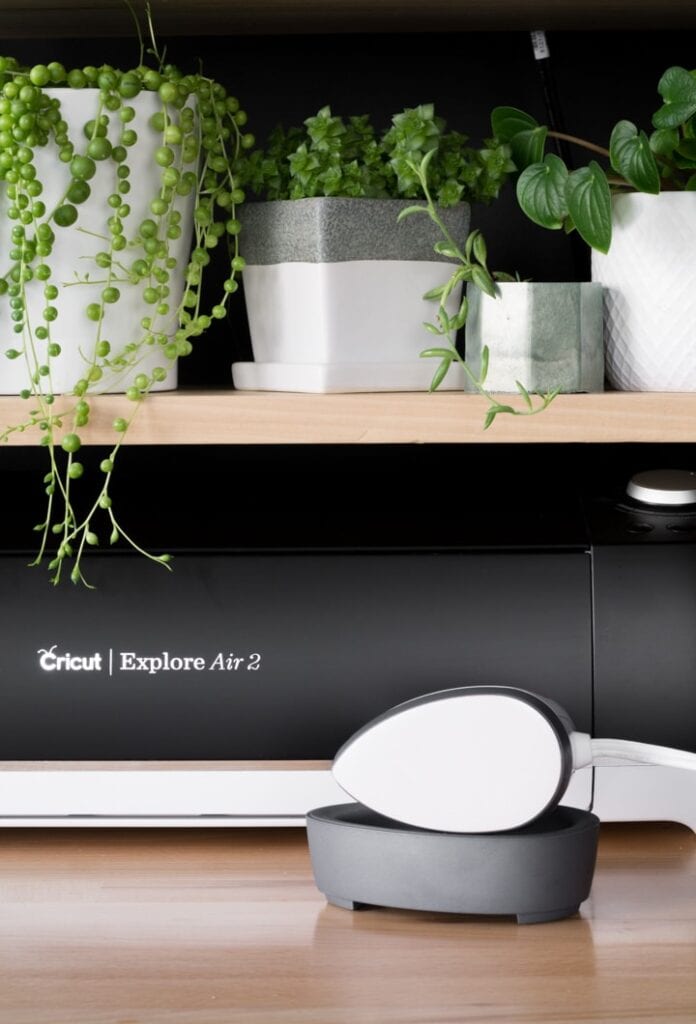
The Cricut EasyPress Mini is the newest addition to the Cricut EasyPress family. It’s awesome as both a standalone tool and an awesome companion piece to an EasyPress you might already have. The EasyPress Mini would have been fab for that small pouch project.
I’m really excited that the folks at Cricut have created an EasyPress for smaller and weirdly shaped projects. It gives you the portability and ease of use of a household iron with the effectiveness of the EasyPress line.
Want more? Check out my guide to using the Cricut Knife Blade to cut wood, how to slice text in Cricut Design Space, my tips for working with holographic mosaic iron-on, and and my debossing and engraving tip tutorial.

What Makes the EasyPress Mini Better Than an Iron?
Listen. I get it. It’s smaller than an iron and more expensive. (Unless you have one of those bougie irons, in which case I am jealous.) So the first thing any Cricut EasyPress Mini tutorial needs to cover is why getting one in the first place is a good idea.
I wrote about this at length in my ultimate EasyPress 2 guide post, but I want to touch on it here, too. Especially because the EasyPress Mini is so much smaller than the traditional EasyPress products. It might seem like it isn’t worth the money.
As I said in my original EasyPress 2 post, if you do only a handful of heat transfer projects every year, you probably don’t need the EasyPress Mini. Or any EasyPress, for that matter. But if you’re a crafter, whether for occasional fun or for business, the EasyPress line is a solid investment. Cheaper than a heat press while still giving you quality that’s far, far better than a traditional household iron.
It also ups your quality while saving you time. And it is designed with no-brainer settings with very little room for error. Trust me, I’ve ruined nice heat transfer and iron-on material with my household iron. It is not fun throwing it away. Especially when it’s the good stuff like glitter iron-on or metallic foil!
Much like the other EasyPress products, the EasyPress Mini does not require a press cloth and is compatible with all major brands of heat-transfer material—not just Cricut stuff. The evenly dispersed heat helps create transfers that last longer than an iron would.


How does the EasyPress Mini Create Professional-Quality Heat Transfer Designs?
There are three major things that contribute to getting professional heat transfer results at home. Your household iron can meet some of these, sure. But not all of them. The first is evenly dispersed heat. Your household iron generates one hotspot in the middle, and heat decreases as you get to the edge of the iron’s plate. This can mess with how well your design is adhered in certain parts. The EasyPress products have totally evenly dispersed heat.
The second is the ability to precisely control temperatures. EasyPress products, including the EasyPress Mini, also give you the ability to set temperatures. All of Cricut’s heat transfer products have been tested with the EasyPress products. They have a nifty Interactive Quick Reference Guide that makes setting your temperatures a total no-brainer.
And third is the need for a flat, stable surface. And I don’t mean an ironing board, which can be bumping or padded. The EasyPress mats are a fabulous solution. They are firm but not too firm and can be set on a flat surface like a table. The mat also protects the surface underneath from heat and moisture.
Okay, You’ve convinced me. So what are the Cricut EasyPress Mini Details?
The compact size of the Cricut EasyPress Mini makes it perfect for small or uniquely shaped heat transfer projects. Think hats, shoes, sleeves, items with pockets, stuffed animals, and more. The size and shape of the EasyPress Mini also make it easy to curve around projects and squeeze into tight areas like seams, zippers, and between the rubber sole and top of a shoe.
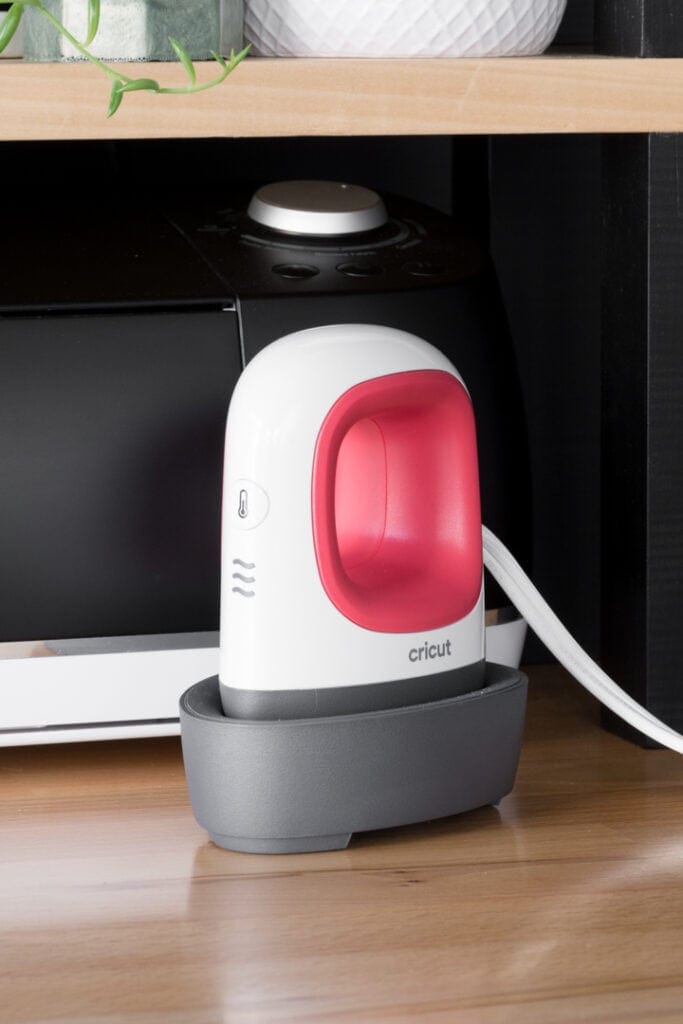
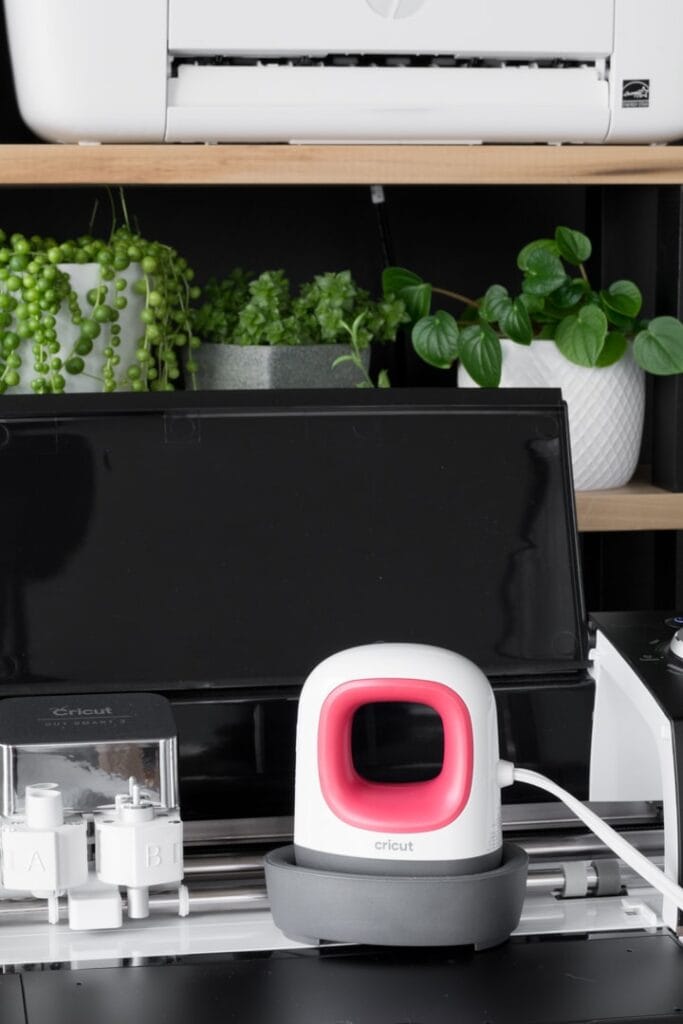
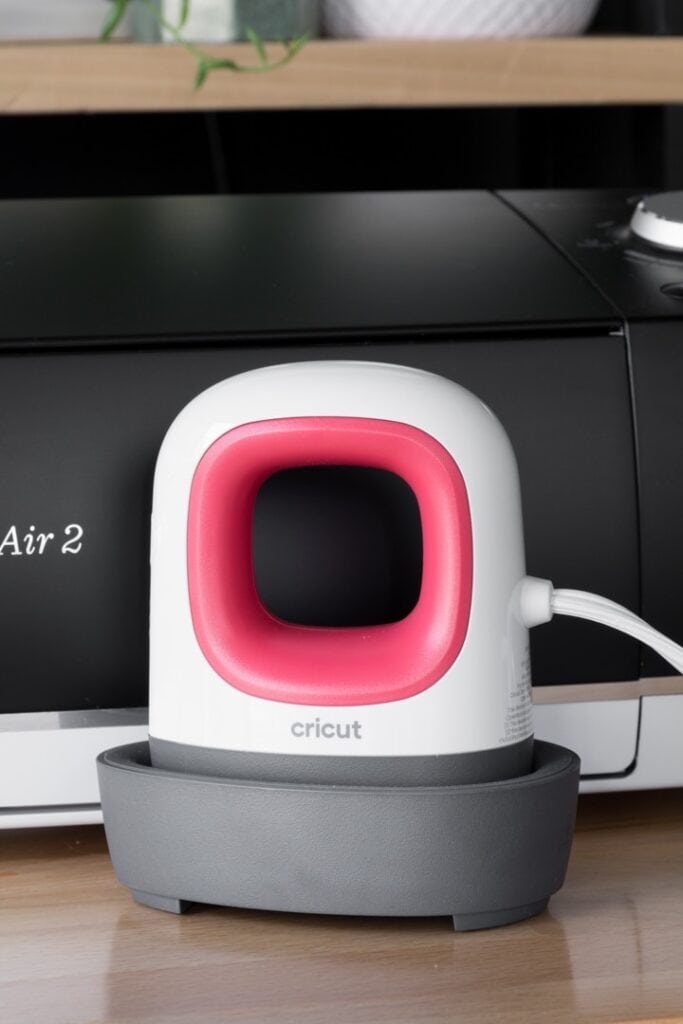
Much like the other EasyPress products, it comes with a ceramic-coated heat plate for dry, even, edge-to-edge heat. It is designed to accommodate both iron-on and Cricut Infusible Ink projects, and it comes with an insulated safety base and auto-shutoff feature (13 minutes after it last moved).
And for the sewers out there—the EasyPress Mini is fab for pressing seams, paper piecing, and projects with applique. Its small size (and the small size of the EasyPress mats) also make it perfect to keep by your sewing machine for easy access without making things feel too crowded.

How is the EasyPress Mini different from the other EasyPress products?
They are very similar. Size is the key difference, and it also has a nifty little precision tip for reaching the smallest of areas. And there are a few other differences to keep in mind. The EasyPress Mini has an additional layer of ceramic coating to help keep things smooth when you’re moving it around your design.
The Mini has only three heat settings—low, medium, and high. The heat settings guide on Cricut’s website tells you which setting to use for your project. But in general, low is for lightweight or delicate materials (e.g., foil iron-on), medium is for most fabrics and iron-on vinyl, and high is for Cricut Infusible Ink.
The last key difference between the EasyPress Mini and the other EasyPress models is that the EasyPress Mini does not have a built-in timer. So make sure you have your phone or another countdown timer handy for EasyPress Mini projects.


What size design should I use the EasyPress Mini on?
There’s no limit on how small of a design you can create with the EasyPress Mini. However, Cricut recommends the following maximum design sizes—roughly two times the size of the heat plate:
- Iron-on: 4″ W x 3.5″ L or 1.7″ W x 5.25″ L
- Infusible Ink: 2.75″ W x 2.75″ L or 1.625″ W x 5″ L
Cricut recommends these sizes so that you can ensure all parts of your design get the proper heat required for adhesion to your base material. Moving the other EasyPress models around isn’t ideal, but you can do it if you have a very large design. The EasyPress Mini, however, is designed to be moved around.
You can move the EasyPress Mini from side to side as you work on your design. Make the Mini extends about a ½ inch beyond the edge of your design, though. This helps to ensure you get a complete transfer and don’t leave the edges out.
How do I get a design to adhere on seams using the EasyPress Mini?
The EasyPress Mini makes adhering designs on seams much easier because it gives you the ability to be more precise. Cricut recommends using the Cricut Heat Resistant Tape to tape down designs you’re pressing on. They also recommend adding an extra 3–5 seconds of pressing when adhering iron-on material over a seam.

Cricut EasyPress Mini Tutorial: Using Iron-On Material With Wood
Safety Note: Do not use the EasyPress while small children or pets are around, and always return the EasyPress to its safety base when you’re not using it. Even when it’s not hot, it’s just good practice. The heat plate can get VERY hot and cause severe burns if you touch it.
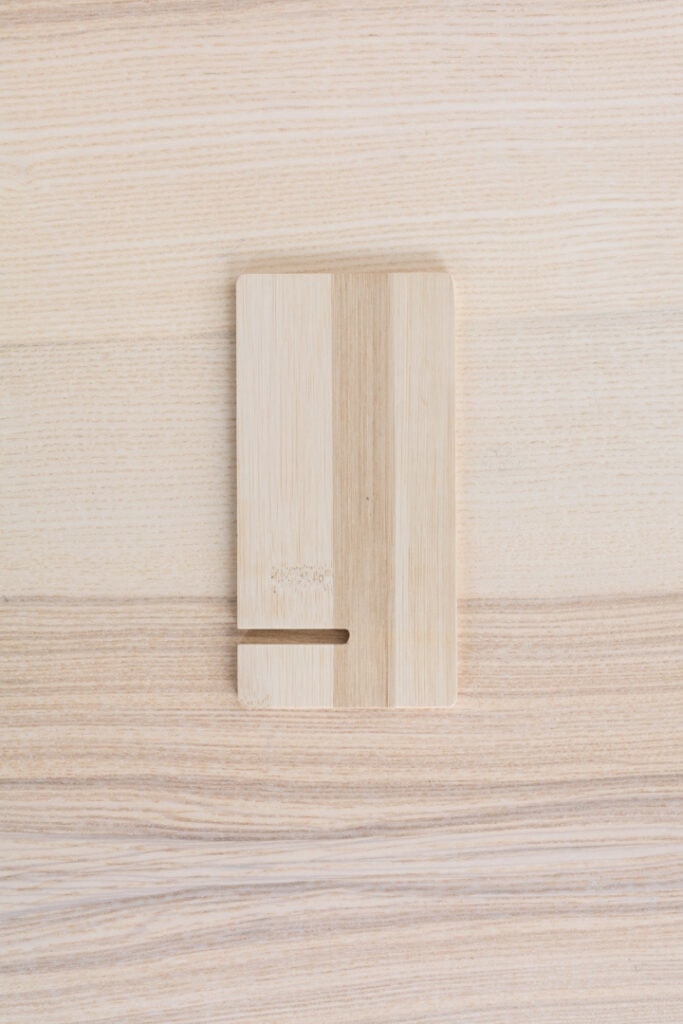
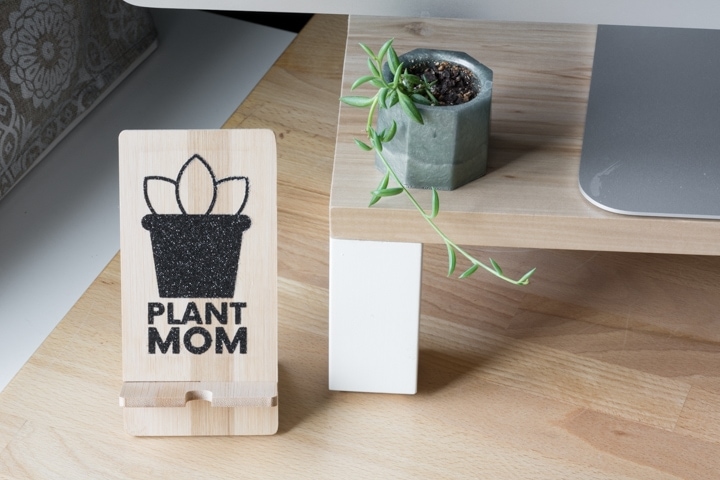
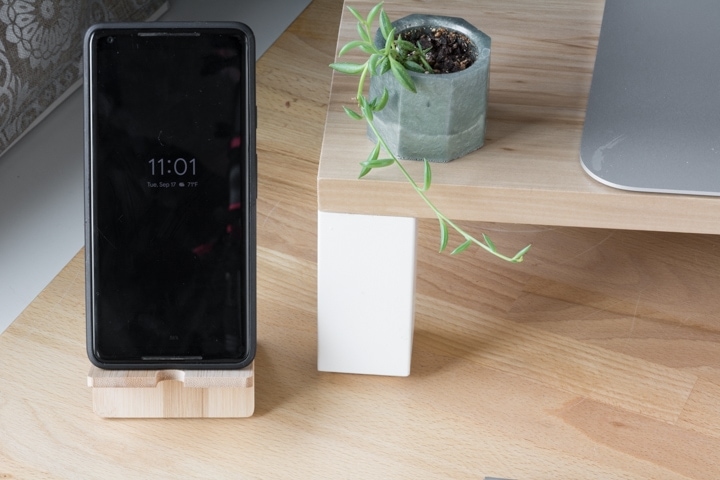
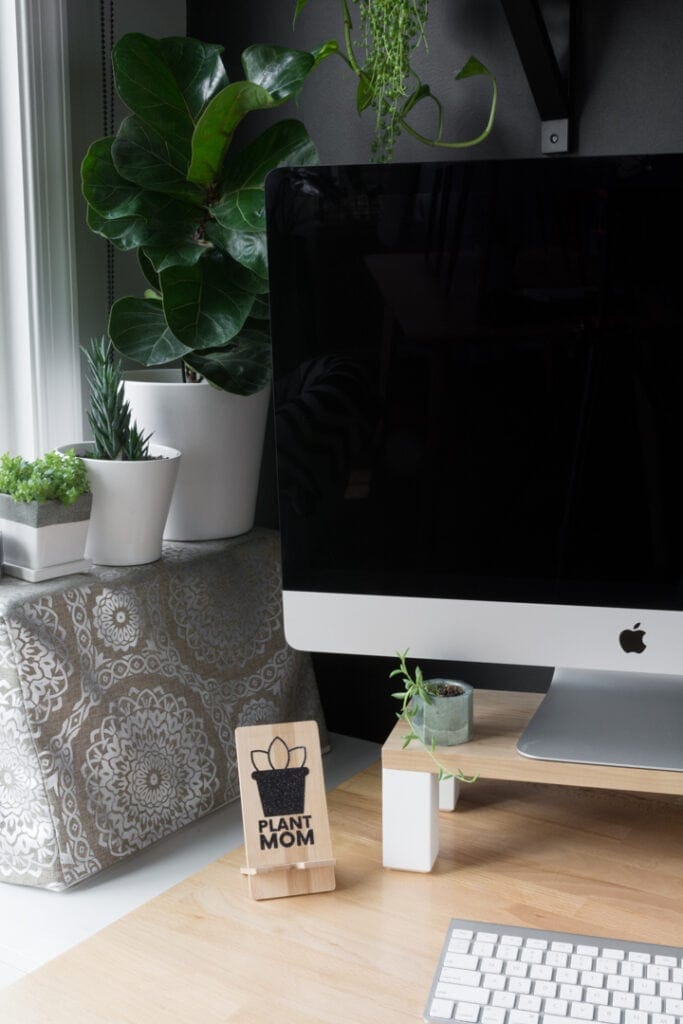
For my Cricut EasyPress Mini tutorial, I’m going to chat about using iron-on material with wood. The general guidelines in this tutorial are good for using any of the EasyPress products with wood. The EasyPress Mini just happened to be perfect for this tutorial because I’m using a small wooden cell phone stand.
I got this cell phone stand for free, and I love how it looks. I keep it on my desk to prop my phone up when I’m listening to a podcast. Since it’s about the size of a cell phone, using a larger EasyPress would have been overkill. The EasyPress Mini is a great fit for this little project.
Here’s how to use iron-on vinyl with wood.
Step 1: Cut your design
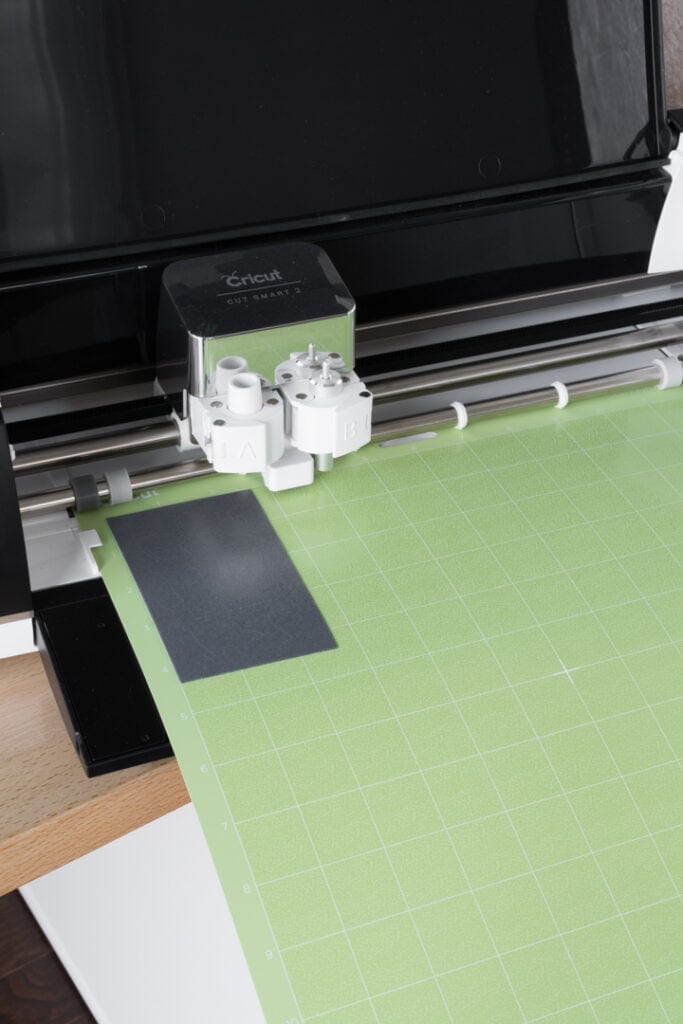
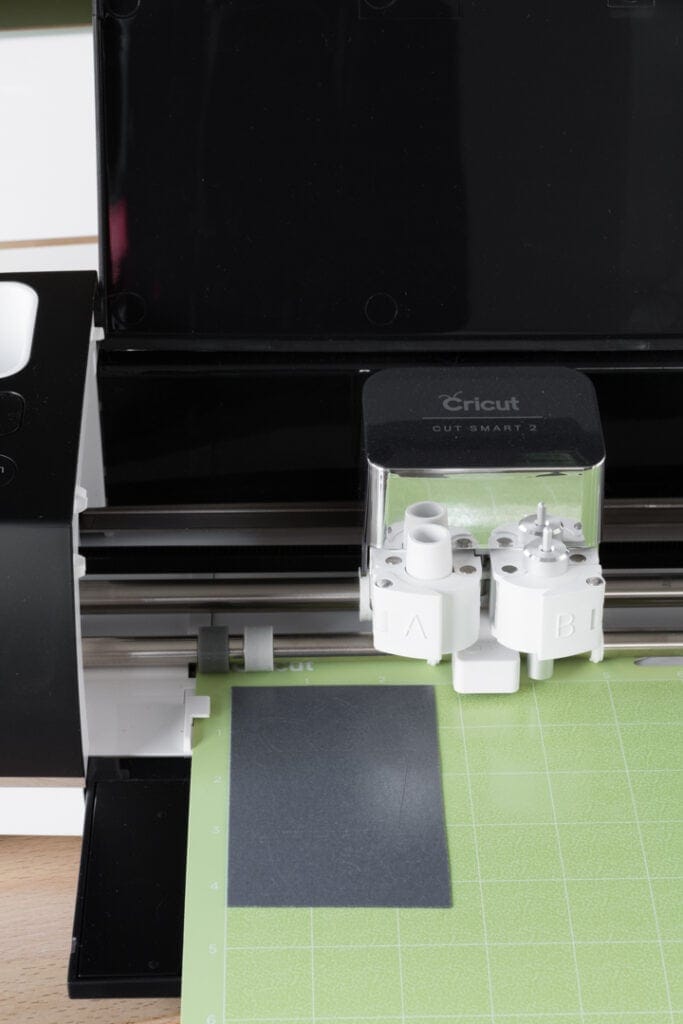
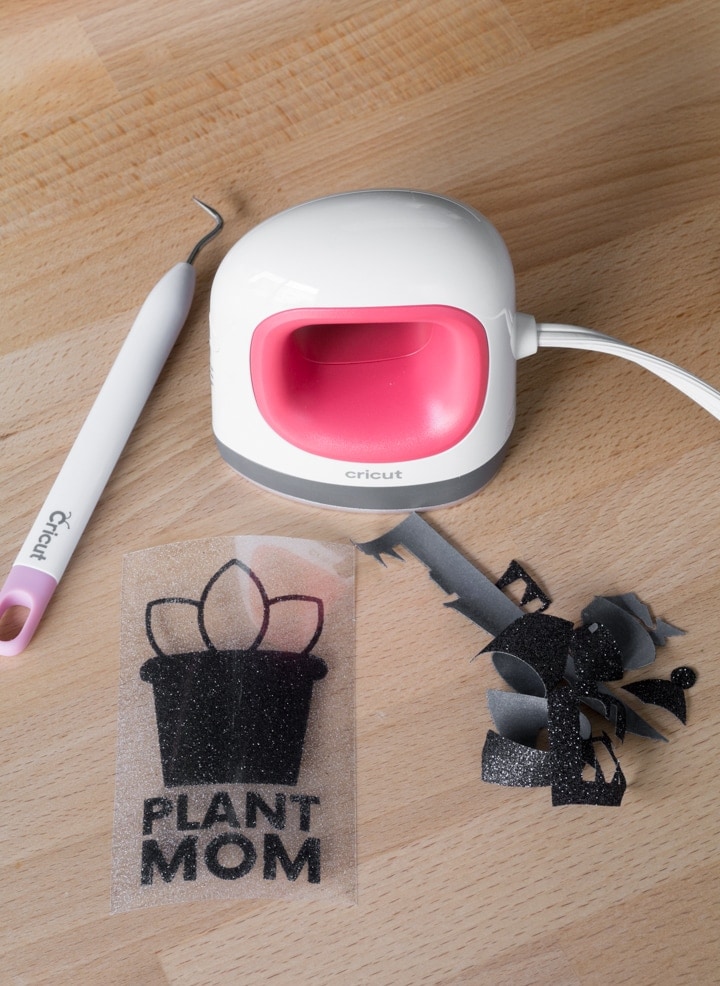
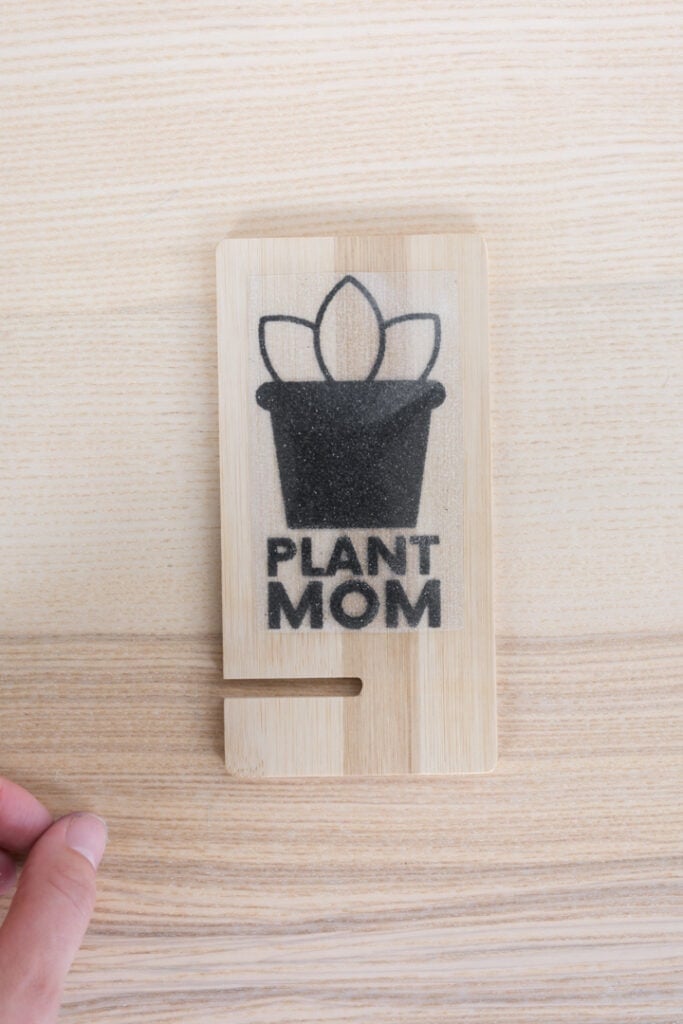
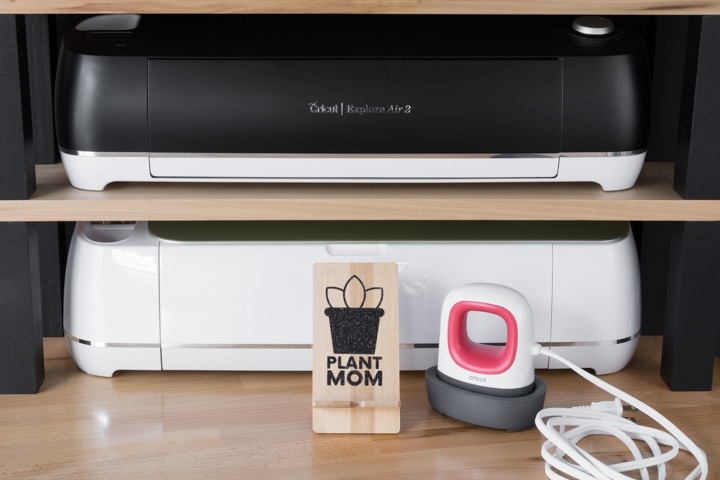
I used my Explore Air 2 to cut a “plant mom” .SVG from a free bundle of plant lover cut files I have. For this project, I chose black glitter iron-on.


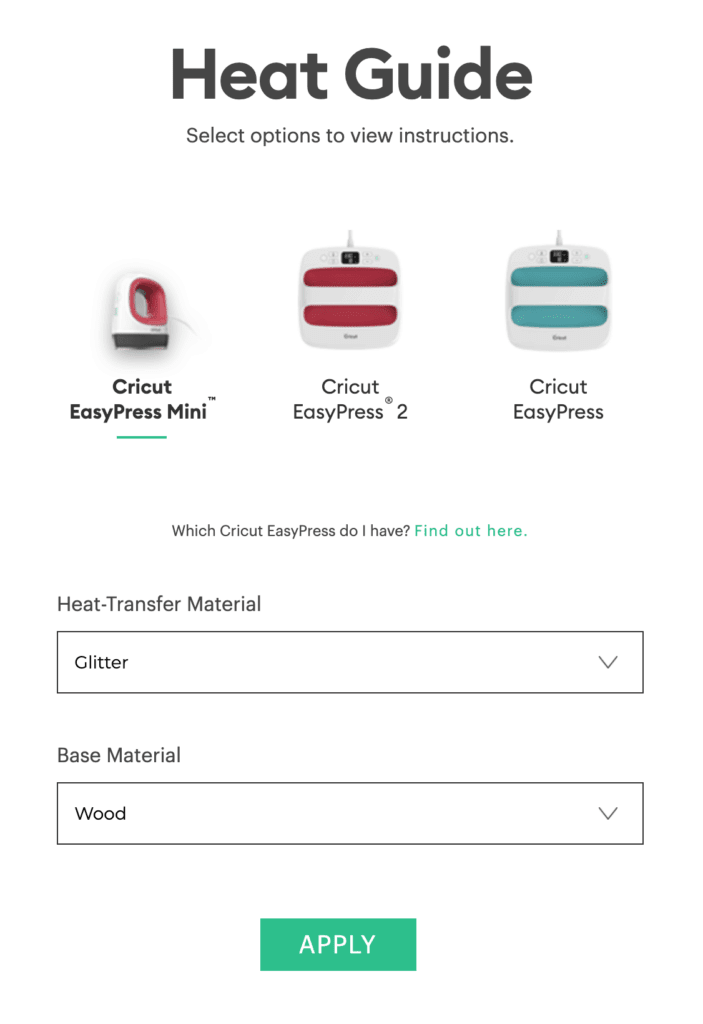
Step 2: Figure out your heat settings
Use the Cricut Quick Reference Heat Guide to select your EasyPress version, material, and base material. I selected the EasyPress Mini, Everyday Iron-on, and Wood as the base. For best results, make sure your wood is totally flat. (This is a good rule of thumb for any base material, not just wood, because the heat plate must be able to make full contact to properly adhere a design.)
For my project, the Heat Guide told me to set my EasyPress Mini on Medium heat. It also told me to preheat my base material for 5 seconds.

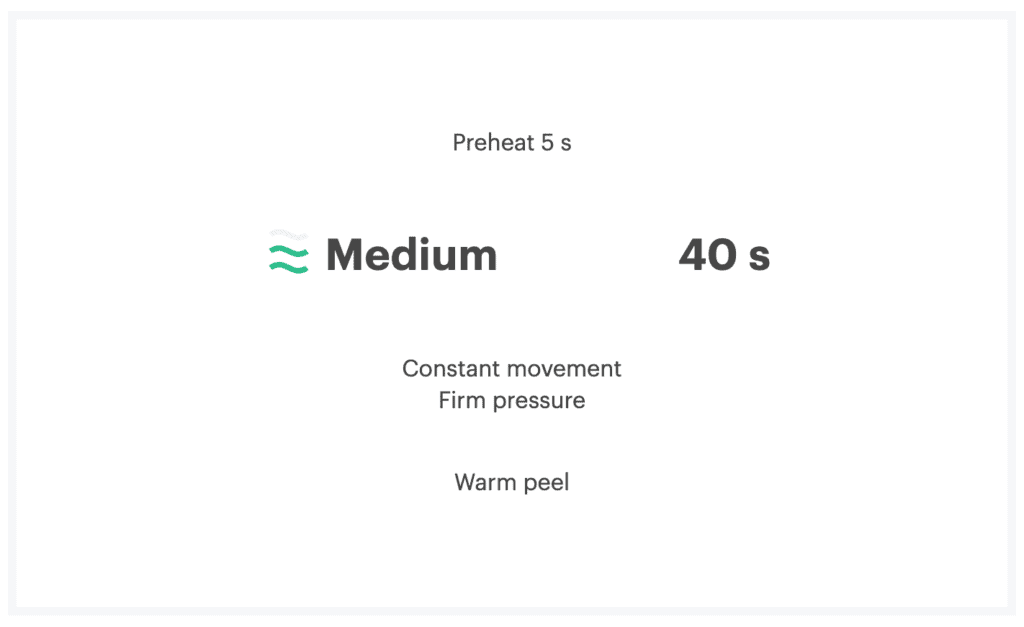

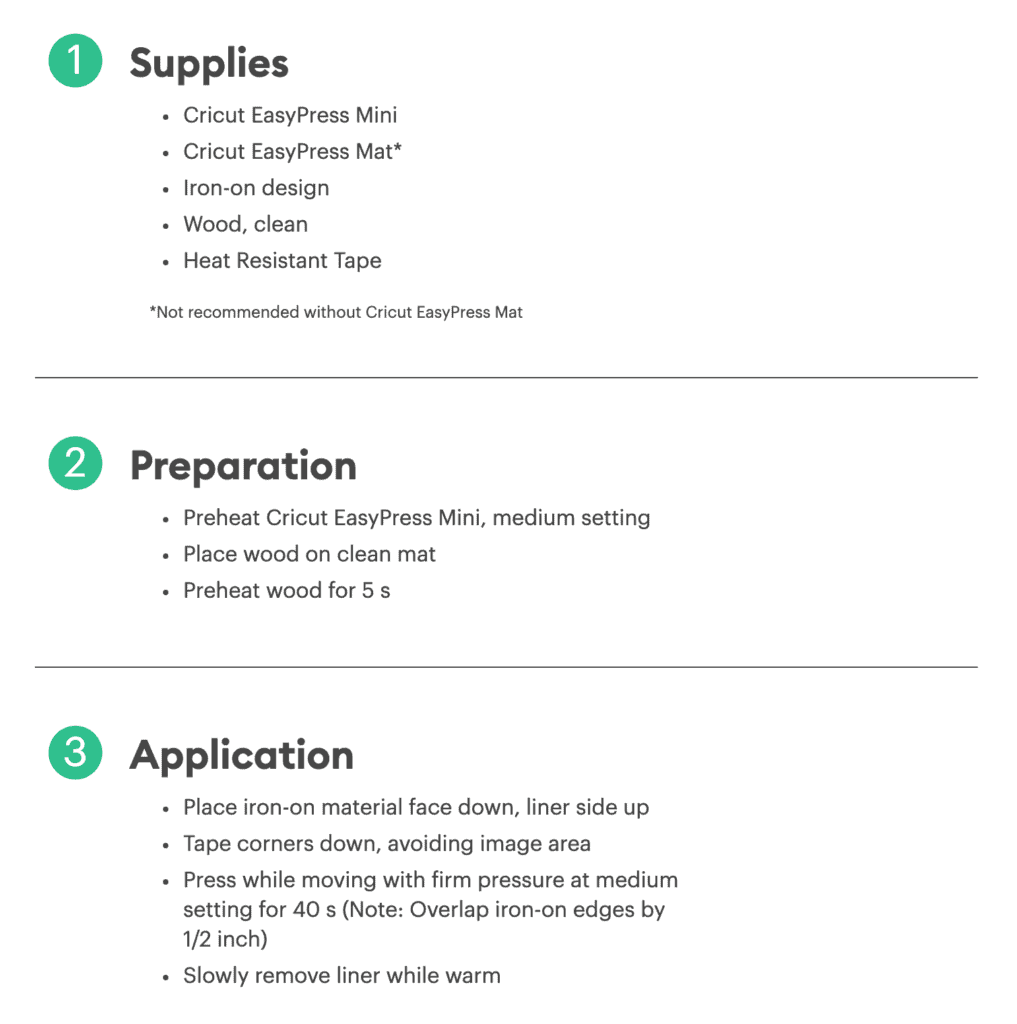


Step 3: Adhere iron-on to wood with the EasyPress Mini
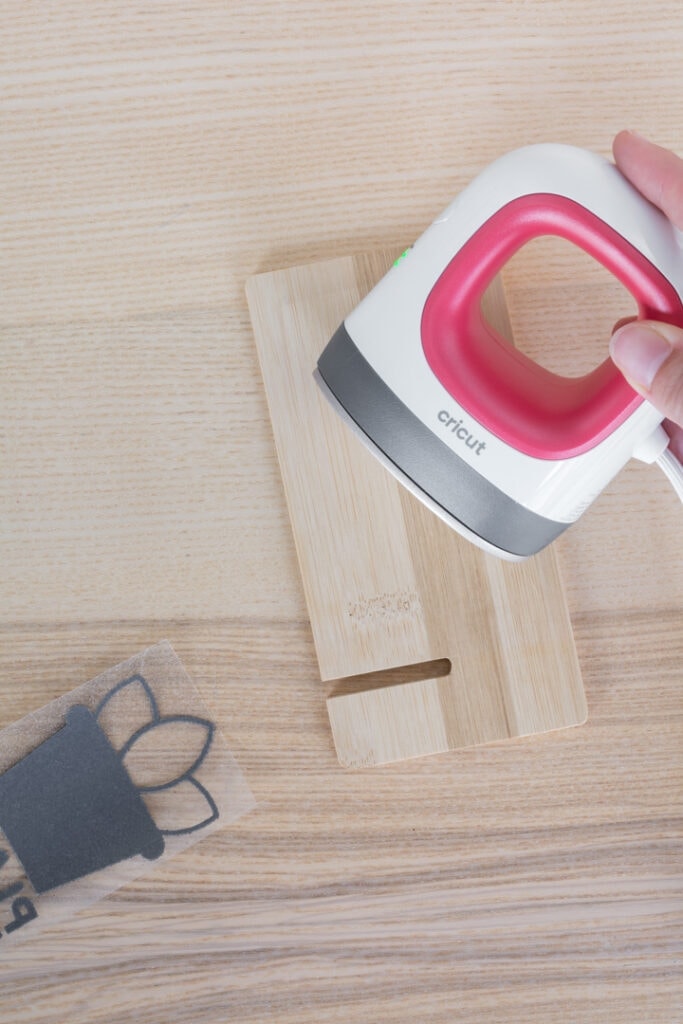
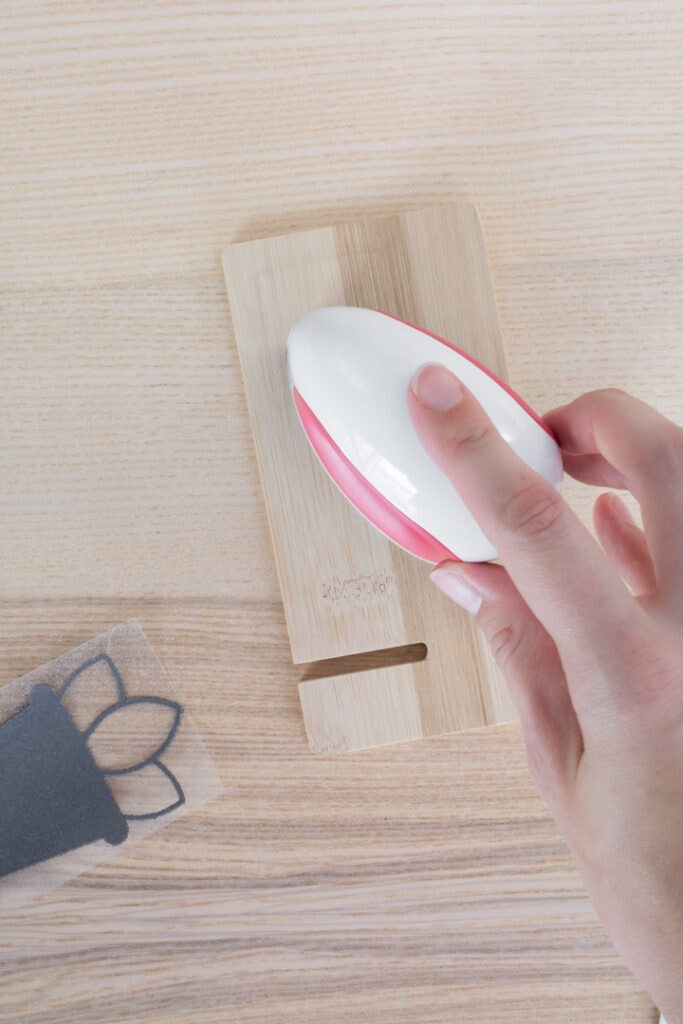
After cutting my design on my Explore Air 2, plugging in and heating up my EasyPress Mini, and preheating the base material, I set the design on the wood. With the liner side facing up as normal for iron-on and heat transfer projects.
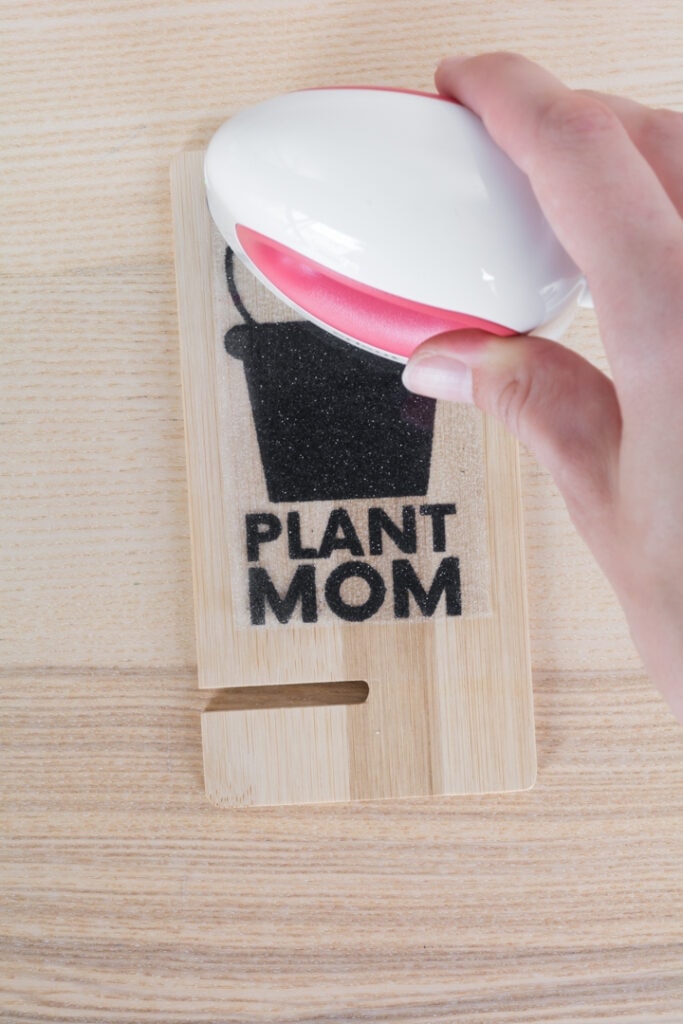
Then I placed the EasyPress Mini down on the top corner of the design, making sure to slowly move it around the design. Remember that the EasyPress Mini has an additional layer of ceramic on the heat plate to help it glide over your material, avoiding press marks. But you still don’t want to press down too hard—just be firm. Move it like you would a computer mouse.


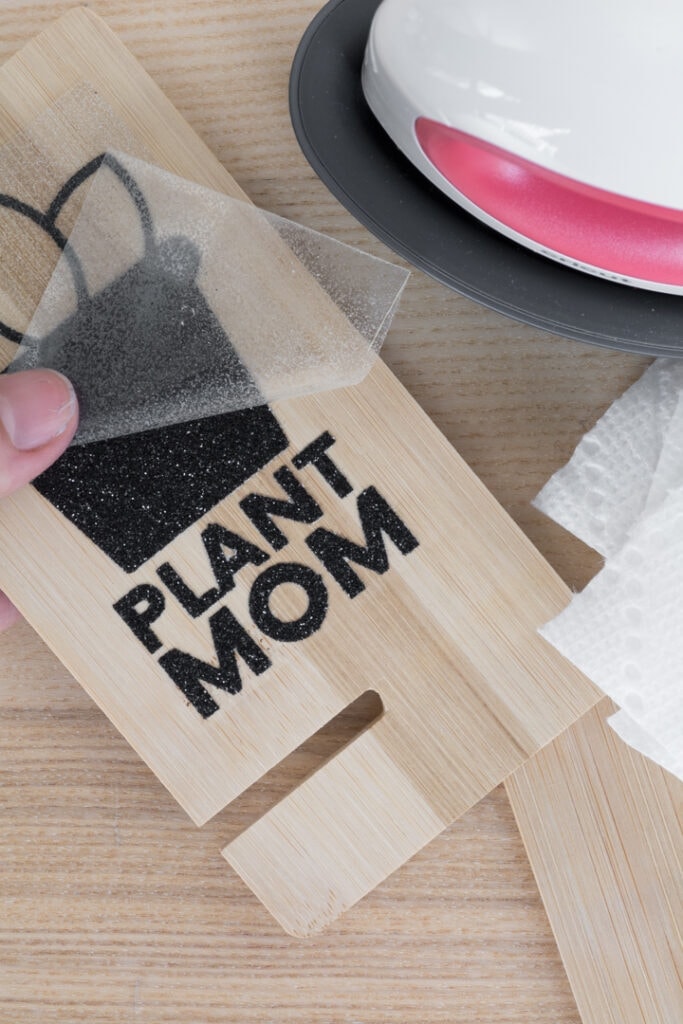
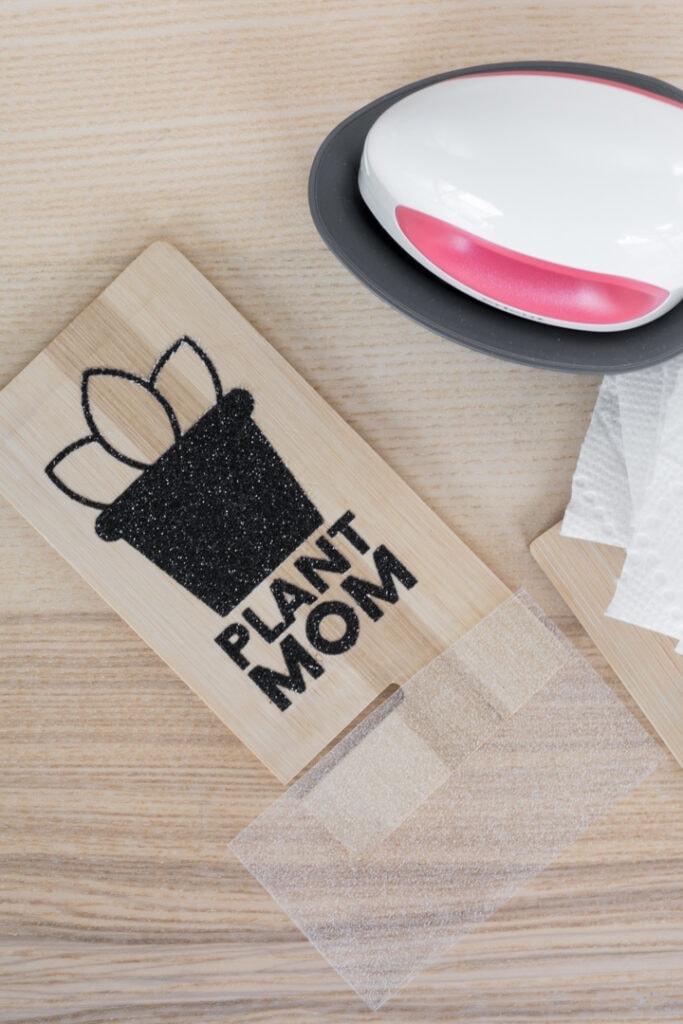
Step 4: Burnish and peel
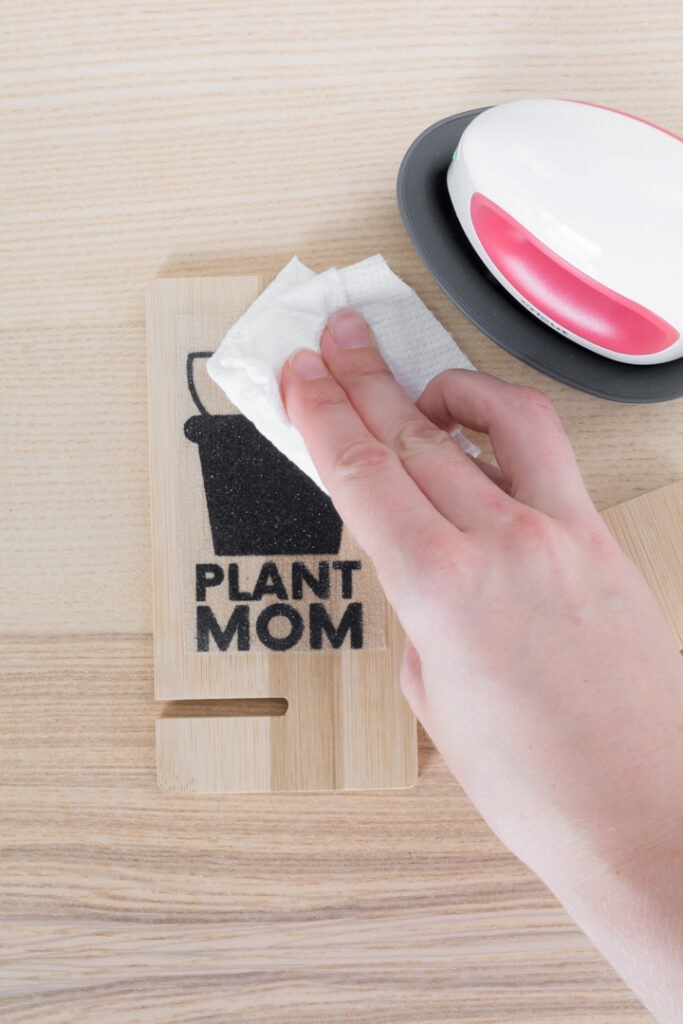
Once I’d heated my design for the recommended amount of time (40 seconds), I set the EasyPress Mini back in its safety base and grabbed a clean cloth. I used the cloth to rub the design (it would be too hot to the touch without a cloth). This is called burnishing, and it helps ensure the iron-on firmly adheres to the base material as it begins to cool.
Immediately after burnishing and while the iron-on was still warm (but not hot), I peeled the protective liner off to reveal my design. (The Quick Reference Heat Guide recommended a warm peel for iron-on and wood. Some projects require a cool peel.)
Want more Cricut? Check out my tutorial for how to turn an image into an .SVG file to use in Design Space, my post on how to make DIY wall decals, and my tips on using a Cricut machine to cut chipboard.


And that’s that! Super easy to use iron-on material with wood. And it’s definitely good to know that iron-on is a versatile material that can be used on things other than fabric. I always have scraps I’m looking to use up. I can’t waste any of it! (If you don’t have any scraps but want to make sure you don’t generate a ton of waste, Cricut now also has Everyday Iron-on mini-samplers!)
I hope you found this tutorial Cricut EasyPress Mini tutorial helpful and that you’ve learned everything you need to know about using it—especially when using iron-on material with wood!


Pin my Cricut EasyPress Mini Tutorial & Tips for Using Glitter Iron-On With Wood!