Category: Uncategorized

  • 8 Cricut phone case ideas to inspire your next crafting session!

    This content may contain affiliate links. See my full disclosure here.

    Looking for Cricut phone case ideas? I am sharing 8 fun projects to help inspire your next crafting session! These images are shared with the permission of their respective owners. Enjoy!

    Hello, hello! It’s time for another Cricut crafting roundup. And today it’s about Cricut phone case ideas. Because Cricut crafters love a good blank, and a phone case is usually just screaming to have some vinyl slapped on it 😉

    A few years ago I added a “plant mom” decal to a wooden phone stand and wrote a post about it. The post focused on how to use iron-on with wood, actually, and the phone stand was just a model for the post.

    These projects are even easier because they don’t use iron-on—most of them use adhesive vinyl, and one even used card stock! So let’s take a look starting with one that I love…a cat phone cover 🙂

    This cat phone case made with vinyl from my friend Cori at Hey, Let’s Make Stuff is adorable! I know you’ve probably seen images similar to this one, and I love it. Looks like my girl Blanche when she is about to pounce on Henry.

    This is a great beginner vinyl project, too, since it is only one cut and uses one color of vinyl. Also, it looks like it could be done without transfer tape if you wanted to. Cori also shares tips of getting your Cricut phone case decals to last.

    Hey, Let’s Make Stuff

    The Crafted Sparrow did a great job with a series of “geek-inspired” phone cases. She has four different options to choose from, including my favorite—a robot! My daughter is obsessed with robots right now and would love that one.

    The Crafted Sparrow

    This DIY phone case using holographic vinyl from Laura’s Crafty Life is gorgeous! I love Cricut’s holographic adhesive vinyl and used it in my daughter’s dollhouse, including on both the DIY dollhouse wallpaper and some of the DIY dollhouse miniatures I made with my Cricut Maker.

    This project would also be perfect for either the simple butterfly SVG files or the fancy butterfly SVG files I have up for grabs on my blog. Laura also includes tips on how to neatly cut the excess butterfly vinyl away from areas on the phone like the camera lens.

    Laura’s Crafty Life

    Ginger at Ginger Snap Crafts had the great idea to use her Cricut Joy machine (perfect for smaller crafts like this one) to make custom phone case inserts using cardstock. (See my review of the Cricut Joy and a few small projects I made with it.)

    I love this DIY because it’s a really neat way to use smaller paper scraps. I hate throwing away any scraps of pretty printed papers and cardstock. It’s also interchangeable, meaning when you want to freshen up your phone case with a different print, you just pop it out. See her tips for cutting the paper in her tutorial post!

    Ginger Snap Crafts

    Sometimes coming up with creative iPhone decals can be as simple as this flower decal project from 100 Directions with Jen Goode. Pick a smaller image and create a pattern—it’s also perfect for using up smaller vinyl scraps. One of my favorite topics 🙂

    100 Directions with Jen Goode

    Another great project for vinyl scraps—these personalized gem phone decorations from Lia Griffith can be easily customized in different colors and finished. A less intricate pattern probably wouldn’t need transfer tape, either! See her post for more tips on this project.

    Lia Griffith

    Christina at The DIY Mommy has a tutorial for using this gorgeous printed vinyl to customize her phone case. Bonus—she also has a tutorial on how to make stickers or skins for a laptop and a notebook in the same post!

    The DIY Mommy

    And last but not least, this cute customized phone case using vinyl from Abbi Kirsten Collections. I have to say, I just discovered Abbi’s blog while writing this post, and she is fantastic! Make sure to check out her website for paper crafting, Cricut crafting, freebies, and much more. Some gorgeous stuff!

    Abbi Kirsten Collections

    Pin my roundup of Cricut phone case ideas!

  • Free printable 52-week money challenge sheets—instant download!

    This content may contain affiliate links. See my full disclosure here.

    Want to jump-start your savings for the new year? Check out my free printable 52-week money challenge sheets! You can download the instantly, and why wait to get started?!

    A few months ago, I posted my 15 Free Printable Savings Trackers and talked a bit about how much I love personal finance. I love savings challenges, listening to podcasts about personal finance (my favorite is Afford Anything), and learning about investing.

    But sometimes it’s about taking small steps, and that’s where the 52-week money saving challenge comes in! Today I have several free printable 52-week money challenge sheets to help you get started, too.

    Like these? Check out my 25 Free Printable Thank You Tags, my Free Printable To Do Lists, and my Free Printable Daily Planner Pages!

    So as you can see by these sheets, the premise of the 52-week saving challenge is pretty simple. For an entire year—which is 52 weeks—you input that amount of money. So during week 1 you put $1 in, week 2 you put $2 in, etc. It’s easy at first, but it gets harder as the weeks go on!

    But if you can manage to put away the week’s amount of money each week, you’ll end up with $1,378 by the end of the year. And that’s a pretty sweet dent in an emergency fund or some sort of debt payoff. Really, any savings goal.

    And I have a few versions of these trackers. One just has all of the values, and you can cross them off as you save them. The other version has a blank spot for a date so you can fill out when you do the deposit. Your call.

    I get it. Not everyone is in a position to save a lot of money every week. Sometimes even a few bucks can be the difference between paying the bills and late fees. I’m a big fan of saving at whatever rate you can, so I also created versions of these trackers that remove the “week” label.

    For these, you can go at your own pace. I’ve relabeled the “week” columns as “block.” So you can save multiple blocks at once and cross them off. And if there’s a week you can’t save, just catch it next week! At the end of the chart, you’ll still have the same amount.

    Want to download the free printable 52-week money challenge sheets? I use Grow by Mediavine to deliver most of my exclusive freebies. Signing up below will unlock a Dropbox folder with all of the printables for instant download. Enjoy!

    Here is a link to the Dropbox folder!

    Pin my free printable 52-week money challenge sheets!

  • DIY Gold Leaf Ornaments: How to Decorate Ornaments With Gold Leaf

    This content may contain affiliate links. See my full disclosure here.

    This post is part of my week of Christmas ornament DIYs series. I’m sharing 7 different DIY projects for clear ball ornaments, each of which you can complete in 30 minutes or less. Today I’m making DIY gold leaf ornaments. Gold leaf is an easy way to make anything beautiful.

    Day 6, and today I’m doing one of my favorite things: gilding with gold leaf. Its messy but beautiful and easy. Here’s a peek at how some of mine turned out…

    Pour paint into the ornament via the opening and rotate the bulb until the entire interior surface area is covered. Put upside down in a cup to drain extra paint out.

    Use aerosol glue or a glue stick to spray or draw a simple pattern onto the outside of the ornament. You’ll see that I used the glue stick to draw designs onto the front of ornaments, and I used the aerosol to spray the bottoms for a “dipped” effect.

    Then carefully lay the gold leaf down onto the glued areas. Pull off the parts that aren’t on the glue to save!

    Like these? Check out my easy DIY glitter ball ornaments, my DIY marbled clay ornaments, and my DIY acorn and wood bead garland!

    Go about your business while the glue dries, and then use a paper towel to rub the excess gold leaf off. Do not panic if it doesn’t stick to every glued area. It’s supposed to have a bit of an abstract and rough look.

    Seal with a coat of glossy aerosol finish spray in gloss if you’d like. Thoughts? 🙂

  • Learn how to splatter paint with kids—a great messy art project!

    This content may contain affiliate links. See my full disclosure here.

    Learn how to splatter paint with kids, a great messy painting activity you can do outdoors! It’s forgiving, fun, and perfect to use up leftover paints.

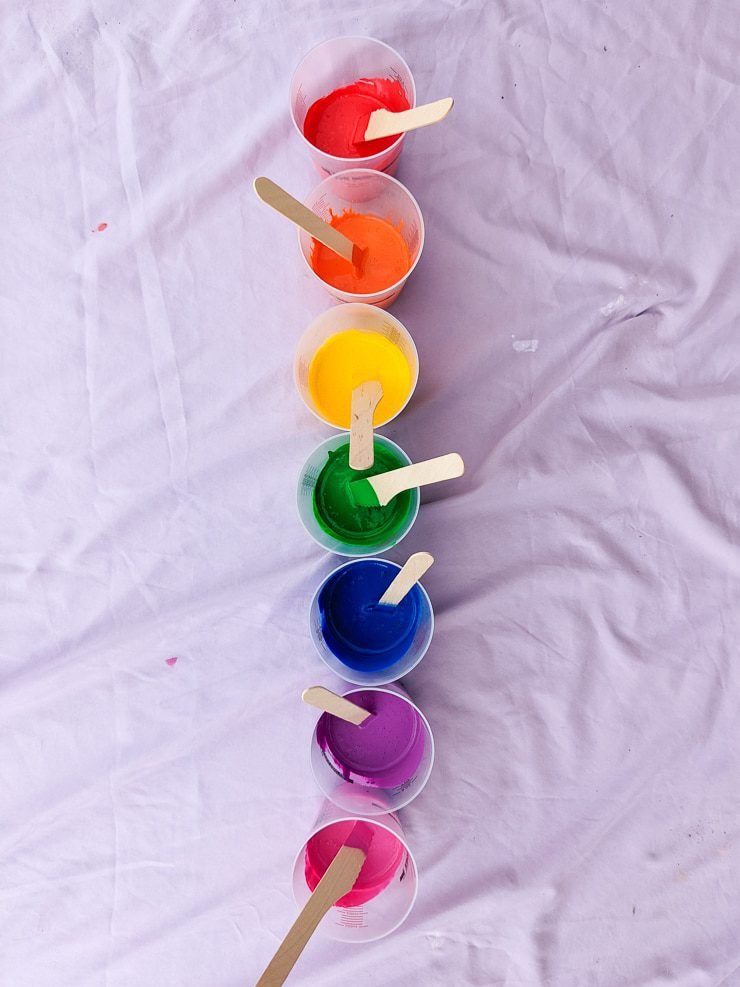
    This is something I have been wanting to do with R since we finished up her rainbow-striped mural wall…I had just enough paint left over of each color to use for a project, and I had an old canvas just begging to be painted!

    So one Saturday morning when we had nothing else going on, I decided I’d let her splatter paint it. Wondering how to splatter paint with kids? Well, splatter painting is easy, but it is messy! Messy with adults, definitely messy with kids.

    I had to make sure I was in just the right mood to be patient with this project! But she had a blast, and it looks lovely hanging in her rainbow-themed room (more on the artistic “treasure hunt map” she added at the end of the tutorial).

    For more fun kid projects, check out my Easy Acrylic Painting for Kids tutorial, our trials of 5 popular DIY slime recipes, and my post about 17 Indoor Activities & Crafts to Do With Kids!

    I recommend doing this only outside or in an area that you do not care about getting very messy. We used a drop cloth for easy cleanup but got a bunch of paint splatters on the patio, too. I probably could have kept it to the drop cloth, but R definitely couldn’t!

    I didn’t mind getting paint on the patio, though. This patio is about to be demo’ed and removed, so it’s no biggie for us. I put the canvas on the drop cloth and centered it.

    Also—for our canvas, we just used an old canvas and rolled some plain white paint over it. It’s great if you can find any old canvas from Goodwill! As long as it’s in decent shape and smooth, you can paint over almost anything.

    I recommend using a water-soluble acrylic paint for this project. It will look the best on canvas. Add a tablespoon or two into a cup with paint and stir well. Remember that it’s easier to add more water if the paint is too thick.

    When using acrylic paints…just remember that kids are not very careful, so it’s a bit harder to wash off. Put them in clothes you don’t care about, including socks!

    We went barefoot and R’s feet ended up covered in paint splatters. It would have been so easy to just chuck socks that were already on their last leg! And of course my feet were covered, too. But I did far less tracking into the house 🙂

    If you are doing splatter painting with very little kids, I recommend using only kid-friendly paints that wash off with ease. Then you’d have to worry less about the paint getting on stuff.

    And then it’s time to start paint splattering! I just used an assortment of regular paintbrushes for this project. I simply dipped a brush in to get plenty of paint on it, and then I flicked it toward the canvas.

    The more paint you load the brush with and the harder you flick it with your wrist, the more lines and less splatters you’ll get. I think it looks really cool with a mixture of both.

    I initially started washing our the brushes between each color, but when things started getting really messy, I just used a paper towel to wipe the excess off. That worked fine.

     %postname%

    And here’s where working with a four-year-old artist reared its creative head. I stepped inside to grab some more paper towels, and she took a brush and made a “treasure map” on the canvas while I was inside.

    Did I originally have a moment of panic? Yes, I’m a control freak and I had a vision for this piece 🙂 But is she 4 and was she having a blast? And is this going in HER rainbow room? Yes. And man if she wasn’t SO proud of the treasure map she made.

    We now call this piece “treasure splatter,” and it’s hanging up in her room. Since the paint was a bit thick in some spots, I gave this piece about 24 hours to dry in our cool basement (it was SUPER humid at the time) before hanging it.

    Pin my post about how to splatter paint with kids!

  • My review of the powerhouse Cricut Maker 3 crafting machine!

    My Cricut Maker 3 review contains what I think you need to know about the machine before buying it! This article was sponsored by Cricut and contains affiliate links.

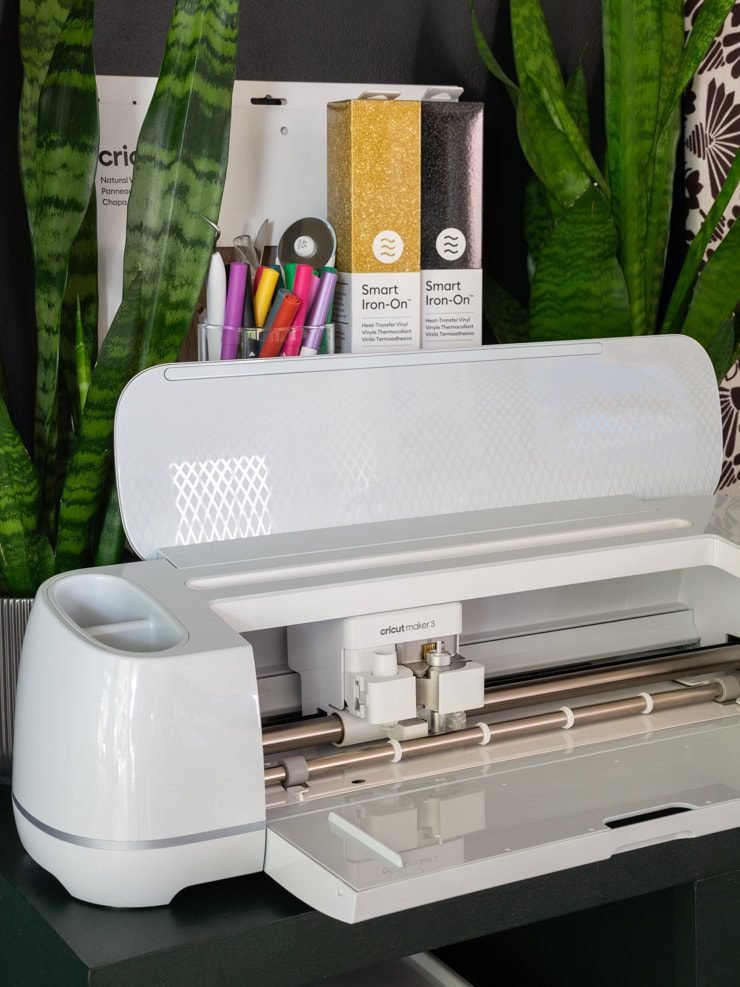
    Today’s article is an exciting one for me—it’s a Cricut Maker 3 review, and it’s the last Cricut machine I’ve been waiting to get my hands on! I have review guides for all of the other Cricut machines, as well as a Which Cricut Should I Buy comparison guide.

    • Explore Air 2
    • Maker
    • Joy and Joy Xtra
    • Venture

    Today it’s all about the Maker 3, though. I did a post about unboxing and setting up my Maker 3 a few weeks ago—Unbox a Cricut Machine With Me—that you can check out. I know that this is a big investment, so I want to help you better understand the Maker 3’s capabilities and what kind of crafter it might be the best fit for. So let’s jump in.

     %postname%

    Not into reading? Here is a quick list of high-level pros and cons I think are important to know about the Cricut Maker 3. Enjoy!

    Pros:

    • Versatility: Can cut 300+ materials, including popular ones like vinyl, iron-on, and paper, as well as other materials like chipboard, wood, fabric, and more.
    • Compatibility: Works with a wide range of blades and tips, expanding crafting capabilities through the use of the knife blade, rotary blade, debossing and engraving tips, and more.
    • Smart Materials: Streamlines the cutting process by eliminating the need for using adhesive mats; allows for much longer cuts.
    • Growth Potential: A machine you can grow with; as needs evolve, invest in additional specialty blades, tools, and materials to expand capabilities.
    • Project Diversity: Ideal for making the widest variety of projects, ranging from making custom shirts to crafting dimensional projects.

    Cons:

    • Higher Price Tag: Comes with a higher price tag compared to some other Cricut machines; may not be worth it if you are not going to leverage the Maker-only capabilities and materials.
    • Size: The Maker 3 weighs 15.4 pounds. This is slightly heavier than the Maker 3 and over double the weight of the Joy Xtra, so it might not be the most portable option.
    • Additional Costs: To fully leverage the machine’s expanded capabilities, you will need to invest in additional blades and tools over time.
    • Not Essential for Basic Projects: For those primarily interested in basic projects like vinyl decals, smaller iron-on designs, or simple cards, the advanced capabilities of the Maker 3 may be unnecessary.

    The Maker 3 is what I consider to be Cricut’s top-of-the-line desktop cutting machine. Branded as the “ultimate smart cutting machine,” the Maker 3 works with over 300 materials, including popular materials like adhesive vinyl, iron-on, and paper. But its specialty blades also give you expanded flexibility to cut things that some other machines cannot, like leather, thicker chipboard, kraft board, craft form, felt, and more.

    In a nutshell, it has more compatible materials and tools than other Cricut machines. While the Venture machine can field impressively sized projects, it doesn’t really fit into the desktop category. So if you’re looking to invest in a machine that has a wide range of capabilities while still being relatively compact, the Cricut Maker 3 is worth looking into.

    Chipboard leaf decor Basswood cake topper Felt cat party hat Leather hair bow

    But the Maker 3 has a higher price tag than some of the other Cricut machines. You might be wondering if you’ll use it enough for that price tag to be worth it. I think it’s better to reframe your thinking around both what you want to make now and what you might want to make in the future.

    That’s because the Maker 3 is a machine you can truly grow with. When you first purchase that machine, you probably won’t invest in all of the specialty blades and tips available. But as you learn more about the machine and its capabilities, you can invest in additional tools as appropriate.

    For example, Cricut’s knife blade is compatible only with the Maker 3—not the Explore or Joy machines. You can use this nifty little attachment to precision-cut thin softwood (like basswood) and chipboard that’s up to 3/32 of an inch thick (or 2.4mm).

    The Maker is also compatible with many blades and useful tips: double and single scoring wheel tips, a rotary blade for precision fabric cutting, debossing and engraving tips, and blades for perforation and wavy cuts.

    Assorted Maker blades and tips

    Much like the Explore 3, the Joy, and the Joy Xtra, the Maker 3 is compatible with Smart Materials. Smart Materials are made by Cricut and do not require the use of an adhesive cutting mat. I love working with Smart Materials because it streamlines the process and is one less thing I have to worry about storing or replacing.

    Using Smart Materials also gives you the benefit of longer cuts. Since you don’t have a mat holding you back, you can cut a single image up to 4 ft or repeated shapes up to 12 ft. This expands your options, allowing you to make longer cuts or cut smaller images in bulk.

    Smart Paper comes in 13″ by 13″ adhesive sheets and allows you to load a sheet into the machine without a mat, cut, and assemble your project. The super-sticky backing means no need for glue on layered paper projects.

    Smart Materials

    You’ll likely start out using your Cricut for things like cutting vinyl to make decals and and iron-on material to make custom shirts. I love my Maker 3 for those projects because its speed and ability to work with Smart Materials makes projects quick and easy.

    But there is so much more you can do with a Maker 3. Here are just a few examples.

    • Use pens and markers to write labels on the SmartLabel Writable Vinyl and cut them out using the fine-point blade.
    • Cut dimensional projects in soft wood with the knife blade—home decor, models, and more.
    • Grab a sublimation mug and cut a design out of Infusible Ink to create a custom mug.
    • Invest in a rotary blade to help streamline marking and cutting pattern pieces when sewing—or to get a perfect cut on quilt squares.
    • Engrave certain metals like tags or jewelry with the engraving tip attachment.
    • Leverage Smart Materials to cut out large-scale decals or make signs and banners.
    • Cut, score, and foil cardstock to make bespoke gift boxes.
    • With an InkJet printer, design, print, and cut out full-color, custom stickers.
    • Cut and embellish real or faux leather to make earrings, bracelets, and more.

    Stickers made with a Cricut machine

    But what does the Cricut Maker 3 really look like in action? I dove into Design Space, Cricut’s free design software, to find some projects. There are a TON of ready-to-make projects you can choose from to get started, so no worries there.

    I wanted to test the knife blade, which I’ve used in the past on my first-generation Maker; the deep-point blade; and the regular fine-point blade. I searched for projects using these blades and some of the materials I had to get some inspiration, then it was off to the races!

    For my first project, I used Smart Materials to quickly cut a cute “Maryland” design out of iron-on vinyl. I did this in two layers: the black base later and the red Maryland layer. For the gold glitter heart layer, I used a mat and a small piece of scrap iron-on I had.

    I decided to layer the iron-on vinyl not only to create some dimension, but for a practical reason. I got this amazing tote bag for free at a conference I went to, but it said Clemson on it. Nothing against Clemson, I promise! I just have no association or affiliation with them and love being able to use my Cricut machine to personalize things.

    So I covered the Clemson graphic up with the black iron-on vinyl, putting my design on top of that. This cut beautifully and very quickly using the Smart Materials. The scrap piece of iron-on I cut using an adhesive mat worked great, too. I used my EasyPress to assemble this project.

    For my second test project, I used the knife blade to cut 2mm chipboard. I cut a door hanger out. This took multiple passes but was absolutely faster than when I’d used the knife blade on my first-generation Maker to cut chipboard monstera leaves.

    The door hanger popped right off the mat when I was done with it, and I didn’t have any issues with the chipboard moving off the mat while the machine did its thing. Then I popped the fine-point cutting blade back on and cut out a few sayings from permanent adhesive vinyl for the sign.

    The longest part of this project was painting and chipboard and letting it dry! The 2mm chipboard cut like a dream with the knife blade. I cut a few just to be sure I could replicate the results, and all of them were fantastic.

    The last project used wood veneer—a material I hadn’t ever worked with. I was a little nervous but figured it would be similar to cutting wood with the knife blade. However, the wood veneer is so thin that you can use the deep-point blade to cut it in just a few passes. I was shocked!

    I measured an old tin can of olives so that I could make a wood veneer “sleeve” for it and upcycle the can into a pen holder. Then I created a rectangle in Design Space, cut it out of the wood veneer, and glued it on after spray painting the can. Wow—what a quick and easy project to upcycle an old can!

     %postname%

    The Cricut Maker 3 stands out as a powerhouse in the world of crafting, offering a remarkable combination of versatility and precision. Its extensive compatibility with 300+ materials, along with a variety of blades and tips, positions it as a top-tier cutting machine.

    The Maker 3’s higher price tag is justified by its growth potential and adaptability. While it may have a learning curve, the machine’s ability to handle a wide array of projects—from basic vinyl decals to intricate wood veneer creations—makes it an investment for those with evolving crafting ambitions.

    Its advanced features make it a compelling choice for craft enthusiasts and professionals seeking a cutting machine that can handle diverse crafting endeavors. So what do you think? Will you be getting a Maker 3? Do you have experience with the machine? Let me know in the comments!

    Pin this review!

  • 5 gorgeous spread joy not germs free printables, instant download!

    This content may contain affiliate links. See my full disclosure here.

    Stay healthy this holiday season with one of my 5 Spread Joy Not Germs free printables! You can print these lovely signs to use at your home, office, place of business, classroom—whatever you’d like. Enjoy!

    Hey all! It’s about that time again—we’re heading into the holidays. The holidays are always a time to be extra vigilant with hand-washing and cleaning. With lots of big gatherings, staying indoors, and cold and flu season upon us, it has always been inevitable.

    However, this year it remains an extra-important issue with the ongoing COVID-19 pandemic. We want to prevent the spread as much as possible, and these days, we see signs like “spread love not germs” printables everywhere year-round!

    So I decided to put a spin on the “spread love not germs” free printables I did a few weeks ago and put together some spread joy not germs free printables. These aren’t overtly holiday-themed, but they have a distinctly wintery vibe to them.

    You can see teasers of all of the signs here in this post. (Keep in mind that the colored backgrounds they are on are not part of the printables—those are just for display here. I wanted to make these as easy as possible to print at school, home, or work, and those printers usually don’t print all the way up to the edge.)

    A few have hand-washing or sanitizing, while others just have a bit of a festive theme. You can welcome to print any of these signs and use them at home, at work, as your place of business, at school—whatever floats your boat.

    If you want to download all 5 of these printables, you can sign up below. I use Grow by Mediavine to deliver many of my exclusive freebies. Simply sign up below to unlock the printables! You’ll see a link to my Dropbox folder with all of the files and will be signed up for my mailing list—enjoy!

    Click this link to get to my dropbox and download all files

    Pin my 5 spread joy not germs free printables!

  • Kate Spade Inspired Decor: Confetti Canvas Art DIY

    This content may contain affiliate links. See my full disclosure here.

    This post shares my Kate Spade inspired decor, confetti canvas art! I’m sharing the full tutorial so you can make your own. This post is sponsored by DecoArt and originally appeared on bybrittanygoldwyn.com.

    Hey all, I’m working with DecoArt today to share some lovely Kate Space inspired decor. It’s confetti canvas art with an “eat cake for breakfast” theme. I’m excited to be doing something a little different today, too. I really need to do more fun projects like this.

    This is also my first project as a DecoArt Core Creator! Those of you who have been around the blog for a bit know that I’ve worked with DecoArt many times. They are an awesome paint company, and I’m excited to share that I’m joining their team as a Core Creator for the year.

    That means I’ll be doing regular projects for them and sharing them with you. Sometimes here, sometimes over on the DecoArt blog. I’ll be doing projects every other month…and every other one of those I will put here. 🙂

    One of the things I’m most excited about is working with some new materials and working on new and different projects. This canvas art is definitely an example of that. To make it, I used a combination of painting (with a new line I’ve never worked with before), paper crafting, glittering by hand, and decoupaging.

    I do a lot of painting, but I don’t typically work with decoupage or glitter. (Unless you count my DIY glitter Christmas ornaments or the recent epoxy paint pour art I made, which had hints of glitter in it.)

    So it was great doing something a bit outside of my comfort zone. Even if I’m going to be finding super fine gold specs of glitter around my dining room for months.

    For more thrifty paint projects, check out my painted wine bottle upcycled into a bud vase, my post on how to paint thrifted clay pots, my scrap wood mini plant stand tutorial, and my post about how to paint glass jars!

    You can head over to the DecoArt Blog to check out a complete step-by-step tutorial for this project, as well as a bunch of other great projects. You can download the “eat cake for breakfast” cut file here and catch a peek of the piece below!

    Share my Kate Spade inspired decor on Pinterest!

  • Read my unbiased Toniebox review…I actually bought one!

    Looking for an unbiased toniebox review? I bought my own toniebox for my daughter and am sharing my 100% unbiased, unsponsored review of it. Let’s jump in!

    Today I am sharing a product review, which I don’t do too often! I almost never take sponsored product reviews because I feel super invested when I buy something with my own money. I’m not saying that people lie on sponsored reviews…but I am saying that I have zero problems being hyper critical of products when it was my money that bought them 🙂

    So today we’re talking about the Toniebox, a product I had admittedly never heard of until visiting one of my best friends. Her girls each had a Toniebox, and my daughter thought they were the coolest things!

    I loved that the girls got to play with them after screen time was over before bed. They could listen to songs and stories together featuring all of their favorite cartoon characters.

    I’ll cut to the chase and say yes—I do think the Toniebox is worth it if you buy in a bundle or catch them on a good sale. Don’t pay full price…wait for a good sale. But there are lots of things that influenced this that I want to talk about in this post.

    Toniebox markets their product as “an imagination-building, screen-free digital listening experience that plays stories, songs, and more.” It’s a relatively small cube—4.7 inches—that is covered in a nice foam child-proof cover (six colors available).

    It has speakers and two little cat-like ears. And each “Tonie” is a different character you’re probably familiar with—Disney princesses, Cat in the Hat, Paw Patrol, etc. There are a bunch of them.

    When a child puts a Tonie on top of the Toniebox, it begins playing the songs or stories. The child can pinch the right ear to raise the volume and the left ear to lower it.

    Parents can control max volume in the Toniebox app, as well as a few other things about the listening experience. Oh—and there is a headphone jack. Perfect for car rides when you don’t want to hand over your phone for a game.

    To move forward to a different song or story in a Tonie’s sequence, you just tap the sides of the cube. They can also silt the cube to fast-forward or rewind, but I haven’t taught my daughter that yet.

    When kids are done with a Tonie, they simply take it off and the music or story stops. They can then pop another Tonie on to start another sequence. (Tonies will only pick back up where they left off if no new Tonie is placed on the box.)

    The Toniebox experience is designed for kids 3 and up. My daughter got hers for her 5th birthday, and I definitely would have gotten it sooner had I known about it! It’s really easy to use. As long as kids like the character’s songs and stories, they’ll like the Toniebox.

    The run time for each Tonie depends on the character. Tracks can range anywhere from 16 to 50 minutes according to the company.

    Disney Tonies average about 22 minutes each, while musical content ranges from 40 to 50 minutes. When you buy a Tonie, the page will include the track list, a run time, and a description of what the content is supposed to teach. If your Toniebox is fully charged, it has a battery life of about seven hours.

    A really cool feature Toniebox has is a “creative Tonie.” While Tonies come pre-programmed with songs and stories, creative Tonies have space for up to 90 minutes of custom content. You can record and upload favorite stories, songs, or messages.

    You can also send recordings to the creative Tonie using the app no matter where you are. So if you’re in California and your child is in Maryland with their Toniebox, you can add a recording via the app.

    Creative Tonies do have some restrictions, though. They are restricted to certain file types, and a lot of files—such as audiobooks purchased from the iTunes store—can have digital copy protection on them that prevent the files from being read on Toniebox.

    Toniebox also cannot support streaming services such as Spotify, Apple Music, Amazon Music Unlimited, Prime Music, Audible, Deezer, and Google Play Music. That’s because the content is in an encrypted format that cannot be processed by the Toniebox.

    If you have a piece of audio that you own, and that audio file is a compatible file type, you can add it to your creative Tonie. Generally the creative Tonies are used for personal recordings, story readings, and messages though.

    Here’s an unethical life pro tip for you, though. You can really add any compatible audio file…so if you were to, say, know how to extract audio from YouTube videos of people reading stories or songs you like…you could *theoretically* add those. Don’t ask me how I know. 🙂

    Like my Toniebox review? You might like my Colorable Cardboard Playhouse Review!

    The individual Tonies are about $15 each, which is very reasonable. I bought my daughter a bundle with the box and a few Tonies, and then my mom and brother each got her an additional Tonie for her birthday.

    That gave her a great lineup to play with, but it certainly does add up if you’re buying it all on your own. And that brings me to my first complaint about the Toniebox…

    …and that’s the cost of the actual Toniebox. It’s steep! The Toniebox is $100 when it isn’t on sale, and that comes with one starter “playtime puppy” Tonie. See the image below for the songs playtime puppy plays.

    The technology is not that advanced, so $100 seems kinda steep and is a low point in this Toniebox review post. I ended up getting my daughter a bundle set with the Toniebox, playtime puppy, and three additional Tonies for $130. So that’s essentially one Tonie for free if you do that bundle. 

    The price tag still hurt, though. Definitely a special occasion gift like a birthday or Christmas. And even then, it takes up a pretty big portion of the gift budget! I was confident my child would like hers though since she’d been exposed to one and loved it.

    No, the Toniebox does not currently come with books. That is another complaint I have and a negative for my Toniebox review. I think it would be a really awesome way for them to expand—maybe have different Tonies that can also read books with early readers.

    Yes! It took me a while to figure this one out. Toniebox requires WiFi during the setup process and to download and set up new Tonie content. So when you get a new Tonie, you put it on the box. 

    The light under the Tonie will blink blue for a while…sometimes a long while. This is the Toniebox downloading all of the content from the Tonie, and it needs WiFi to do this.

    Once that blinking blue light turns green, you can remove the Tonie. All of the content is downloaded. And as long as the Toniebox is charged up, you can use it safely anywhere without power or WiFi!

    Want more kid stuff? Check out my post about Trying 5 DIY Slime Recipes, my tips for Splatter Painting With Kids, and my post about Easy Acrylic Painting for Kids!

    In addition to my minor complaints about the price and the lack of companion books, I have to share that our setup process was an absolute nightmare! I was seriously ready to throw this thing out the window.

    We could not figure out what the problem was. Our Toniebox just kept saying, “Uh oh! Search code hedgehog to find out what the error is.” It kept saying it couldn’t connect to the Internet, and we couldn’t figure out why.

    After a lot of frustration, my husband remembered that he encountered a similar error setting something up a few years ago. The issue ended up being that we have 5GHz Internet, and Toniebox REQUIRES 2.4GHz WiFi to connect.

    Most people seem to have an option for both, but we don’t. We have only 5GHz WiFi. 5GHz WiFi is a newer type of Internet that allows for faster speeds, and Toniebox can’t connect to it. This really frustrated me for how expensive this device was.

    While the box says this clearly…I did not know what kind of Internet we had! So I thought I was going to have to take it to my mom’s or something to set up, but my husband suggested using his phone’s WIFI hotspot.

    And that worked! We just had to set up the hotspot and connect the Toniebox to it for the set up process and for downloading all of the Tonie content. So keep that in mind and don’t rip your hair out trying to figure out the stupid hedgehog error.

    Also something to keep in mind if you have 5GHz WiFi is that TonieBox also cannot connect to open networks (like those that do not require a password) or Captive Portal WiFi networks, like those found in coffee shops, schools, libraries.

    And another source of frustration that wasn’t immediately clear to me—there is no way to manually turn off your Toniebox. If a Tonie’s sequence is finished or if a Tonie is removed from the Toniebox, it will automatically shut off after 10 minutes. 🙂

    Before I bought the Toniebox, I did do a bit of Googling to see if there were any alternatives. I came across a lot of comparisons between the Toniebox and the YOTO player. Which is best? Here’s what I gathered in a nutshell.

    In general, they are very comparable—both in functionality, price point, and experience. The differences seem to be in what age the devices are best for.

    Toniebox is generally geared toward younger kids, where YOTO player is geared toward somewhat older kids. While younger kids can use it, their website says it can be for kids upwards of 12. So there is obviously a wider variety of content.

    I opted for the Toniebox because we had personal experience with one, so I knew my daughter would love it. Check out some thorough reviews of the YOTO player though—especially if your kid is on the older end and is a more advanced reader.

    I hope you found my Toniebox review helpful! We love it–aside from the price and the setup struggles, it’s a cool, versatile toy. I recommend it!

    Pin my Toniebox review post!

  • Easy DIY tote bag—Plus how to attach straps to a tote bag!

    This post shares an easy DIY tote bag project, which is a perfect sewing project for beginners. Join me as I navigate my sewing machine to make my own bag, including tips on how to attach straps to a tote bag.

    One of my resolutions for 2015 is to sew more. My grandmother was a seamstress (and still sews), so I had a lot of exposure to sewing growing up. Her basement was her sewing room, and it was always covered in beautiful fabric remnants and leftover beading, both of which she’d often let us take home. We worked on a few projects together, like Christmas potholders for my parents, but that was about the extent of it.

    I also had some exposure to sewing in a middle school home economics class (yes, that was still a thing in 1999). Fast forward to last year—I was furloughed from work, bored, and shopping for wedding veils. I was having a really hard time finding something simple and affordable, so I decided I’d learn to sew and make a veil myself.

    Hey—I had nothing but time on my hands, and I figured I might as well make use of it. So I went out, found a sewing machine on sale, and brought it home. My then-fiancé thought furlough had driven me mad.

    I did successfully make my veil, but after that, the sewing machine sat collecting dust in the closet (aside from a few minor projects like minor mending and DIY cat toys…yes, cat toys). Since 2015 is right around the corner, I figured I’d get a jump start on my resolution by completing a simple project: a reusable bag. The approach seemed simple…a bag with two sides and two straps. I can do that, and I did do that:

    Like easy sewing projects? Have a look at my easy fabric scrap cat toys, my DIY sewing machine cover, my DIY wrap shawl, and my custom sewing machine cover project!

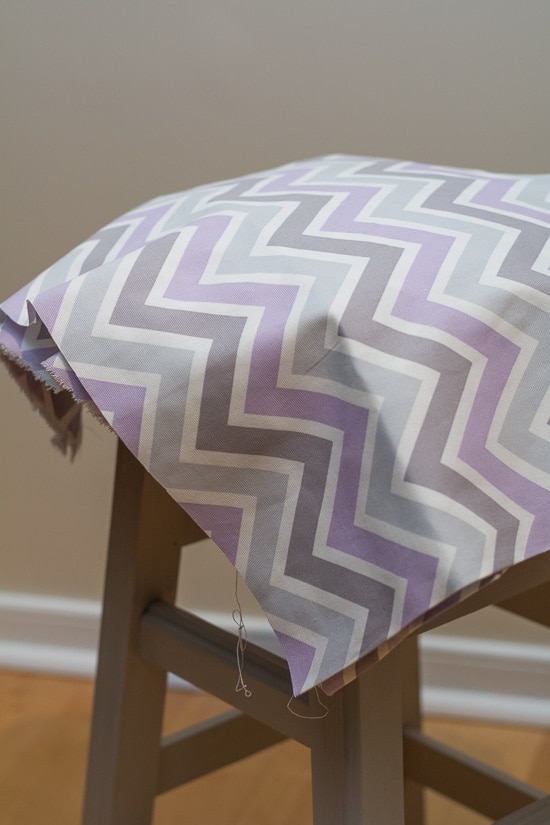
    • Sturdy fabric. I used reupholstering fabric I found in the remnant bin at my local Jo-Ann. I bought one yard knowing that I wouldn’t need that much but thinking I would probably mess up something and need extra.
    • Measuring tape & pins.
    • Scissors (remember to use your fabric scissors).
    • Iron & ironing board/pad.
    • Sewing machine.

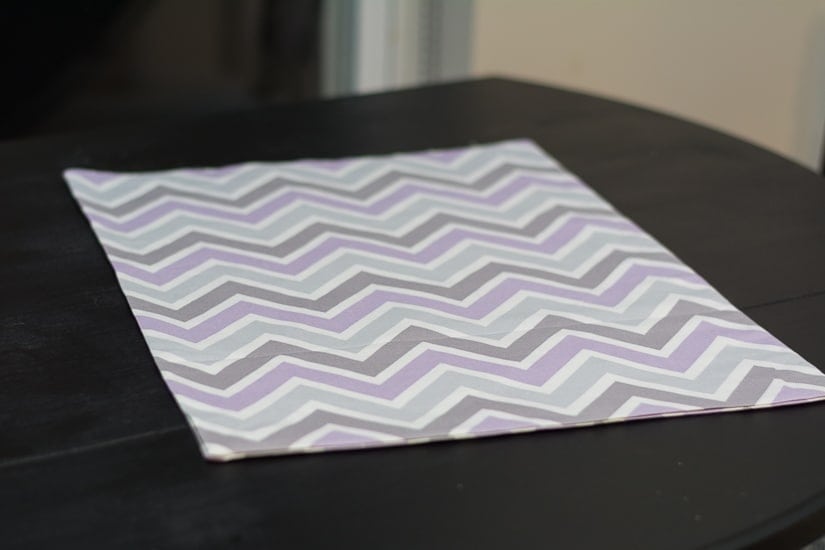
    Here’s the fabric I chose. Remember to wash and dry your fabric before you use it! 🙂

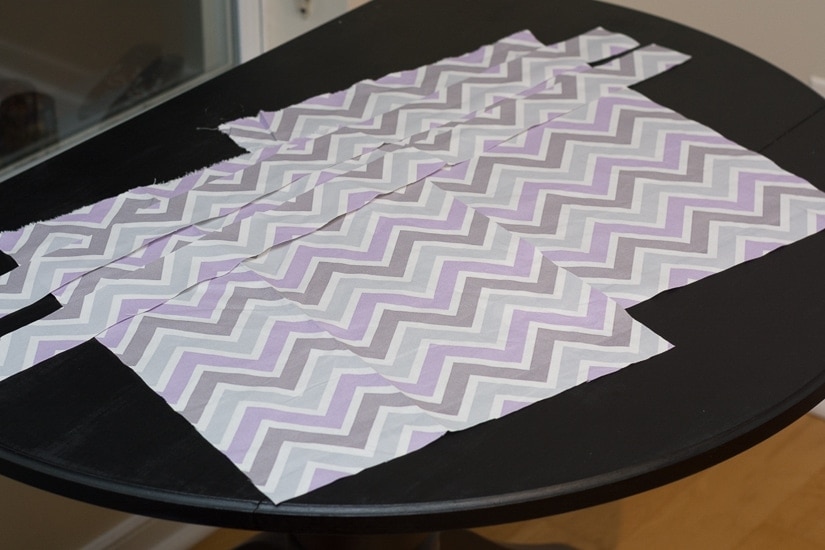
    Measure and cut the pieces you need for the bag. You’ll be cutting two big rectangles for the body of the bag and two long, thin strips for the bag’s handles.

    I used the measurements 20 x 15 inches for the two body pieces and 38 x 2.5 inches for the two strap pieces, but you can adjust those if you’d like your bag to be bigger or smaller. Remember to build in a seam allowance when measuring and cutting your fabric; the seam allowance is the area you’ll sew to make a seam.

    You can also use an existing bag as  template for sizing. On your fabric, you can just make small marks on the wrong side of the fabric to indicate where you’ll need to cut. I made small dots with a little marker. Once you’ve measured and cut out your pieces, they’ll look like this:

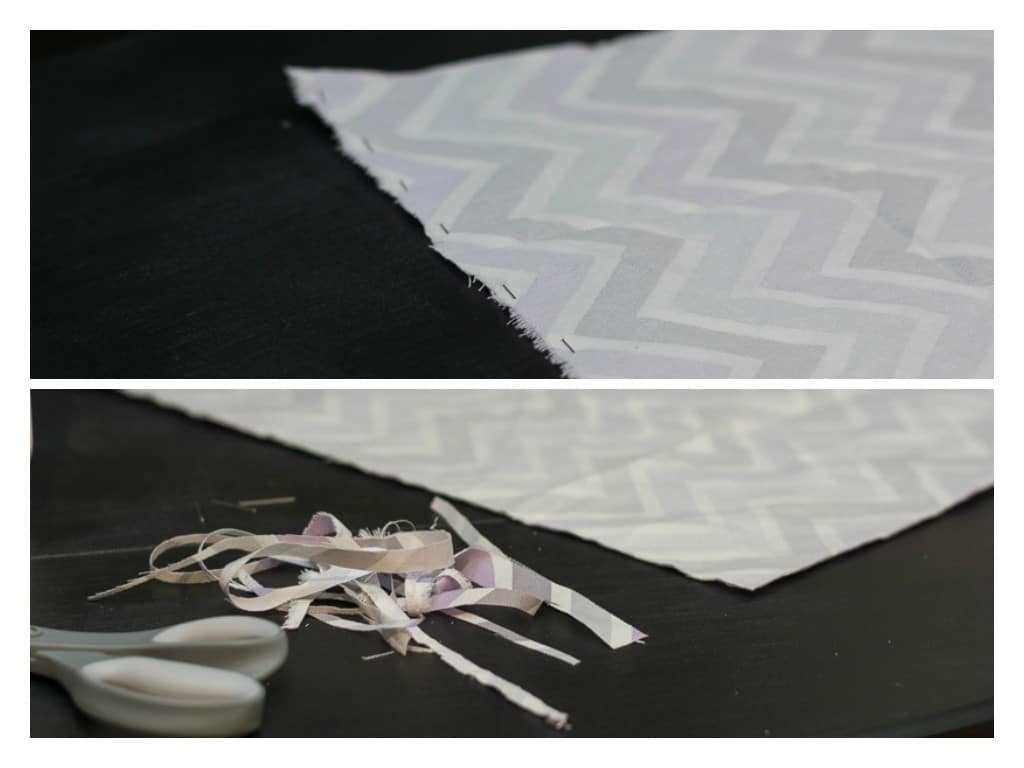
    Pin the two big pieces together with the right sides facing one another (see below, top photo). If you sucked at cutting your original pieces (like I did), you may need to do some trimming around your pieces to ensure all sides and corners match up (see below, bottom photo).

    You are now ready to begin sewing. You’re going to sew together three sides of your two big pieces; do not sew the side you’d like to be the opening (i.e., the top) of your bag. Beginning with one side, stitch a straight seam on each of the three sides.

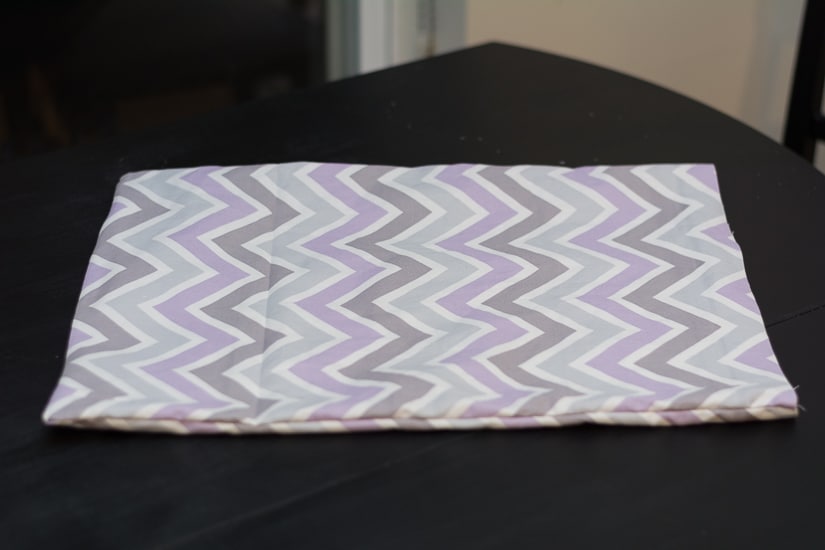
    After you’ve sewn shut the three sides, trim the excess fabric from the seams, remove the pins, and flip the bag inside out. It will look something like the second pic below. Starting to look like a bag!

    Take a blunt object like the eraser end of a pencil, round pen end, or knitting needle and poke into the inside of each corner to make them as sharp and defined as possible. Then iron your newly created strapless bag to flatten the seams. The bag will look like this!

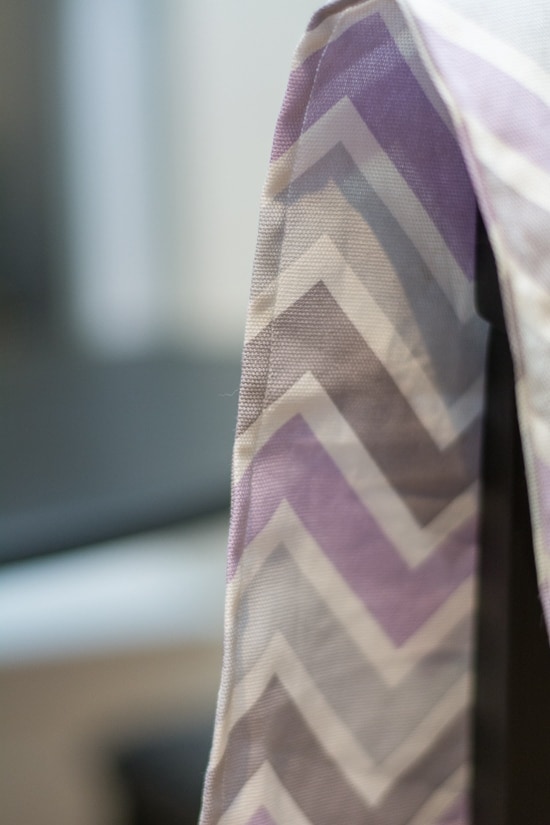
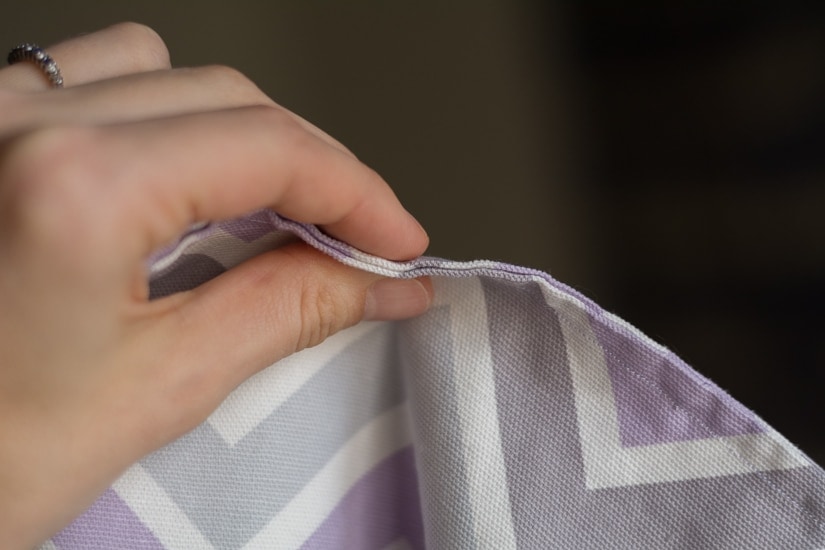
    Next, you’re going to create a french seam, which will give your bag a clean look around the edges. This is optional, but I think it’s a nice touch—and it was easy! To create a french seam, you’ll simply sew a second straight seam along each side.

    However, you’ll sew the second straight seam with the wrong sides of the fabric together, unlike in step 3. By sewing a second straight seam along each of the three sides, you’ll essentially be encapsulating the first seam. When finished, it will look like the next two photos.

    You’ve now completed all three sides of the bag. Now, you just need to hem the opening of the bag. To do so, simply fold down the open (i.e., the top) part of the bag about an inch all the way around. Fold it down on the inside of the bag, not the outside. Pin or sew the fold in place; then, sew one straight line around the entire opening. Trim the excess fabric from your seam.

    The second part of the DIY tote bag is creating and attaching the straps. It’s not hard, but it’s a bit more detailed than the tote bag body. Here’s how to create tote bag straps from fabric—and how to attach straps to a tote bag.

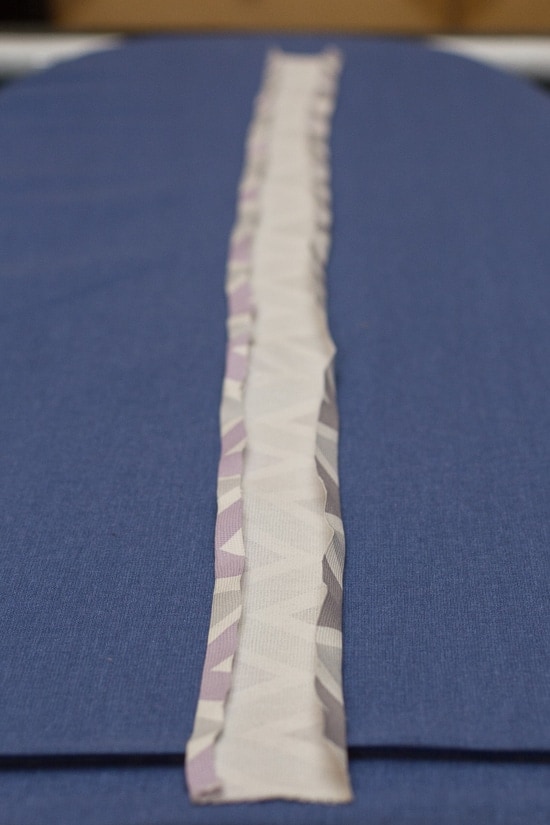
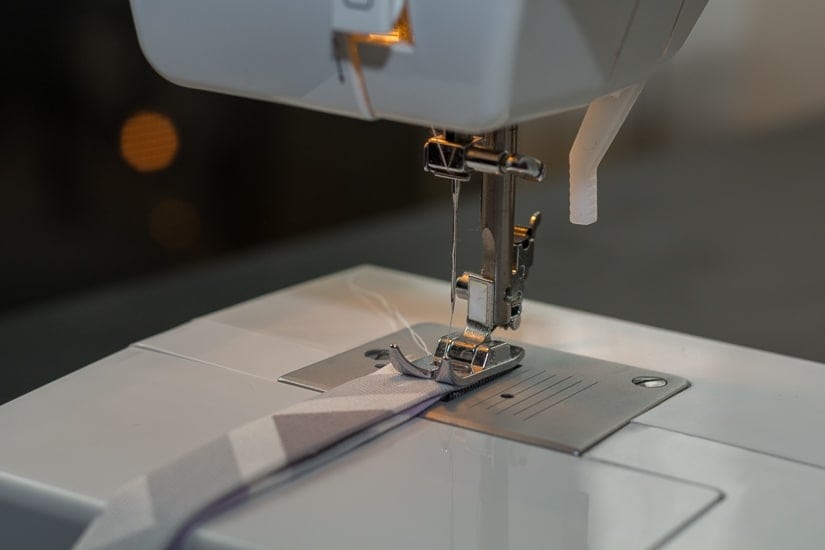
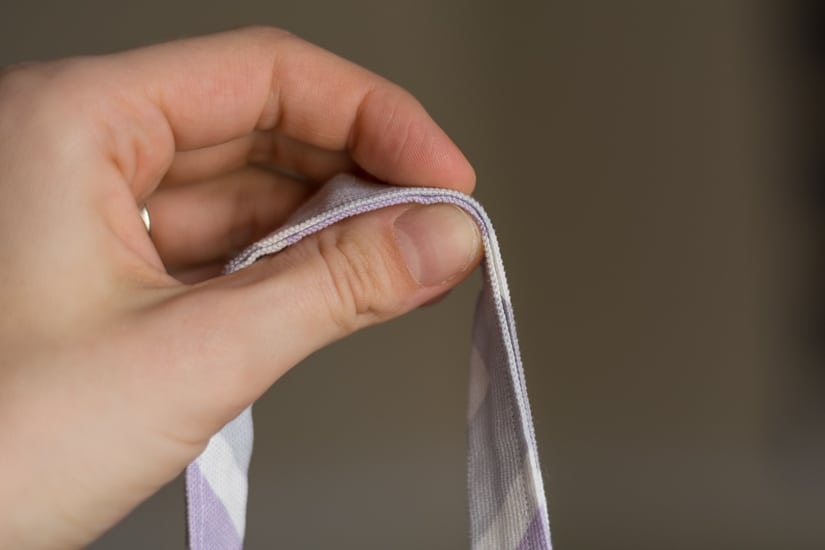
    First lay one strap out on your ironing board/pad and fold along each of the long sides (see first photo below). It helps if you iron the folded sides down as you go; this negates the need for pins.

    Once your strap looks like the first photo below, you’ll fold it in half once more and sew it shut using a straight seam down the entire length of the strap (see the second photo below). I also used the iron to define this fold and did not need pins, but you can use them if you need to. Repeat for second strap.

    Now you need to attach the straps to the tote bag. Place your tape measure along the top (opening) of your bag. On the inside of the bag, make small markings to indicate where to sew in your straps. The placement is up to you. You’ll sew in the straps on the inside of the bag.

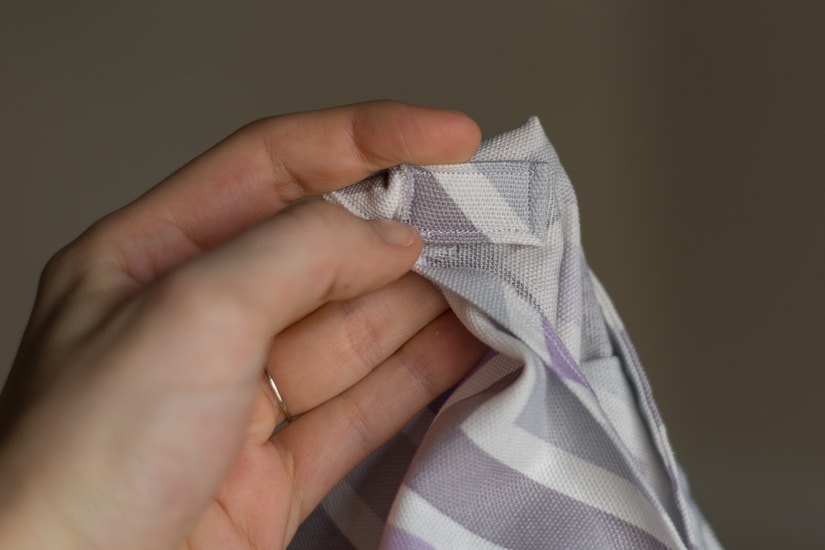
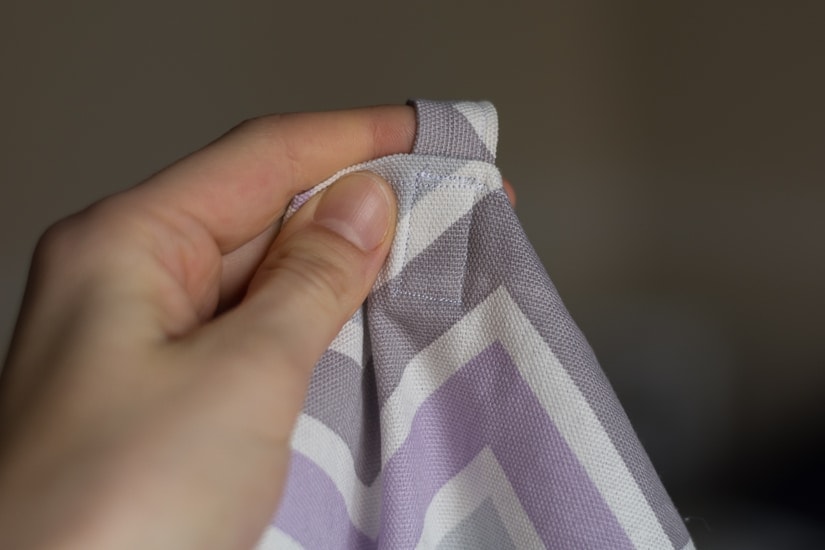
    Fold the end of one strap over onto itself about one inch; then, place it on the inside of the bag at the marking you made in step 7. Folding the strap over onto itself helps to make it more stable when weight is put on it. Sew the end of the strap onto the bag by using a straight stitch to make a rectangle around the entire border.

    You can do this twice if you’d like, but I felt like one rectangle was enough for this fabric. Repeat for all four ends of the straps.

    Inside of the bag Outside of the bag

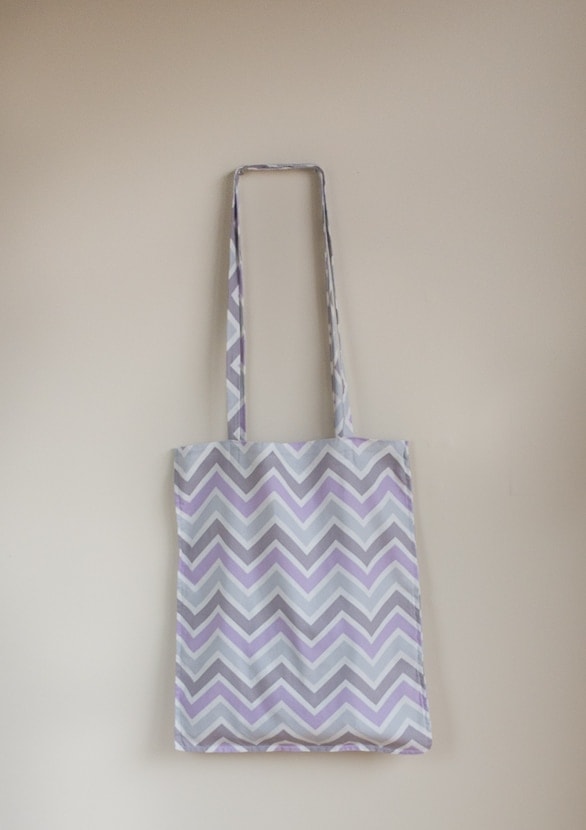
    And that’s that! Here is the finished tote bag, straps and all. Now get to sewing (and then shopping). Enjoy!

    Pin This!

  • How to make stickers with Cricut: A guide for basic home printers!

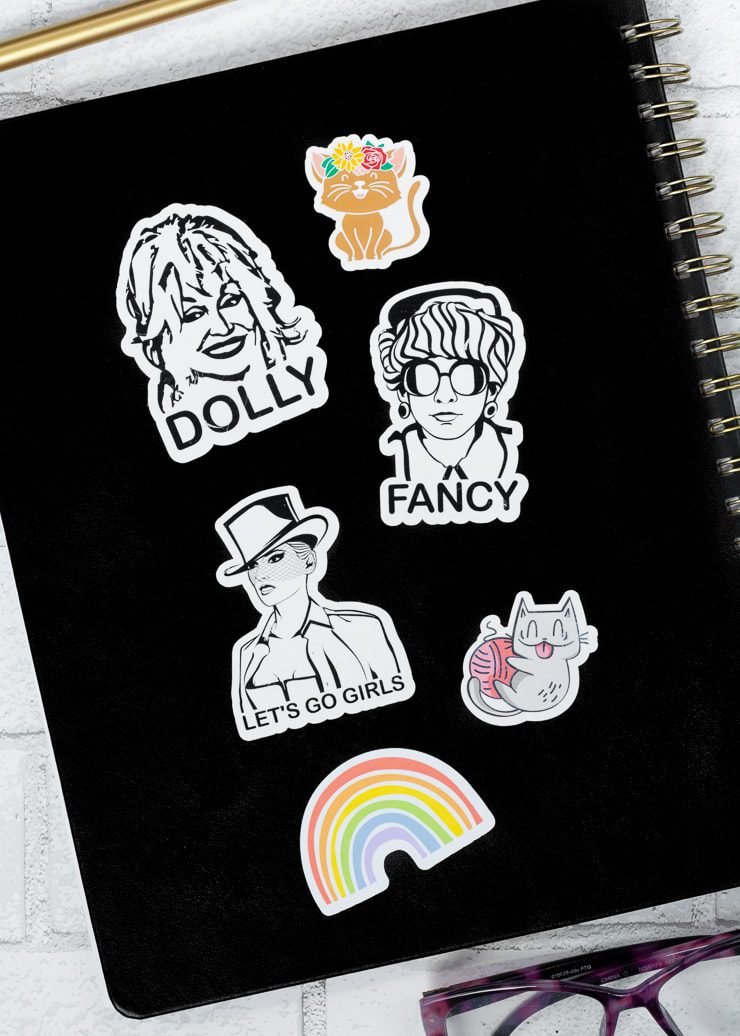
    This post will share a tutorial for how to make stickers with Cricut, including how to do it on a normal home printer! I will discuss 5 different types of vinyl that I tested, including their durability and ease of use with a smaller home printer. Finally, I’ll address how to make Cricut stickers waterproof to help enhance their life.

    It has been a while since I’ve done a print-then-cut project. Print-then-cut projects really expand what you can do with your Cricut machine…you can essentially put any image on something with the print-then-cut feature!

    So why don’t I do more of it? Well, I didn’t have a printer for a long time. When I finally got one, I didn’t feel like I could justify buying a big expensive printer because of the cost and the amount of space it would take up.

    I just wanted to use the print-then-cut feature for my own personal projects—not to make things to sell. And it is possible! You don’t need to use a super nice printer to take advantage of Cricut’s print-then-cut feature.

    And you don’t even need to use Cricut paper. That’s right—I’ll also test out 5 printable vinyl products and let you know which ones work with my piddly printer.

     %postname%

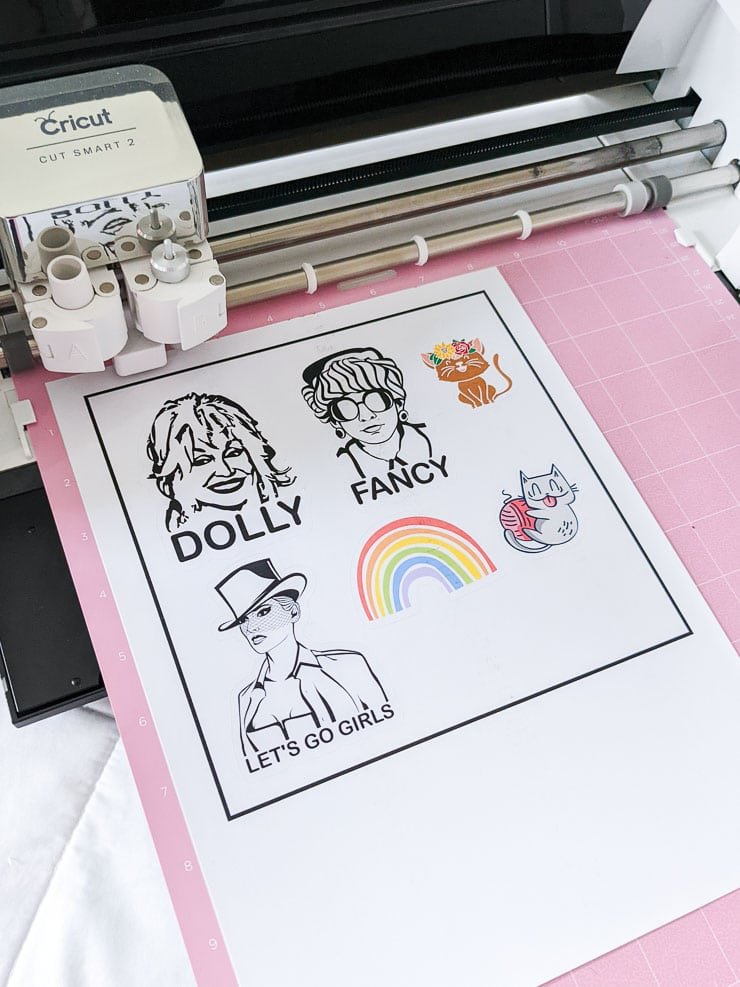
    Print-then-cut is a cool Cricut feature that lets you print things out on your home printer—then after printing, you can put the printed sheet on your adhesive mat and run them through the machine to cut them out. This is an amazing feature for making decals, stickers, and other things.

    You can print anything you want. Grab something from Design Space, or upload something else from your own collection. You can even use photos.

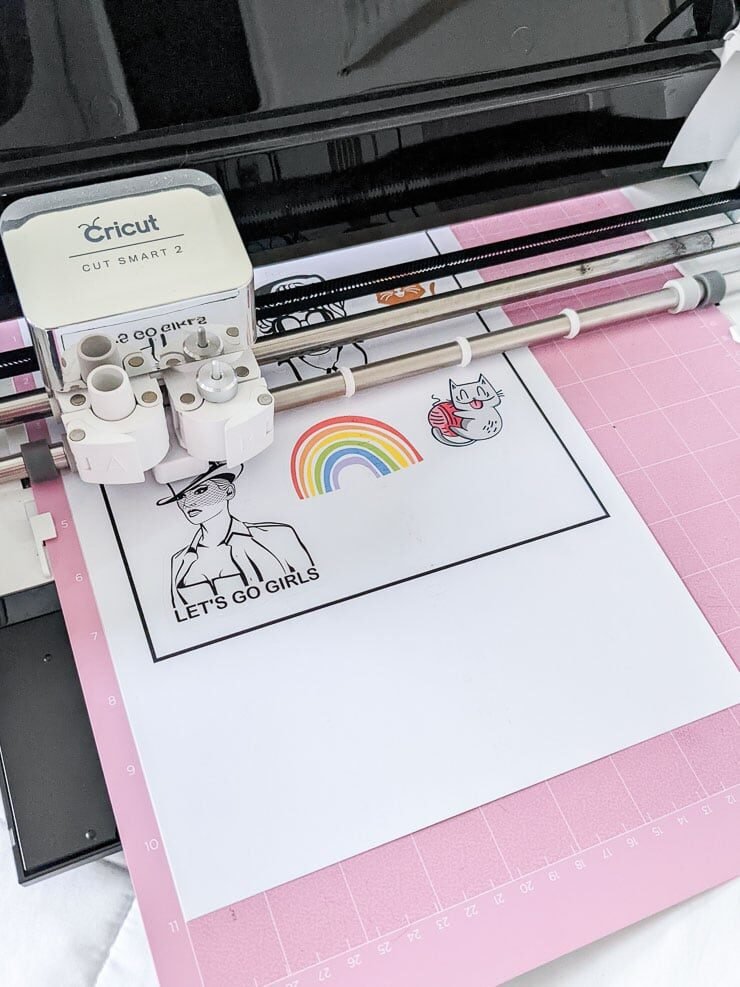
    Print-then-cut works by printing a cut sensor marking (the rectangle outline) around your printed images. That way, when you feed the printed pages into the machine, your Cricut can scan for the sensor marking and know where to cut.

     %postname%

    You might find my guide on how to convert an image to an SVG helpful!

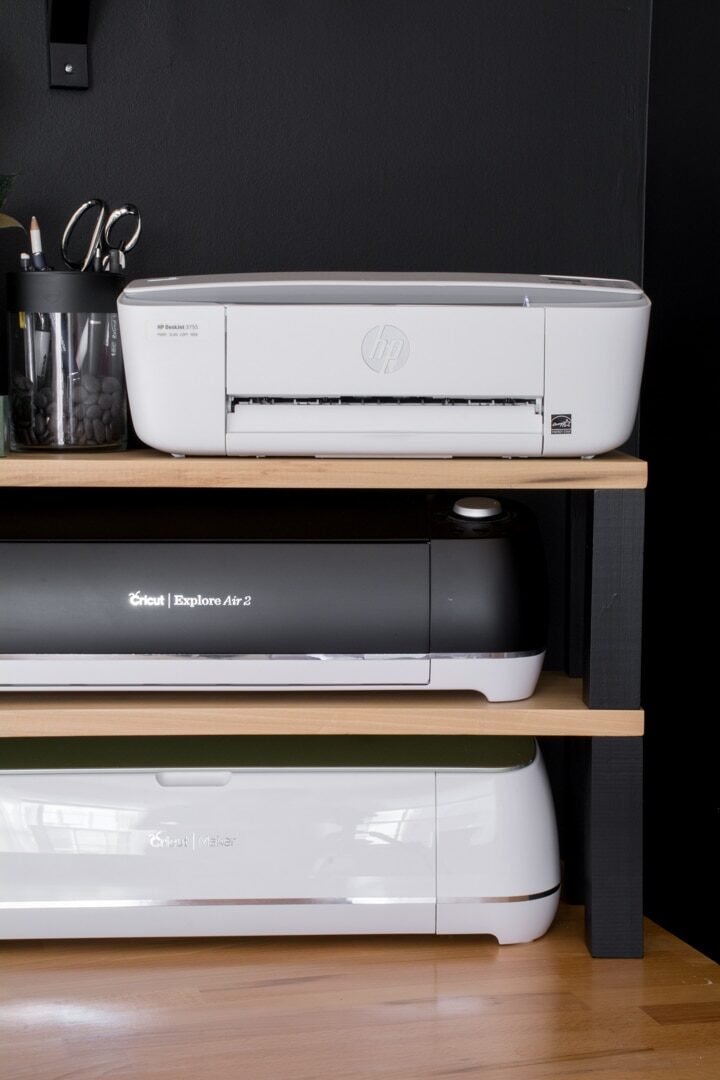
    I am using my favorite machine—my Cricut Explore Air 2. However, Makers can do print-then-cut, too! And the newer Explore 3 can do print-then-cut. The Cricut Joy cannot do print-then-cut (only draw and cut).

    cricut-explore-air-2-8386136

    There are a zillion Cricut sticker tutorials out there, so I’m just going to provide a brief overview of how to make stickers with Cricut. I will address a few things that stumped me at first to hopefully save you the time. The process for making stickers in Cricut’s design space is the same no matter what printer you have.

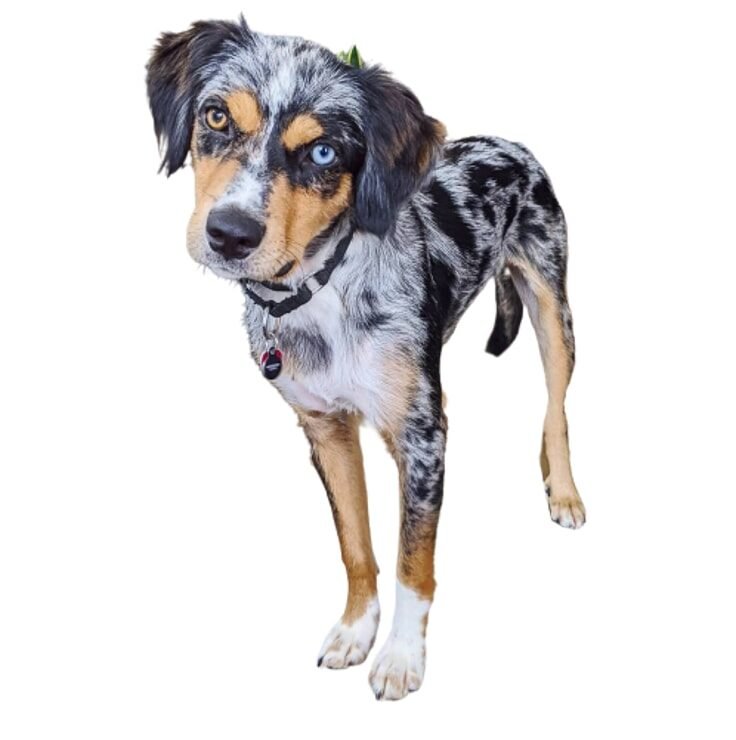
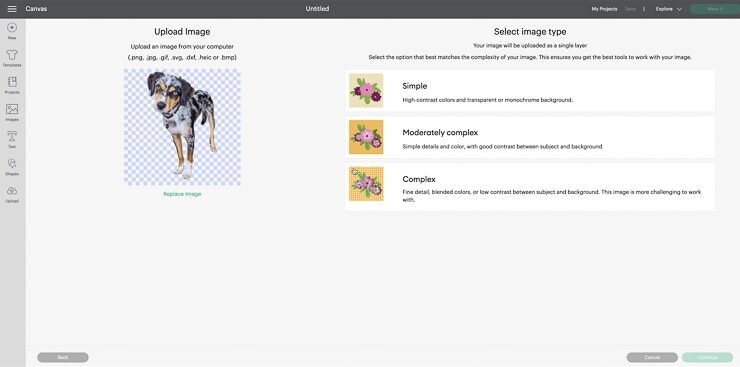
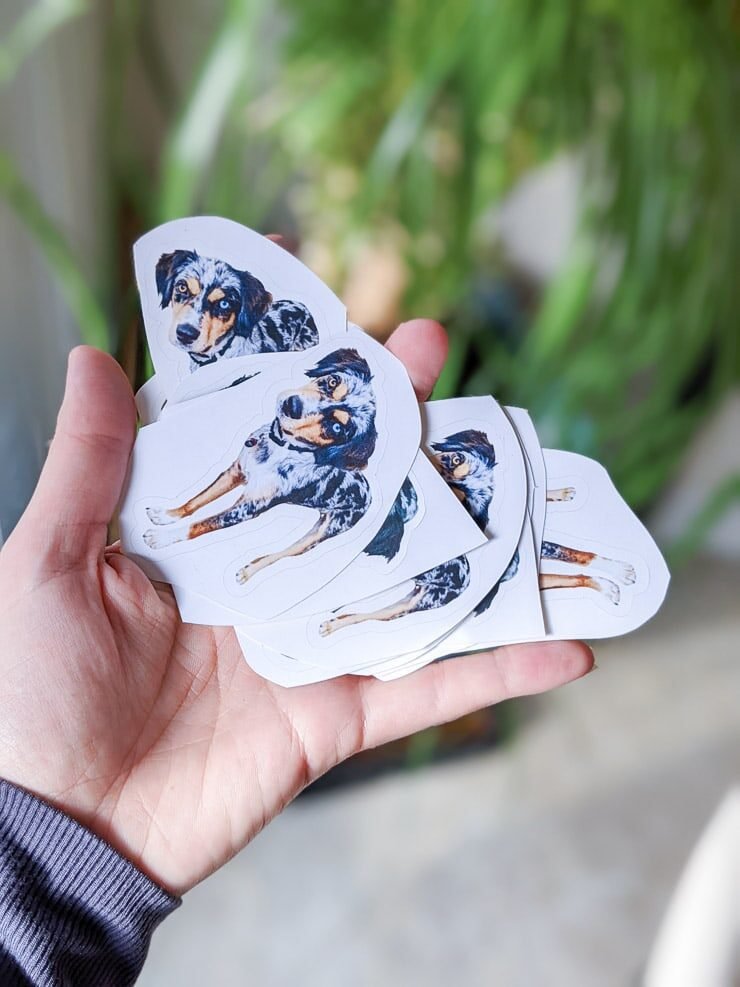
    You can use clip art, things from Design Space, your own files you uploaded, and even photos. A tip for photos—run them through a free background remover tool online (like this one) if you want to make stickers or just a face or something like that. We did that with my brother’s dog, and they turned out really cute!

    how-to-make-stickers-cricut-10-5501048

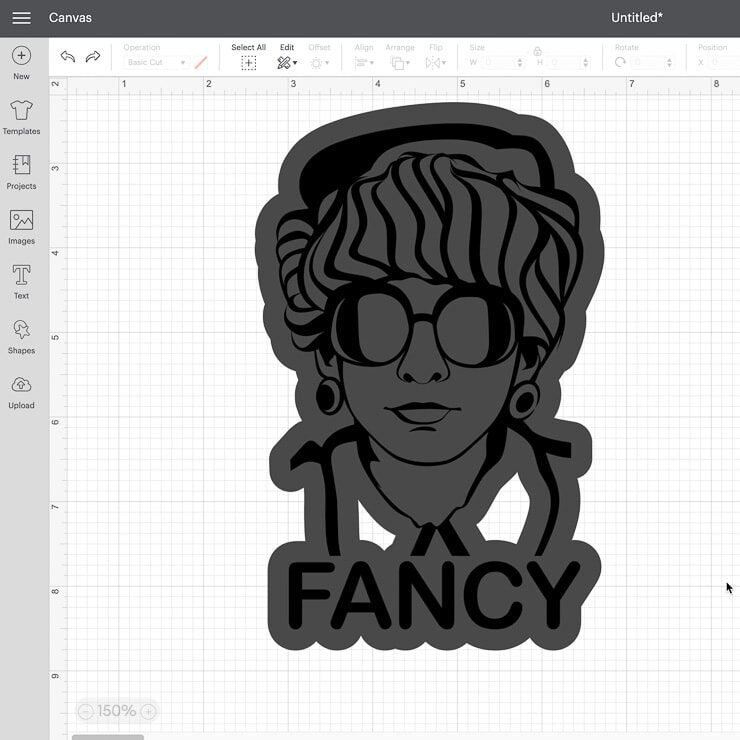
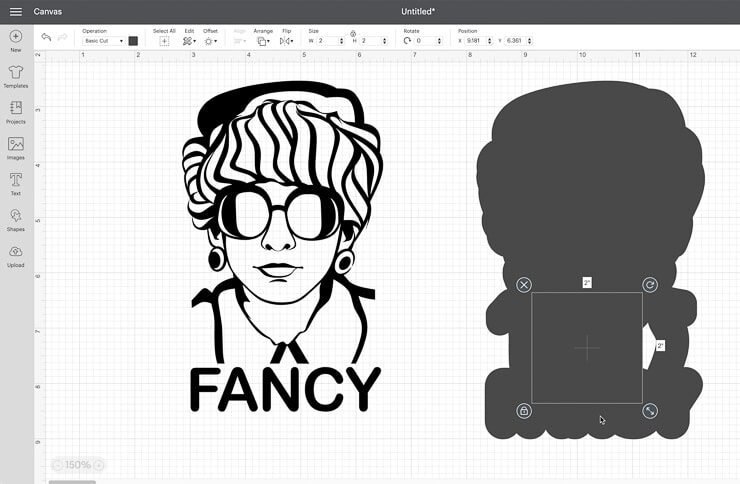
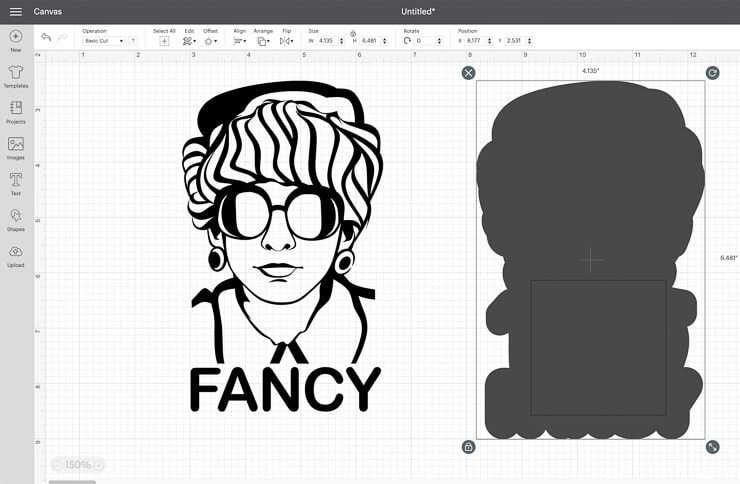
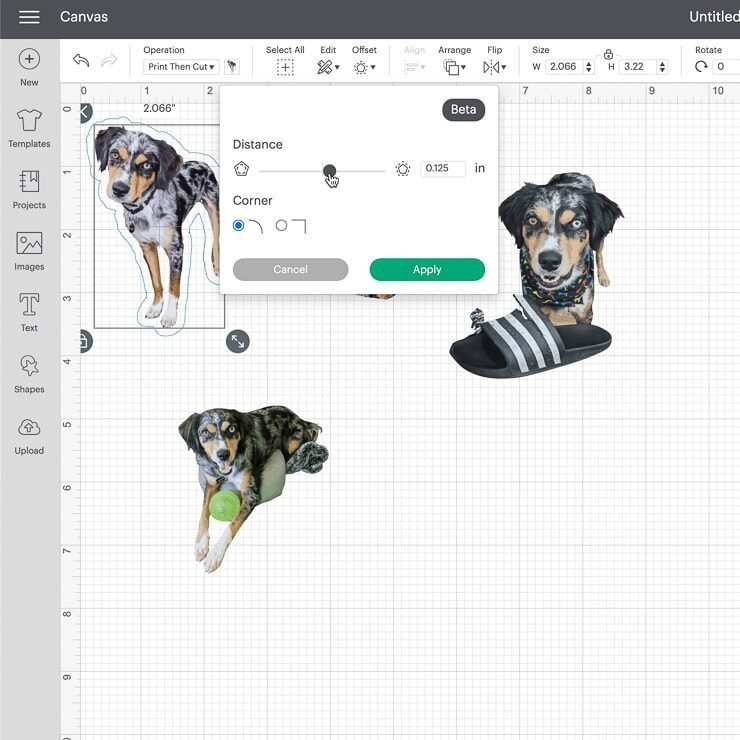
    The offset feature in Design Space is a newer feature—and it’s still in beta. But I had no problems working with it. Simply highlight the image you’d like to offset and click the offset button.

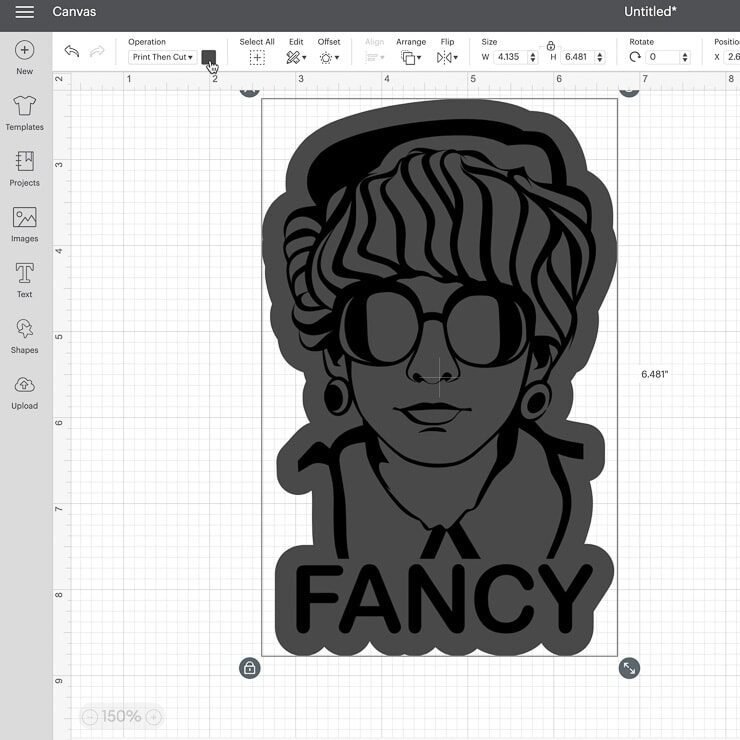
    Then you can adjust the width of the offset. The offset is what gives you the polished sticker look! The offset defaults to a dark gray, which is kind of weird.

    I think Cricut might change that in the future, because white is the color most people want to use. To turn your offset white, just click it and revise the color from dark gray to white.

    how-to-make-stickers-cricut-11-4846031 how-to-make-stickers-cricut-3-6308652 how-to-make-stickers-cricut-4-2902791

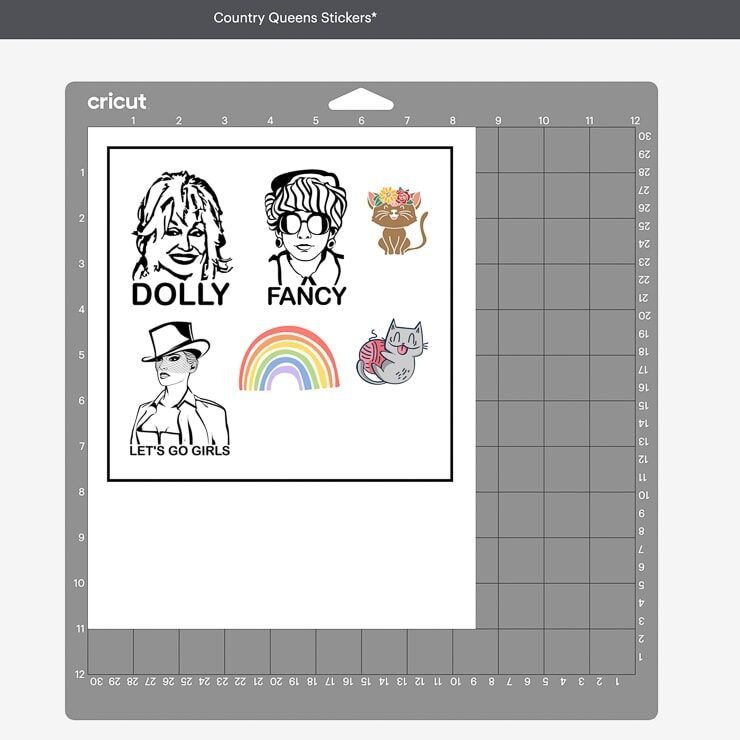
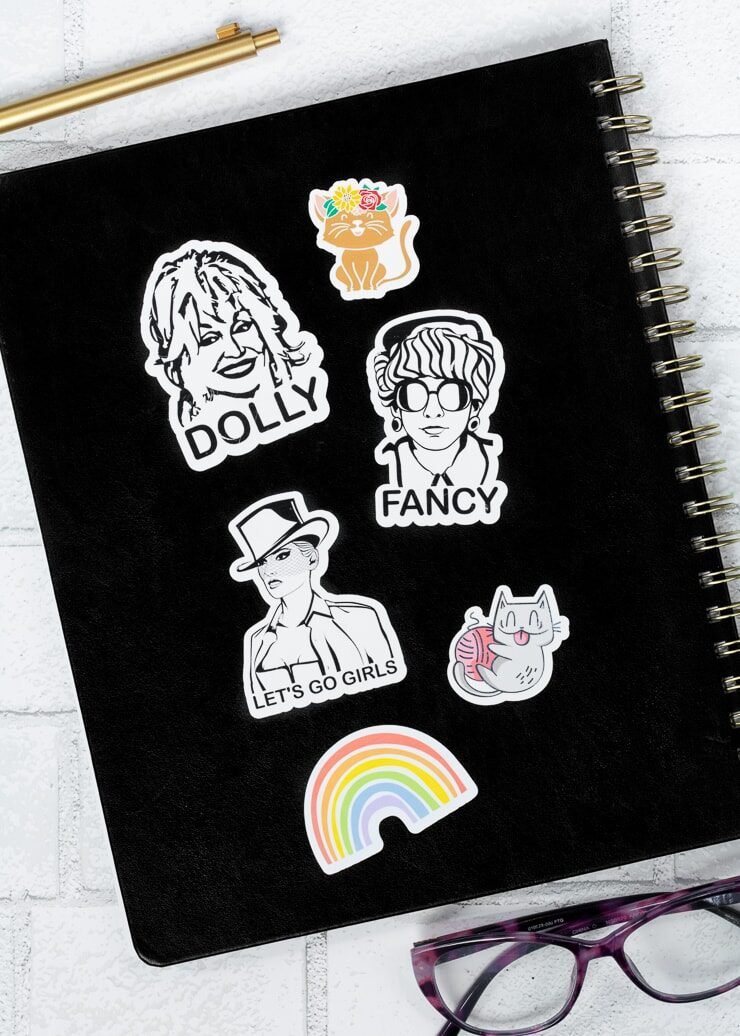
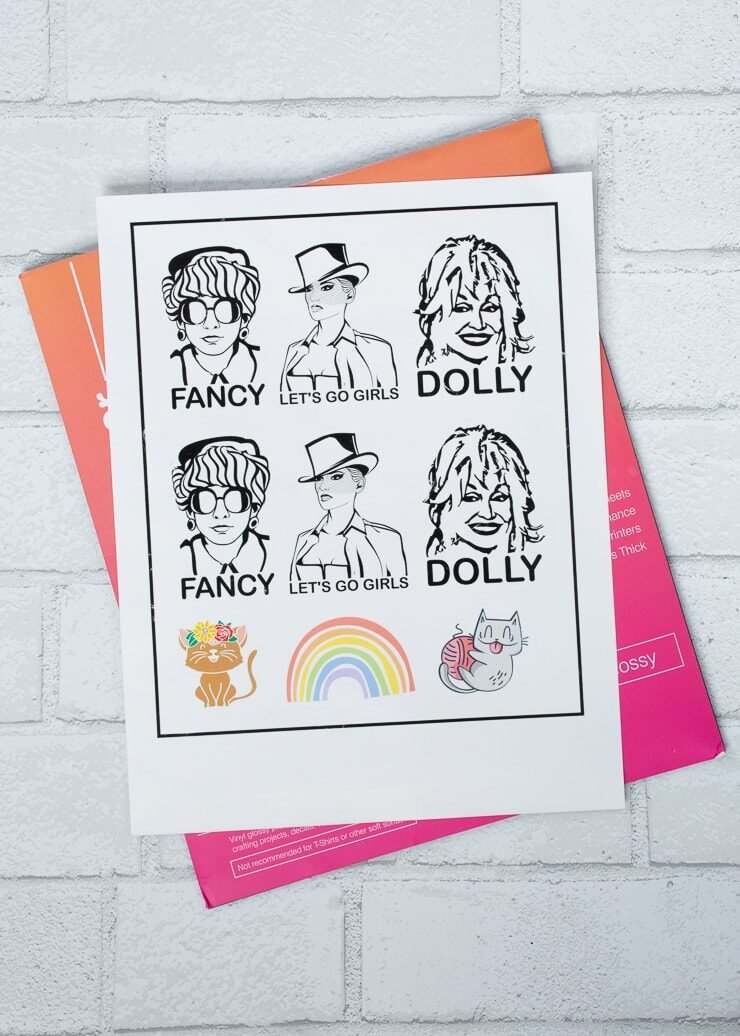
    I used some of my country queens SVG files for this project. And since those are SVG files with no background and intricate lines, the offset feature didn’t work 100%.

    As you can see, there were some gaps in the offset. But there is an easy fix! Simply grab a simple shape from the shapes option in Design Space. I used squares, but you can use anything.

    Next size the shapes to cover the bare spots without extending over the border of the offset. Once you’ve covered everything, highlight the offset and all of then shapes and click “weld.”

    This is important—you have to do weld to make all of the shapes merge into one shape. The weld tool allows you to join shapes to create a single image by removing any overlapping cut lines. Attach or flatten won’t work. After you weld all of the shapes together, you can see that the offset has no gaps. Wahoo!

    how-to-make-stickers-cricut-5-4194100 how-to-make-stickers-cricut-6-4285637 how-to-make-stickers-cricut-7-9765287

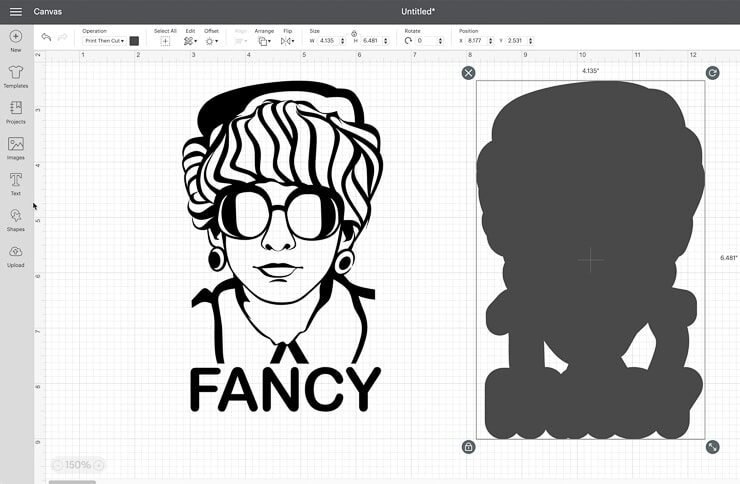
    Now that the offset is finished, put the image back over the offset. You can place it manually, or you can select the image and offset and select “Align” from the top menu in Design Space. Selecting “center” will align the image both vertically and horizontally over the offset.

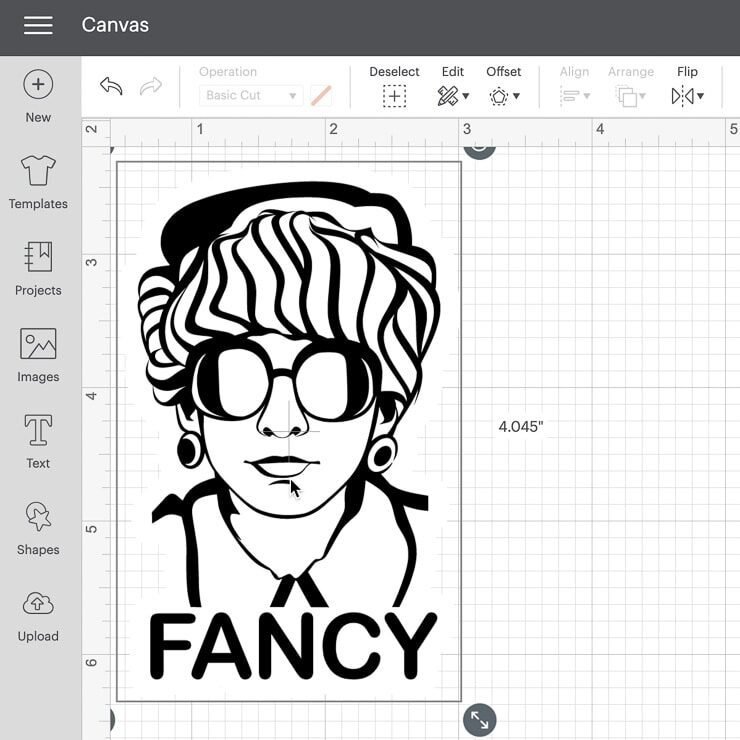
    Next select the offset and the image together and click “flatten.” This is also important. “Attach” or “weld” won’t work. I first tried to make stickers by attaching the image to the offset—but if you only attach them, Cricut will cut out around the image and the offset. You only want Cricut to cut out around the offset.

    The flatten tool allows you to turn any image into a printable image. It merges all selected layers into a single layer. After you flatten an image, you can unflatten them, so it isn’t permanent. Read all about the flatten tool and what is does here!

    For more on Design Space tools, check out my tutorial for how to use the slice tool in Design Space!

    how-to-make-stickers-cricut-8-3007166 how-to-make-stickers-cricut-9-2878111

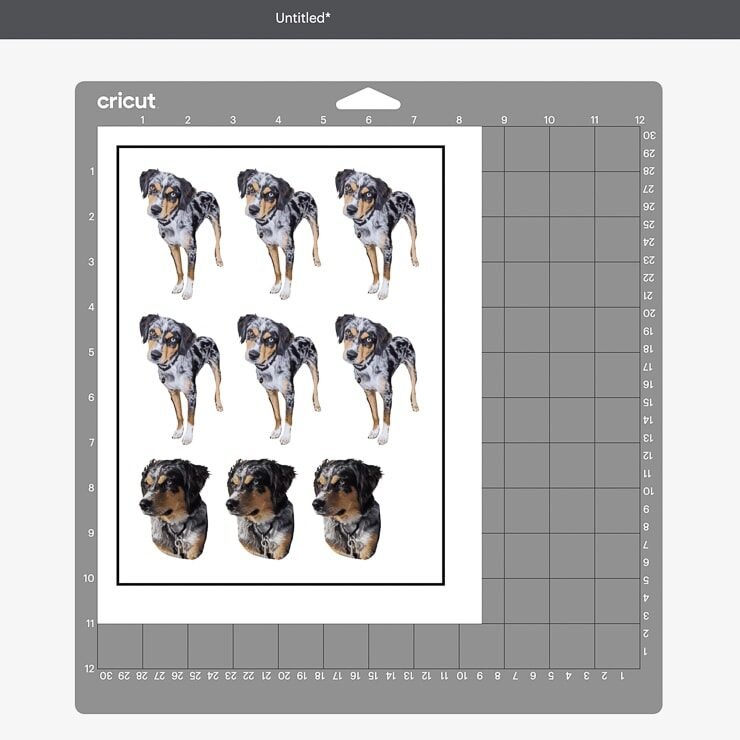
    To maximize the use of your sticker paper, you can arrange the stickers however you want on your canvas. If you select them all and press “attach,” they won’t rearrange when you go to make the project. Then follow the Design Space prompts to send it to your printer.

    how-to-make-stickers-cricut-12-2899307

    Once your printer is done printing, Design Space will prompt you to load the sheet into your machine on a mat. I used a pink FabricGrip mat only because it’s what I had upstairs—and it worked fine! You can probably use a blue or green mat, too.

    The machine will cut automatically based on the sensor marks your printer included on the sheet. Once it is done cutting, simply offload the mat. You can use a straight edge and your True Control knife to cut the stickers out if you’d like—or leave them on one sheet.

    how-to-make-stickers-cricut_-18-6445516 how-to-make-stickers-cricut-33-9036550

    Like Cricut? Check out my other tutorials on How to Use the Cricut Mug Press, the Best Cricut for Making Shirts, and my DIY Wall Decals Using Cricut!

    To remove backgrounds from photos to make stickers, just run them through a free background remover online like this one. They typically do a really good job!

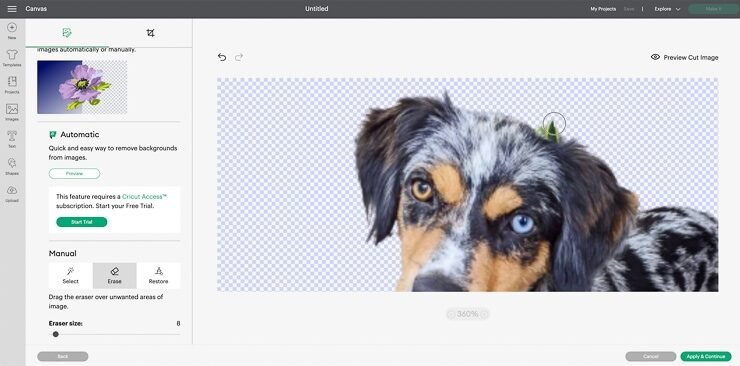
    You can clean them up using the erase tool in Design Space, too. (You do that when you upload the image, before adding it to your canvas.)

    Here is the first image I ran through a background remover. You can see it left a tiny bit of a plant leaf up at the top of Ozzy’s head behind his ear. I nixed that in Design Space using the erase tool!

    Once you’re happy with the image, simply follow the same steps I outlined above. Add the offset, make it white, fill in any gaps with shapes and weld them, and then select the image and offset and “flatten.” Puppy stickers!

    how-to-make-stickers-cricut-1-7866997 how-to-make-stickers-cricut-13-7085017 how-to-make-stickers-cricut-15-5720103 how-to-make-stickers-cricut-16-1770514 how-to-make-stickers-cricut-17-8493047 how-to-make-stickers-cricut-22-9692756

    As I mentioned, this is a Cricut sticker-making tutorial for people with normal printers. AKA, not super expensive printers. I have an HP DeskJet 3755. It’s a small, compact desktop printers that can scan, print, and copy. And it’s wireless.

    It’s mostly for printing on regular paper—but in the description for the product, it says it can print on plain paper matte and glossy brochure paper, photo paper, envelopes, and other specialty inkjet papers. It prints great on regular paper, but how does it hold up on sticker paper? Let’s find out!

    printer-2814928

    Psst…looking for a planner? Here’s the one I had for 2021 and have for 2022 as well!

    I am going to review 5 different sticker paper and printable vinyl options to let you know which one my favorite is. I’ll consider things like quality, price, and of course whether or not it works on my baby printer 🙂 First up, let’s look at Cricut products.

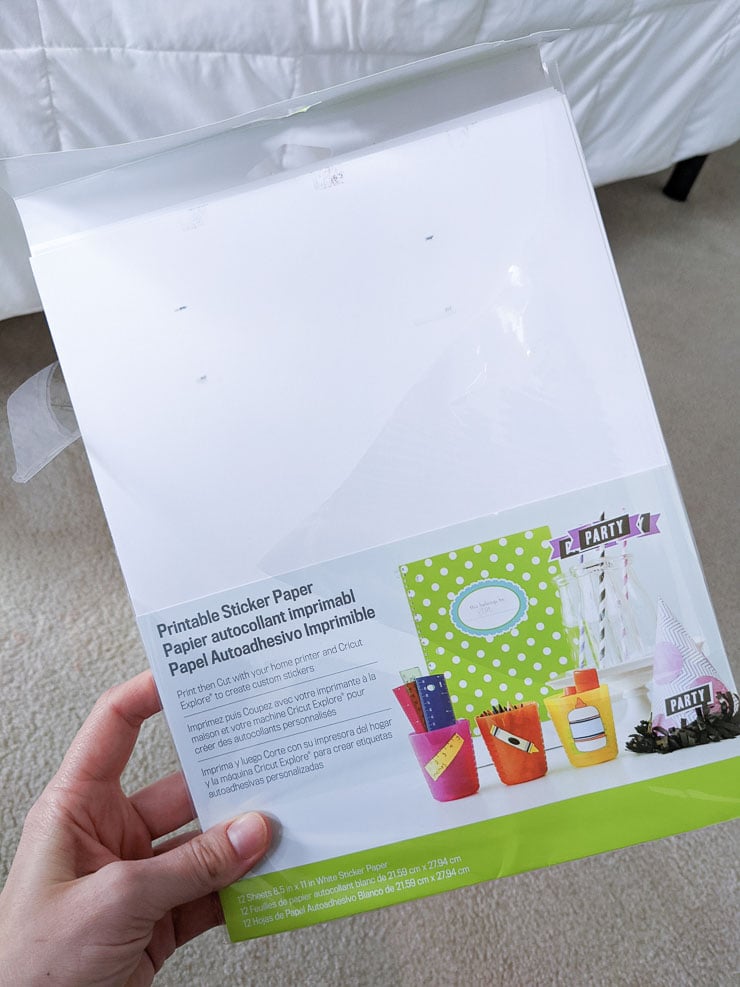
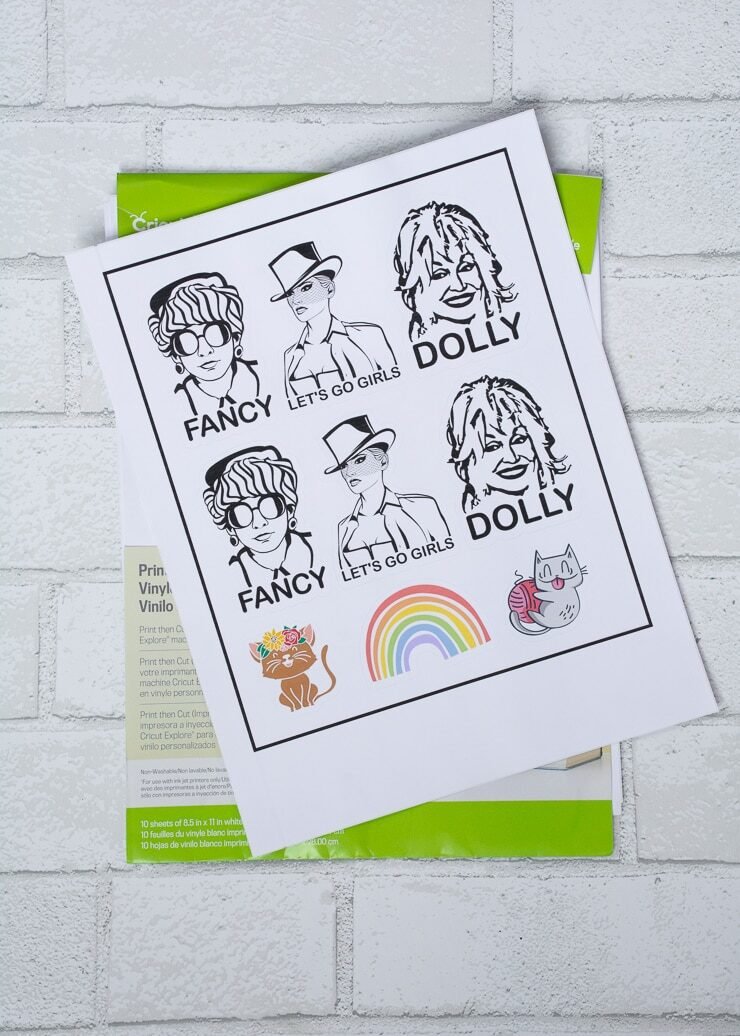
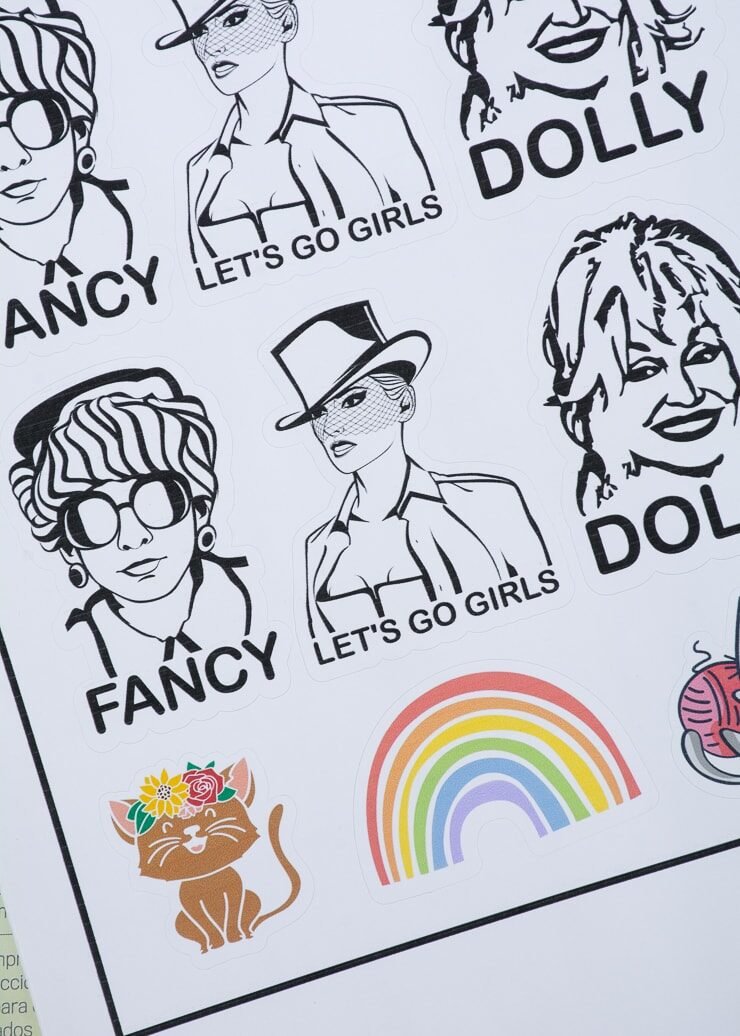
    The first paper I tried was the Cricut Printable Sticker Paper in white. Right off the bat I was nervous about this paper because it has terrible reviews online. Seriously, like every website it is for sale on has awful reviews. But I wanted to give it a try myself.

    Cricut says this paper is designed for use with inkjet printers and then the Print-Then-Cut feature on Cricut Explore machines. Exactly what I want! Perfect. This paper adheres very well and you cannot reposition it once you apply it.

    But I can’t recommend this paper because I never even got to try it! I’m sad to say that all of the reviews are right. It is noticeably thicker when you hold it. And my printer couldn’t take it. It instantly jammed, even when I tried to help it through.

    If you have a nicer printer that can handle this paper, I’m confident that it will work well. Since it is thicker, it seems like it would be a more durable base product. But for regular printers? Nah. Didn’t work for me.

    I’m going to go with no. Not only because it just doesn’t look and feel waterproof, but Cricut’s own website says “keep printed images dry to preserve longevity.” To make it waterproof, you’ll need to put a few coats of an aerosol acrylic or poly sealant.

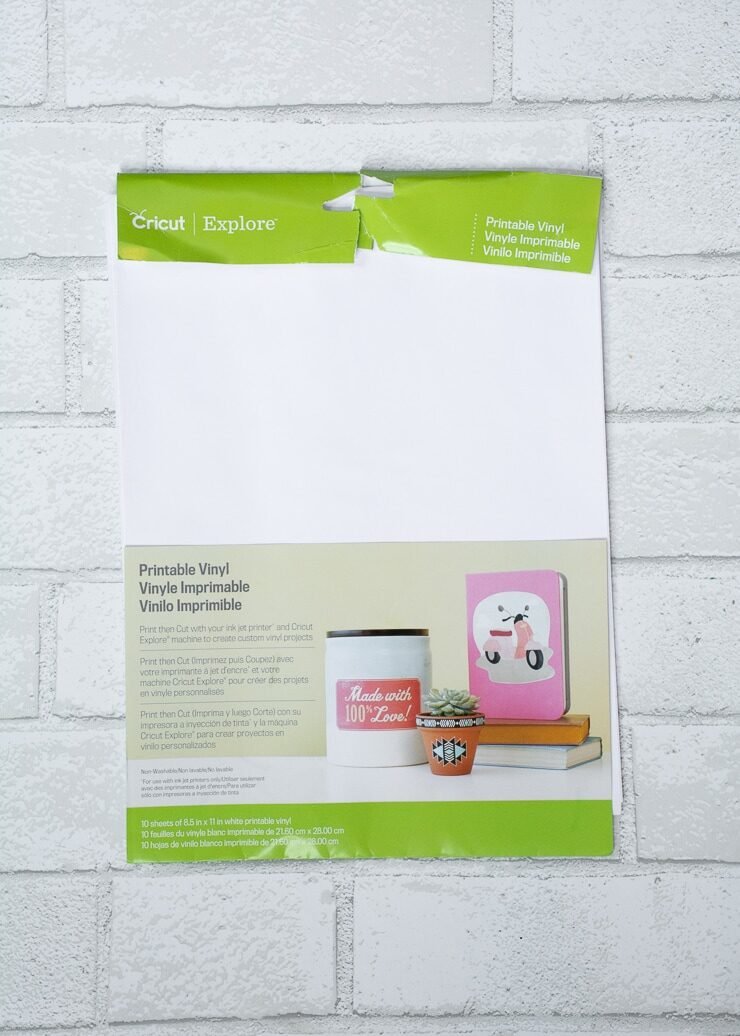
    The good news is that Cricut does make a printable vinyl, which can be an effective substitute for their sticker paper. And it worked on my printer!

    But, keep in mind that this is a slightly different product. It is much thinner and is designed for, well, vinyl projects. Think decals and whatnot. But if you’re making stickers to put on the front of a notebook or planner, I see no reason why you couldn’t substitute printable vinyl!

    Note the Cricut says it has a smooth matte surface and that it removes cleanly, leaving no sticky residue. (But obviously it won’t remove from paper cleanly—they mean hard surfaces like tumblers, I’d imagine.)

    Since this paper is a bit thinner, it did buckle a bit after the wet ink went on. However, it didn’t affect the quality of the decals, and they transfer flat to whatever surface you’re putting them on.

    I also have to say no for this one. And for the same reason. It buckled a bit with the wet ink, so I can’t image it would be super water-resistant. Cricut says “keep printed images dry to preserve longevity.” You can lengthen printable vinyl’s life by adding of an aerosol acrylic or poly sealant.

    how-to-make-stickers-cricut-23-4925053 how-to-make-stickers-cricut-24-3684733 how-to-make-stickers-cricut-25-4153619

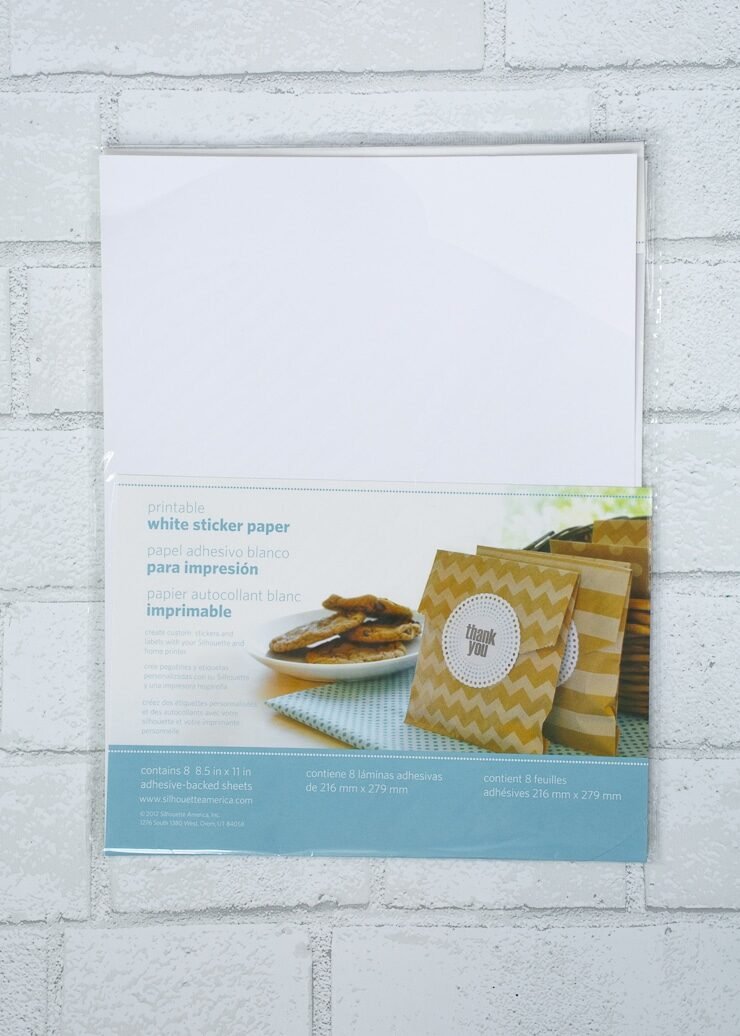
    Next I wanted to see if another brand’s sticker paper would work. There wasn’t a ton of information about the white Silhouette Printable Sticker Paper online. Only this—”Use the Silhouette Printable White Sticker Paper to make custom labels of designs and text of your choice.

    This sticker paper, compatible with Silhouette electronic cutting tools, has a self-adhesive back that makes it perfect for various surfaces.”

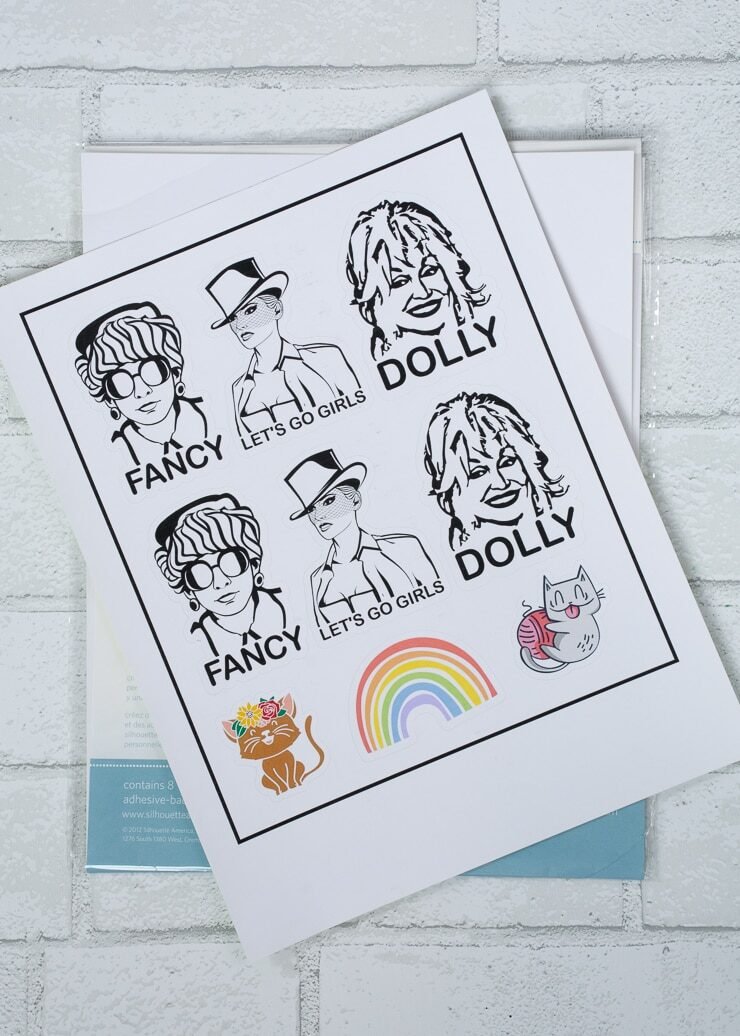
    Right off the bat, it was clear that the white Silhouette Printable Sticker Paper is much thinner than the Cricut white sticker paper. That gave me higher hopes for how it would do in my baby printer. It has the same matte finish that the Cricut paper has.

    And it worked! The HP DeskJet 3755 baby printer took it just fine. I printed several sheets, and none jammed. The ink didn’t bleed or smear once I let it dry completely. And my Cricut Explore Air 2 cut it perfectly.

    I couldn’t find anything online from Silhouette to speak to how durable or waterproof this paper is. But I have to be honest, it doesn’t feel like it would be super waterproof. I’d also recommend giving it a few coats of an aerosol sealant just like the Cricut papers.

    how-to-make-stickers-cricut-26-6002261 how-to-make-stickers-cricut-27-4855784 how-to-make-stickers-cricut-28-3696873

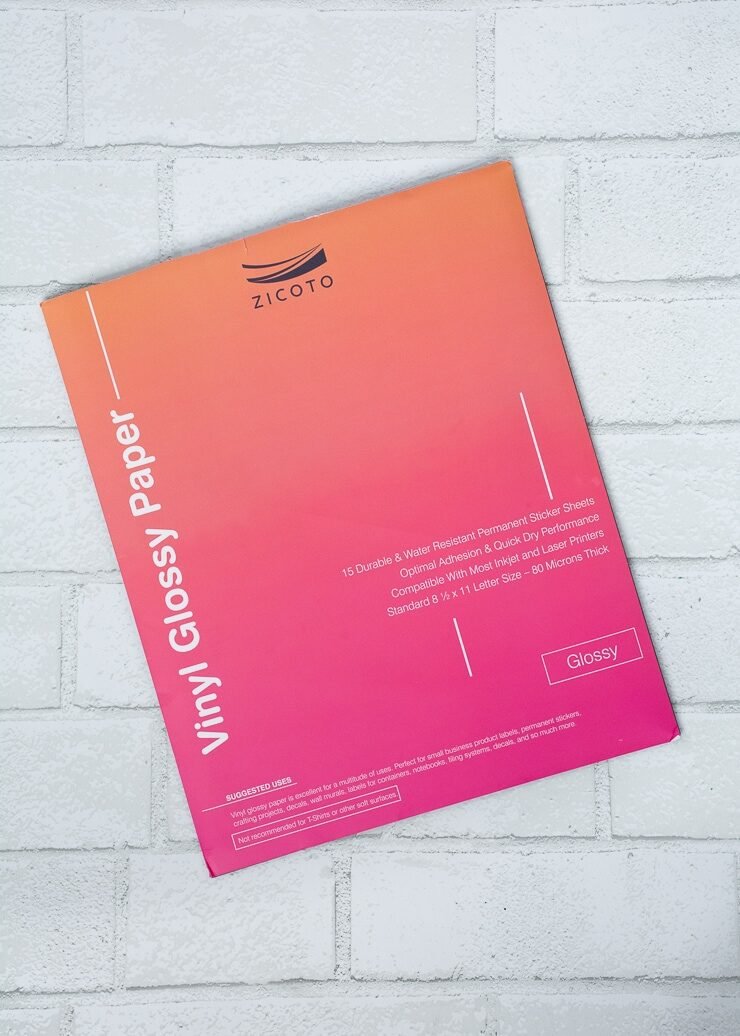
    Next I wanted to try out a few off-brand options. You get more paper for about the same price, so it is much more cost-effective. I chose Zicoto premium printable vinyl sticker paper based on the price and reviews. It says it is compatible with most inkjet printers, and it’s thick without being too beefy.

    Use this paper for wall murals, vinyl decals for cars, bumper stickers, vinyl stickers for laptops, stickers for coffee tumblers, etc. Make sure to let the ink dry thoroughly before handling or it will smear. Zicoto says 5 minutes, and I found that to be accurate.

    Zicoto Premium Printable Vinyl Sticker Paper in matte is marketed as a water-resistant vinyl sticker paper. Zicoto says, “With the Zicoto printable vinyl sheets you can create gorgeous water-resistant labels for multi-purpose use both indoors & outdoors; simply add a clear layer of UV resistant sealer spray to boost waterproofness & durability.”

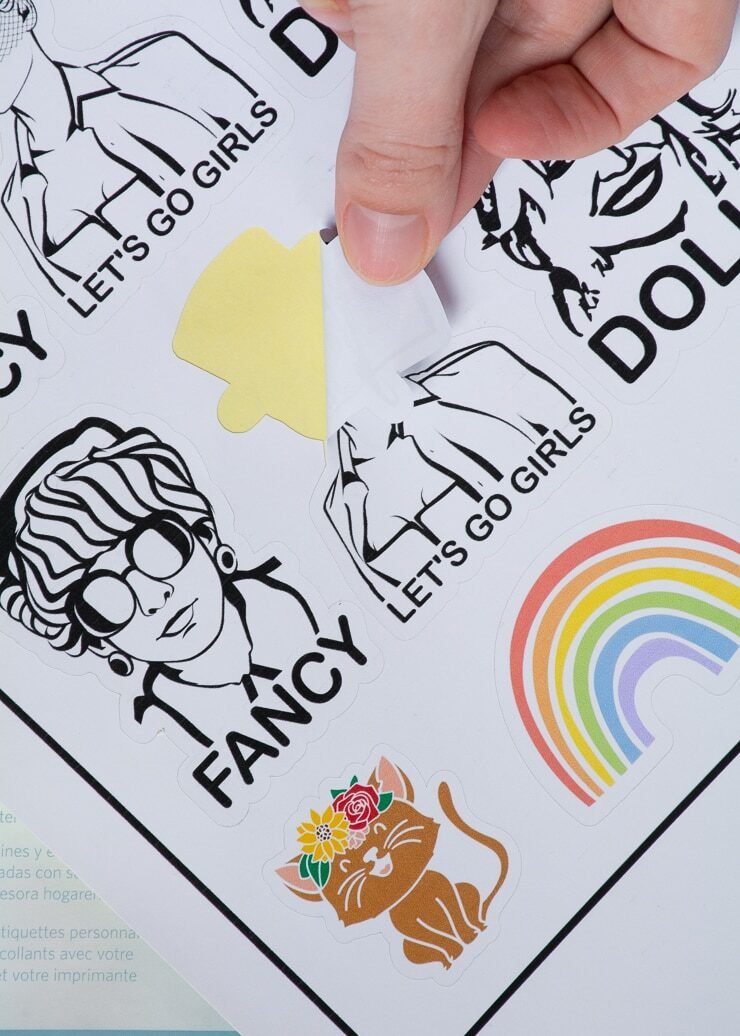
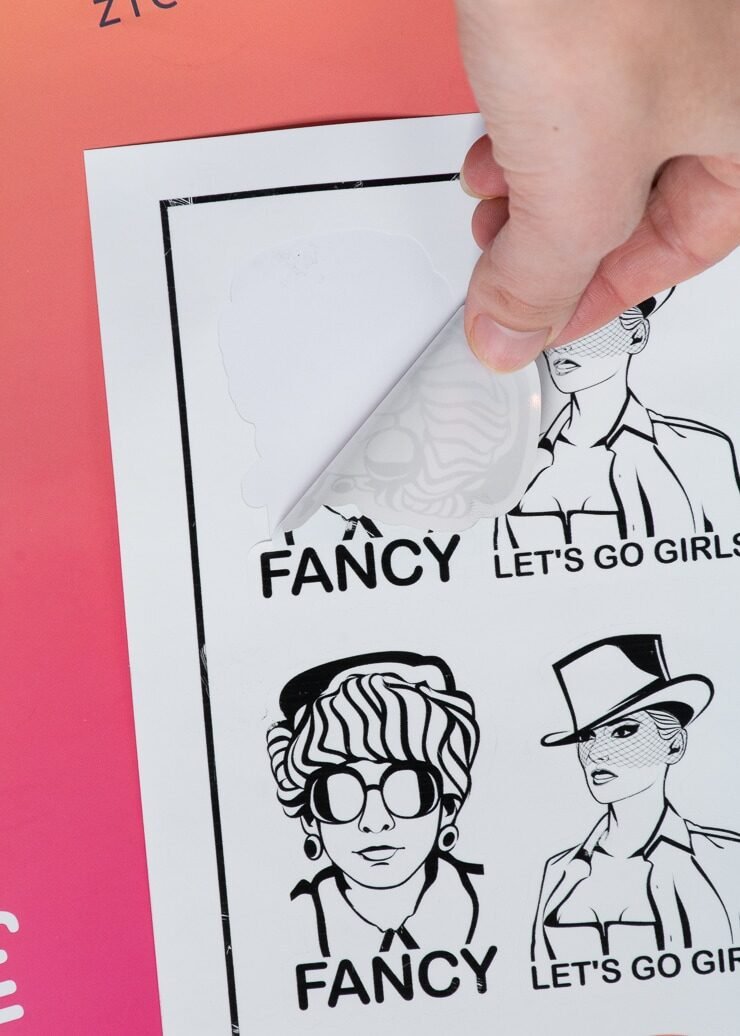
    And I’m saving my favorite for last. The Zicoto Premium Printable Vinyl Sticker Paper in a glossy finish is my winner. Why? Well I just like the glossy finish for the projects I did!

    I feel like it looks more polished, especially with the black and white stickers. The product specs for this paper are about the same as the specs for the matte version.

    It’s the same instructions as the matte finish Zicoto paper—the sheets are “water-resistant” and suitable for indoor and outdoor use. However, add a UV-resistant sealant spray to boost waterproofness and durability. Also…I feel like the glossy finish helps boost water resistance, too!

    how-to-make-stickers-cricut-29-2137364 how-to-make-stickers-cricut-30-3118116 how-to-make-stickers-cricut-31-2964667

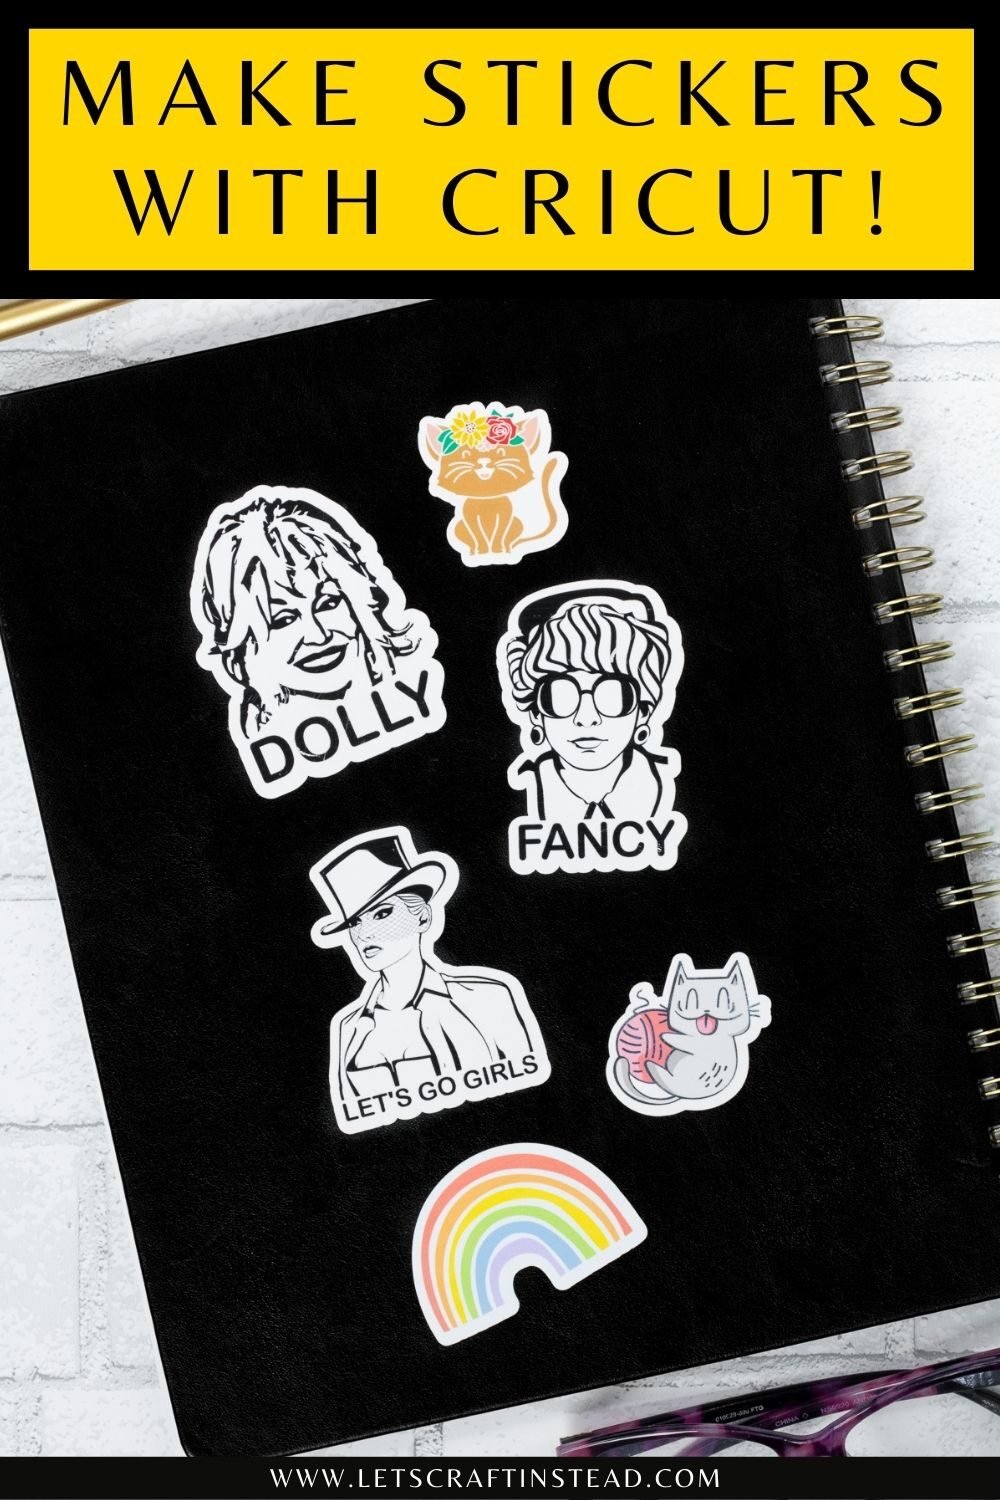
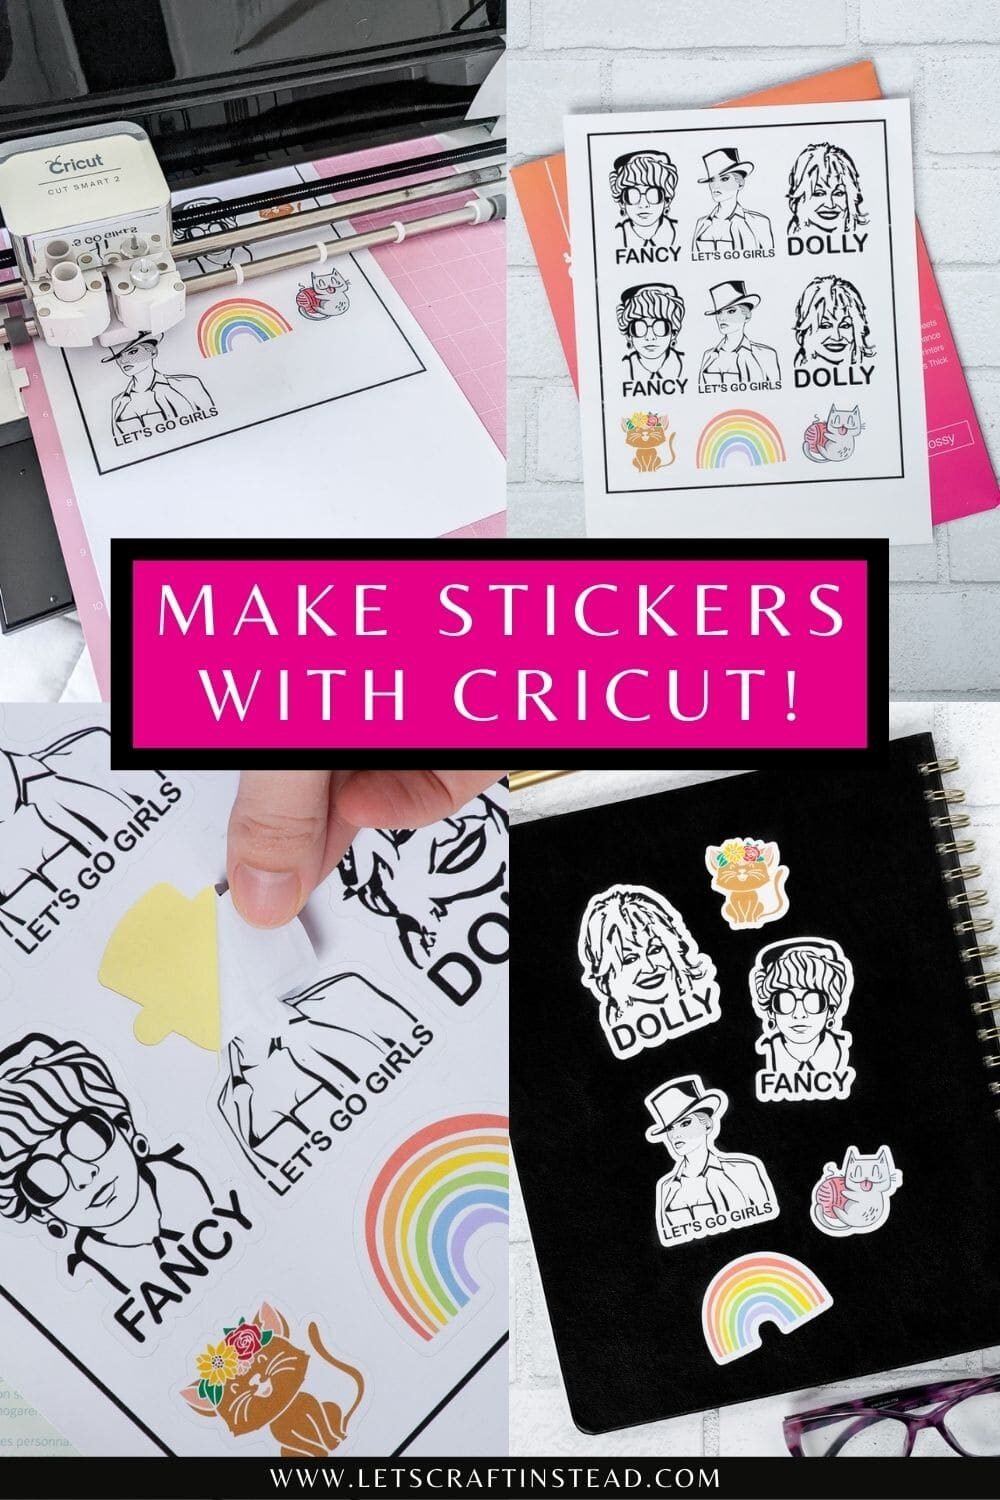
    Pin my post about how to make stickers with Cricut!

    how-to-make-stickers-cricut-pin_2-4399023 how-to-make-stickers-cricut-pin_1-9804589