Category: Uncategorized

  • How to infuse a drawing onto a mug using Infusible Ink markers!

    This content may contain affiliate links. See my full disclosure here.

    Looking for cute personalized gift ideas that kids can help with? Grab some Infusible Ink markers, some paper, and a Cricut mug blank and learn how to infuse a drawing onto a mug!

    I did a huge post about how to use the Cricut Mug Press when it first came out—and then I did a roundup of a bunch of different Cricut mug projects to get your creative juices flowing. Today I am adding a fun mug project to the list with a tutorial on how to infuse a drawing onto a mug!

    You can use this tutorial for infusing any kind of drawing onto a mug. It doesn’t have to be a kid’s drawing that have people with freakishly long legs! But how cute are kids drawings? And what better way to save them forever than to permanently transfer them onto a mug?

    Want more? Check out my tutorials on how to Make an Infusible Ink Tote Bag and how to use Cricut Infusible Ink on Coasters, as well as my post on the Best Cricut for Making Shirts.

    Cut a piece of paper to be a little smaller than the total height of the mug. Then trim it down further so that when you wrap it around the mug, it doesn’t hit the handle area.

    I told my daughter that she could use any of the Infusible Ink markers to color anywhere on the piece of paper I cut. Since these markers aren’t super washable, I put a larger piece of white paper under the paper she was coloring on.

    She loved using “mommy’s special markers” to do a craft. She always sees them in my desk drawer and wants to play with them. You’ll also notice that the colors are a bit duller than what you might expect. This is normal.

    After you transfer the design using the Mug Press, the colors will become much more vivid. Exactly like Infusible Ink sheets.

    Next use a clean lint roller to thoroughly clean off the mug. Even if you don’t see anything on the mug, the goal is to pick up tiny invisible pieces of lint or dust. These can look discolored after you transfer the design in the heat press.

    Next use heat-resistant tape to tape the design in place. The most important spots to tape the design on are near the handles and along the tops and bottoms of the mug.

    Turn on your mug press and let it heat up. It will beep when it’s ready. Then pop the mug in and close it. Watch the lights as they make progress. It will beep when it’s done, and you can remove the mug.

    The handle won’t be hot, but the mug and the teal area in the press will be EXTREMELY hot. Don’t touch! And let the mug press cool completely before you handle it to put it away. Cricut also recommends working in a well-ventilated area because the Infusible Ink transfer process can create fumes.

    Once the paper and mug have cooled completely, you can remove the heat-resistant tape and paper to reveal your design! These turned out perfectly, and they were a big hit when we gave them to my mom and grandma. These are dishwasher safe, too!

    Pin my post about how to infuse a drawing onto a mug

  • Unbox a Cricut machine and set it up with me!

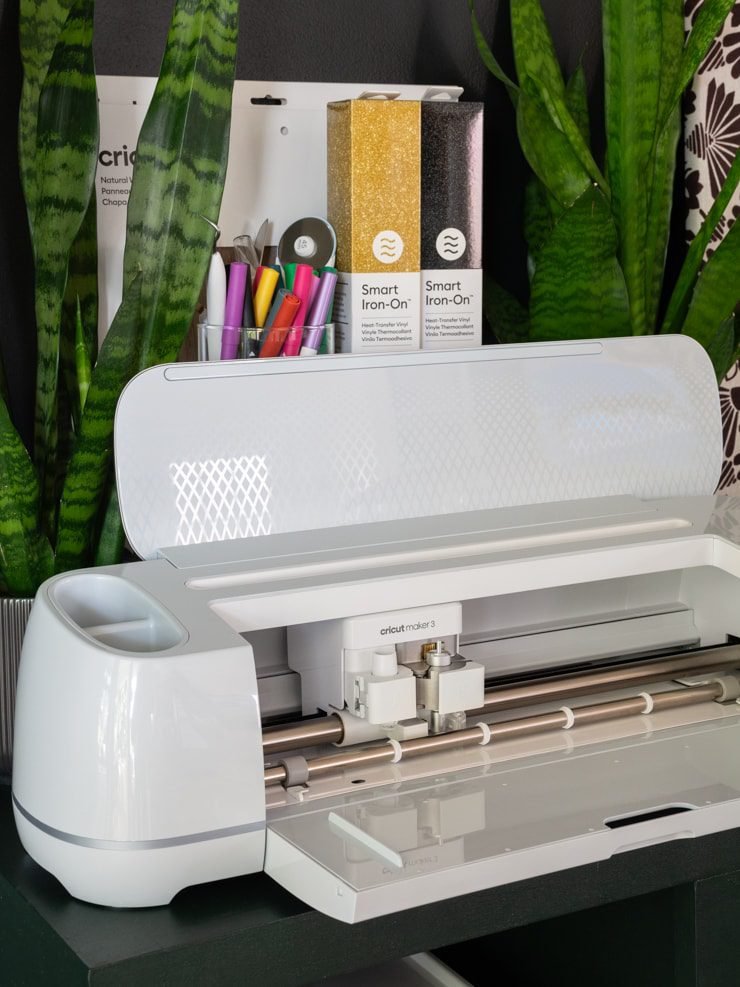
    This article walks you through the steps to unbox a Cricut machine and set it up using a Cricut Maker 3 as an example. Cricut sponsored this post.

    Sometimes one of the hardest parts of getting a new crafting machine is just getting it out of the box. When you ordered it, you probably spent hours reading reviews and building your confidence. But then the machine arrived, and unboxing it and getting started all of the sudden felt daunting.

    You just want to get started making! And once you open the box, the setup instructions and new-to-you verbiage can be intimidating. I know how you feel. I recently ordered my very first serger machine, and it is sitting in a box in my closet.

    Yes. I know I can do it, but I have had a hard time conquering the mental barriers that come with learning a new machine. This is a common feeling among those shopping for a Cricut cutting machine. Trust me—I have been there!

    Trying to decide which Cricut machine is right for you? See my detailed post Which Cricut Should I Buy? to help you decide!

     %postname%

    But now that I have experience with all of Cricut’s machines, I know that they truly are easy to master. There will be a learning curve if this is your first Cricut machine—and especially if this is your first crafting or cutting machine.

    But there are many things you can do before you even receive your machine to set yourself up for success! In this article, I’ll walk you through the process of unboxing and setting up your Cricut machine using the Cricut Maker 3 as an example.

    We’ll start from the very beginning, and I’ll also talk about some of the common questions you might have about investing in a Cricut machine. Are they easy to learn? Do you have to be an advanced crafter to use them? What do I need to purchase with my machine? I’ll answer all of these and more.

    Whether your machine is a Cricut Maker 3 or another Cricut machine, there are a few things I recommend doing before you even receive your machine. You will be able to learn how to use it without these resources…but trust me, doing a little research beforehand will set you up for quick success.

    You do not need to be an advanced crafter to use Cricut machine. In fact, the machines and Cricut’s Design Space software are very straightforward. They are great machines for beginners. Here’s what I recommend.

    There are a lot of things you can do with a Cricut machine, but you don’t need to know everything just to get started. I recommend reading through Cricut’s Guide to Cricut crafting terminology as a good primer.

    This resource walks you through some of the general Cricut terminology you’ll encounter when setting up your machine and making your first project. It also provides a brief introduction to Design Space, Cricut’s free-to-use design software.

    I also recommend reading through the Cricut Learn articles. If you are like me, you would also benefit from watching the free Cricut 101 workshop recording before even receiving your machine—and then again after you set your machine up.

    I also recommend getting your feet wet with Design Space before making your first project. You can download Design Space and set up your Cricut account before receiving your machine here: design.cricut.com. Cricut also has a guide about installing Design Space.

    You can also watch Cricut’s Design Space tour to get to know the software. When you receive your machine, you will already have Design Space ready to go—and you’ll be familiar with its interface. You’ll be able to hit the ground running setting up and linking your new machine to your account.

    Cricut has a user-friendly, robust troubleshooting and help page. I also like how you can search the help library using key terms. Bookmark this page so you can easily refer back to it.

    Now it’s time to walk through the actual unboxing process. Make sure you have a space near your computer (or device you’ll be using Design Space on) with plenty of space.

    After opening the box, you’ll see the instructional envelope (second photo below). Cricut includes a straightforward setup guide that will walk you through initial setup of your machine (third photo below).

    Remove the power cord—that’s the one with the plug. Plug this power cord in to your machine and into a power source and turn the machine on. You’ll also notice a different cord in the box. That’s a USB cord—more on that in a second.

    Cricut Maker 3 in its box Instructional envelope in the box “Let’s get started” guide in the envelope Two cords that come with your Cricut Maker 3

    Remove your machine and set it on your workspace. You can connect your machine to your computer using the other cord in the box (the USB cord), or you can do it via Bluetooth. I like using Bluetooth because it’s one less cord to worry about.

    Keep in mind that you may have to add your Cricut to your computer’s recognized Bluetooth devices before it will show up in Design Space. I am on an iMac, and I have to do that the first time I try to connect any Cricut device.

    Once you’re logged in to Design Space and your computer has picked up your machine, you can proceed with setup. Follow the onscreen instructions; you will know the setup process is complete when Design Space prompts you to make a test cut.

    Note: You must complete the setup process to register and activate your machine. If you do not complete the setup process when you connect your machine to your computer for the first time, you can reconnect your machine, and select “New Machine Setup” in Design Space to go through the process.

    Now that you’ve set up your machine, it’s time to get started making. Your test cut will be the first cut that you make. Cricut includes the material you’ll use for your test cut in the box—it’s a smaller piece of black vinyl.

    Follow the instructions in Design Space to complete this cut. You’ll be prompted to load your material and use some of the buttons on your machine for the first time. Then you’ll be “weed” the vinyl (which means remove it) to make sure your machine is cutting as it should.

    Next I recommend completing some pre-made projects. Your Cricut Maker 3 also comes with a few sheets of basic materials, including some sticker cardstock. This material doesn’t require a mat, which makes loading and using it super fast.

    Below you’ll see that when I navigated back to Design Space, it prompted me to complete a few basic projects. I chose one—cutting dolphin shapes out of the smart paper sticker cardstock. When you do these projects, Design Space also shows you a little window that walks you through the entire process (see the third photo below for an example).

    Congrats! You’ve unboxed your machine, completed a test cut, and made your first project. But you probably also have other questions about your machine. I’ll answer a few of those here with some personal anecdotes.

    The world of Cricut is a welcoming place, and you can spend as much or as little as you want to enhance your crafting capabilities. Here are a few things to know right off the bat about purchases in Design Space.

    The required Design Space software is free to download and use. But let’s talk about Cricut Access—this is what you’ll often hear people refer to when they say they have to “pay to use their Cricut machine.” It is untrue that you have to pay to use your Cricut machine.

    A Cricut Access membership is a monthly subscription that has two tiers, Standard and Premium. Both have a fee.

    • With a Standard Cricut Access membership, you get access to 200,000+ images, 700+ fonts, thousands of ready-to-make projects, 10% off cricut.com purchases, and more.
    • With a premium membership, you get all of those things plus 20% off materials and free economy shipping on $50+ orders.

    I recommend taking advantage of the 30-day free trial your new machine gives you. But you don’t have to purchase either of these memberships if you decide they aren’t right for you. Your machine comes with a free Cricut Access membership that includes 1,000+ free images, 15+ fonts, 250+ ready-to-make projects, and more. And you can purchase things in Design Space individually if they aren’t free.

    You can also use your own designs in Design Space. That means you can import images and fonts into Design Space using the upload feature. I craft using a combination of items already in Design Space and items I either design myself or download elsewhere.

    There are TONS of free SVG cut files, fonts, and images online that you can download to your computer and then upload to Design Space. Read more about that process here on Cricut’s website. I also have a post about How to Convert a JPG to an SVG file for Cricut Crafts that explains the difference between the types of images and uses my logo as an example.

    Below is an example of a Dolly Parton file I designed and uploaded into Design Space to cut. I cut this out of Infusible Ink transfer sheets and used my Cricut Mug Press to put it on a mug.

    A Dolly Parton image I made

    If you just buy a machine, it will come with only the premium fine-point blade and materials for a test cut. I do recommend checking out the bundles on Cricut’s website to get you started. They include a lot of stuff—vinyl, iron-on, some of the tools you’ll likely use, some mats, and more.

    If you run the numbers, these bundles are actually a really good deal. The prices on Cricut’s website fluctuate, but I will give you an example using the prices as of writing this. The Cricut Maker 3 is listed for $429. However, if you choose the essentials bundle instead, it is $499. That’s $70 more, and here’s what it gets you:

    • Everyday Iron-On Sampler
    • Premium Vinyl Sampler Removable
    • Transfer Tape
    • True Control Knife
    • Cutting Mat Variety 3-Pack
    • Tools Basic Set
    •  Portable Trimmer

    I’ll give you an idea on the value of this bundle using current prices on the website. Even using current sale prices, the value of this is about $130. So that’s a $60 savings.

    But before choosing a bundle, you’ll want to make sure you’ll actually use the products that come with it. If you’re planning to work mostly with iron-on or heat-transfer vinyl (like you’d use making shirts), then that lowers the value of a bundle that includes only adhesive vinyl (which is like what you’d use for making decals).

    Are there machine maintenance things to worry about?

    One of the best things about Cricut machines is that they are extremely easy to maintain. Unlike some other crafting machines, they don’t require a lot of upkeep. Keep an eye out for any buildup of dust or cutting scraps that you might accidentally leave in the machine’s working area.

    I regularly wipe down all visible parts of my machine using a microfiber cleaning cloth and a multi-surface cleaning spray. Don’t spray directly on the machine. Spray on the cloth and then wipe down the machine. You don’t need to worry about opening and oiling or cleaning anything inside your machine.

    I hope this article gives you the confidence you need to order and unbox a Cricut machine! It’s an easy process, and if you take steps to prepare for your machine and educate yourself beforehand, you’ll be able to jump right in.

    If you have questions, drop them below! Otherwise, be on the lookout for a full review of the Cricut Maker 3 as my next post. And then I’ll cover the similarities and differences between the Maker 3 and the Cricut Explore 3.

  • Download my 11 free printable days of the week signs!

    This content may contain affiliate links. See my full disclosure here.

    If you need free printable days of the week signs, I’ve got you covered with 11 options! From plain black and white to fancy rainbow, there is something for everyone here. Enjoy!

    I have been trying to add more fun and educational things into my daughter’s spaces. She’s at preschool and they do an amazing job—she has learned so much! But why stop the learning fun at home?

    She loves playing pretend and being a teacher, so she often brings the songs she learns are school home. One is the days of the week song…”there are seven days…there are seven days…” If you’ve had a kid in school, you probably know it!

    So I out together a few cute days of the week printables for you all! Whether you’re a teacher, a parent, a caretaker, or anyone else who interacts with early learners, you’ll find these valuable.

    I also made these days of the week signs with printing in mind. For example, I have some with a lot of bold, bright colors—but I also have some that have either less color or an entirely black and white color scheme.

    I’m going to print the rainbow ones at Staples (love throwing those orders in online for pickup!) on cardstock and cut them out so my daughter can pick the day of the week every day. I think it would be fun to glue little magnets on the back of them and let her play with them on the fridge.

    I have the PNG files available, so if you want to cut these out on a Cricut machine, you’ll be able to easily upload the files to Design Space and convert them to cut files using the remove background feature.

    Like these? Also make sure to check out my 10 Free Printable 120 Charts, my 6 Book Tracker Printables for Kids, and my Morning Routine Printable for Kids!

    Want to download the free printable days of the week sheets?

    Want to download my free printable days of the week sheets? I use Grow by Mediavine to deliver most of my exclusive freebies. If you want to download all of these rainbow files, sign up below! It will unlock a link to my Dropbox folder that has ALL of my free educational and fun printables for kids.

    Here is a link to a Dropbox folder with all of the files!

    Pin these freebies here!

  • This is the only guide you'll need to use the Cricut EasyPress!

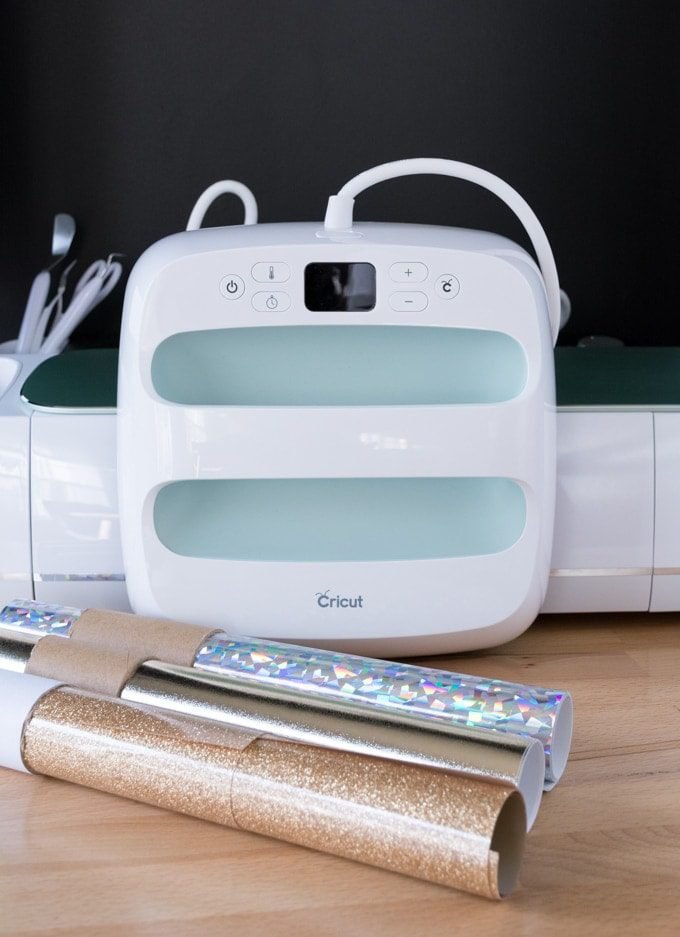
    This post shares the complete guide to using the Cricut EasyPress family of products, including both the original EasyPress and the updated EasyPress 2 options, to create professional-quality heat transfer products in your own home. I’ll tell you why it’s better than an iron, why you should probably get an EasyPress Mat, how to use it to create layered designs, and more.

    Today I’m sharing the complete guide to using your Cricut EasyPress to complete beautiful, professional-looking iron-on and heat transfer projects in your own home. Cricut’s EasyPress line combines the speed, accuracy, and reliability of a professional heat press with the approachability of an iron.

    It works great with traditional heat transfer vinyl, as well as the fun stuff like heat transfer foil, glitter, and metallic materials.

    The first thing to discuss in any complete guide to using the Cricut EasyPress is why it’s actually necessary in the first place. Until now, I have always used an iron for my heat transfer and iron-on projects. And almost all of them turned out good.

    I’m going to be totally honest with you—if you only do a few heat transfer or iron-on projects a year, you probably don’t need an EasyPress or EasyPress 2. But if you do a lot of crafting work, this bad boy will up your quality while also saving you time. And if you sell your products, you need a heat press to ensure uniform, professional results across your projects.

    The EasyPress and EasyPress 2 are both easy to use, do not require a press cloth for most projects, are great for layered projects, are compatible with all major brands of heat-transfer materials (not just Cricut), and help transfers hold up and look great through multiple washes.

    According to Cricut, there are three main factors that contribute to getting professional heat transfer results at home. Your household iron can meet some of these, but not all.

    Once you’ve read all about the EasyPress 2, make sure to check out my post on how to use the EasyPress Mini, including tips for working with glitter iron-on and wood!

    Your household iron is not designed to disperse heat evenly. It generates one hotspot in the middle, and the heat decreases as you get to the border of the iron’s plate. For this reason, iron-on projects done with a household iron usually require a barrier between the iron and the project, usually a thin cloth. This helps spread out the heat more, but doesn’t get you there totally.

    Heat transfer or iron-on materials adheres to a surface once it reaches a specific temperature. For example, this temperature will be different for foil iron-on than it would be for regular iron-on vinyl. All of Cricut’s heat transfer products have been tested with the EasyPress and EasyPress 2. You can use their Interactive Quick Reference Guide to see what settings you need to use for a given material.

    Speaking from personal experience, I think the EasyPress 2 does a much better job on metallics, foils, and other special items that aren’t plain ol’ vinyl. The temperature can be more difficult to control with an iron, and using the EasyPress can help you get the exact right temperature and time needed to ensure results that last. The only iron-on project I’ve ever had fail was actually

    A flat surface works best. And I don’t mean an ironing board. Cricut suggests using their EasyPress on a flat surface like a table with a Cricut EasyPress Mat. The mat provides the extra benefits of protecting the surface underneath from heat. 

    Cricut originally released the EasyPress in 2017, and it came only in a 9” x 9” machine. The company then release the EasyPress 2 in 2018, which comes in three different sizes: 6” x 7” (ideal for smaller items like baby clothes), 9” x 9” (ideal for everyday use), and 12” x 10” (ideal for larger format projects). 

    Both the EasyPress and the EasyPress 2 will up the quality of your designs. They have very similar capabilities. Cricut has a very handy guide outlining the differences between the EasyPress and the EasyPress 2, as well as a traditional iron and a lower cost heat press. 

    Here are the major changes the EasyPress 2 adopted:

    • Gets hotter—precise temperature control up to 400°F (205°C); the original EasyPress has precise temperature control up to 360°F (180°C).
    • Heats up quickly—up to 25% faster than the original EasyPress.
    • Has totally uniform, edge-to-edge heating.
    • Comes in different sizes with different price points.
    • Has a micro USB port that allows you to update firmware. 

    And here are a few other things the EasyPress 2 has that the original EasyPress doesn’t—these wouldn’t necessarily be something that would impact my buying decision personally, but you should be aware of them:

    • Different color choices (purely cosmetic—this in no way affects the quality of your heat transfer).
    • Ability to register the product online to receive educational materials and updates.
    • Streamlined safety base that keeps work surface up to 60°F cooler. 
    • Remembers time and temperature settings from last use. 

    Learn more about Cricut materials with my tutorials for how to cut leather, how to cut chipboard on a Cricut, how to cut wood with the Maker’s knife blade, and how use Infusible Ink on coaster blanks!

    The Cricut EasyPress Mat is a must have, in my opinion. Have you ever tried to do iron-on projects on a towel and ended up with a ton of moisture? Or on an ironing board and ended up with some wonky rippling in your design? The EasyPress Mat prevents all of this, all while being use to use and store.

    It’s soft but stiff, providing the perfect flat surface to press on. It eliminates moisture and directs heat where it needs to go: evenly dispersed across your project. And it also protects your work surface from the heat.

    The mat is made of a heat-resistant cover, a felt layer for moisture control, a foil lay to reflect heat back up to your project, and a silicone sponge layer to insulates your work surface and functions as a pressing pillow to absorb seams and whatnot (see section below about working with your EasyPress and seams/zippers!). 

    The EasyPress Mat comes in three sizes so you don’t have to buy a mat that’s bigger than what you need: 8in x 10in, 12in x 12in, and 20in x 16in. The mat is one-sided, and the internal layers are designed to help you get the perfect transfer. 

    You don’t have to use an EasyPress Mat with the EasyPress, but it was designed for it and makes things really seamless. You want to avoid ironing boards, corrugated cardboard, and silicone baking mats/aluminum boil, which gets very very hot.

    Using the EasyPress on smaller items can be a bit less straightforward. That’s because you want even pressure across a flat surface for your design to adhere, and seams and zippers can get in the way of that. Getting an EasyPress Mat is the best solution. Here are a few other ways you can work around those tricky spots.

    The best way to use the EasyPress on smaller items is to try to elevate the base material just enough so that the seam will not interfere with getting a flat press. You can do this by putting the item over a piece of thick cardboard that is about the same size. The cardboard should be totally flat with no folds, seams, or corrugation. 

    The seamed or zippered areas should “hang” over the sides of the cardboard. Remove the EasyPress immediately after your press time (usually 30 or so seconds) and let the cardboard cool completely before handling.

    You could also use a folded towel on a flat surface with your project on top of it. When you apply the EasyPress, the raised seam or zipper areas will flatten out since the towel material has a bit more give. 

    For something like a bag or pouch, you could also fold (not bunch up) a small towel and put it inside of the item, under the area where the design will go. This will bump up that area and allow you to avoid the seams, which will be lower.

    With all this talk about distributing even heat, you might be wondering if you can work with a design that is bigger than the EasyPress or EasyPress 2 surface area. The answer is yes, you can!

    One great tip from the folks at Cricut is to fold your base material in half and use your EasyPress to create small creases in the material. This will for a plus sign on your base material that will help guide you when placing larger items. 

    Begin at one corner of the design and press according to the setting outlined for your base and iron-on material. Once your timer beeps, move the heat press to a new section and repeat. It’s okay if the EasyPress overlaps just a bit with the previously heated area. Just make sure you don’t leave any gaps that have had no heat applied. 

    After you’ve finished applying heat to the entire design, flip your project over and apply heat to each area of the back for about 10 seconds. Remember to never slide your EasyPress. Always lift it and set it back down on a new area.

    If your large design uses multiple different types or iron-on material or several smaller designs, you might decide to peel off the protective liners as you go. Just make sure the heat press doesn’t touch the areas you’ve already peeled off. You can use the liners for protection as you’re working through your design.

    Layering materials is an easy way to add dimension to your heat transfer projects. (See my tutorial for how to layer iron-on vinyl for more!) In fact, there are many Cricut designs out there that are designed specifically with layering in mind. They have multiple layers that are placed on top or one another to create the final image.

    All Cricut iron-on products can be used in layering, but Cricut recommends using some materials as final layers only: foil, glitter, holographic, and holographic sparkle iron-on. Additionally, SportFlex Iron-On should be layered on top of other SportFlex Iron-On only—that’s from Cricut. I’ve never worked with SportFlex. For best results, don’t include more than four layers on designs.

    The first step is to apply the first—or bottom layer—of your design to your materials. To do this, using the recommended temperature setting for your materials, but instead of following the recommended time, cover your design with your EasyPress and apply firm pressure for 3 seconds. Use both hands and put some muscle into that pressure!

    Once the liner has cooled from hot to warm, carefully peel it off. Be super gentle because the design isn’t totally set yet. Then, repeat the 3 second firm pressure step for all of your remaining layers (except the final layer), making sure that your EasyPress doesn’t touch any exposed material. Also take care not to let the edges of your liners leave imprints in the already adhered material.

    For the final layer, apply firm pressure for 15 seconds (note: use only 10 seconds if you’re using foil iron-on), then flip the material over and apply 15 seconds of heat to the entire design from the back. Once the liner for the final layer cools from hot to warm, gently peel it off to reveal your fab design.

     %postname%

    Iron-on material is traditionally associated with fabric, but you can use the EasyPress to adhere iron-on designs to other bases like wood and paper. As with ironing on to fabric, your base material and workspace must be super flat so that the EasyPress can distribute heat evenly.

    Use Cricut’s Interactive Quick Reference Guide to find the right settings—make sure to change the base material! The process is very similar to applying iron-on to fabric.

    Simply place your design and set the EasyPress down over it. (Note: If you have to use something like a cloth between your base material and your EasyPress, you may need to bump the temp or apply heat for longer.)

    You don’t have to apply pressure—just let it sit there doing its thing. After the EasyPress timer beeps, burnish the design. I like to do this for most of my heat transfer projects, honestly. I take a balled-up paper towel and rub all over the design to help the iron-on film adhere as it cools. You can see me doing this in the video I have in this post.

    Now I’m going to share a real project using my EasyPress 2 and Cricut Everyday Iron-on in black. I’m using a cut file I designed myself.

    Safety Note: Do not use the EasyPress while small children or pets are around, and always return the EasyPress to its safety base when you’re not using it. Even when it’s not hot, it’s just good practice. The heat plate can get VERY hot and cause severe burns if you touch it.

    I cut my design from Design Space on my Cricut Maker. Make sure to always mirror your images when working with iron-on. Then I carefully weeded out the negative space using a weeding tool. 

    I set out my EasyPress Mat and laid my base material, a 100% cotton bag, out over the mat. I set my EasyPress 2 to the recommended settings for a 100% cotton base while working with Cricut Everyday Iron-on and the Cricut mat. Note that the settings can be slightly different if you’re not working with the Cricut Mat, so definitely make sure you check or uncheck that box.

    To change the temperature, I just clicked the temp button and then used the plus/minus buttons. The timer defaults to 30 seconds, which is what I needed. As for the lights, the orange one means your EasyPress is heating up; the green one and a beep means it’s ready to press! (Note: While it’s heating up and whenever your EasyPress is hot but not in use, keep it in its safety base.)

    Once the EasyPress light turned green, I pre-heated the my bag for about 5 seconds. (If you’re working with a wrinkled piece of clothing, this heat press will take the wrinkles out really quickly! Just make sure you let it cool before you proceed with your design.)

    Then I laid my design out carefully on the tote bag, set the EasyPress down over the design, and clicked the Cricut symbol to start the timer. No more clock watching or counting in your head with the EasyPress.

    I apply gentle pressure for the recommended 30 seconds. Remember not to move the EasyPress around like you would while ironing clothes with a clothes iron; this can mess up the design.

    After the timer beeped, I flipped my bag over and applied heat from the back for about 10 seconds. Then I returned the EasyPress to its safety base and flipped the bag back over. I used a balled-up paper towel to gently burnish the design through the protective sheet to ensure optimal adhesion as the iron-on stick cooled. (Be careful—it’s hot!) 

    Once the design had cooled from hot to warm, I peeled off the protective sheet to reveal my design. Your design may require you to wait for everything to cool completely. Check the Interactive Quick Reference Guide for specifics about your project.

    Share my complete guide to using the Cricut EasyPress on Pinterest!

  • Grab my free printable daily planner pages with a gorgeous cat theme!

    This content may contain affiliate links. See my full disclosure here.

    Looking for free printable daily planner pages? I have 6 available for immediate download! They have a cute cat theme and will help you plan your day with morning, afternoon, and evening time sections, as well as lists for priorities, tasks, and more. Enjoy!

    Alright it’s time for my third and final iteration of these cute cat-themed planner pages! The first was a minimal look with a wide-open “schedule” section with no times. You can check those minimal printable planner pages out here.

    The second option was a daily planner printable template with time slots. I am not personally a huge fan of using hourly time slots. I am just not that busy 🙂 But I know a lot of people are, so I whipped some of those up in these cute cat templates as well.

    The last version is these…and it’s probably my favorite to use for my own personal preferences. I love having sections for morning, afternoon, and evening. It’s a bit more structure than a totally blank schedule section, but less structured than the hourly schedule option.

    Like these? You might like my free printable plant watering tracker and my free plant-themed printable to do lists.

    So these planners have the sections for morning, afternoon, and evening, but the stuff on the right-hand side of the page is really my favorite. I often overwhelm myself with my to do lists when I do brain dumps on paper.

    Having a section for priorities and a second section for other tasks is meant to help you focus on what you really need to get done today. There are 6 task spots for each of these sections. And then below that, 3 spots for reminders of people you need to call or email.

    Because honestly, if you’re anything like I am, you often put off very simple calls or emails that will take you like 2 minutes to complete. So frustrating, but a shared universal experience 🙂

    If you have kids, you’ll definitely want to check out my free printable weekly chore charts, my printable sleep trackers, and my 11 free printable potty training reward charts!

    I use Grow by Mediavine to deliver most of my exclusive freebies. If you want to download this and ALL of my printable planner pages and to-do lists, drop your email below! It will unlock a link to my Dropbox folder with all of the files. And this includes my other printable planners, too!

    Here is a link to the Dropbox folder!

    Pin my 6 free printable daily planner pages!

  • How to Make Beautiful DIY Dollhouse Siding Using Balsa Wood

    Learn how to make DIY dollhouse siding using balsa wood strips! This is an easy and cost-effective way to customize your dollhouse.

    Alright guys, this is the second in a series of posts I’m doing about R’s new dollhouse! The first post covered the free PDF build plans for the DIY dollhouse, as well as a thorough step-by-step with tons of pictures. This post is all about cleaning up the front of the dollhouse with siding!

    I decided to make the front of the dollhouse, which is actually really the back when you’re playing with it, pretty for a few reasons. First, I really didn’t want to cut any corners on this project. And leaving the back looking like this meant that it would always have to be up against a wall. I wanted it to be beautiful on both sides!

    For more kid-related woodworking projects, check out my DIY dollhouse bookcase, R’s twin-sized house-shaped toddler bed, my DIY lego activity table, and my DIY water sensory play table!

    Second, R has a dollhouse at my mom’s house, and she really likes the doors and windows. I’ve watched her run around it from front to back making the people “walk” through the doors or wave out the windows. So I just felt like I she’d really enjoy having a fully functional dollhouse.

    So here’s what it looked like before I got started doing anything to clean it up. This is also before I attached the roof, so bear with me. The base material for the front is a super thin plywood I got from the craft store. Two 24″ by 48″ sheets was enough. I traced and cut these with my saw, cut out the windows and door with a jig saw, and attached everything using wood glue and nails.

    • Thin balsa wood strips from the craft store; browse similar here
    • Small hand saw; I didn’t have a miter box, but I would recommend one! Here’s a kit with both.
    • Measuring tape and pencil
    • Fine-grit sandpaper
    • Wood glue
    • Acrylic craft paint

    Since the base was actually made out of three pieces of custom-cut plywood, I painted the entire thing light gray. I figured that would be easier than painting several coats of acrylic craft paint once the siding was on! I did end up having to do a coat of paint post-siding application, but the base coat surely helped.

    I decided that working in major sections would be the easiest way to ensure I could keep things even and spaced appropriately. So I started by setting some boards down—some painted, some unpainted—to get an idea of spacing. I definitely wanted to make sure the rough jig saw cuts on the windows and doors were covered, and I wanted to make sure that the spacing was event between the pieces of siding that stretched the entire length of the house.

    I also thought it was helpful to use painter’s tape to hold my anchor pieces in place while deciding on spacing. For example, to begin work on the bottom of the house’s siding, my two anchor pieces were the sides of the front door and the piece that runs across the entire dollhouse and sits on top of the vertical door pieces. I also needed to make sure this long piece covered the bottom of the two windows and the top of the door.

    Once I decided on the placement of these pieces, it was go time! I measured, marked, and started gluing. It was definitely an exercise in patience, I’ll tell you that. And making sure I didn’t put too much glue on the back was a challenge. I wanted enough to ensure it would stay on, but not so much that it oozed out the sides when I pressed the piece in place.

    Next I repeated the same process I did for the base, except this time I worked on the middle chunk of the dollhouse. I needed to space my pieces so that one covered the seam between the two pieces, one covered the top of the bottom two windows, and one covered the bottom of the top window. You still with me?!

    Once I had decided on the placement of these three pieces, I began measuring, marking, and cutting the pieces to fill in between them. Oh, and I should also say, I measured, marked, and cut every single piece as I went. I wanted everything to be an exact fit—or as close to exact as I could get!

    This definitely slowed me down, but I think it was the best way to ensure the finished result looked professional and as clean as possible. You can see some of the pieces waiting in the background of the picture below. I had already checked to see that all of these pieces fit.

    Next I began filling in the top sections, both the very top area that required each piece to be cut at an angle and the section on either side of the top-floor window. This was exactly as tedious as you imagine! To get the right angle, I just cut one piece as a template and worked from that.

    There was one more seam at the top of the house that i wanted to make sure to cover as well. So you can see that piece cut at the top of the pic below. Once I had that one set, I cut pieces to fill in the gaps.

    So at this point I was getting REALLY excited about how everything was looking. However, I hit a really bit road block when I realized that my spacing was off in the three spaces between the two bottom-floor windows. Basically the slightly larger gap on the right side would look really wonky if I went with horizontal boards for that section.

    So…I decided to do vertical! This was also really great because I was able to use a bunch of smaller scrap pieces to fill in. And it’s also just nice to have some variation in the directions. It certainly took longer to do all of those small vertical pieces, but it was worth it 🙂

    Like kid crafts? See my tutorial for how to make a glitter sensory bottle, how to make a DIY piggy bank using an upcycled jar, and how to make a no-sew felt name garland!

    And here is the finished piece with all of the balsa wood siding glued on! I did end up doing an additional coat of paint over everything just to help it make more uniform. I slightly lightened the gray color too.

    I’m planning to add some more embellishments to this, obviously. A house number, maybe some faux vines, and potentially some faux flower boxes on the windows. I need to take an inventory of all of my scrap pieces!

    You’ll see I also used a few of the scrap pieces to finish framing out the balcony. I wanted to trim out the door to help polish the rough jig saw cuts (I am not the best at the jig saw), and these did the trick! I painted them black before gluing them on. Check out this before and after:

    Next week I’ll be sharing all about how I am working on wallpapering the inside of the dollhouse…and then on to trim in the inside and adding accessories and decor.

    Like this? Check out my post about 2 ways to make wallpaper for a dollhouse, as well as 7 dollhouse miniatures I made using my Cricut Maker! Then check out my finished dollhouse here 🙂

    Pin my tutorial about DIY dollhouse siding!

  • How to make DIY carpet powder using rosemary and lavender!

    This content may contain affiliate links. See my full disclosure here.

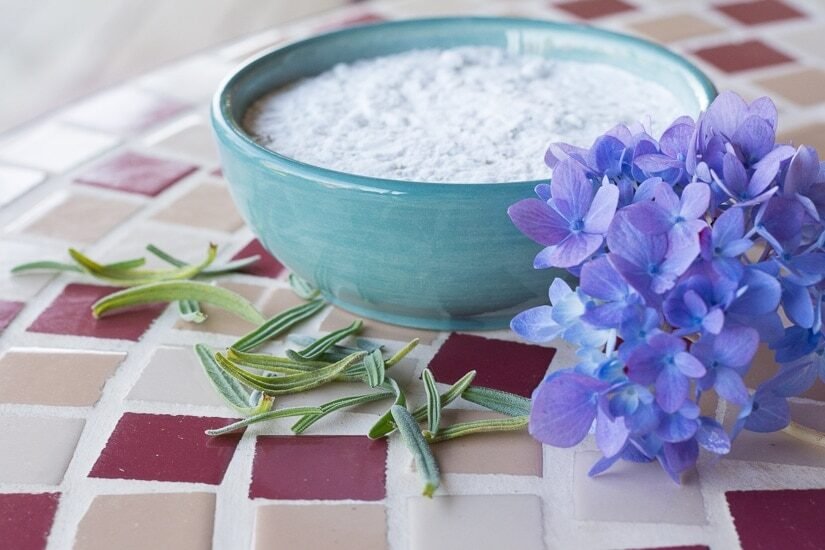
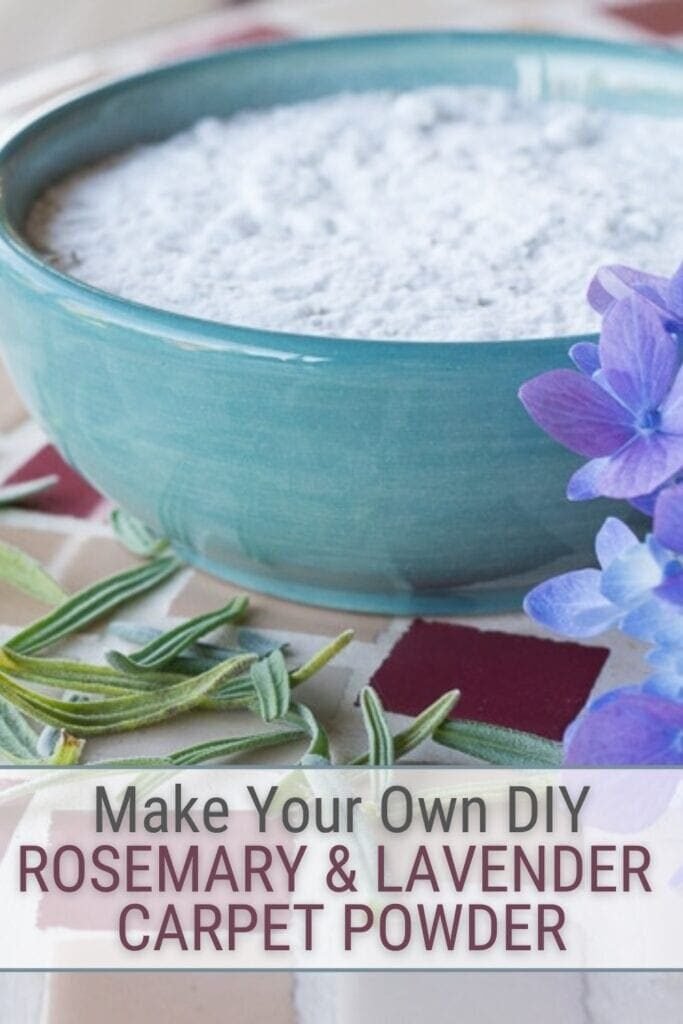
    Looking for info on how to make DIY carpet powder? I’ve got you! Learn how to make an easy rosemary and lavender carpet powder using a baking soda base.

    If you have a lot of carpet or rugs in your house, you know that one of the easiest ways to give your rooms a pick-me-up is by using deodorizing carpet powder before you vacuum. I’ve always used an Arm & Hammer “pet fresh” powder, but a few months ago, I ran out and decided to use plain old baking soda.

    After all, the carpet powder you buy at the store is about 96% baking soda, 2% artificial fragrance, and 2% other stuff (hydrogen peroxide, water, alcohols, etc.). And baking soda by itself is pretty cheap, especially when you buy it in big containers. Which I do because it can be used to so many things around the house.

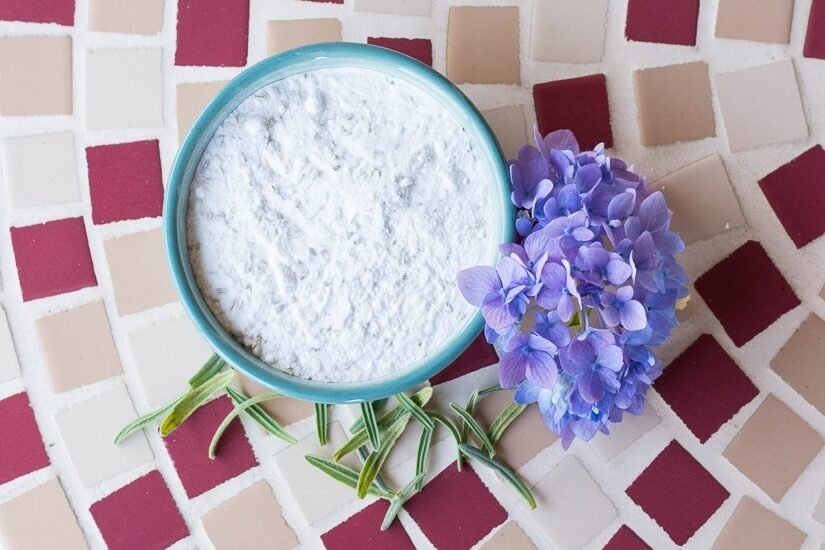
    The great thing about making your own carpet powder is that you can customize the scent each time. I’m using dried rosemary and lavender essential oil to scent mine today. I’d originally wanted to use dried lavender. But I already had dried rosemary on hand and didn’t want to wait on an Amazon order.

    I looove the smell (and taste) of rosemary, so I decided to use that as the dominant scent and throw in a bit of lavender oil as well. In addition to customizing the scent, you can decide how strong or weak you want it to be by just adjusting the baking-soda-to-scent ratio. In general, homemade carpet powder isn’t going to have as strong of a scent as the store bought brands, which use artificial fragrance. But the homemade version still smells really nice.

    diy-carppet-powder-4-8626916

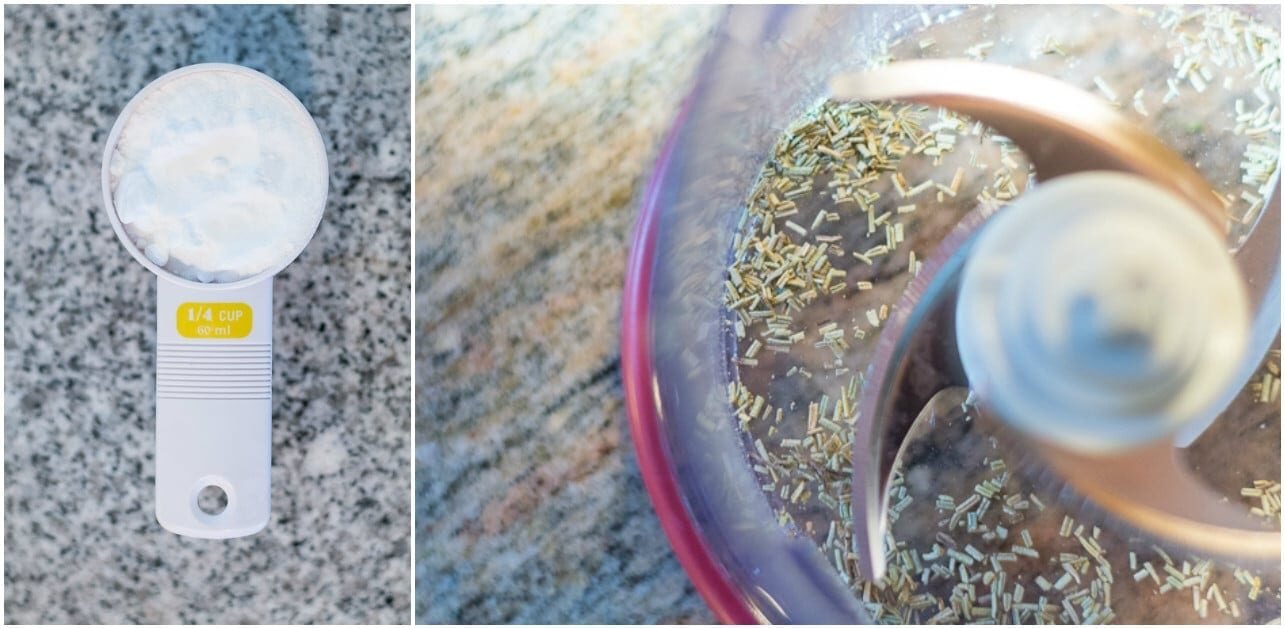
    • 1/2 cup baking soda
    • 2 tsp dried rosemary, which you can get here. But if you’re making a small batch, it’s probably better to just grab some out of your kitchen cabinet or pick up a little can at the grocery store.
    • Lavender essential oil
    • Food processor or knife, cutting board, and patience
    • Plastic baggie

    Step #1: First I chop my rosemary up using a food processor. The finer the rosemary, the more evenly it will spread out the scent over the carpet.

    diy-carppet-powder-1-1707082

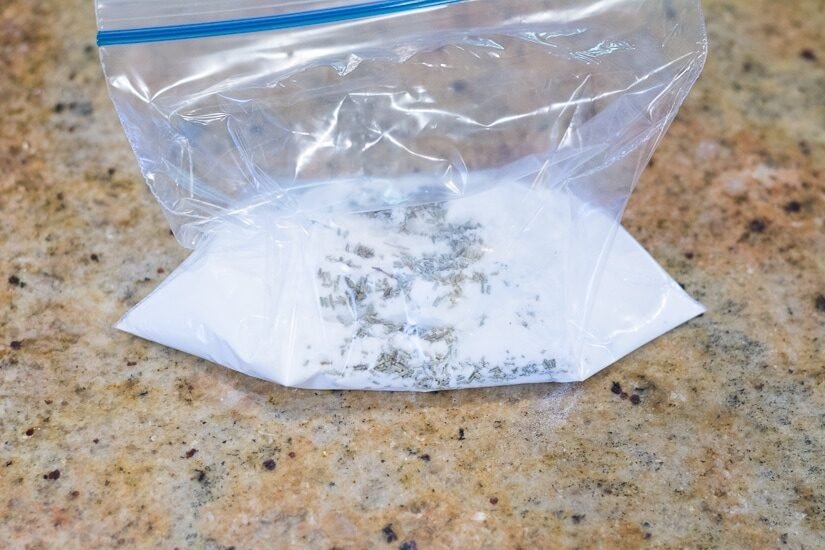
    Step #2: Next I dump the baking soda, rosemary, and five to ten drops of lavender essential oil into the baggie. Seal shut and mix everything up.

    diy-carppet-powder-3-6015363

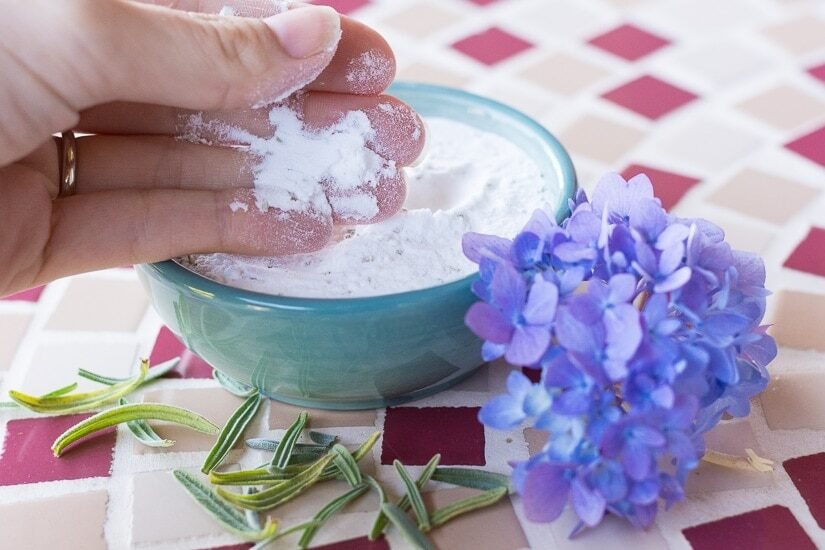
    Step #3: I simply sprinkle the mixture over my carpet or rug just as I would any other carpet powder. I let it sit for 15 minutes or more and then vacuum the room. I let my mom use mine, and she loved it!

    Like this? Check out my homemade soft scrub cleaner, my upcycled wine bottle bud vase, and my tips on painting upcycled glass jars!

    diy-carppet-powder-6-9725572 diy-carppet-powder-5-3782467

    Note: If you Google “essential oils and pets,” you’ll probably find articles about how certain essential oils are toxic to pets. However, many of these articles are about what happens when you put essential oils directly on to your pets and they ingest them (or when you just straight up feed them to your pets). Think homeopathy for pets. I don’t recommend that people or pets ingest essential oils, and I think that a few drops mixed in to baking soda, dispersed over an entire room, and vacuumed up is fine. I’m sure they eat worse things when we’re not looking. If you have any questions, you should always consult your vet. 🙂

    Like this? PIN IT!

     %postname%  %postname%

  • How to sew an envelope laptop sleeve, a great beginner project!

    This content may contain affiliate links. See my full disclosure here.

    Learn how to sew an envelope laptop sleeve! This tutorial has no zipper and is the perfect project for beginners looking to try something new and branch out from super basic sewing projects.

    When I saw this fabric in Jo-Ann one day, I knew I had to make something out of it. It doesn’t really fit anywhere in the apartment, but I’ve been wanting to make a new laptop sleeve for a while now, so I thought that’d be the perfect thing for it.

    This is a pretty easy project that you can customize to fit your laptop or tablet. I chose to do an envelope-style flap with a Velcro closure because I thought that would be a bit quicker and easier than doing a button or zipper closure.

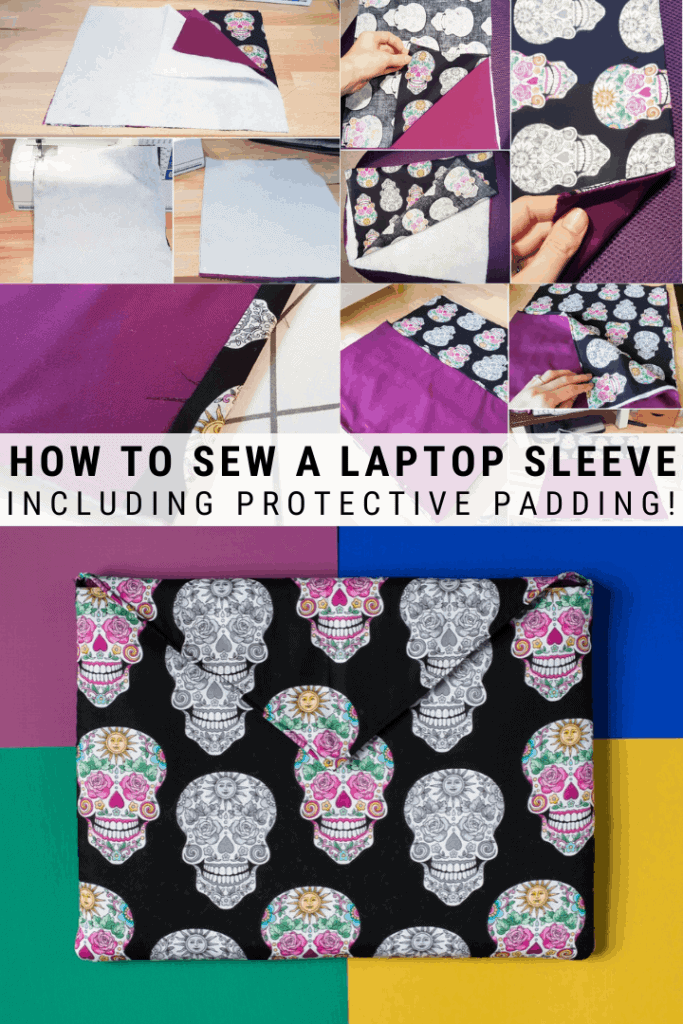
    Here’s the final product! Ahh, I’m so happy with it! If you want to make an envelope laptop sleeve like this one, read on for a supply list and step-by-step instructions.

    • Decorative fabric—browse similar to what I used
    • Cushioned fabric—I used crib batting
    • Lining fabric
    • Hook-and-loop and fabric glue—I use Aleene’s
    • Sewing machine, scissors, measuring tape, pencil
    • Iron and ironing board (spray starch is also helpful)

    Before getting started, measure the height and width of your laptop; mine is 12 in x 9 in. You’ll use these numbers to create your pattern.

    You’ll make two patterns: one smaller piece that will be the front of your sleeve (the part that the envelope closure folds over), and one bigger piece that will wrap around from the back of your laptop and become the envelope closure.

    • The smaller piece’s measurements will be your laptop’s measurements + 1 in. Therefore, my smaller piece’s measurements were 13 in x 10 in. The extra inch is to account for your seam allowance and a bit of wiggle room for the laptop.
    • The bigger piece’s measurements will be the same as the smaller piece’s, except you’ll add 7 in to the height. 

    Note: If your decorative or lining fabric has a pattern like mine—one that doesn’t look the same when it’s upside down—you’ll need to cut the flap fabric from the bigger piece, flip it right-side up, and sew it back on. If you do this, just add 7.5–8 in to your bigger piece instead of the 7 in specified above.

    Like easy sewing projects? Check out my tutorials for how to sew a simple circle skirt, how to sew envelope pillow covers, and how to sew a sewing machine cover!

    Using your measurements, cut six pieces of fabric: three smaller pieces and three bigger pieces. You’ll have two piece of decorative fabric, two pieces of batting, and two pieces of lining.

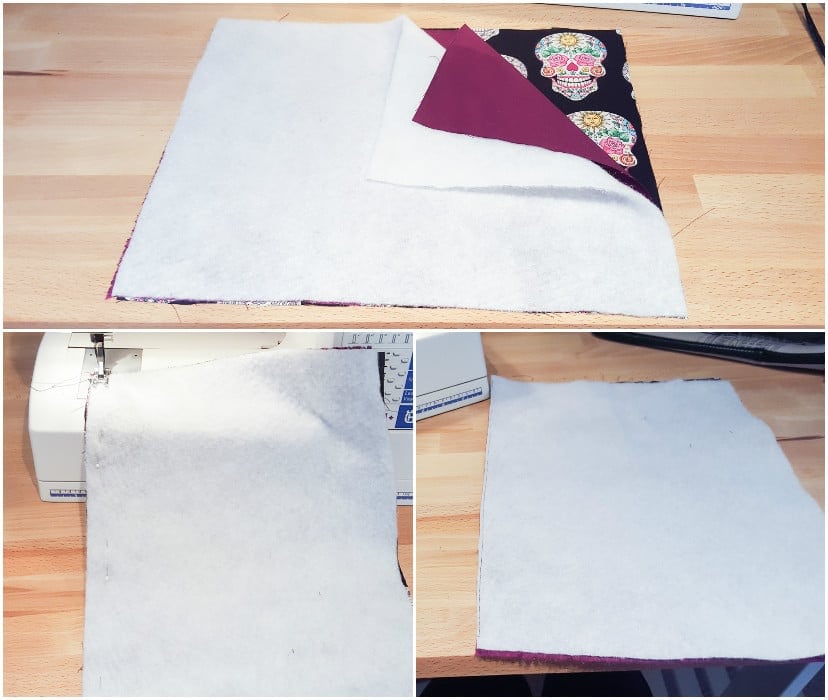
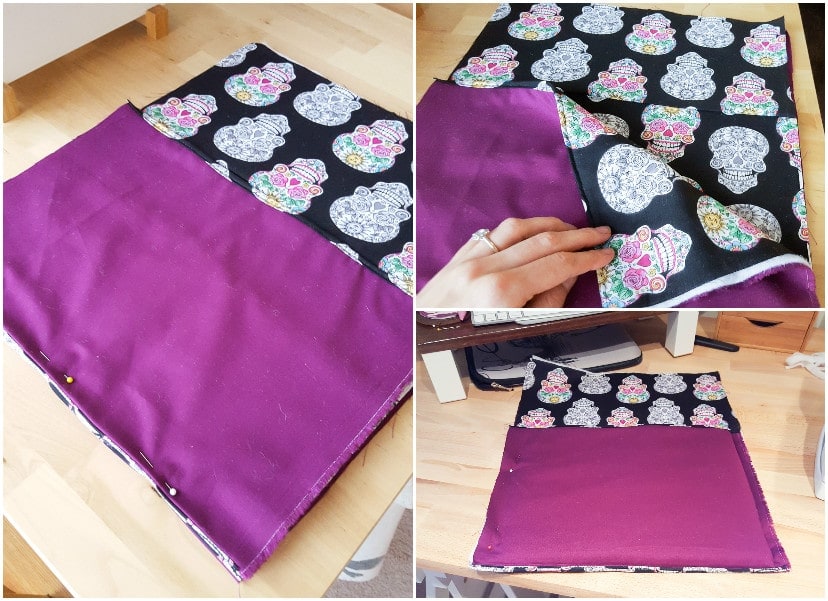
    Work with the three smaller pieces first; lay them on top of one another as pictured below. The batting should be on top, and below that should be the lining and then the decorative fabric. The lining and decorative fabric should have their right sides facing one another.

    Sew a straight seam along the bottom using a 5/8 inch seam allowance (the same seam allowance you’ll use throughout this project).

    Flip the decorative fabric forward so that it covers the batting. Press the seam. Then repeat steps 1 and 2 on your three bigger pieces (not pictured).

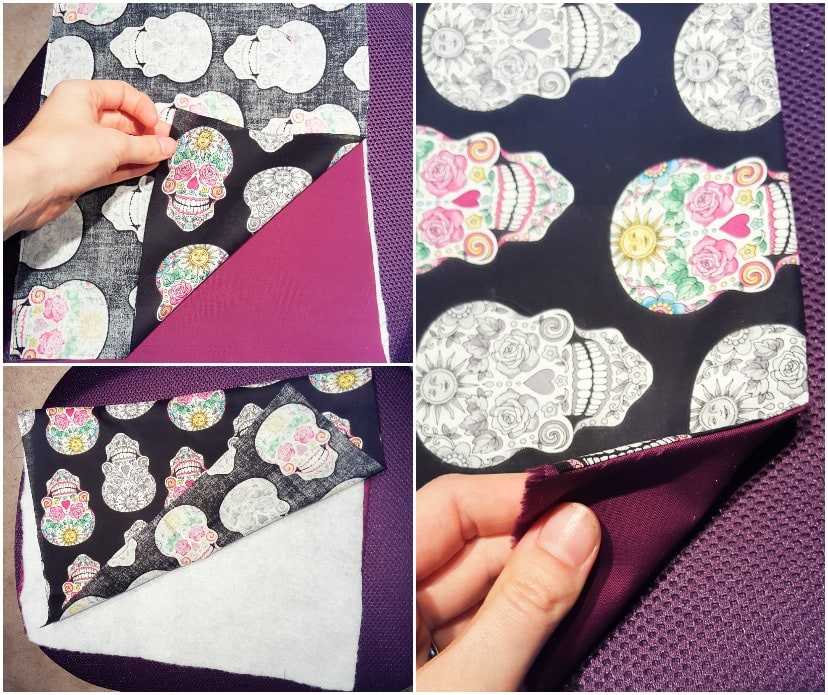
    If you have fabric that looks different when it’s upside down, cut the flap off, flip it around, and sew it back on now (also not pictured, but you can see what I mean in the first photo collage for step 4!).

    I hemmed the exposed edge on the front (the smaller piece of fabric) before sewing the pieces together. Here’s a peek at what that process looked like.

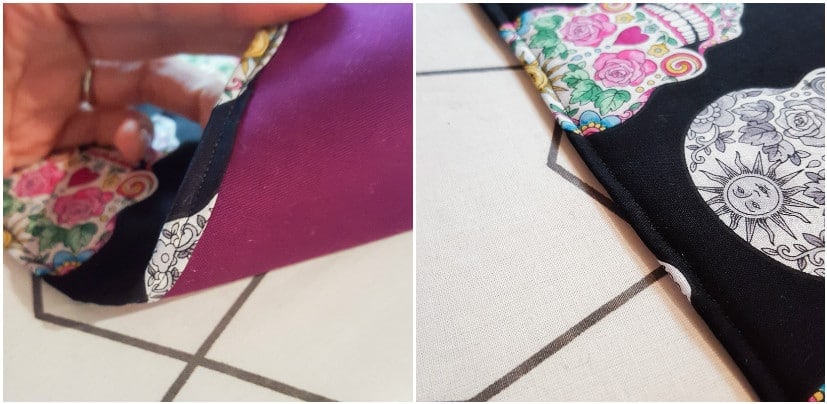
    To create a clean edge, I trimmed down the batting (below, top left photo). I folded and pressed my lining fabric over the batting (below, top right photo) and then folded and pressed the decorative fabric over that (below, bottom photo).

    I don’t have a serger, so instead I sewed a straight seam across the hem and then trimmed the excess fabric very carefully with tiny scissors. I have these scissors; I don’t use them often, but when I do, they are a lifesaver.

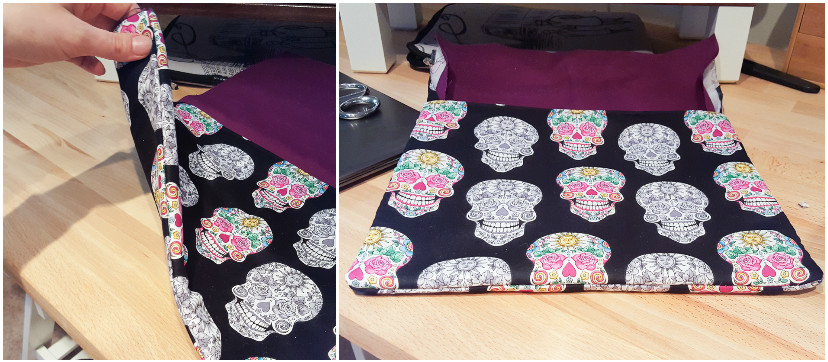
    Put the two pieces together with the right sides facing one another and pin in place. Sew them together along the bottom and both sides, making your laptop pouch.

    Flip right-side out and give your seams a quick press. The seams will be a bit bulky because of the batting.

    Trim the flap fabric down into a “V” shape, then hem the edges just as you did in step 3. Use fabric glue to adhere hook-and-loop on the inside of the flap.

    And here it is! I could not for the life of me get all of the little white batting fuzzies off of the fabric for these pictures, but they’re gone now. I used machine-washable fabric, so I can easily run this through the wash if I need to.

    Pin my tutorial about how to sew an envelope laptop sleeve!

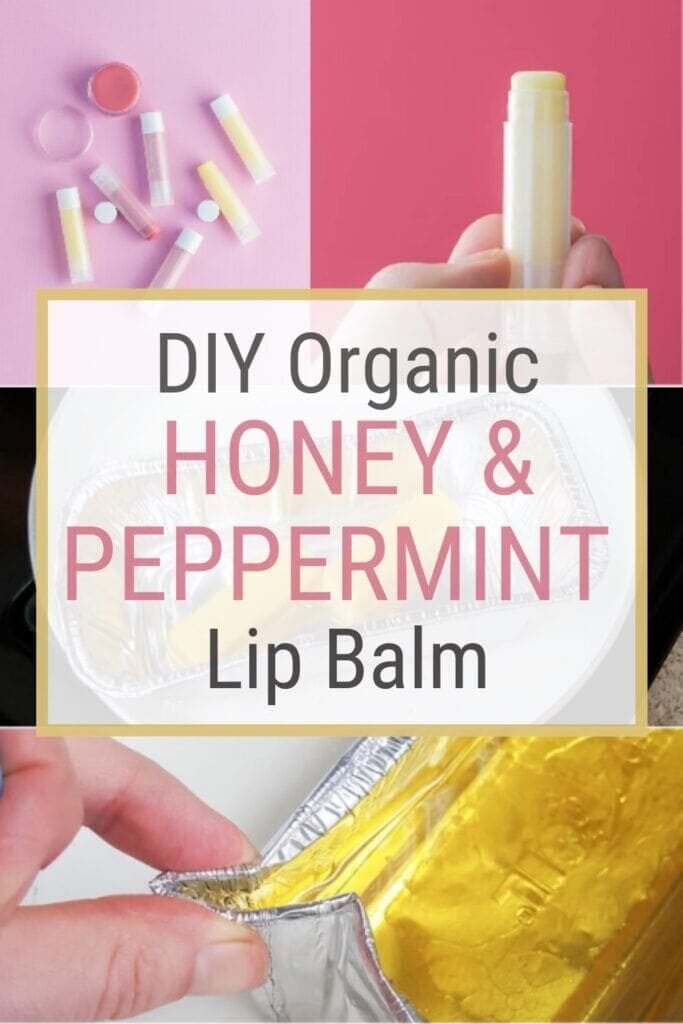
  • How to make easy DIY beeswax lip balm with honey and peppermint

    Learn how to make DIY beeswax lip balm with honey and peppermint, as well as just a few easy ingredients and an hour in the kitchen!

    I am doing a DIY lip balm post a year after I’d intended to. That has to be a record, right? Do I get a prize? No? Ok.

    I made my first batch of DIY lip balm last year at this time. I was happy with the result (after revising the recipe three times during the cooking and testing process) and have kept it at my desk at work for the past year. Well I finally ran out a few months ago and am just now getting around to cooking up another batch.

    I decided to revise the recipe again, though, because this time I’d planned to put the balm into tubes instead of little lip gloss pots. That meant that I had to ensure the mixture was solid enough to not get smushed in the lip balm tube, but I didn’t want to lose any of the sheen or softness by adding too much beeswax back in.

    So after a little experimenting in the kitchen, I settled on a recipe that I think turned out quite well. I also added in honey for this round. I love it combined with the peppermint.

     %postname%

    (Don’t use any ingredients you’re allergic to, and always spot test new ingredients to make sure you don’t have a reaction to them. Do not use any homemade products without consulting with an appropriate medical professional first.)

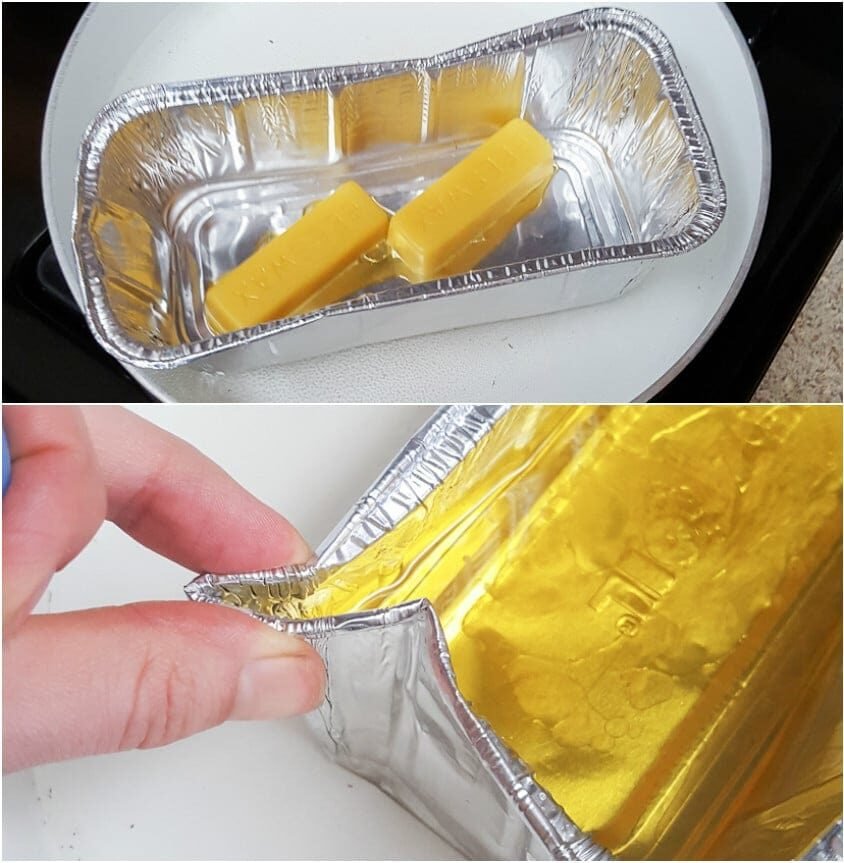
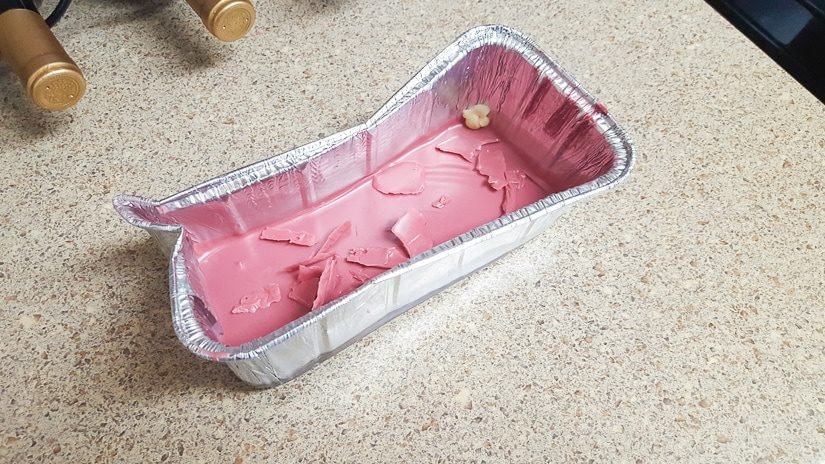
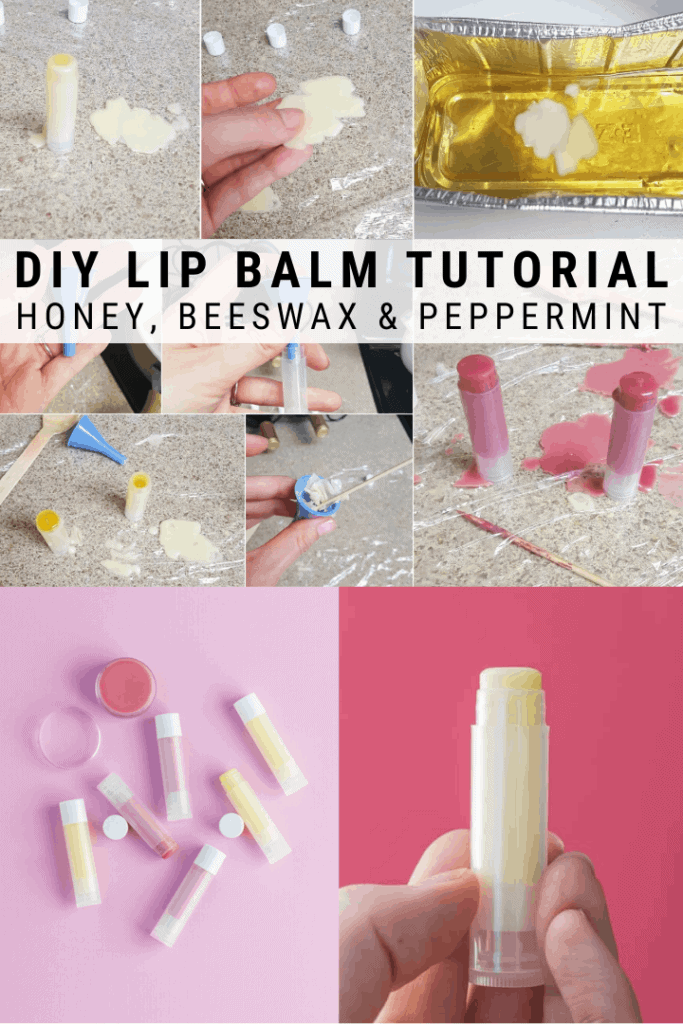
    First I heated up about an inch or two of water in my pan. While the water was heating, I put the disposable aluminum tin in the pan and dumped the beeswax, coconut oil, shea butter, and honey into the tin (not the pan!). This is a double boiler method. Never heat beeswax without a double boiler method.

    I stirred the mixture in the tin until it melted completely, then I turned the heat down to low and added the peppermint and rosemary oils. The goal here is to keep the mixture warm, but not so hot that I couldn’t handle the tin. When it was safe to touch the tin, I pinched one of its corners to make a little spout.

     %postname%

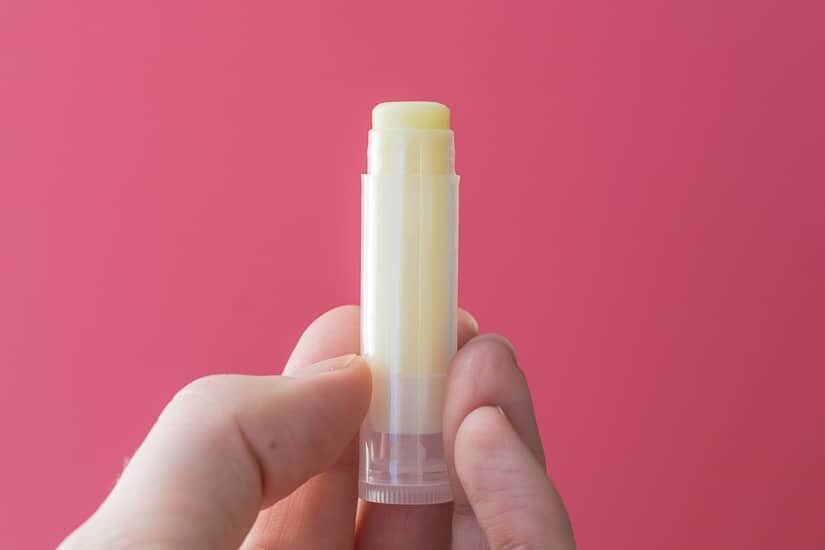
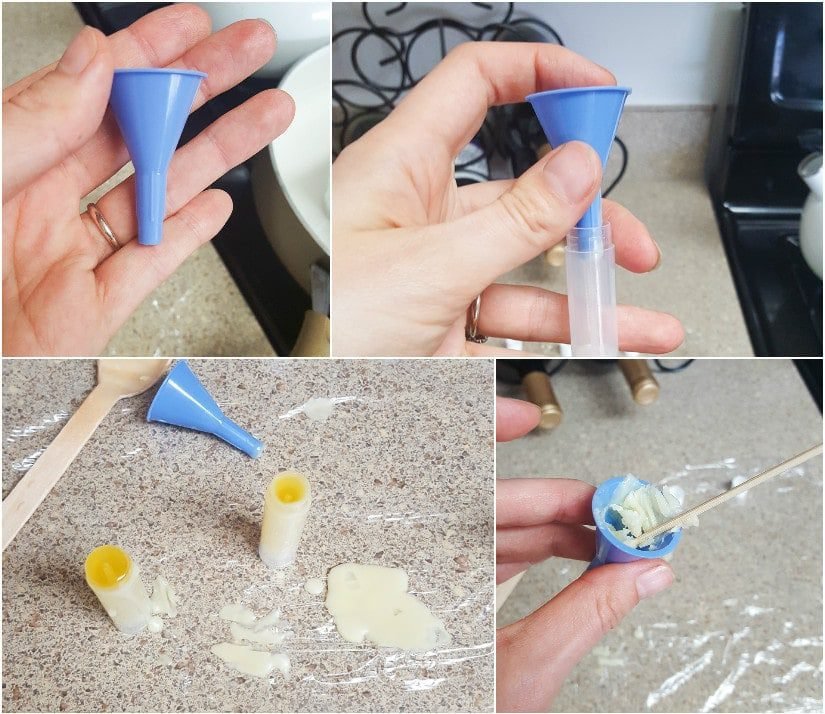
    I laid a piece of saran wrap on my work space, then I grabbed my funnel and started pouring into the tubes! The tubes will fill up fast, but don’t worry—it’s fine if they overflow a bit. In fact, I prefer overflowing them because it gives the tip a nice smooth, rounded, professional-looking finish. Spillage is easy to clean up once it solidifies, which will happen quickly!

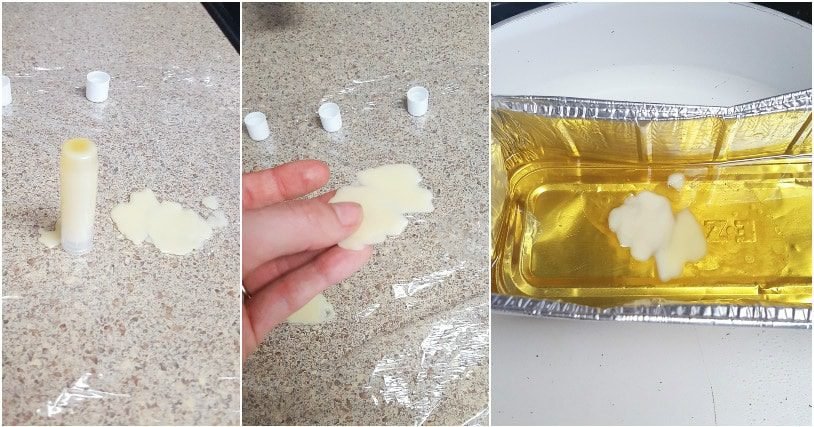
    As I was pouring, my funnel began to clog. When that happened, I just grabbed a toothpick, scooped out the wax, and dumped it right back into the aluminum tin to re-melt it. I did the same with any spillage.

     %postname%  %postname%

    Like this DIY lip balm? Check out my DIY eucalyptus salt scrub recipe, my baked bath salts recipe, and my shea and lavender whipped body butter tutorial!

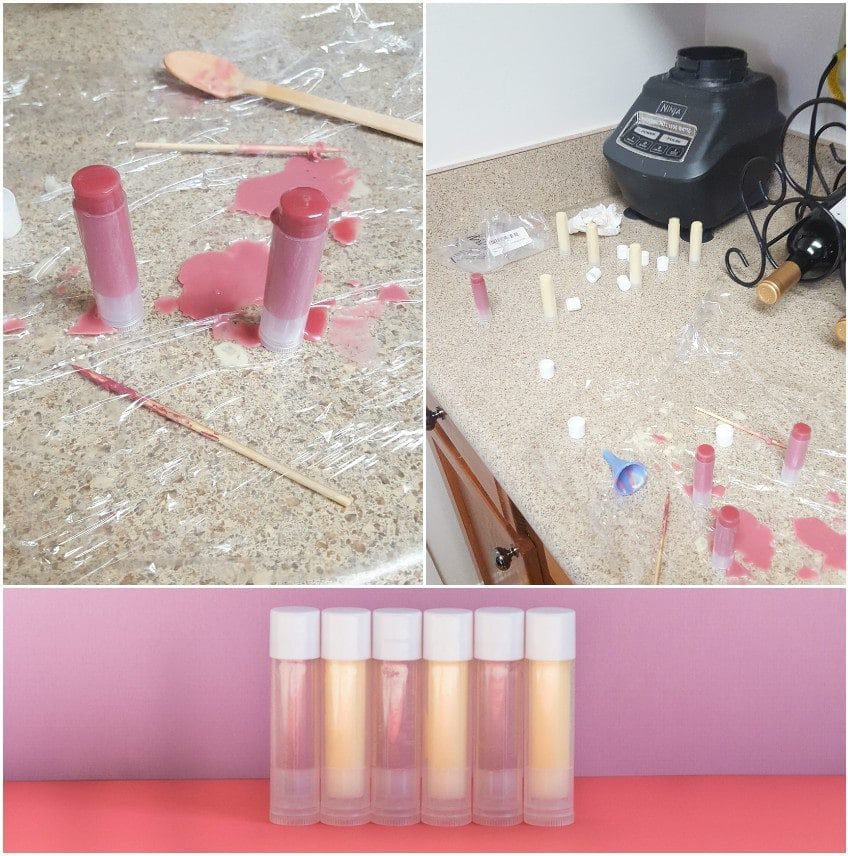
    When I’d finished pouring and the liquid in the tubes had solidified but was still warm, I grabbed a paper towel and wiped off overflow from the sides of the tubes. This is easiest to do when the balm is still a bit warm. If the tubes were extra sticky, I put the caps on them and gave them a rinse with a bit of soap and water.

    The saran wrap made clean up super easy since I could just ball it up and chuck it. Same with the aluminum tin. I actually had some leftover mixture, so I just wrapped it up and popped it in the fridge. I made a double batch and ran out of tubes, so I am saving my tin of wax to make some more as soon as the rest of the tubes arrive.

     %postname%  %postname%

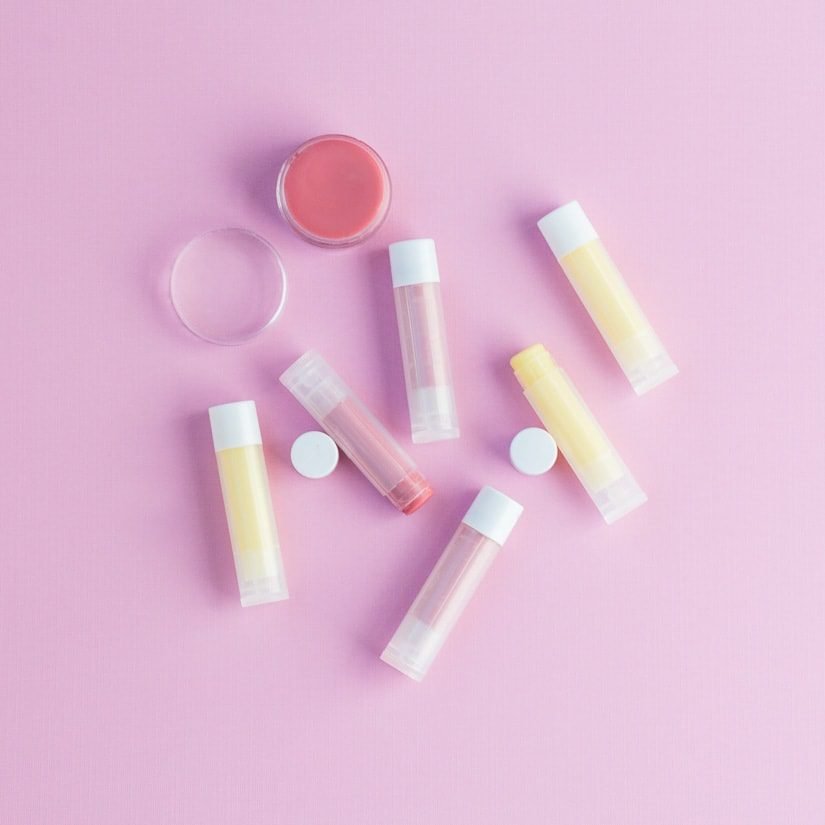
    And there you have it! I had a leftover lip balm tub from last year, so I filled that as well. 🙂

     %postname% diy-beeswax-lip-balm-pin-3-1116533 diy-beeswax-lip-balm-pin-2-3113043 diy-beeswax-lip-balm-pin-1-6856011

  • 6 free snowflake SVGs for instant download!

    This content may contain affiliate links. See my full disclosure here.

    Looking for free snowflake SVGs? I have 6 gorgeous options for you to choose from—download instantly for all of your personal crafting needs!

    It’s about that time of year where I live—the temps are dropping, and I’m starting to think about SNOW! Snow was a lot more when back when I might get off work for it. Thanks to teleworking, that’s no longer the case 🙂

    But it’s still a fun excuse to hole up inside and do nothing. And, of course, with a kid, snow definitely takes on a new level of excitement! She’ll still get snow days and get to enjoy it.

    So to celebrate my excitement about the weather turning, I’ve got 6 free snowflake SVGs up for grabs today! These freebies are perfect for all of your personal Cricut (and other cutting machine) crafting needs. If you’re interested in using these for commercial purposes, drop me a line.

     %postname%

    There are 6 options to choose from, and when you sign up, you’ll get all 6. I’ve mocked them up on various things to show you what they look like, but they are pretty classic snowflake designs.

    They are intricate, but not so intricate that weeding them after cutting will drive you mad. Some have more intricate cuts than others, so you’ll surely find exactly what you need for your project! Have a look—

    Like these? You’ll love my free butterfly cut files, my free pumpkin cut files, and my guide on how to convert JPG files to cut files for your Cricut crafting!
    I use Grow by Mediavine to deliver most of my exclusive freebies. If you want to download all of the files, drop your email in the signup form below! It will unlock a link to my Dropbox folder with all of the files. As a bonus—the link will give you access to all of my free cut files. Enjoy!
    Here is a link to the Dropbox folder with all of my free cut files!

    Pin my 6 free snowflake SVGs!