Category: Uncategorized

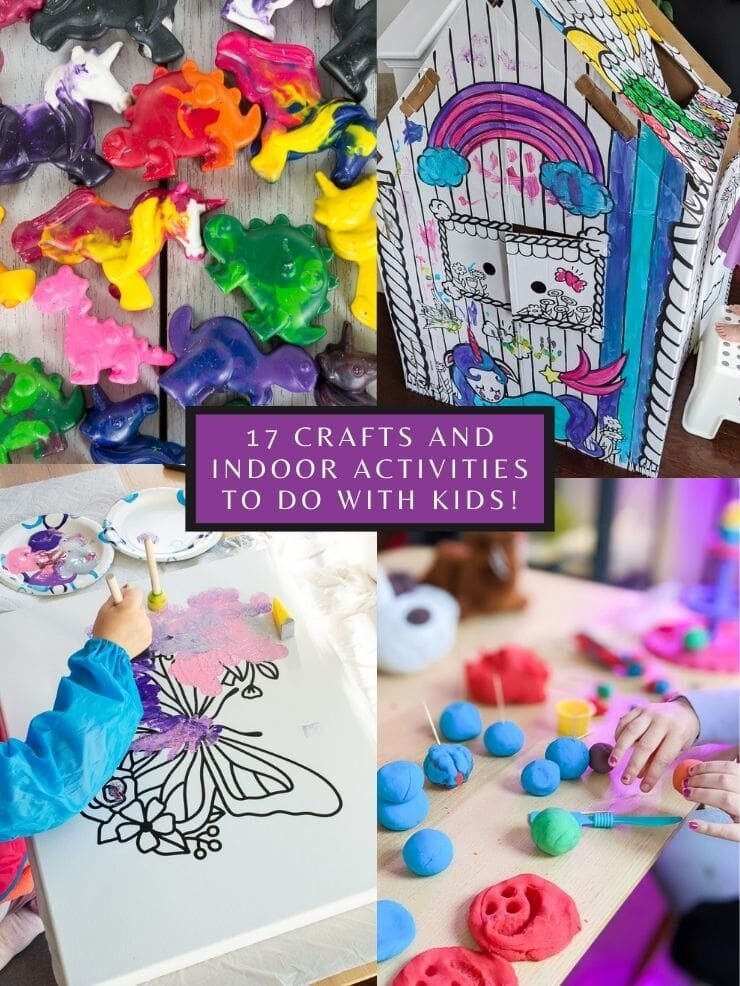
  • 17 super fun indoor activities and crafts to do with kids!

    Are you looking for indoor activities and crafts to do with kids? Here are 17 fun ideas that I’ve actually done with my daughter!

    Hey all! We’re deep in the depths of winter over here, and I don’t know about you, but I go NUTS when I’m stuck indoors. Add a 4-year-old into the mix, and it’s a recipe for stir-craziness.

    There are a lot of posts out there already all about indoor activities and crafts to do with kids…but I had to throw my own into the mix! That’s because all 17 of the crafts and activities in this post are things I’ve actually done with my daughter.

    And I have posts for almost all of them! So I figured it would be nice to throw everything together into one post. From homemade playdough and slime to making personalize t-shirts and melting crayons in silicone molds…you’ll find something to do here!

     %postname%

    First up we’ve got homemade slime! My daughter and I tested out 5 homemade slime recipes and shared our results, including our favorites.

    We made sure to test options with and without sand, with and without fabric softener, and a few other ingredient changes. Definitely check out all of the steps, recipes, and pics of the process!

    Popsicles are amazing. And sometimes you just have to make your own! I grabbed these adorable flamingo-shaped silicone popsicle molds and made popsicles with orange juice.

    This is the perfect thing for a sick day! Just keep in mind that straight-up orange juice will thaw a bit faster, so you might have to eat a bit faster, too. And it’s very sticky when it melts 🙂

    This one isn’t as much of a craft as it is an activity. But there’s really nothing like a daytime tubby to reset a difficult day! You can use a ton of stuff for an activity in the tub, and this day we chose balloons.

    I blew up a few balloons I had left over from R’s birthday, and then I filled up a few more with water. I kept them small so they wouldn’t pop, and it created a good effect where the water balloons sunk a bit and the air balloons floated!

    If you want to get outside and get some fresh air, take a walk and collect some unicorns. My daughter had a lot of fun stringing acorns onto twine (after I drilled a hole in them) and adding beads.

    If it’s not the tie of year for acorns, you can just do beads and make different patterns. Or find something else outside and get creative! You can see the whole DIY acorn and wood bead tutorial post for more.

    We also decided to make a tub version of the DIY sidewalk chalk paint we did a few years ago! This recipe was super simple, too. I put cornstarch in a bowl and added a bit of water until it became the consistency of paint.

    Then I added food coloring to make them different colors. This definitely makes a mess in the tub, but my daughter had a lot of fun! I just gave her a paint brush and let her do her thing. Easy cleanup, too.

    I decided to introduce my daughter to air dry clay a few months ago because she is getting old enough to start experimenting with different craft-related things. She had fun!

    I made a little clay pot, and I taught her how to make pinch pots. She also did a hand print ornaments that we later painted. See my full air dry clay tutorial post for more.

    My post about how to make a glitter sensory bottle was one of the first posts I put up on this blog 🙂 We made a few of these one day to kill some time, and while they didn’t take long, my daughter has had fun playing with them for over a year now.

    This is one of a few crafts in this post that require a Cricut machine to create. My daughter LOVES making custom shirts using our Cricut! I let her pick a design, and then she runs the Cricut machine to cut it out.

    Then she helps me transfer the design (just be careful because this involved a heat press or iron). The designs she makes are some of her favorite shirts. See my post on the best Cricut machine for making shirts for more!

    Homemade playdough is something I remember loving when I was a kid, so why wouldn’t my daughter love it, too? We did something similar to what we did with the slime test post.

    I gathered a few popular homemade playdough recipes, and we tried them all! They have small differences, and our homemade playdough test post includes lots of photos and our favorites!

    This DIY matching game project requires a Cricut machine—but if you don’t have one, don’t worry! You can easily make a homemade matching game using lots of other things:

    • Images you print and glue on
    • Drawings
    • Photos
    • Stickers

    What do you do with all of those crayons your kids break? I remember melting them into muffin tins when I was little. We decided to have a little more fun and melt ours into dinosaur and unicorn silicone molds!

    My post on how to melt crayon in silicone molds also has a couple of tips on the different ways you can melt crayons.

    This was a game we came up with during our post-COVID quarantine. I taped down a big piece of paper and wrote numbers in a bunch of circles. Then I gave her some little pebbles and asked her to count out the right number for each circle.

    This was a great way to practice numbers and keep her occupied for a while not just sitting at a table.

    I made this personalized door hanger for the little girl neighbor. I would have loved this kind of thing when I was younger—and bonus points if the kid can pick the design and colors!

    For the unicorn and name I used a Cricut machine, and the door hanger is a painted wood one from Michaels. However, if you don’t have a Cricut, you can use paint and stickers to decorate it.

    I love introducing my daughter to new crafting mediums, and she loves getting to try out stuff from my craft closet. Getting to try my “big girl” acrylic paints was a huge day for her!

    We stuck a vinyl butterfly down on canvas and I let her sponge paint purples, pinks, and grays over the whole canvas. Then we removed the butterfly to reveal a design. It turned out beautifully, and you can check out the whole easy acrylic painting for kids post for more!

    This is the last craft project on the list that requires Cricut supplies…but I couldn’t resist sharing! We used special markers and our mug press to infuse a design my daughter made on a blank mug!

    These were awesome Christmas presents that she was able to make for my parents and for my grandmother. And they will last forever, dishwasher-safe! See the full post about how to infuse a drawing onto a mug for more.

    My daughter doesn’t do dance, but like a lot of little ones, she loves the idea of ballet and ballerinas. So I picked up a few 6″ rolls of tulle and we made a dress-up tutu!

    This only requires a little bit of hand sewing using needle and thread to create the elastic band. See the whole tutorial for how to make a tutu, including tips on complete no-sew methods.

    A colorable cardboard playhouse is the real MVP of entertaining kids indoors! It’s like a giant coloring book that you can also play in. Functional doors and windows, too!

    My daughter was 2 when we first got her one, so she mostly just slathered paint all over it and used dotters to make dot art. However, she is a bit older now, and I’d love to try this again! We did a whole colorable cardboard playhouse review, too.

    Pin my post about 17 indoor activities and crafts to do with kids!

  • 21 cards with free printable tumbler care instructions, download instantly!

    This content may contain affiliate links. See my full disclosure here.

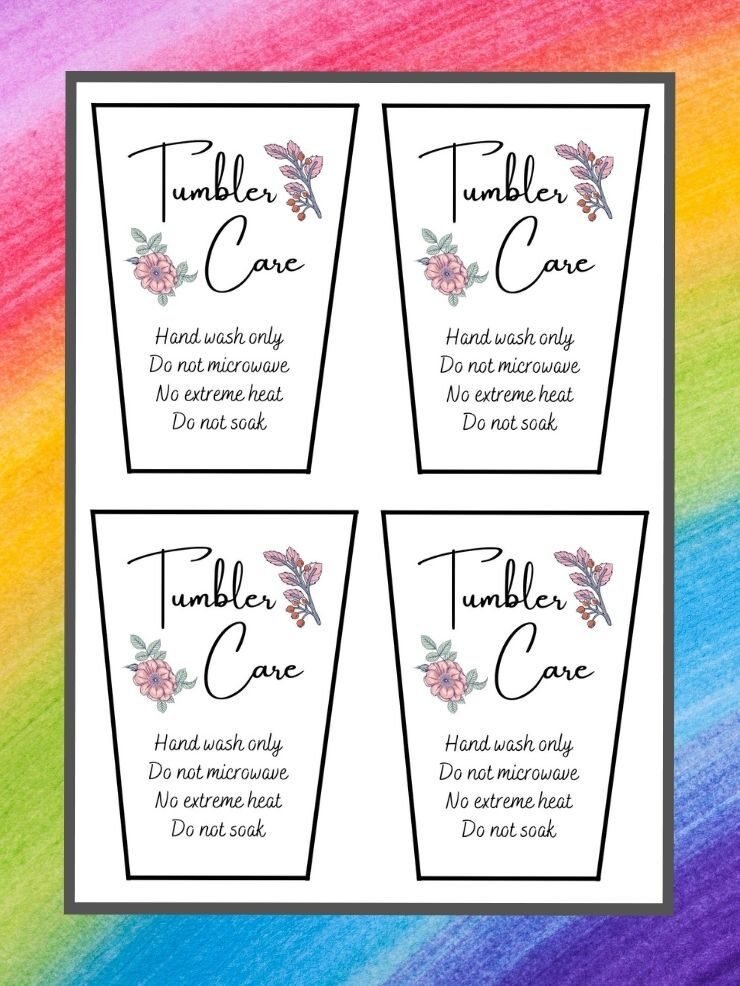
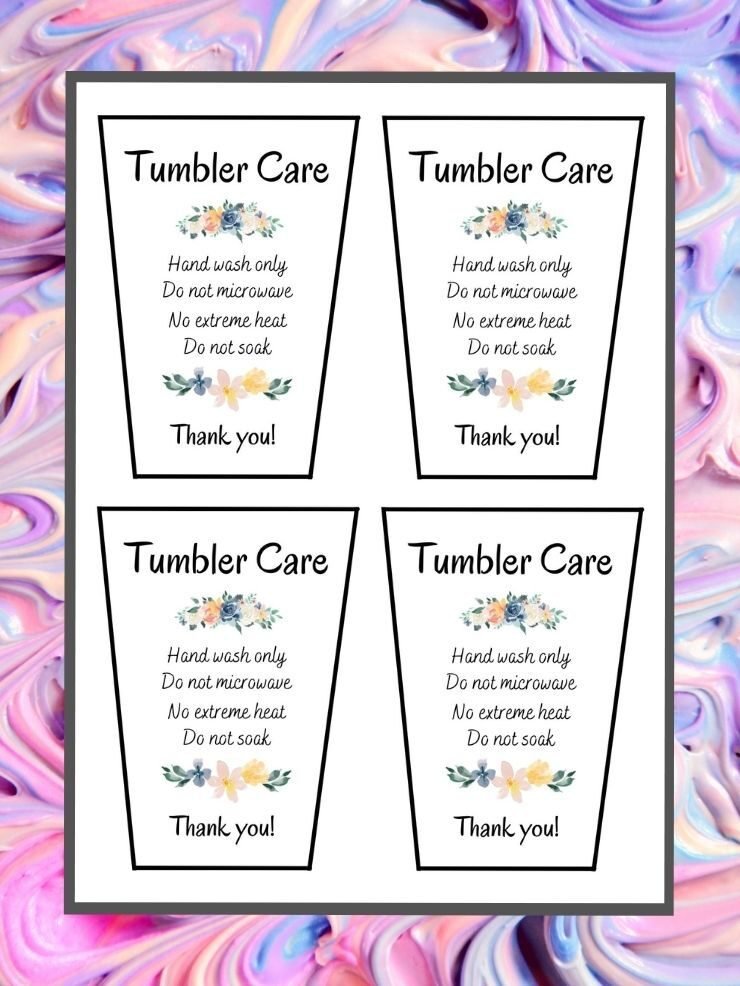
    Looking for free printable tumbler care cards? I’ve got you! I put together 21 cards with free printable tumbler care instructions that you can print and use!

    Hey all! I’m guessing you landed here because you own an Etsy shop or something similar and are looking for cards with free printable tumbler care instructions on them. Well, you’re in the right place!

    Tumbler care cards are a great extra touch to add in with the personalized tumbler projects you send out. That’s because tumbler care is a little bit different than caring for a regular cup, and not everyone knows that.

    You definitely want your customers to be able to appropriately care for their purchase and not ruin the tumbler. Instead of putting the instructions on a plain piece of paper, throw in a care card they can pop up on their fridge!

    I put together 21 different free printable tumbler care cards with a bunch of different styles. You can instantly download all of them and pick which ones you want to use.

     %postname%

    Like these? Check out my 25 free printable thank you tags for any occasion, my free printable plant-themed daily planner page, and my free printable weekly chore charts for kids!

    When you are using something for profit, no matter if you’re selling tumblers to 2 people at a craft show or fulfilling 1,000 orders a month on an Etsy shop, you need something that is for commercial use.

    If you are just making a tumbler for a friend for a gift and don’t have a business—maybe you just do a few projects on the side here and there—then that’s personal use.

    A lot of the cards with free printable tumbler care instructions you’ll find online are not for commercial use. Lucky for you all, mine are! 

    Feel free to download, print, and use these for your commercial purposes. However, please don’t download them and try to sell them. 🙂 

     %postname%

    I am including two different options for each of the tumbler card card printables. First, a PDF version with multiple copies of the design on it. These are best for printing and cutting out by hand.

    Second, I’m also including a .png file of each design. Each of the .png files will have either ONE of the designs on it or a full page of the designs. These are best used on cutting machines using the “print then cut” feature, and you can copy/paste as many as you want. 

    I’m a Cricut user and recommend using the Cricut Design Space “offset tool” to create a larger cuttable border around some of the cards with more intricate, hard-to-cut designs. You can read more about using this tool in my post on how to make stickers with a Cricut machine.

    Want to download all 21 designs? I use Grow by Mediavine to deliver most of my exclusive freebies. Signing up below will unlock a Dropbox folder with all of the printable tumbler care cards for instant download. Enjoy!

    Here is a link to the Dropbox folder!

    Pin my 21 cards with free printable tumbler care instructions!

  • We tried 5 DIY slime recipes. Here’s what happened…and my favorite!

    We tried 5 DIY slime recipes. Here’s what happened…and my favorite!

    Looking for the best DIY slime recipe? I tested 5 different slime recipes—including slime without borax, contact lens solution slime, sand slime, fluffy slime, and liquid starch slime—and I’m sharing which one came out on top.

    This was such a fun project to do with my daughter, who loves slime (and making a mess 😅). I also added some science notes so you know why each recipe works.

    Why Try DIY Slime?

    Slime is one of those timeless kids’ activities that’s fun, messy, and surprisingly educational. It’s great for:

    • Sensory play (texture + squish factor)
    • Creativity (colors, glitter, add-ins)
    • Science experiments (learning about polymers)
    • Screen-free playtime (win!)

    Safety Note for Parents

    Some recipes use borax, boric acid (in saline/contact solution), or liquid starch. These are safe when used correctly but should always be handled by adults. Remind kids not to taste slime and to wash hands after play.

    Recipe 1: Classic Borax Slime

    This is the slime everyone seems to start with.

    Ingredients:

    • ¾ cup water
    • ¾ tsp borax
    • 1 ½ cups glue + ¾ cup water
    • Optional: food coloring

    Instructions:

    1. Mix borax + water in one bowl.
    2. Mix glue + water in another.
    3. Add food coloring if desired.
    4. Combine the mixtures and knead until slime forms.

    Science bit: Borax (a boron compound) reacts with the glue’s polyvinyl alcohol (PVA) to form polymer chains—the stretchy slime consistency.

    My review:

    • ✅ Easy to mix
    • ❌ Borax didn’t fully dissolve, leaving it grainy
    • ❌ Rubber-like consistency, not smooth like store slime

    Recipe 2: DIY Sand Slime (Contact Lens Solution)

    I first saw this on Smart School House. I loved the idea of adding sand for extra texture!

    Ingredients:

    • Clear glue
    • Sand (regular or colored)
    • Contact lens solution (with boric acid)
    • Baking soda

    Instructions:

    1. Mix glue, baking soda, and food coloring.
    2. Add contact lens solution until slime forms.
    3. Knead in sand.

    Science bit: The boric acid in contact lens solution reacts with glue’s PVA, just like borax does.

    My review:

    • ✅ Similar to Kinetic Sand (my daughter loved it)
    • ✅ Easy to customize with glitter + colored sand
    • ❌ Messier than others (sand falls off)
    • ✅ Stored well in a baggie for reuse

    Recipe 3: Easy 3-Ingredient Slime

    I used I Heart Naptime’s simple recipe. Perfect when you don’t want 10 different ingredients!

    Ingredients:

    • Glue
    • Baking soda
    • Saline solution

    We added orange + yellow food coloring and glitter for fun.

    My review:

    • ✅ Super easy
    • ✅ Slimy and stretchy
    • ❌ Very sticky—hard to get off hands
    • ❌ My daughter wasn’t a fan of the messiness

    Tip: Add extra saline solution if it’s too sticky.

    Recipe 4: Fluffy Slime with Shaving Cream

    Inspired by The Best Ideas for Kids, this one promised “fluff.”

    Ingredients:

    • Glue

    • Shaving cream

    • Water

    • Baking soda

    • Contact lens solution

    Instructions:
    Mix shaving cream, glue, and water first, then add the rest.

    My review:

    • ✅ Super fluffy (the kids loved the texture)
    • ✅ Great group activity
    • ❌ Very messy—expect a big cleanup
    • ❌ Harder to store (airtight Tupperware works best)

    Recipe 5: Liquid Starch Slime (Winner!)

    From Little Bins for Little Hands. I was curious about using liquid starch for the first time.

    Ingredients:

    • Glue
    • Water
    • Liquid starch

    Instructions:

    1. Mix glue + water.
    2. Add liquid starch gradually while stirring.
    3. Knead until it reaches that stretchy slime consistency.

    My review:

    • ✅ Easiest recipe
    • ✅ Stretchy, smooth, not sticky
    • ✅ Felt exactly like store-bought slime
    • ✅ Easy cleanup + washes out of clothes
    • ✅ Held my daughter’s attention for 30+ minutes 🎉
    • Pro tip: If it feels too sticky, add more liquid starch and whip it with a spoon.

    The Best DIY Slime Recipe

    After testing all five recipes, here’s how they ranked:

    🥇 Best Overall: Liquid Starch Slime (closest to store-bought)
    🥈 Runner-up: Sand Slime (fun texture, great for sensory play)
    🥉 Most Fun: Fluffy Slime (messy but hilarious)

    More DIY Kids’ Crafts You’ll Love

    • [5 DIY Playdough Recipes]
    • [DIY Sidewalk Paint Recipes]
    • [Melted Crayon Art in Silicone Molds]
    • [DIY Glitter Sensory Bottles]

    FAQ About Homemade Slime

    What is the easiest slime recipe?
    The liquid starch slime is the easiest and most reliable.

    What can I use instead of borax?
    Use saline solution, contact lens solution, or liquid starch. They all contain boron compounds that react with glue.

    How long does homemade slime last?
    Stored in a baggie or airtight container, slime can last about 1 week.

    Is slime safe for kids?
    Yes—with adult supervision. Avoid ingestion, and wash hands after play.

    Looking for the best DIY slime recipe? I tried 5 popular DIY slime recipes, including DIY slime that doesn’t include borax, DIY slime using contact lens solution, DIY sand slime, and more. I’m also sharing my favorite of the 5 recipes I tried.

    Instead of recreating the wheel by coming up with my own DIY slime recipe—which I don’t think is even possible because sooo many people have done DIY slimes already—I decided to test 5 popular recipes and report back!

    This would also be a fun activity for me to do with my daughter since she loves slime and anything that involves mixing and mess, really. So without further ado, let’s jump in!

     %postname%

    I have seen a lot of people looking for “DIY slime recipes without borax,” but a lot of homes have borax, and a lot of the recipes use borax. They are typically really easy recipes with very few ingredients, so I knew we had to try one. Plus we had a big box of borax in the laundry cabinet.

    When I mentioned I wanted to make some slime with R, one of her teachers said she would send us a recipe for one of her favorites. This is actually what kicked off my idea to review several different types!

    • ¾ cups water
    • ¾ tsp borax
    • 1 ½ cup glue and ¾ cup water

    The mixing part for this recipe is very easy. Simply mix the water and borax together in one bowl. Then mix the glue and water together in another bowl. You can add food coloring to either bowl.

    After this, mix the contents of the two bowls together. It will begin to form the slime consistency you are expecting. You’ll likely need to begin kneading it on the table after it reaches a critical mass.

    If you’re wondering, the borax is actually a boron compound, a mineral, and a salt of boric acid. The borax reacts with ingredients in the glue to form the slime consistency.

    It was a good first try. But it wasn’t my favorite. I felt like it was hard to completely dissolve the borax, which led to the slime feeling a bit grainy and chunky. You can see it in some of the pictures below.

    Also, keep in mind that if you add food coloring to one bowl and not the other, you might not be able to mix it completely. The consistency was a lot like…rubber. Not a slime consistency like you might be used to with store-bought slime.

     %postname%  %postname%

    Like this? Check out the post we made after testing 5 homemade playdough recipes!

    The next recipe I tried was from Smart School House, and it’s sand slime. Head over to her blog for the measurements and full tutorial. Below is a peek at the ingredient list.

    • Clear glue
    • Sand
    • Contact lens solution
    • Baking soda

    This was the first recipe I tried using contact lens solution, and I was really intrigued by this ingredient. How did it work? Who realized you could use this to make DIY slime?

    Well it’s exactly why the borax helps to create slime with it mixes with glue! I learned that there is boric acid in the contact lens solution (which is in there to act as a disinfectant). Boric acid is also boron—specifically, a monobasic Lewis acid of boron.

    The boric acid mixes with the polyvinyl alcohol (PVA) in the glue to create a polymer chain. That polymer chain? That’s the slime consistency. Science! Adding the sand in makes it more tactile and doesn’t interfere with the boric acid and PVA reaction.

     %postname%  %postname%  %postname%  %postname%  %postname%  %postname%  %postname%

    I liked it! used regular sand because that’s what I had on hand. The tutorial called for colored sand, so I colored my sand with blue food coloring and added glitter. Then I mixed it with the other ingredients. It was easy to mix and work with.

    My daughter enjoyed this recipe, too. It reminded her a lot of Kinetic Sand, which she also likes to play with. We were also able to store this one in a baggie and reuse it a few times before chucking it, so it kept really well.

     %postname%  %postname%

    It also had a cool web-like consistency that you can see in the pic below. One thing to warn you about, though. Be ready to get a bit messy. Although the sand is mostly stuck in the slime mixture, some does fall off onto the table. (See second pic below). So just prepare for a tad more cleanup.

     %postname%  %postname%

    For more fun kid crafts, check out my post about trying DIY sidewalk paint recipes, my post about how to melt broken crayons in silicone molds, and my DIY glittery sensory bottle tutorial!

    The third recipe we tried was I Heart Naptime’s easy homemade slime made using only 3 ingredients. I liked the sound of that—the easier, the better. Check out her post for the full tutorial and measurements.

    • Glue
    • Saline solution
    • Baking soda

    We opted to add some orange and yellow food coloring to the glue before mixing everything. And of course threw some glitter in.

     %postname%

    This one was…messy. LOL. If your kid isn’t afraid to really dive in to things, this is your slime. My daughter was a little bit more hesitant, though. She didn’t like that it was difficult to get off her fingers and ended up washing it off.

    We probably could have added some more saline solution to help pull everything together a bit more, but the kid was losing interest, so we didn’t. Here are a few pics so you can see the consistency. Very slimey!

     %postname%  %postname%

    The 4th trial was from The Best Ideas for Kids, and it’s DIY fluffy sand slime. This one was fun. The shaving cream helps you get the “fluff.”

    I chose it because I liked the fluffy paint—we’ve done fluffy tub paint with shaving cream before, so I wanted to see it in action with DIY slime. Check out the original post and tutorial for the full instructions and measurements for everything.

    • Glue
    • Contact lens solution
    • Baking soda
    • Water
    • Shaving cream

    We ended up mixing the shaving cream, glue, and water, and it was already really fluffy! We added a bit of pink food coloring and then finished out the recipe to finish mixing.

     %postname%  %postname%  %postname%

    We liked it! My daughter had a friend over to help her test this one out, and they made a huge mess. They loved it, though, and thought making the mess was hilarious.

    Just keep in mind that this one is a bit messier, so you’ll have a bit of cleanup after play. We also thought this one was harder to store in a bag. I’d probably put it in an air-tight Tupperware container. You can check out the consistency in the closeup pics below.

     %postname%  %postname%  %postname%

    And the 5th and final trial of DIY slime recipes was the DIY liquid starch and glue slime from the website Little Bins for Little Hands. I chose this one because it used a new ingredient—liquid starch.

    Like the kind you use for clothes. Grab the measurements and full tutorial at the link above. I have never used liquid starch, and I have a feeling maybe I’m not the only one.

    It even said on the bottle that it is “great for crafts,” suggesting that they want us to use it for other things, too. Now I have a big ol’ bottle, so I definitely want to look into the other crafts I can use it for.

    I will be honest…I was skeptical. Only three ingredients? Would it be too sticky for my picky daughter like the other 3-ingredient slime? This one was easy to mix: Glue, water, liquid starch.

    Why liquid starch? Why does it make slime? Well, as described above, it has to do with how the ingredients in the liquid starch mix with the PVA in the glue. The glue creates polymer strands—aka chains of the ingredients in the liquid starch—to create a slime.

    We added red and orange to get a nice salmon color. (My daughter wanted pink, but we were all out, so I tried to pass salmon off as pink.) We then dumped in a bunch of pink glitter before adding the last ingredient to create the slime.

     %postname%  %postname%  %postname%  %postname%  %postname%

    Yesssssss. THIS. This is the one! I was shocked by how much it felt exactly like the store-bought slime you can buy! And it was so easy to make.

    I will say that I did end up pouring in more liquid starch than the recipe called for, so if yours isn’t getting that “slime” consistency, add more liquid starch.

    Once I added a bit more than the recipe called for, I used a spoon to really “whip” the mixture in the bowl. And it turned out FANTASTIC! This is definitely our favorite recipe and the one I recommend if you’re really going for the consistency of the store-bought slimes.

    I took so many pictures because the consistency was so mesmerizing, haha. And we played with it for like 30 straight minutes, which is gold for a 3 year old. I even felt it was relaxing to play with 🙂

    It also created almost no mess or residue on the table after we played with it. This was a huge selling point for me because it’s one less thing to do.

    Oh—and I got some on my skirt and it washed out just fine. (Not to say that the others don’t, I just didn’t test them.)

     %postname%  %postname%  %postname%  %postname%

    Pin my post about trying 5 DIY slime recipes!

     %postname%  %postname%  %postname%

  • Looking for a mini couch for kids? Here are 11 highly reviewed options!

    This content may contain affiliate links. See my full disclosure here.

    Looking for a mini couch for kids? I’ve gathers the specs for 11 highly reviewed mini kid couches, all available on Amazon! Learn about each couch, including whether or not it has a removable cover, its size, it’s materials, and more!

    Is there anything cuter than mini versions of regular-sized things? Maybe dollhouse versions…but kid-sized versions are a close second. Most parents have purchased a mini kids couch at some point. We have one that folds out, and we keep it at my mom’s house. It gets a ton of use!

    If you’re looking for the perfect mini couch for kids, don’t worry—I’ve gathered 11 highly reviewed options that are all available on Amazon. These are all relatively affordable options, and I’m including all of the details you need to know. Happy shopping!

    This convertible sofa is made in the United States and has a convertivle 2-in-1 design, serving as both a couch and a sleeper/napper sofa. If has foam consturction (Serta foam) that helps it keep its shape, as well as a non-slip bottom to prevent accidents.

    Here are some specifics about this mini couch for kids:

    • Ships in a small box; once unboxed, the chair expands to about 5x, which might take about 24 hours total
    • Removable super-soft slipcover that zips off
    • Available in gray (pictured below) and light pink
    • Manufacturer recommends 18+ months
    • Sofa size: 30”W x 17”D x 15”H
    • Lounger size: 30″W x 40″D x 12″H

    The lovely Jaxx Zipline convertible sofa is similar to the previous couch, but it has a bit more of a modern feel. And it is modular and fully customizable. For example, you can clip the top over and pop the cushions in to make a totally flat bed for lounging. Also made in the United States.

    Here are some specifics about this sofa:

    • Available in 10 colors (fuchsia pictured below)
    • Given its modular frame, kids can use it to serve as a puppet show frame, a ball pit frame, and loads of other creative ideas other than a mini couch
    • Upholstery-grade firm foam with no hard corners; removable, machine-washable cover
    • Shipped compressed in a smaller package
    • Folded: 20” x 40” x 16”
    • Folded out as a lounge: 40” x 40” x 8”

    This linen two-seater mini couch doesn’t fold out to be a lounger, but it does have a sturdy wooden frame and a super chic look! I can’t find where it’s made, but I don’t think it’s U.S.-made since the listing says it has passed all of the required U.S. safety tests.

    Here are some specifics about this sofa:

    • Available in 4 colors (light green pictured below)
    • The legs are wood, not plastic; the sofa can also be used without legs
    • It does not ship compressed or assembled, but all you need to do is screw on the wooden legs it comes with
    • Manufacturer recommends 1 to 4 years old, 99-pound weight limit
    • Assembled size is 29″ x 17.7″ x 19″

    Disney alert! This flip-open comfy foam sofa might not be the trendiest looking mini couch, but your kids will love it because it comes in different Disney themes—Minnie, Ariel, Elmo, Frozen II, Micky Mouse, Paw Patrol, and Toy Story.

    Here are some specifics about this sofa:

    • 7 different Disney themes; polyester fabric slipcover is removable and machine-washable
    • Ships compressed and may take up to 24 hours to fully expand
    • Manufacterer recommends 18+ months for this sofa and a 100-pound weight capacity
    • The sofa is 14.75″ X 29.25″ X 16” deep; extends out to 39″ as a lounger

    While this chic velvet mini couch might not have a removable cover, it is absolutely adorable! I love kids furniture that actually just looks like scaled-down versions of adult furniture 🙂 This piece is made with a plywood slat frame, foam, and velvet fabric.

    Here are some specifics about this sofa:

    • Comes in purple and pink
    • Not made in the United States, but the piece passes all U.S. safety designations
    • Ships in a large box; legs must be screwed on before use
    • Spot clean with a damp towel and mild soap only; cover is not removable
    • Couch size: 17.5″ X 35.6″ X 22.6″

    This sherpa convertible mini couch is basically begging me to take a nap on it. I love anything sherpa fabric—we have sooo many throw blankets around the house that I could just bury myself in. This flip-open sofa design has that same cozy sherpa fabric!

    Here are some specifics about this sofa:

    • Comes in 3 colors
    • Comfy foam construction with side-pocket slipcover for books or a tablet; slipcover is removable and machine-washable
    • Manufacturer recommends 18+ months old only; fits 2 to 3 small kids
    • Ships compressed and expands 5x after unboxing; can take up to 24 hours to reach final size
    • Sofa size: 30” X 16.5” X 15”
    • Lounger Flipped Open: 30″ X 40.5″ X 15″

    If your kid is an old soul, get them this faux leather mini couch. I don’t know why I think this, but I feel like a tiny old man would like this sofa. And the best part about this one…the cushion is covering toy storage!!

    Here are some specifics about this sofa:

    • Comes in brown only
    • This couch is made of a wood frame, high-density foam, and PVC “faux leather”
    • The cover isn’t removable, but you can easily wipe spills clean
    • Manufacturer recommends 1-2 kids, but the weight capacity of this mini sofa is 220 pounds
    • Size: 16.5″ X 35″ X 19.5

    This absolutely adorable space-themed couch is made in Europe and, like many of the others, folds out into a lounger. It has extra-wide arm rests also comes in chair sizes.

    Here are some specifics about this sofa:

    • Comes in 3 couch patterns and a bunch of chair-sized patterns, too
    • Machine-washable, removable slip cover with a pocket for the zipper
    • Three-piece foam design with 100% cotton fabric for the seat; polyester printed graphics (all material is OEKO-TEX STANDARD 100 Certified)
    • Size: 30.75″ X 14” X 16.5″

    This super comfy modular couch is a lot like #1 in this list, but it has a Serta sheep print on the fabric. It’s also modular, meaning you can arrange the pieces like #2. The best of both!

    Here are some specifics about this sofa:

    • Configure into multiple different shapes and sizes: lounger, sofa, ball pit, etc
    • Foam core and a soft, low-impact surface and no sharp or hard corners; has a slipcover that is removable and machine-washable
    • Comes compressed in a box and takes up to 24 hours to fully expand
    • Recommended for ages 18+ months and holds up to 200 pounds
    • Sofa size: 20″ X 40″ X 16″
    • Flipped out: 40” X 40” X 8”
    • Ottomans size: 14” X 14” X 8”

    Another faux leather sofa—this faux leather mini couch with footstool is a step up from the other faux leather sofa on this roundup—if you have the extra room for a footstool, it is a great option! Unlike the other one in this roundup, this also comes in a few other colors, too.

    Here are some specifics about this sofa:

    • Fits 1 or 2 kids; constructed with a wood frame that is filled with “soft sponge”
    • No removable cover, but easy to wipe spills clean with a damp cloth and mild soap
    • Size: 32.5″ X 16.5″ X 16″

    This super chic wood and linen sofa has me a bit jealous I can’t get it in my size…especially in this gorgeous purple color! If you like kid stuff that doesn’t necessarily look like kid stuff, this one is for you. It has a very nice high-end modern feel.

    Here are some specifics about this sofa:

    • Comes in three colors
    • Cushion is made of a thick fireproof sponge cushion with a fireproof linen pattern PVC surface; solid wood structure
    • The seat cushion and backrest are removable and washable, but I don’t think the covers come off
    • Must assemble the base when it comes, but the reviews say it isn’t difficult!
    • Size: 17.1″ X 30.3″ X 17.7″

    Like this? Check out my Colorable Cardboard Playhouse Review, my Rainbow Quotes for Kids + 21 Free Printables, and tutorial for how to make DIY Wall Decals Using Cricut!

  • DIY Pineapple Costume, Including an Easy Pineapple Headband DIY

    Need a last-minute Halloween costume? My DIY pineapple costume for my toddler is quick and easy—and includes the steps for an easy pineapple headband DIY. Learn how to make it!

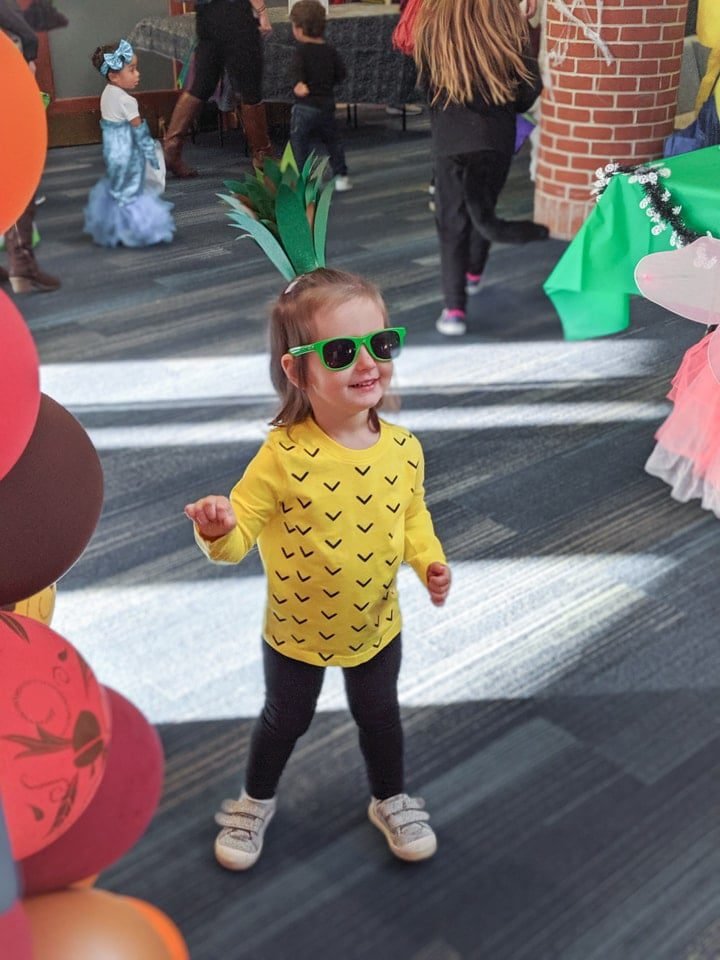
    I’m really excited about R’s halloween costume! It’s a pineapple. Inspired by her hair. 🙂 And it’s an easy DIY costume that you can make yourself even if you don’t have a lot of crafting skills or supplies. 

    I’m using my Cricut and EasyPress collection for a lot of it, but that’s only because I have them. I want this idea to be accessible to folks who don’t have those supplies, so I’m providing alternative ideas as well (e.g., black electrical tape instead of iron-on vinyl, household iron instead of an EasyPress). So let’s chat about how to make this costume.

    • Medium green scrapbook paper, 1 sheet
    • Light green scrapbook paper, 1 sheet
    • Brown scrapbook paper, 1 sheet
    • Green sparkle scrapbook paper, 1 sheet
    • Scissors and quick-drying glue
    • Painter’s tape
    • Disposable paper cup
    • Yellow long-sleeved shirt
    • Black vinyl iron-on or black electrical tape or black fabric pen

    Let’s talk about the pineapple costume headband DIY first. This is the first half of the costume, because what would a pineapple costume be without an ostentatious pineapple topper headband? So let’s jump in.

    For the first step, I grabbed a disposable paper cup that I’d been storing things in in my craft closet. I used scissors to cut the bottom out and then started cutting leaves. For the first layer of the leaves, I used the medium green scrapbook paper.

    When I first started cutting the leaves, I cut them out in more of a triangle-like design (second pic below), and then trimmed in the bottom of each to make it look more like a leaf. I didn’t use a template—just winged it. Next I applied fast-drying glue to the bottom of each leaf and taped it on using FrogTape.

    I used FrogTape because it is easier to remove than regular clear tape. I wanted to use something to hold the first layer of leaves in place while the glue dried, though. First I did one full layer along the entire base of the disposable paper cup. I used my fingers to slightly curl each leaf outward.

    To help ensure this first round of leaves stuck to the cup completely, I also applied a bit of glue midway up each leaf—not just at the bottom. I did a row of the FrogTape here as well to keep the leaves in place while the glue dried.

    However, once I removed the FrogTape from the paper, I have to be honest…it pulled a bit of the scrapbook paper off! But that’s okay. I had many, many more layers of the pineapple costume headband planned.

    Okay, so for the second later I focused on the glitter green paper. I cut out a bunch of just slightly smaller leaves to add to the base layer. Since the base layer of leaves was set, this was an easy step.

    I used some tiny clothespins I had on hand (because I’m a weirdo). But if you’re normal and don’t have these, you can just use binder clips, regular clothes pins, or paper clips.

    Once the main body of the pineapple headband was done—the first two layers—it was time to add the embellishments. I basically just cut out smaller leaves from the remainder scraps of the medium green and glitter green paper. Then I cut thin strips of the brown scrapbook paper as an accent.

    Since the first two layers of the headband was done and secure, most of these pieces we were able to add the glue and just stick the pieces in place to dry without using pins or anything to keep them still. So this was very easy. I also used my fingers to curl each pieces I glued before I glued them on. All pieces curled out.

    I stuck the pieces all over—between the cup and the first layer and between the first and second layers. I didn’t overthink this. Just stick pieces in areas where the headband looked bare.

    And since I had some leftover light green paper, I added it on the inside of the cup just to help disguise the inside white portion of the cup. Looks lovely completed!

    So to attach the pineapple topper, I initially wanted to use a headband. In fact, like a crazy person, I ordered a 20-pack of headbands on Amazon. (Honestly, why can’t you just buy ONE plain toddler headband at Target? Why do you need 20?)

    They are beautiful and nice quality, but I quickly realized that gluing the pineapple topper to the headband would not be stable enough for an energetic toddler that would probably be bopping around. It also seemed to make it quite the apparatus and might bother her. She’s not a huge fan of headbands.

    So I decided to cut three strips of cardstock, fold them over lengthwise to make them a bit thicker, and glue them onto the pineapple topper. I glued them on the inside and folded them out under the topper so that they were sticking out like tabs.

    Then, the plan was to put her hair up in a ponytail on top of her head to make a secure space. And use hair clips on the “tabs” to clip the topper in place.

    I used vinyl iron-on and my EasyPress/EasyPress Mini for my design. You can use a household iron if you want to use iron-on. If you want to use something less permanent, you can use adhesive (not iron-on) black vinyl or even black electrical tape!

    I used a yellow long-sleeved shirt from Primary. They have the best solid-color kids clothes. We love them for R’s normal wardrobe, so a Primary shirt for her costume was a no-brainer. Also, a bright yellow shirt is kind of hard to find in October. 🙂

    For more Cricut, check out my posts about how to use the Cricut EasyPress 2, as well as my tutorial on how to use the Cricut EasyPress Mini!

    I used my Cricut to cut a series of V’s on one sheet so that I could apply it all at once and save time. If you don’t have a Cricut, you can cut out Vs by hand. First I focused on the main area of the shirt. This was two parts: the bottom and the smaller top area.

    Once I was done with that, I began filling in the bare spots using stray V’s. I used my Cricut Easy Press Mini for this just because it made life easier, but if you don’t have one, you can easily use a household iron.

    What do you think? I think the DIY pineapple shirt turned out pretty good! I decided not to do the sleeves and the back of the shirt. Honestly I didn’t think it would add that much, and it would have been a pain. So I’m calling this good as is. 🙂

    Want more kiddo projects? Check out my DIY scrapbook paper and yarn party hats, my dollhouse bookcase build, my unicorn bookends, and my no-sew felt name garland!

    We paired the yellow shirt with a pair of plain leggings from Carter’s. We love their leggings, so I got a two-pack with black and white. Honestly, I’ll probably dye the white leggings after Halloween…there is literally zero chance white toddler leggings will not be stained about 15 minutes.

    Oh, and the sunnies were not planned as part of the costume, but they totally work! They were in her diaper bag, and she’s going through a major sunnies phase right now. They are from the Dollar Store. 🙂

     %postname%

    Share my DIY Pineapple Costume on Pinterest!

  • How to Make a DIY Balloon Garland Without an Expensive Kit!

    This content may contain affiliate links. See my full disclosure here.

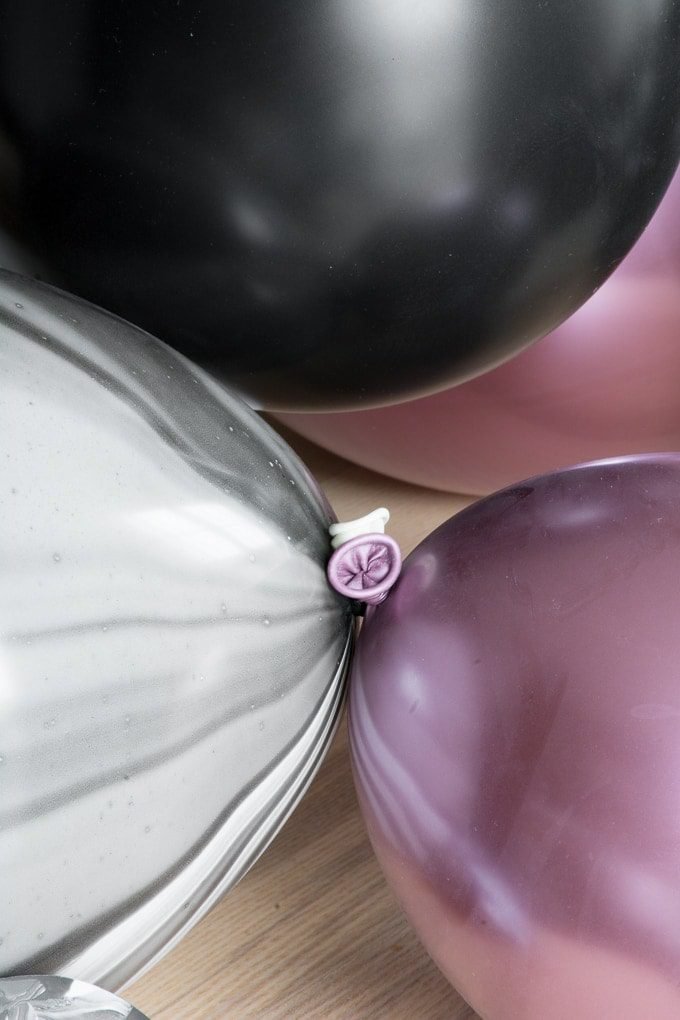
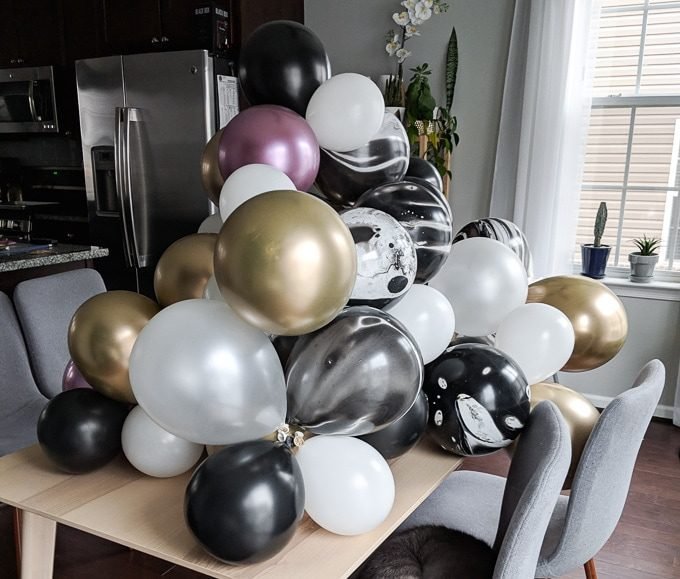
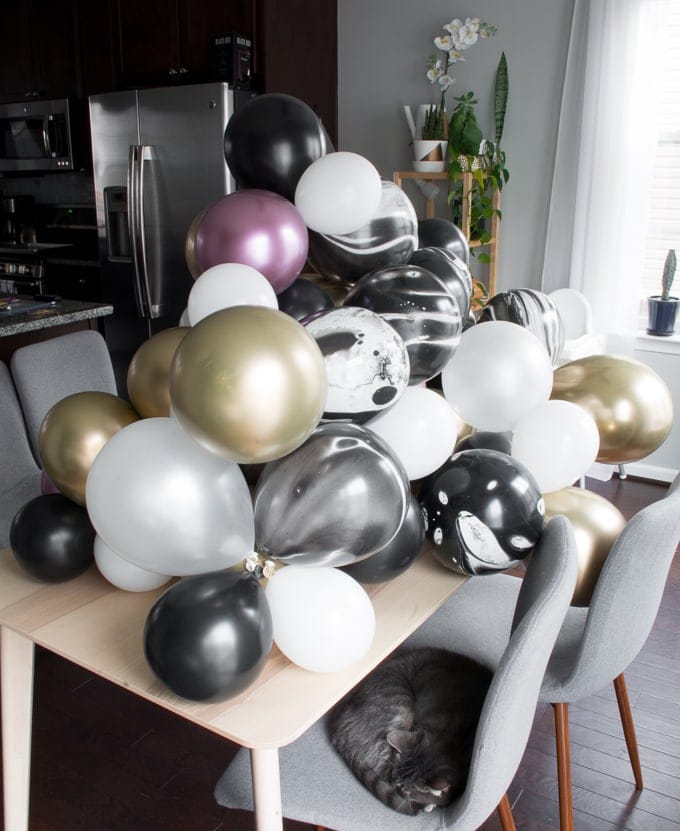
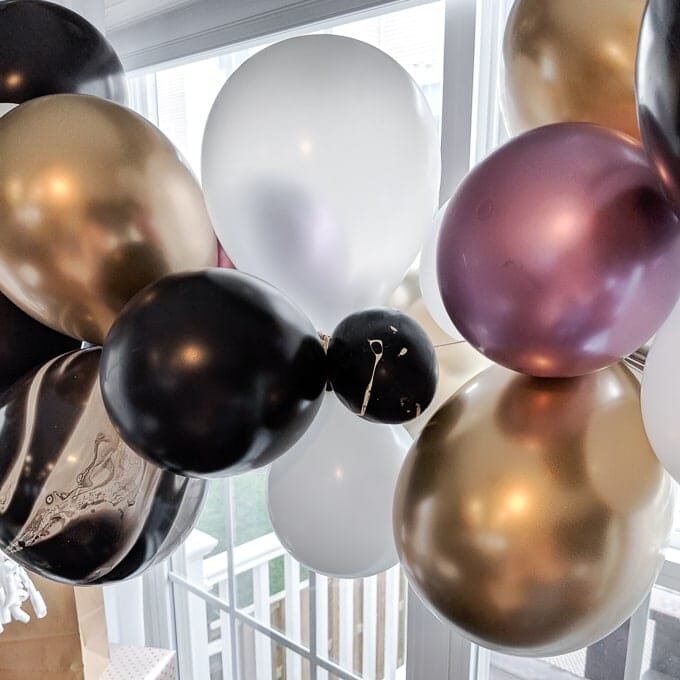
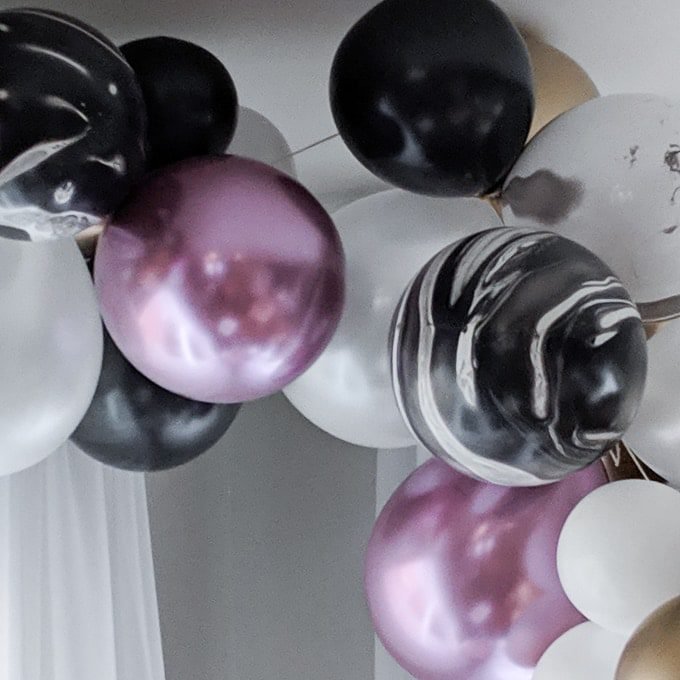
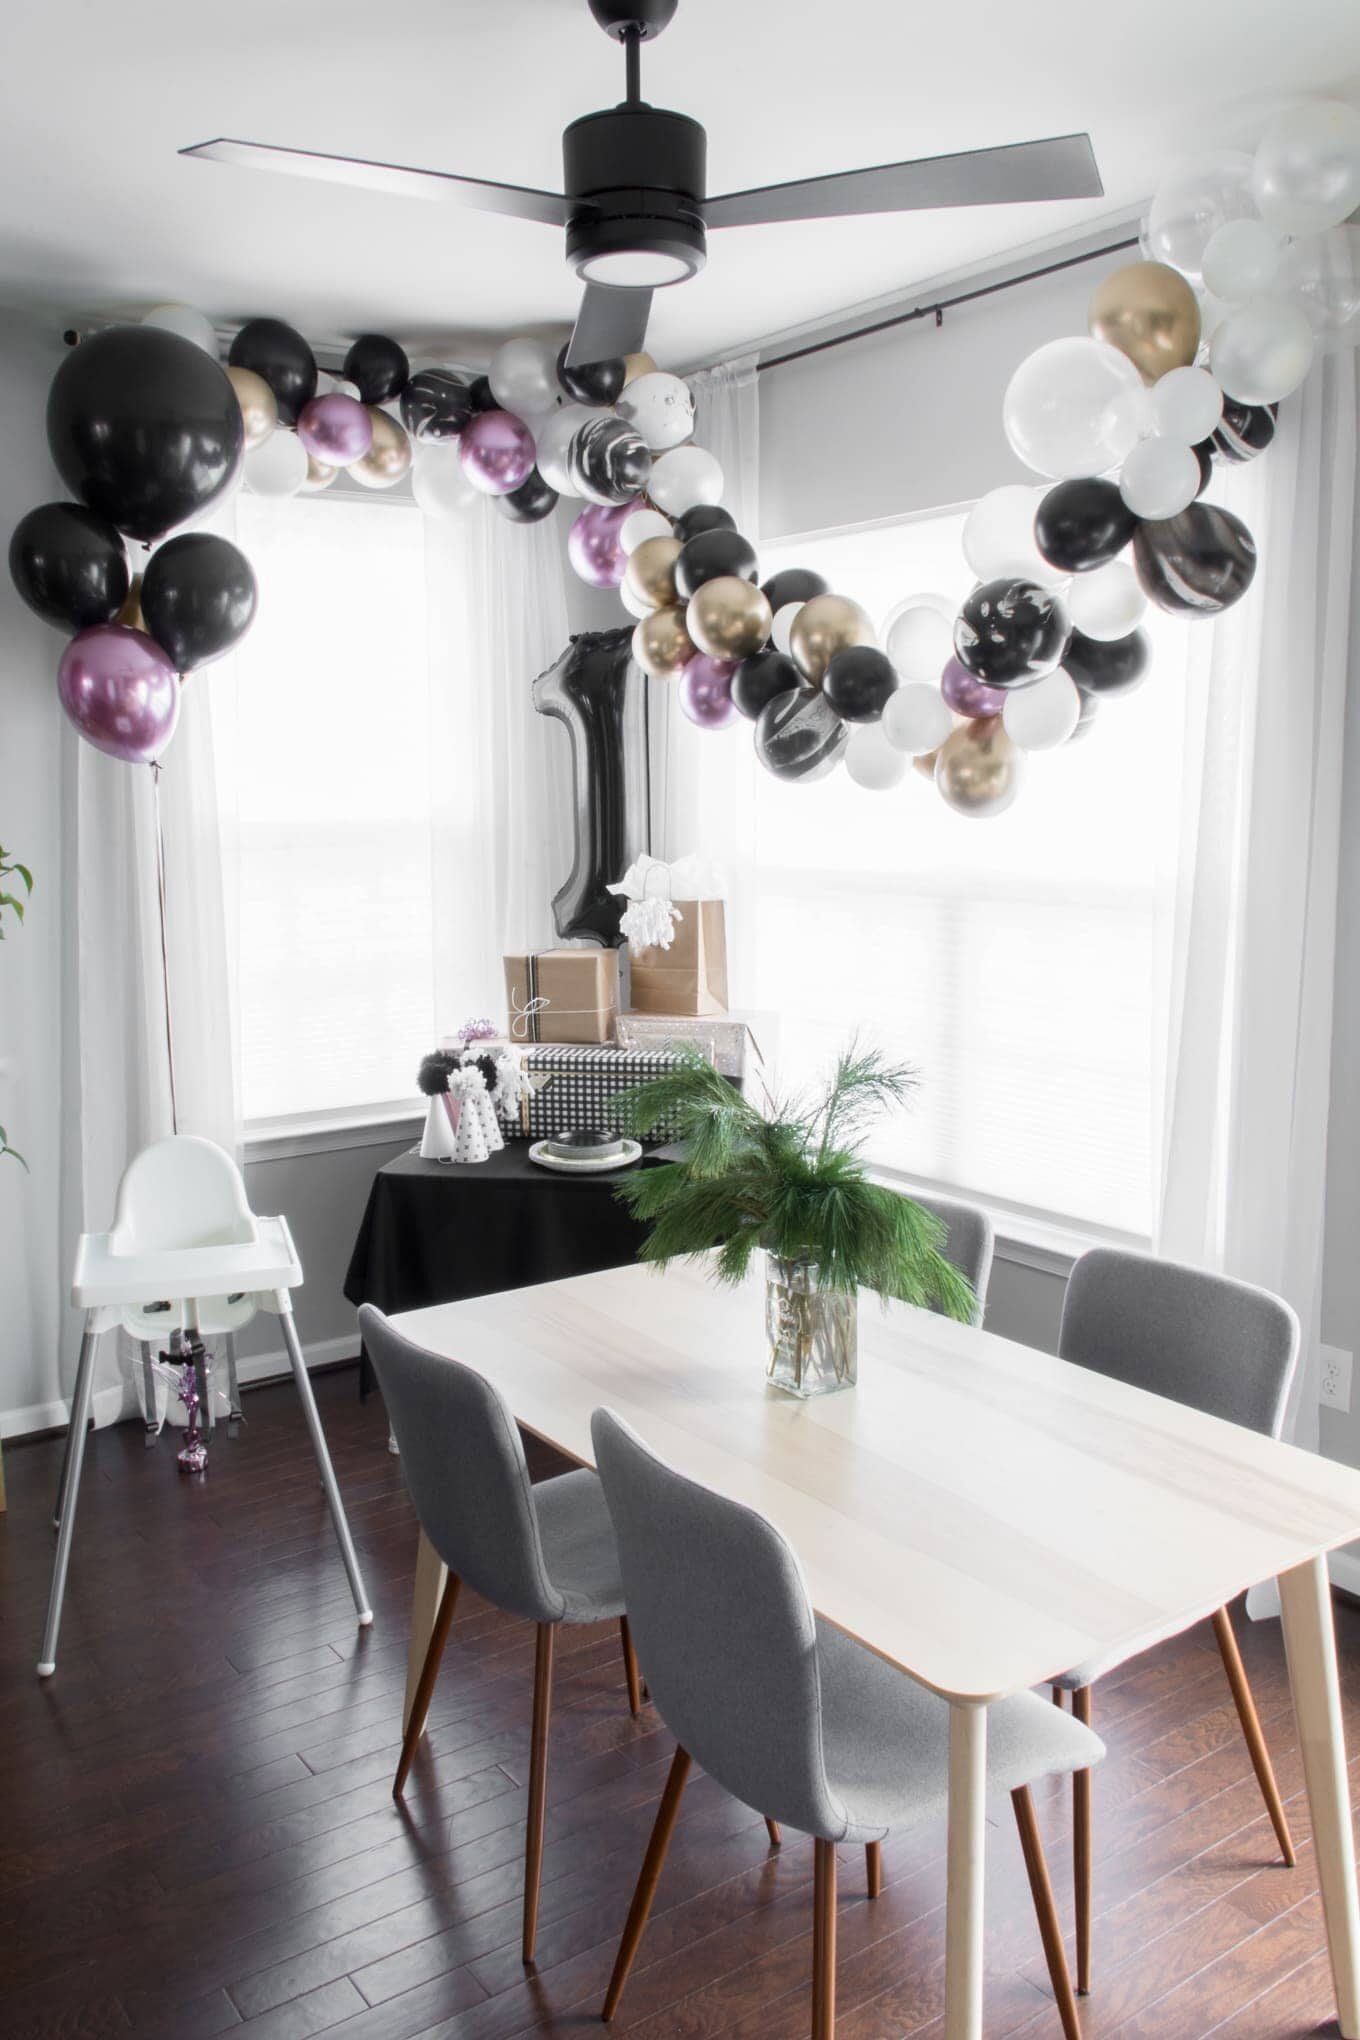
    This post will show you how I made an easy DIY balloon garland without an expensive kit using black, white, gold, marbled, and mauve balloons. It’s a chic and inexpensive way to decorate for a party.

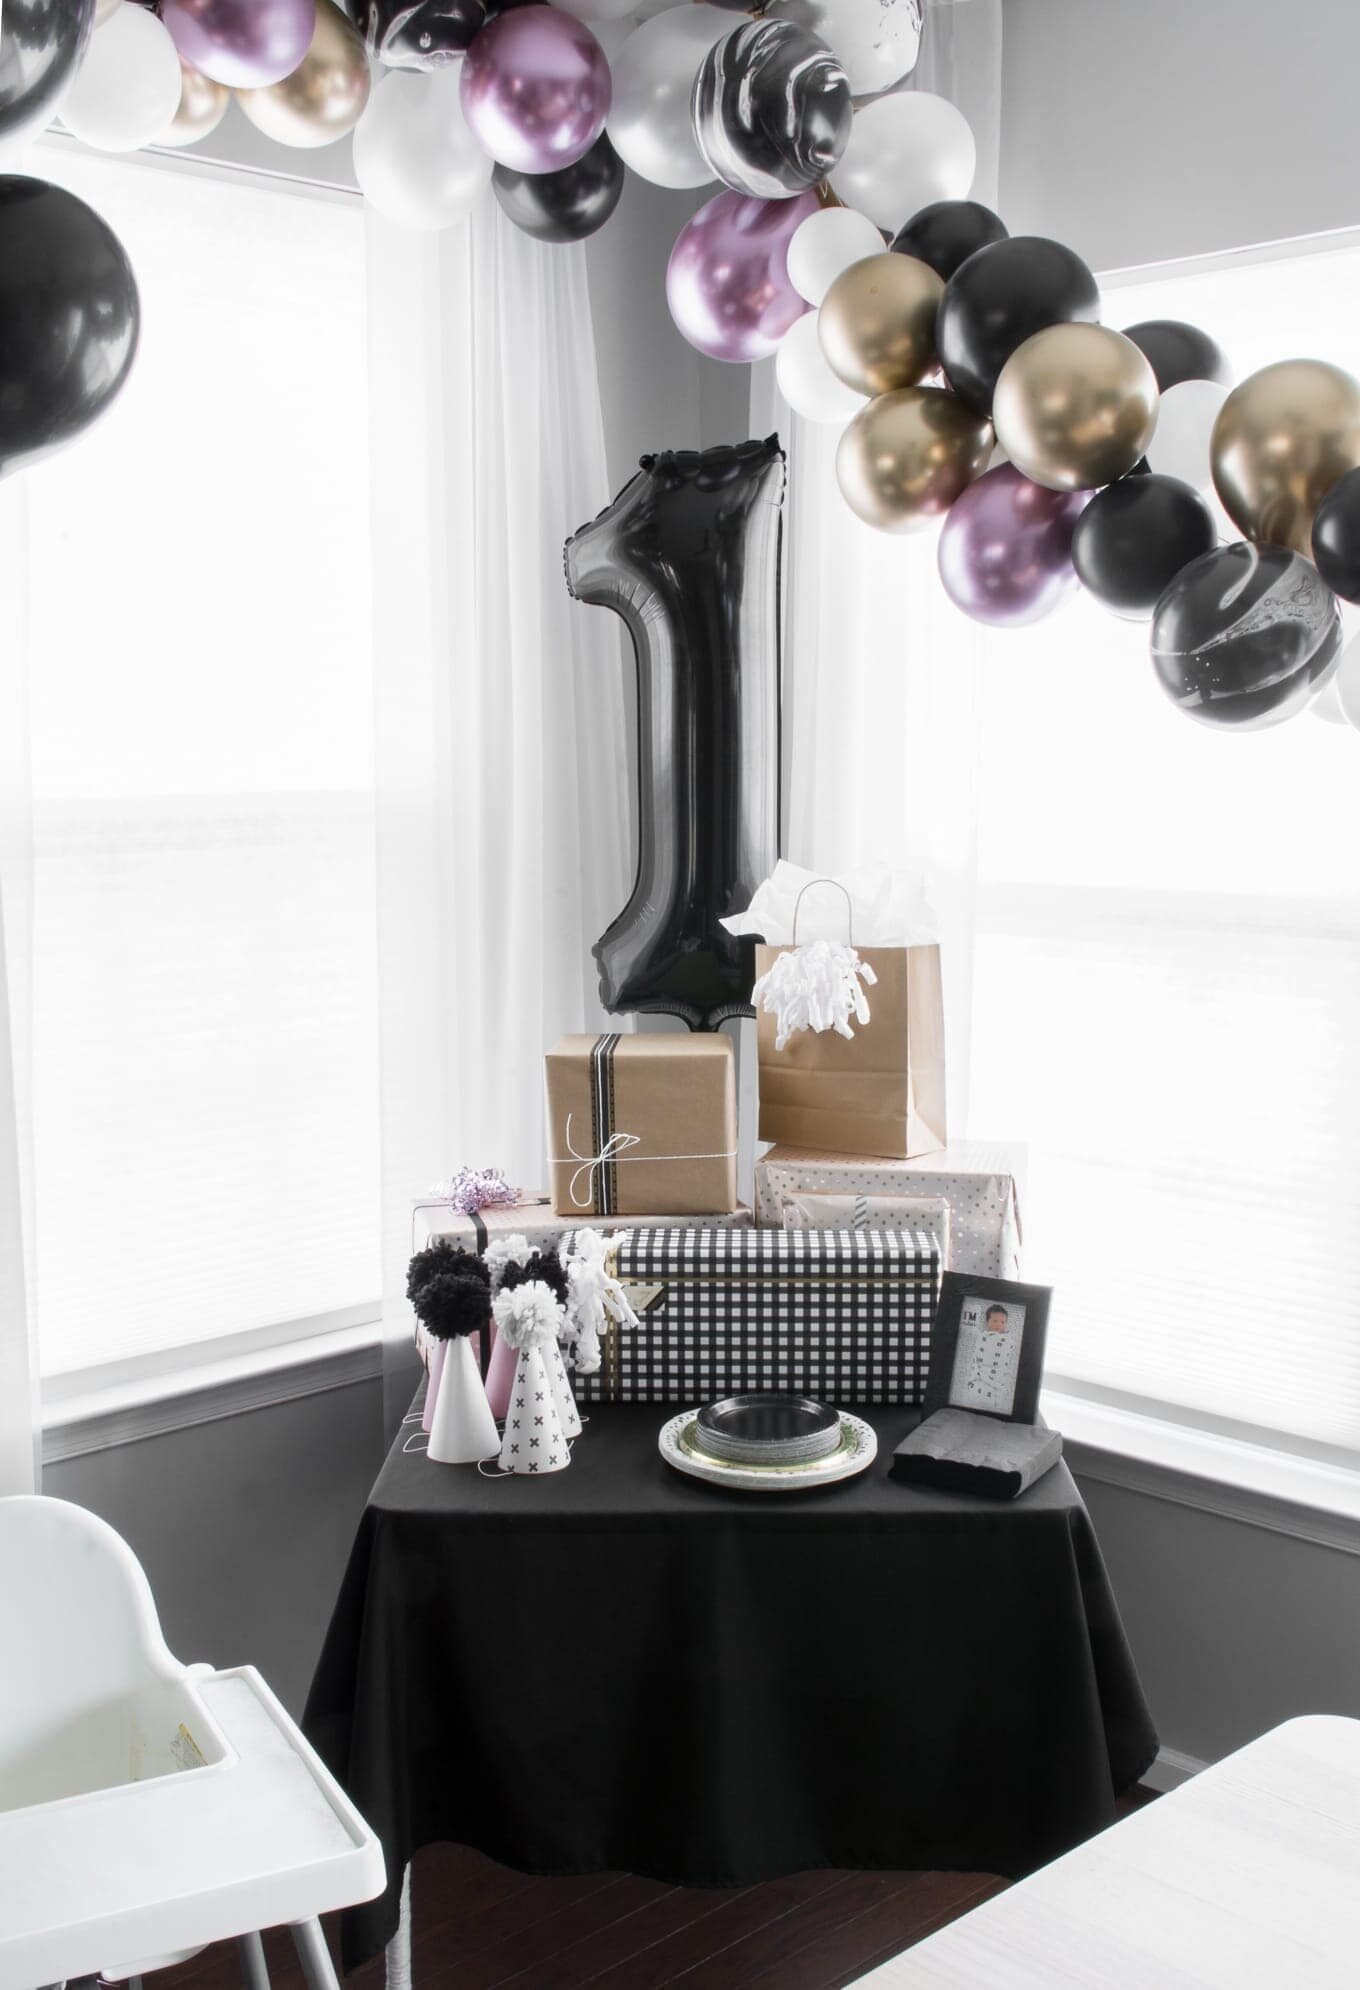
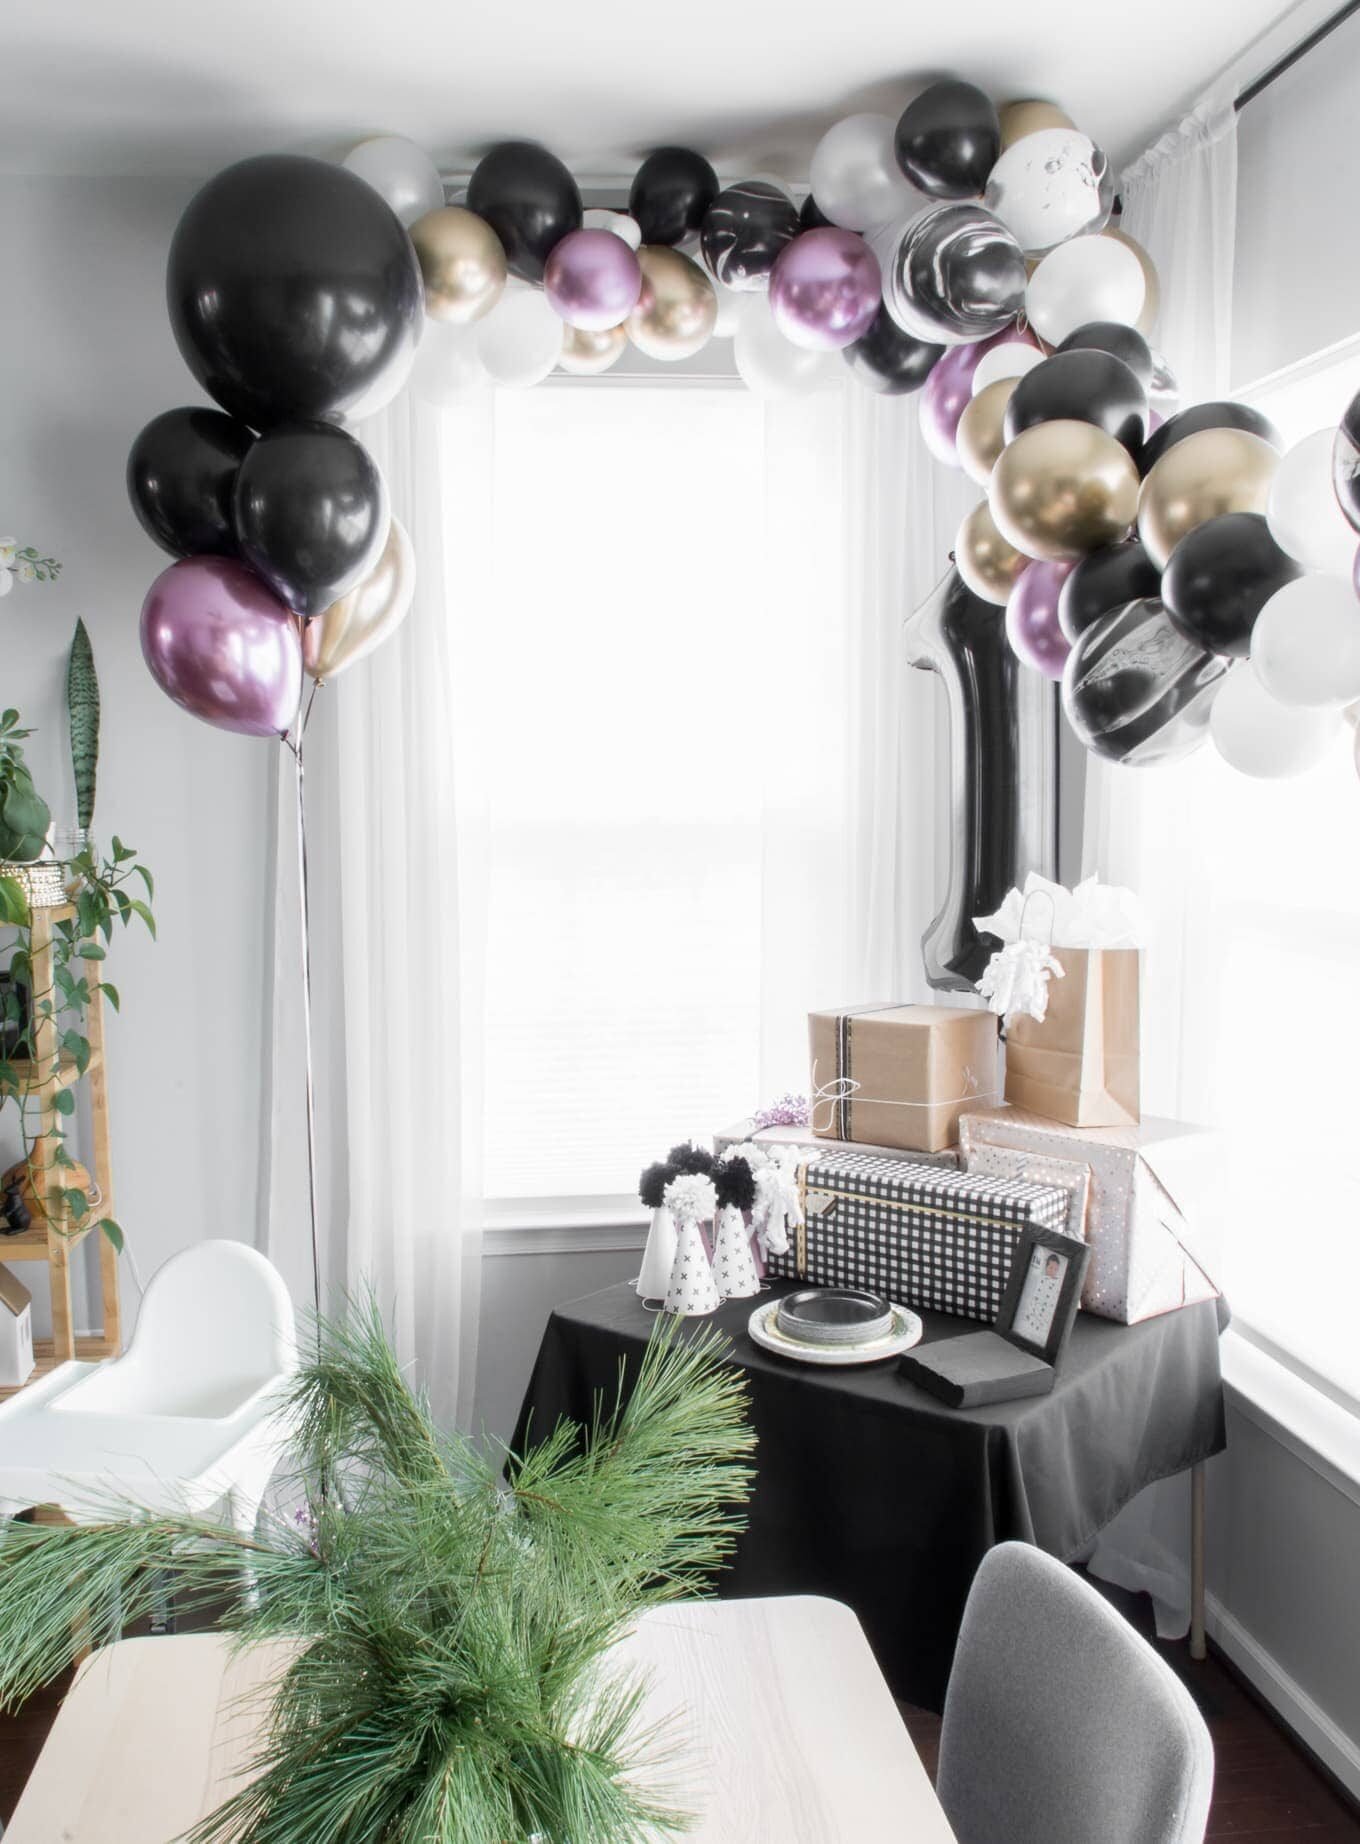
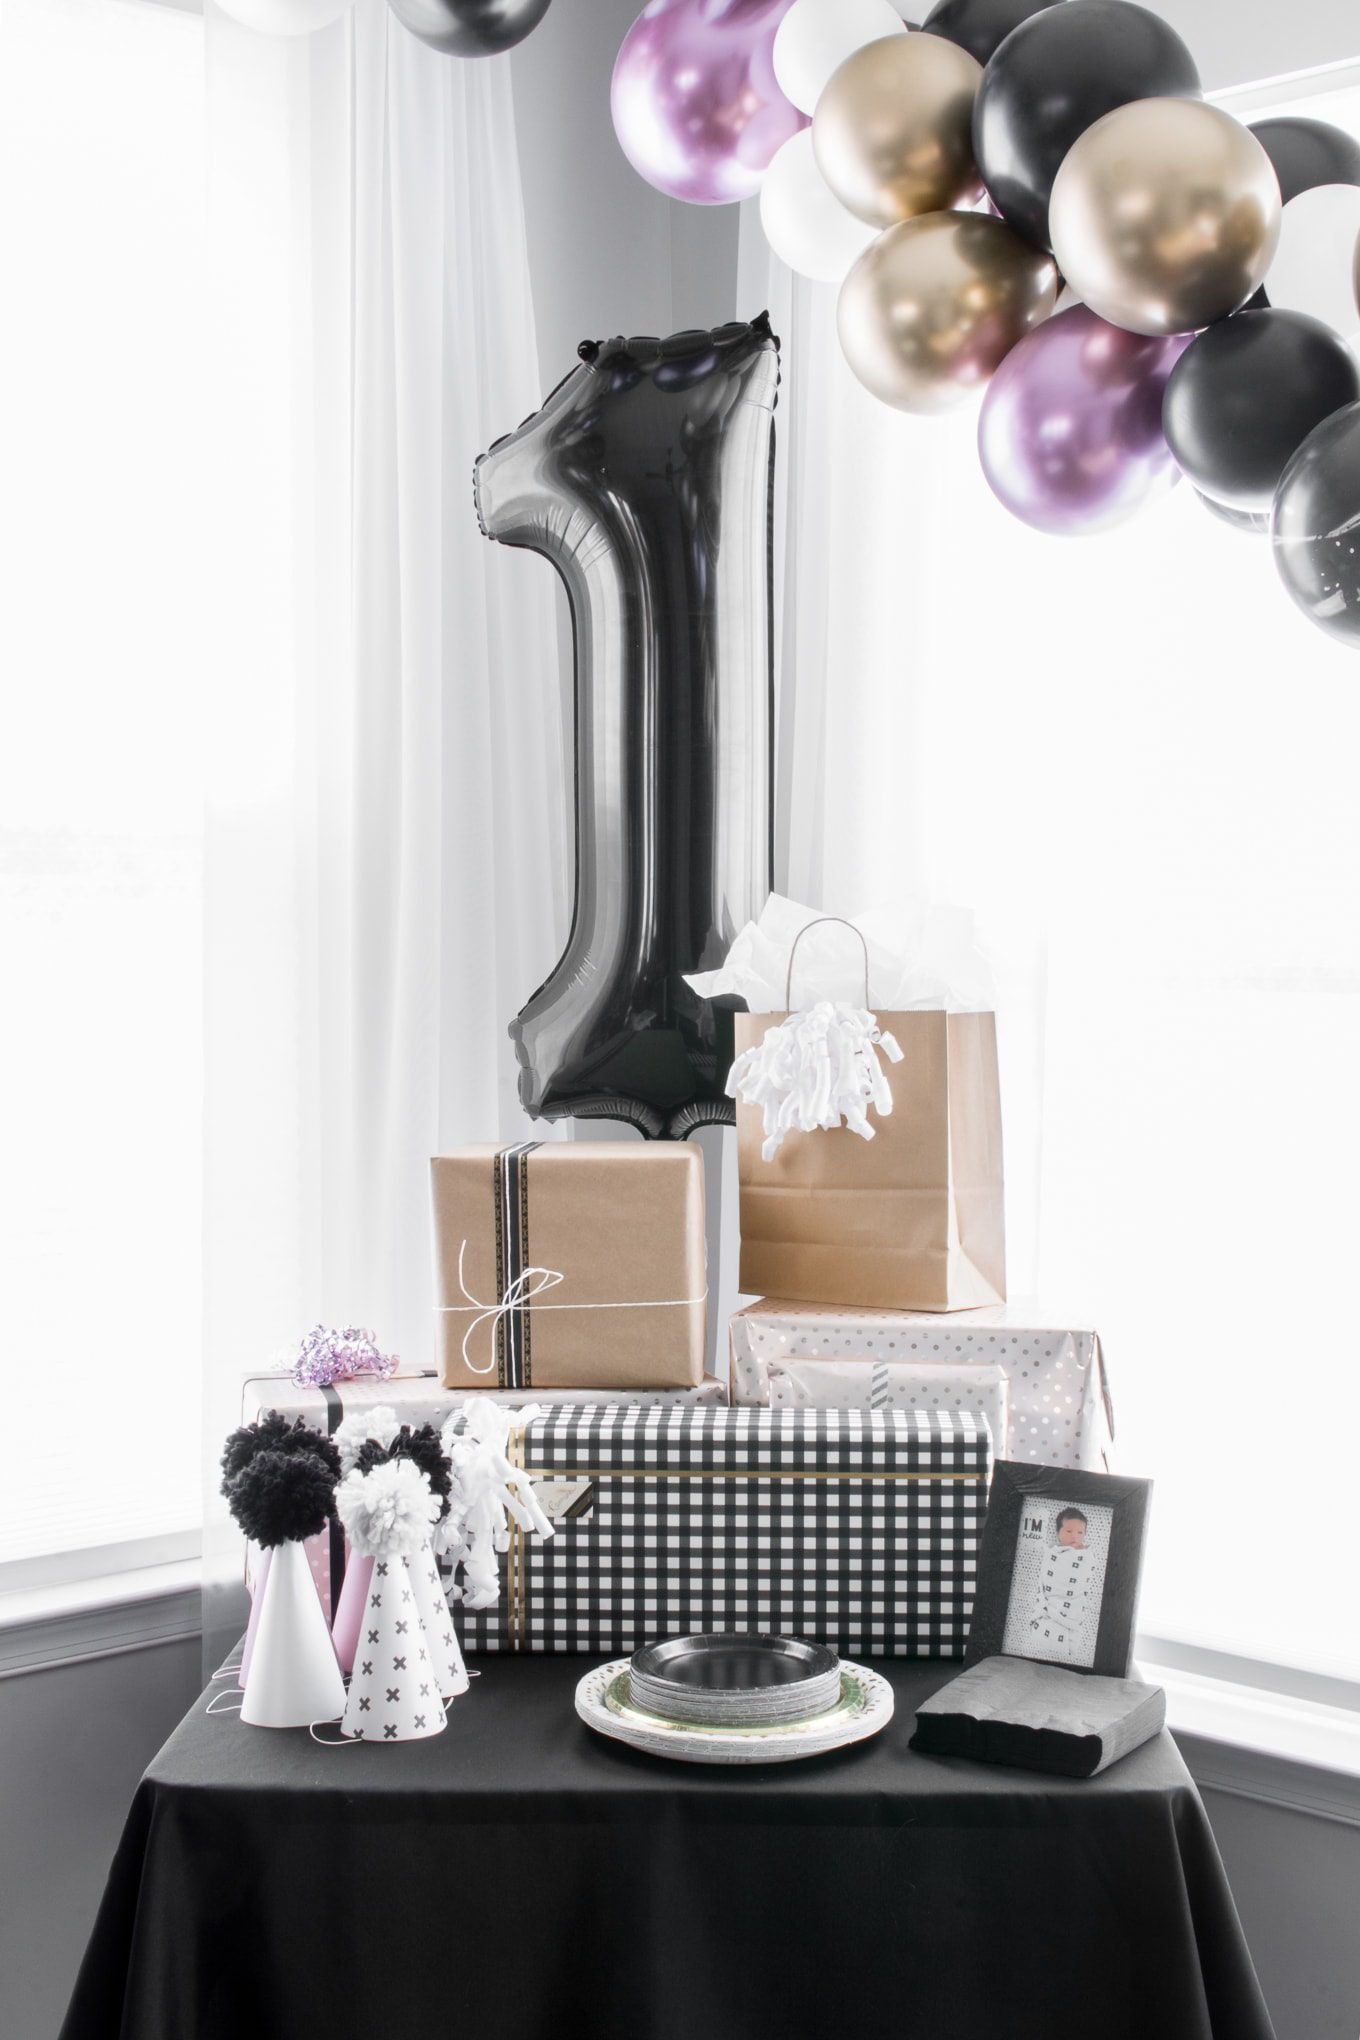
    Hey all! I recently shared photos of R’s first birthday party setup (and some family photos from the day of the party). I included lots of pics of the DIY balloon garland I made. Today I’m sharing the steps I took to make it.

    Ahhh, so pretty. I think R liked it, too. She can’t talk yet, but she pointed at it a lot and smiled. I did the same thing 😉

    The metallic and marbled balloons are all from Paperboy Party’s Etsy shop. They were STUNNING. The pictures online did not disappoint. They look exactly like this in real life, maybe even better.

    I started by sorting all balloons by color and size, using mostly 12″ balloons but also a few smaller sizes. I picked the balloons I wanted to be my main focus (mostly the metallic and marbled ones). Then started to blow those up completely. Just a few to start.

    Next I picked complementary colors and started blowing them up one by one, tying them off onto the main balloons I blew up in step 1. I did this with varying color combinations and balloons blown up to various sizes until I had a bunch of balloon clumps.

     %postname%

    So…I wouldn’t recommend making your clumps larger than three or four balloons each. Most of mine had four or five, but a few of my balloons lost air overnight. Which I think was due to having so many on some clumps.

    I also thought having larger clumps would make it easier to fill out the garland. But now I’m confident that smaller clumps are better since they can be moved around more easily and might even keep a tighter seal.

    There wasn’t really any plan for how I wanted each clump to look. I just kind of winged it and just tried to get a variety of colors and sizes in each one.

     %postname%

    Next I cut a piece of twine that was a few feet longer than what I needed. I knew I wanted to string my garland up onto my ceiling plant hanger and then use the curtain rods to support it. If you don’t have anything to use, you can use command hooks.

    I wrapped the middle-ish point of the twine around the ceiling plant hanger to anchor it.

    I cut a bunch of smaller pieces of twine and used one to tie each balloon clump up onto the string. I only tied once. Just tight enough to stay put but loose enough to slide along the longer main piece of twine.

    After I’d gotten a few clumps on, I started gently pushing them all up toward the ceiling to bunch them together. Don’t worry too much about how it looks; as you bunch more balloon clumps on, it may rotate the twine a bit, changing the way the garland looks. You can tweak it when you’re finished.

    Once I’d strung all clumps on and was pleased with how it looked, I tied off and secured the ends and rotated some of the clumps so that certain colors and balloons were more prominent. I also blew up a few of the leftover plain black and plain white balloons in varying sizes to fill small gaps. We just wedged those in without tying them on.

    Our balloon garland went up the night before R’s party, and by the party, two or three balloons had started to deflate. I just cut those off and stuck a plain black or white balloon in their place so the twine wouldn’t show. This solution worked perfectly.

     %postname%  %postname%

    We saved two of the metallic balloons to have them blown up with helium at Party City (and two black balloons). It looked super sitting next to the garland as a little accent.

     %postname%  %postname%  %postname%  %postname%

    For more party inspiration, check out my simple DIY wooden cake topper, my post about how to make a cake topper using a Cricut machine, and my tips for making scrapbook paper party hats!

    Pin my DIY balloon garland!

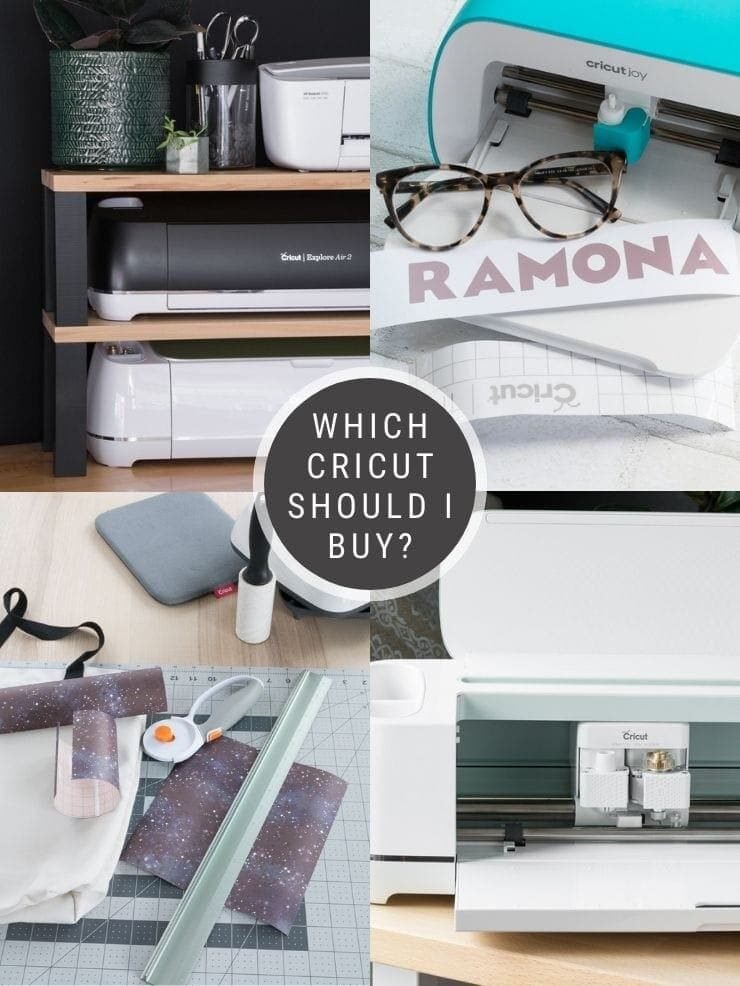
  • Which Cricut should I buy? I've tried them, here's my 2024 guide!

    Wondering which Cricut machine you should buy? My guide has a detailed comparison of all available Cricut machines and their features. Cricut provided some of the machines reviewed in this post, but as always, all opinions are my own.

    Alright guys, buckle up for a mammoth Cricut post! I have often gotten questions from people about which Cricut machine they should buy. The capabilities and descriptions can be a little overwhelming if you’re just getting started with Cricut crafting.

    So before we get too far into the holiday season this year—the time when most people buy their first Cricut for either themselves or someone else—I wanted to do a breakdown post with info on the available Cricut machines you can buy.

    Here are the machines we’ll cover:

    • Explore Air 2
    • Explore 3
    • Maker 3
    • Maker
    • Joy
    • Joy Xtra
    • Venture

     %postname%

    I love all of the machines I’ve owned. And while they have many similarities, they also have a few important differences that might help you make your decision about which Cricut machine you should buy.

    I’ll do an opening section for each of the machines with a quick overview. Then I’ll go into more detail about its features and wrap at the end of this post with my thoughts on how to choose a machine. So let’s dive in!

    First I am going to be covering the Cricut Explore Air 2. This is the first machine I owned, and I also want to highlight that it’s a machine I bought myself. Yes—I was a Cricut user before I ever worked with them in their influencer program!

    The Explore Air 2 is one of Cricut’s older machines, but it is absolutely a valid choice. It currently has a base price of $249.99, comes in different colors, and cuts 100+ materials. You can use tools for cutting, writing, and scoring on the Explore Air 2.

    When working with this machine, it has a 2-ft max material length using the 24″ mat. The max material width is 12 inches. You can make stickers and work with printable iron-on with an Explore Air 2 because it works with print-then-cut features. It is not compatible with Smart Materials.

    A lot of people make their decision about which machine to buy based on what the machine’s cutting capabilities are. The Cricut Explore Air 2 doesn’t cut the biggest number of materials, nor can it accommodate the longest range of materials.

    But in my opinion, it hits a sweet spot of cutting the materials most people likely want to cut at a great price point. The Cricut Explore Air can cut over 100 materials using it’s premium fine-point blade.

    Some highlights you’ll likely be interested in are vinyl, iron-on, card stock, paper, bonded fabric, adhesive foil, canvas, craft foam, paper-thin faux leather, infusible ink transfer sheets, kraft board, and much more. Cricut’s website has a full list of materials the Cricut Explore Air 2 can cut.

    The Explore Air 2 also has two other cutting modes: fast mode and precision mode. Fast mode cuts up to double the speed of a normal cut, but it isn’t available for all materials. Precision mode is best for really intricate cuts. I honestly don’t really use either, but it’s good to know they are there.

    Looking for more Cricut? Check out my detailed review of the EasyPress 2, my post about the EasyPress Mini, and my tutorial all about using the Cricut Mug Press!

    You can use four different tools on the Cricut Explore Air 2. In addition to the premium fine-point blade used for cutting, you can also use a scoring stylus, a deep-point blade, and a bonded-fabric blade.

    The scoring stylus can be used to create folds for things like cards, which the deep-point blade is used for thicker materials on the Explore Air 2. 

    Writing is also simple on the Explore Air 2. You simply put the special pen into one of the tool holders and let the machine write for you. You can write in Design Space using a script font and then have the machine write it all out.

    This is great for things like beautiful decorative writing with a lot of flourishes…or if you just have bad handwriting. 🙂 The pen can also draw intricate shapes for you. 

    A newer addition to the Explore Air 2 suite of capabilities is foil crafting. The new foil transfer tool is compatible with the Air 2 (and the Maker) and helps you embellish invitations, gift boxes, cards, and more. I haven’t tried this capability yet, but I’m keen to get my hands on the foil transfer kit soon!

    Next up, the Cricut Explore 3! I have had a chance to work with mine quite a bit. You might see the “3” in this machine’s name and think that it is simply a better version of the Cricut Explore Air 2. And, honestly—it pretty much is. But that doesn’t mean you need to get it.

    Cricut is still promoting both of these machines and has them available for purchase on their website. And the Cricut Explore Air 2 remains cheaper than the Explore 3. So what do you get for ponying up a bit of extra money?

    The Explore 3’s base prince is $319, and it cuts 100+ materials and works with tools for cutting, writing, and scoring. It also worked with print-then-cut. Sounds like the Explore Air 2 so far but more expensive, right? So what’s different?

    Well, it works with Smart Materials, meaning it can cut up to 12 feet instead of 2 feet. It also operates faster and (in my experience) smoother than the Explore Air 2.

    I’m not going to go too much into the materials this machine can cut and the tools it uses, because it really mirrors the Explore Air 2’s capabilities. The major difference on the Cricut Explore 2 is that it can cut without a mat is you’re using Smart Materials.

    And it can do looooong cuts with some of those Smart Materials as well. Here are the maximum cut sizes for a single cut:

    Not needing a mat is a huge bonus, in my opinion. Just loading the material and pressing go is a time saver. Plus you don’t need to continue buying mats and trying to use them within the last inch of their life when they are losing their stick.

    The Cricut Explore 3 can also cut faster. It is 2x faster (when cutting Smart Materials) compared to fast mode on the Explore Air 2. One thing I notice when cutting—regardless of whether I’m using Smart Materials or materials on a mat—is that the Explore 3 is smoother and quieter, too.

    So, is all of this worth it to you? It depends on what you want to make with your machine! If the idea of using Smart Materials and no mat is appealing to you, the Explore 3 is worth the extra money. And don’t worry—you still have the ability to cut using a mat with other materials.

    Long or repeated cuts could also be something that you’d like doing. Say you want to cut out a TON of smaller decals. You can just load a roll of Smart Vinyl and let the machine do its thing. No more swapping out mats and starting the cut again.

    For more on this machine, see My Guide to Using the Cricut Explore 3!

    Cutting on the Cricut Explore 3 using a mat DIY confetti cut out on a Cricut Explore 3 using a mat

    The third machine I’ll profile is the Cricut Maker. It’s a real powerhouse—both in DIY capabilities and in weight. Although it’s the same size as the Cricut Explore Air 2 and really looks pretty much the same, it’s definitely not the same on the inside!

    This machine is pretty incredible and is for the very serious crafters among us. Its base prince is $299, and it cuts 300+ materials. That’s compared to the 100+ materials that the Explore Air 2 and the Explore 3 cut.

    The Maker also works with 11+ tools for cutting, writing, scoring, debossing, and engraving. However, it has the same material max as the Explore Air 2: 2-ft max material length and 12-inch max material width. It also has print-then-cut functionality.

    The real selling point for the Maker is that it can cut A LOT of different materials. It cuts all of the stuff the Explore Air 2 can cut, but it also uses specialty blades to cut things like wood veneer, bass/balsa wood, leather, thicker chipboard, thick felt, corrugated cardboard, and more. Like the Air 2, it writes, scores, and is compatible with the foil transfer kit. 

    So let’s talk about the differences. Overall, this machine is just more powerful. It has commercial-grade technology (probably why it’s so much heavier) and an adaptive tool system to control the blades and cut pressure, providing 10 times more cutting power. The basic cutting is also done using the premium fine-point blade used on the Explore Air 2.

    The Maker has tons of tools for cutting, writing, scoring, debossing, engraving, and more. In addition to the fine-point blade, the Maker has a fantastic knife blade. The knife blade really takes the Explore Air 2’s deep point blade to another level, cutting up to 2.4mm (3/32”) thick materials. 

    You use the knife blade to cut basswood and balsa wood, among other things. I have a full tutorial on how to use the knife blade to cut wood on the Maker, as well as a post about cutting chipboard with it and making a leather hair bow with it.

    The Maker is also great for crafters who are into sewing. I haven’t used the sewing capabilities too much yet, but I did use my rotary blade and Maker to make some masks at home in the early days of the pandemic.

    In addition to the rotary blade making cuts super precise, the Maker can mark patterns on fabric. I suck at cutting straight lines and even cuts. And you can get tools for scoring, perforating, debossing, engraving, and creating wavy lines. I tested the debossing and engraving blades, and they were cool.

    The fourth machine we’ll profile is the Maker 3. This is the only machine I have never owned or personally tested. But it rolled out during the same campaign that Cricut rolled out the Explore 3 in, so I am pretty familiar with its features.

    Essentially the Maker 3 does everything that the original Maker machine can do, but it has the same upgrades the Explore 3 has—

    • It can cut without a cutting mat if you’re using Smart Materials
    • Cut the length increases dramatically if you’re using Smart Materials—up to 12 feet
    • It is compatible with the roll holder (sold separately) for large/long projects
    • It cuts 2x faster than the Cricut Maker

    Its base price is $429. So if you want access to all of the quick swap tools, the knife blade, and you want to extra perks of longer, faster cuts on Smart Materials, the Cricut Maker 3 may be a good choice!

    The next machine is the tiny but mighty Cricut Joy! This is such a cool little machine that really packs a lot of features into something that can be neatly stored in a drawer—a huge plus for those of us without a dedicated craft room! 

    This would make an amazing holiday gift for someone who wants to get their feet wet with Cricut. As a bonus, it’s the machine with the lowest price-point while still packing a bunch of different capabilities and features.

    The Joy’s base price is $179.99, and it cuts 50+ materials. You can cut and write on this machine, and it is not compatible with print-then-cut. The max material width is 5.5 inches, but you can get a 20-foot length with Smart Materials. It also has a cool card-making feature.

    Ok, so 50 materials might not seem like a ton coming off the heels of the 300+ materials that the Maker can cut…but here’s the thing. The 50 materials that the Cricut Joy can cut probably include many—if not all—of the materials you’ll want to cut if you’re a novice or intermediate crafter.

    It uses a fine-point precision blade, much like the Explore Air 2 and the Maker, to cut tons of intricate shapes. It can cut vinyl, iron-on, card stock, label paper, construction paper cardboard, Infusible Ink transfer sheets, papers, and more (see the full list of materials the Cricut Joy can cut here).

    A great feature the Cricut Joy has is mat-less cutting. This was Cricut’s first mat-less machine. You don’t need to use an adhesive mat if you’re using Smart Materials specifically designed for Cricut Joy.

    If you want to use regular materials or scraps, that’s fine too—you’ll just need to use a little Cricut Joy mat. I have cut things both ways on the Joy, and both are easy. 

    While it cuts a much smaller maximum width—5.5 inches—it can cut up to 20 feet long without a mat. (It can do a single image up to 4 feet long.) I really love this feature.

    Like other machines, the Joy can write for you. But keep in mind that the pens are a different size, so you can’t use the Explore Air 2/Maker pens on the Joy. Everything is scaled down for the little Joy. 

    But the writing feature is really great on the Joy, especially since you can use ready-made label paper! I actually used the label paper to make some return address labels—I just had the Joy write out my name and address and then cut the labels out. 

    Another cool thing about the Cricut Joy is that it comes with a mat specifically designed for making greeting cards. The card cutting works by cutting a design into a card stock sleeve. Then you insert a different-colored card on the inside of the sleeve, making the design pop.

    When the 2020 quarantine first started, R and I made a bunch of cards for her to draw in and send to friends. Helped us kill a few hours of being trapped inside 🙂 I have since used this for a couple different occasions, both designing my own cards and using the readymade projects in Design Space. 

    For more on this machine, see my post What You Can Make With a Cricut Joy!

    The Cricut Joy Xtra is an upgraded version of the original Cricut Joy. It can do everything the Joy can do, but it has a larger cutting size, allowing for shapes up to 8.5 inches wide. And you can use print-then-cut on the Joy Xtra!

    Its base price is $199, and it can cut the same number of materials the Joy can cut—50+ materials. All of the stuff you probably want to cut. It writes, draws, and foils.

    The Joy Xtra can cut all of the same things that the Joy can cut—vinyl, iron-on, cardstock, paper, labels, etc. The Joy Xtra’s cut size is an A4 letter size, so 8.5×11 inches, when using a mat.

    And it is compatible with Smart Materials (sized for the Joy Xtra). When using Joy Xtra Smart Materials, you can cut up to 8.5 inches wide and 4 feet long. And, of course, when using the Smart Materials, you don’t need a mat.

    So if you have a Joy and a Joy Xtra, you can’t use the Smart Materials on both. But if you choose the Joy Xtra, you get a wider cut range. Meaning you can cut larger designs, or more smaller designs at once.

    The Joy Xtra is also marketed heavily for its ability to work with print-then-cut functionality. And you know what that means…stickers! You can make stickers! And, of course, you can use the print-then-cut feature for printable iron-on and vinyl.

    So that means you can do a ton of stuff on the Joy Xtra that you can’t do on the original Joy. Honestly, I am really impressed with the functionality vs. price for the Joy Xtra. It’s a fantastic machine for both entry-level and experienced crafters alike!

    The Cricut Venture is Cricut’s foray into large-format cutting. It provides commercial speed and impressive precision while also adhering to Cricut’s promise of providing sleek, user-friendly machines.

    One thing you’ll notice immediately when looking at the Venture is that it does not lay flat. That means you don’t load it from the front. Instead, and because it’s a larger machine, it sits at a 45-degree angle. That helps to conserve room by negating the need for space behind and in front of the machine when working with mats.

    The Venture’s base prince is $999, and it can cut over 100 different types of materials—a few examples are vinyl, iron-on, paper, Infusible Ink, leather, poster board, and bonded fabric. And I used it to make some really cool large-format coloring pages for my daughter!

    There are two main selling points to the Venture: cutting speed and its size. Let’s talk about both. The Venture cuts at speeds of up to 25 inches per second, so it is FAST. If you are running a small business and want to cut a bunch of the same design quickly, the Venture is a great choice.

    When using Smart Materials, the Cricut Venture can cut up to 24 inches wide—twice the width of other Cricut machines. It can cut single images up to 12 feet long and repeated/separate images up to 75 feet long.

    And you can also cut with a mat on this machine. The Venture mats are performance machine mats that are made of a more durable material. You should know that other Cricut machine mates will not fit in the Venture and will crack and warp under the pressure of the pinch rollers.

    For a full review of this machine, see my post What is the Cricut Venture?

    Alright, so I’ve told you all about the different features of the machines. Now let me give you my hand-to-the-sky, God’s-honest truth about which Cricut machine I think you should buy:

    I don’t know. LOL. Sorry. But everyone’s needs are different. So let’s highlight a few things I want you to keep in mind while shopping. I have given this a lot of thought, and I truly hope it helps!

    • Cricut Explore Air 2: Great for beginners looking for a versatile and affordable option; ideal for budget-conscious crafters; best for those who want to work with a variety of materials but don’t require the most advanced features.
    • Cricut Explore 3: Good if you want the functionality of the Explore Air 2 with the additional convenience of cutting without a mat using Smart Materials; offers faster cutting and smoother operation compared to the Explore Air 2.
    • Cricut Maker: Tailored for serious crafters who need versatility and precision; can cut a wide range of materials, including wood, leather, and more; good if you want to cut more materials.
    • Cricut Maker 3: Similar to the original Maker but with the ability to cut without a mat using Smart Materials; perfect for users who need quick swap tools and want the perks of longer, faster cuts.
    • Cricut Joy: Compact and budget-friendly machine, great for beginners and crafters with limited space; most affordable machine and perfect for small-scale projects.
    • Cricut Joy Xtra: Offers the same features as the Joy but with a larger cutting size; unlike the Joy, has a print-then-cut functionality; can use mat-less Smart Materials; versatile and budget-friendly choice for both entry-level and experienced crafters.
    • Cricut Venture: Designed for large-format cutting and commercial speed; suited for small business owners or users who need to cut large quantities quickly; ideal for making large-scale projects; works with Smart Materials.

    Which Cricut should I buy? Pin my guide!
  • How to make personalize Cricut Infusible Ink bodysuits for a baby!

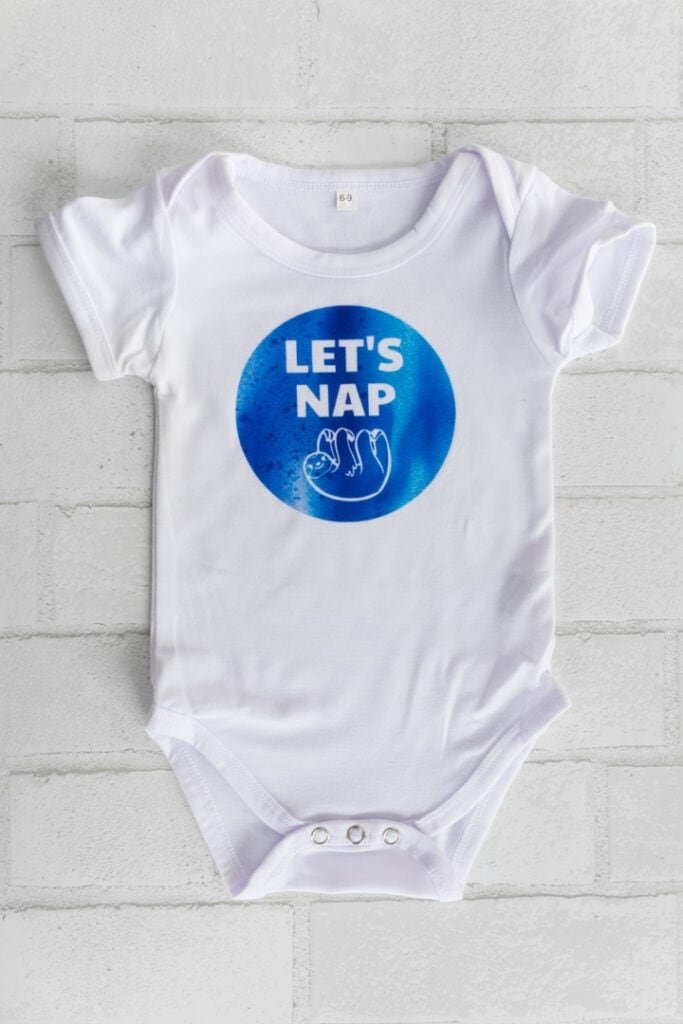
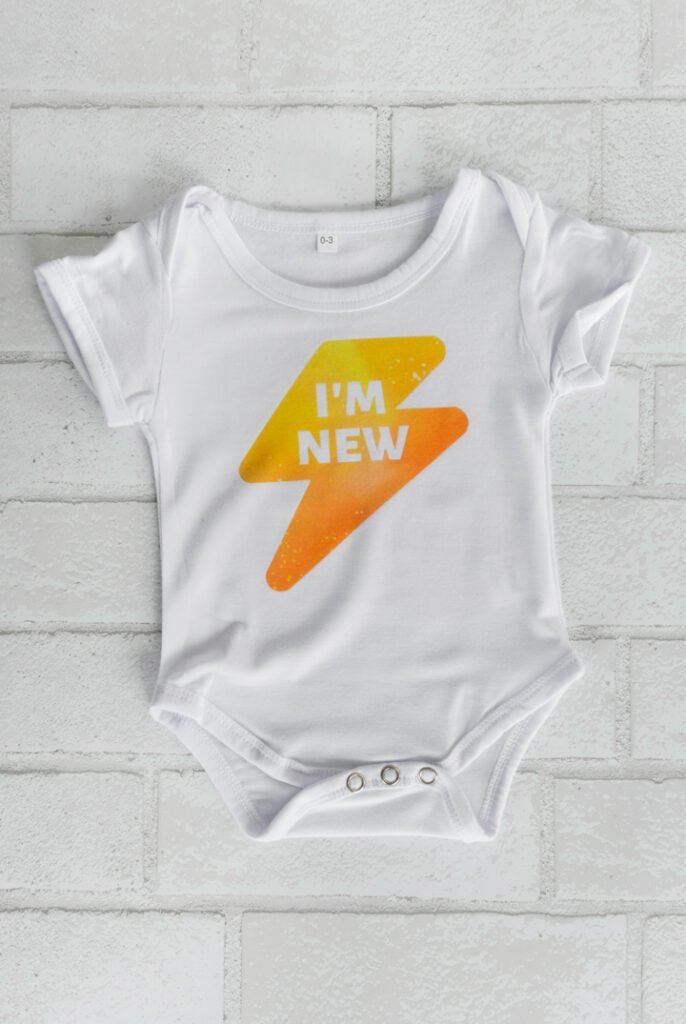
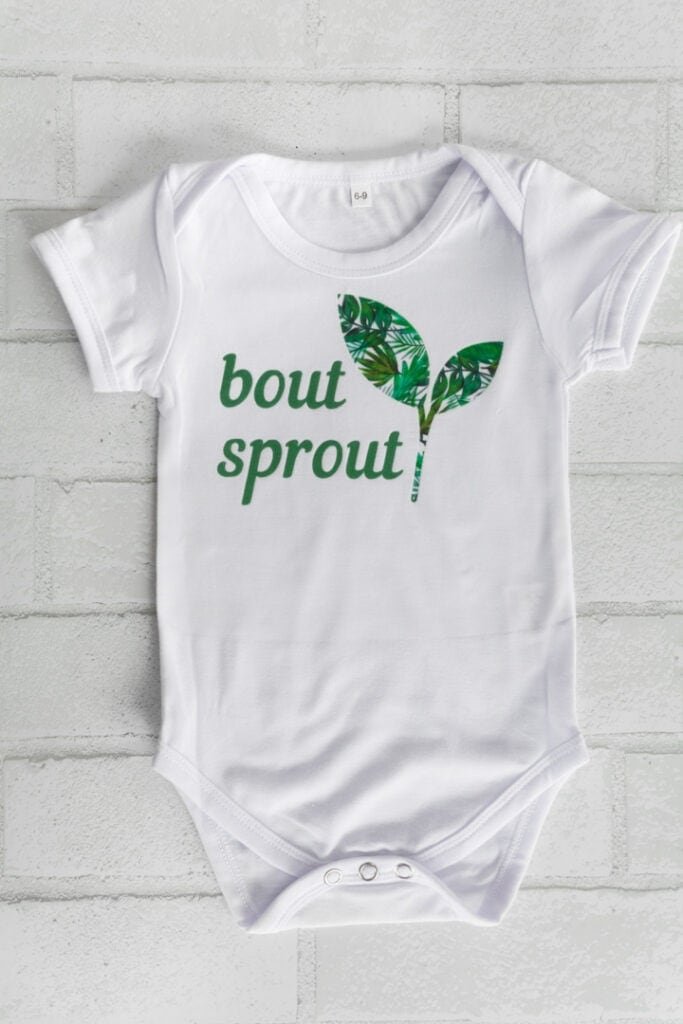
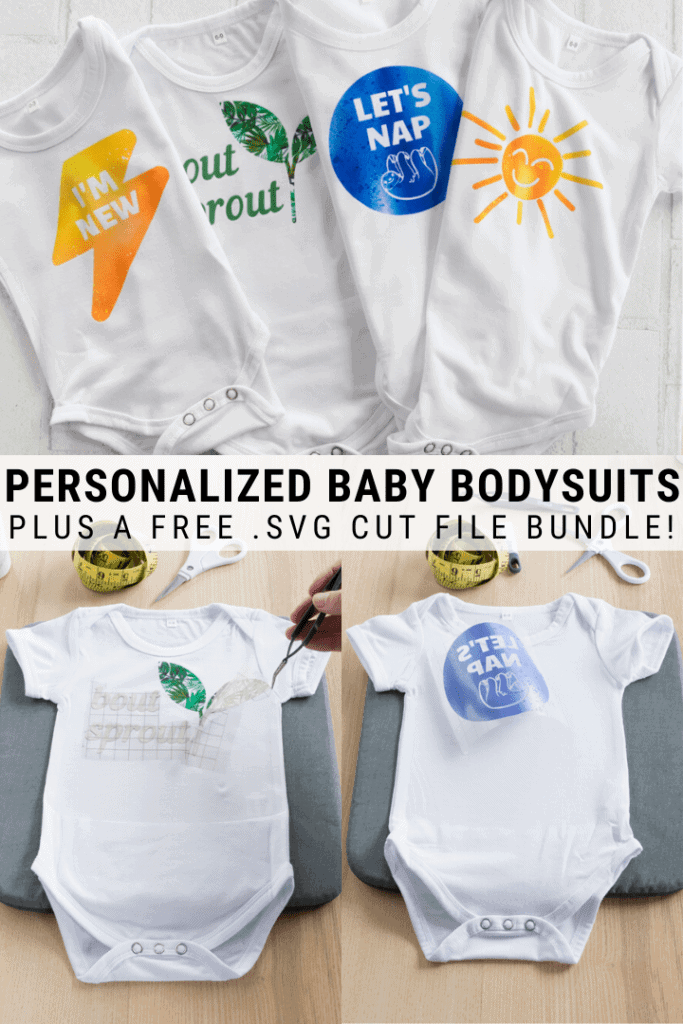
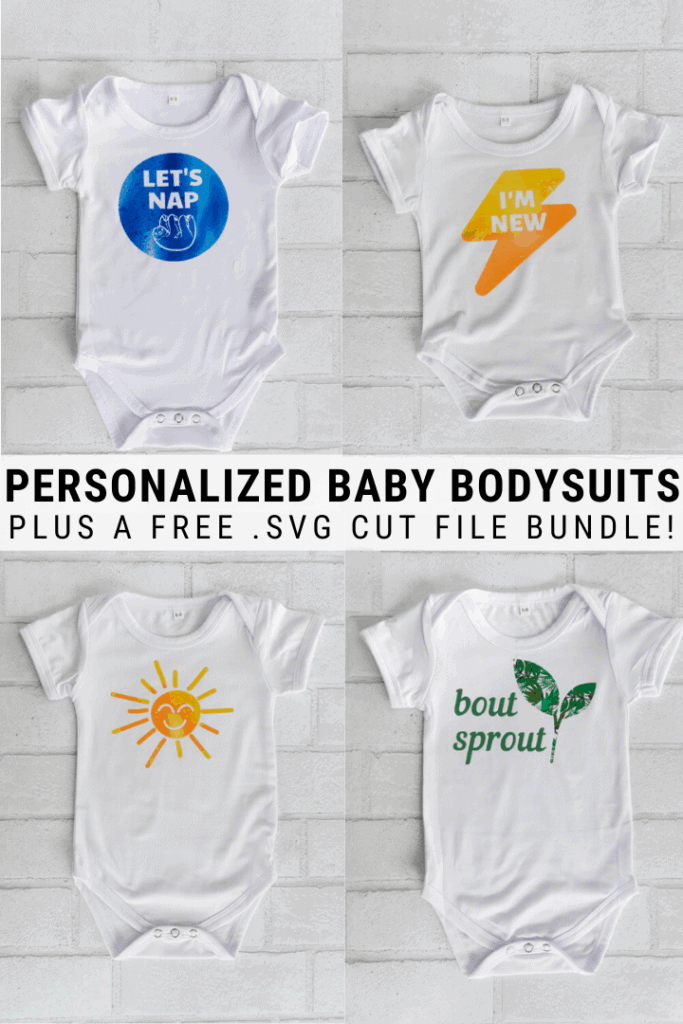
    This post shares how to make personalized Cricut Infusible Ink bodysuits for a baby boy using their custom baby bodysuit blanks! Infusible Ink is a great idea for customizing baby clothing because it is permanent and stands up to heavy washing. Learn how.

    Hey guys! Today I am sharing a post about how to make personalized bodysuits for a baby boy using Cricut’s Infusible Ink. The baby boy on the receiving end of these gifts is my cousin’s baby boy. They are getting TONS of our hand-me-downs, but I couldn’t resist doing a little personalized Cricut project for her.

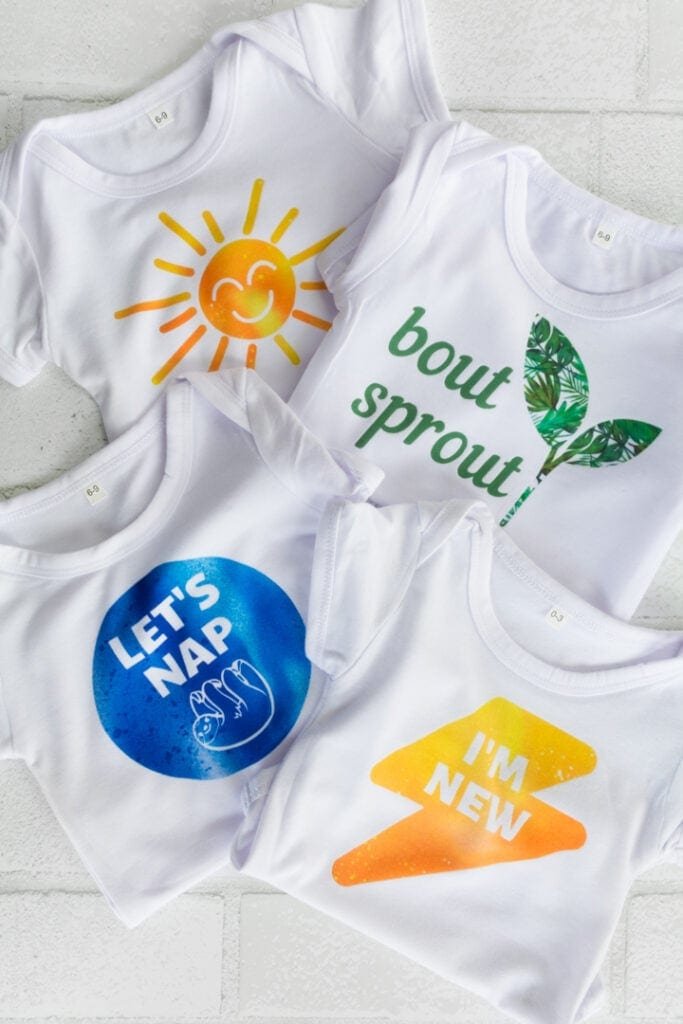
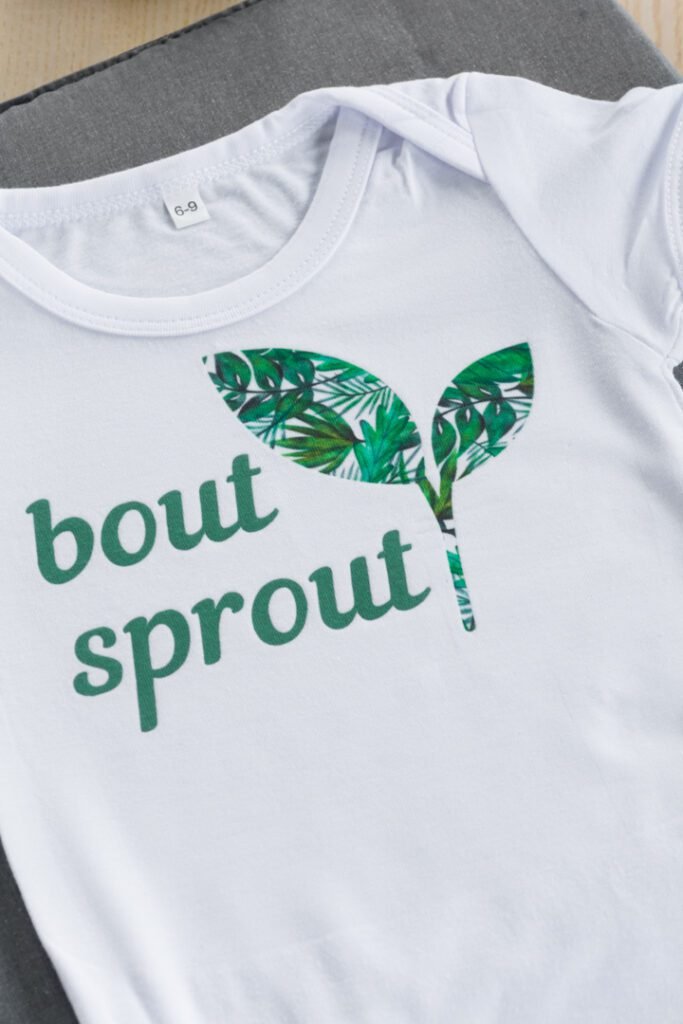
    I had some Infusible Ink scraps left over from previous projects, and since the baby bodysuit blanks are so small, they were the perfect size. I’m also sharing a few of the cut files I used for these baby bodysuits, so enjoy those! (The one that says “Bout Sprout” is generalized to say “Little Sprout” for the free download! I know your last name probably isn’t Bout.)

    If you don’t want to or need to delve deep into what Infusible Ink is, here’s the skinny: In a nutshell, it’s an ink-based heat transfer product. The ink comes in a solid state on a paper sheet (in stunning colors and patterns). You then use a heat press to transfer a design you cut out of the paper sheet to a blank material (baby bodysuit, for example). 

    The heat turns the solid-state ink into a gas and infuses it into the material. So, unlike iron-on or heat transfer vinyl, which sits on top of a material using adhesive, Infusible Ink becomes part of the base material. Cricut recommends using their custom blanks for best results. I’m using the Cricut Bodysuit blanks for this post.

    For more Infusible Ink projects, check out my tutorial on how to use Infusible Ink transfer sheets on coasters; how to personalize a cosmetic bag, toddler t-shirt, and pillowcase blank; and how to mix and match Infusible Ink sheet pieces on a kids t-shirt.

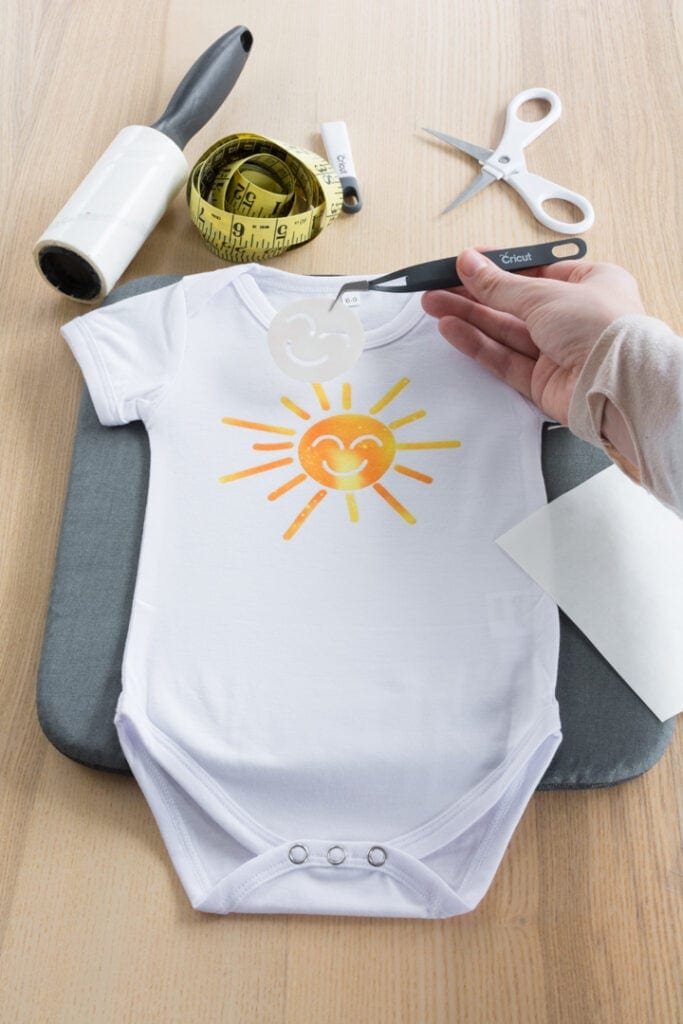
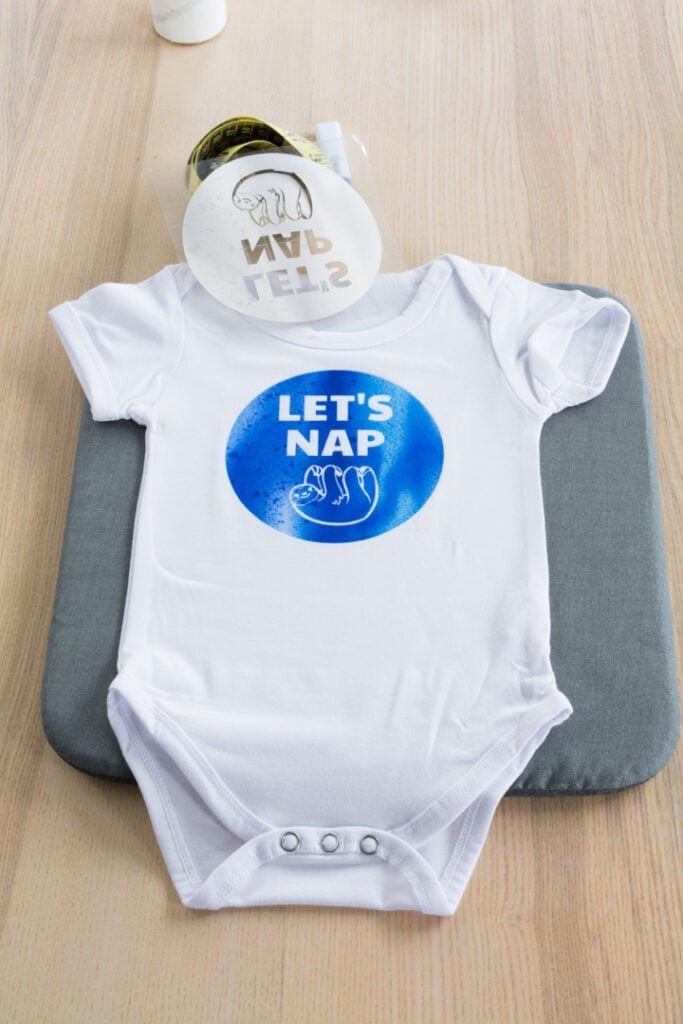
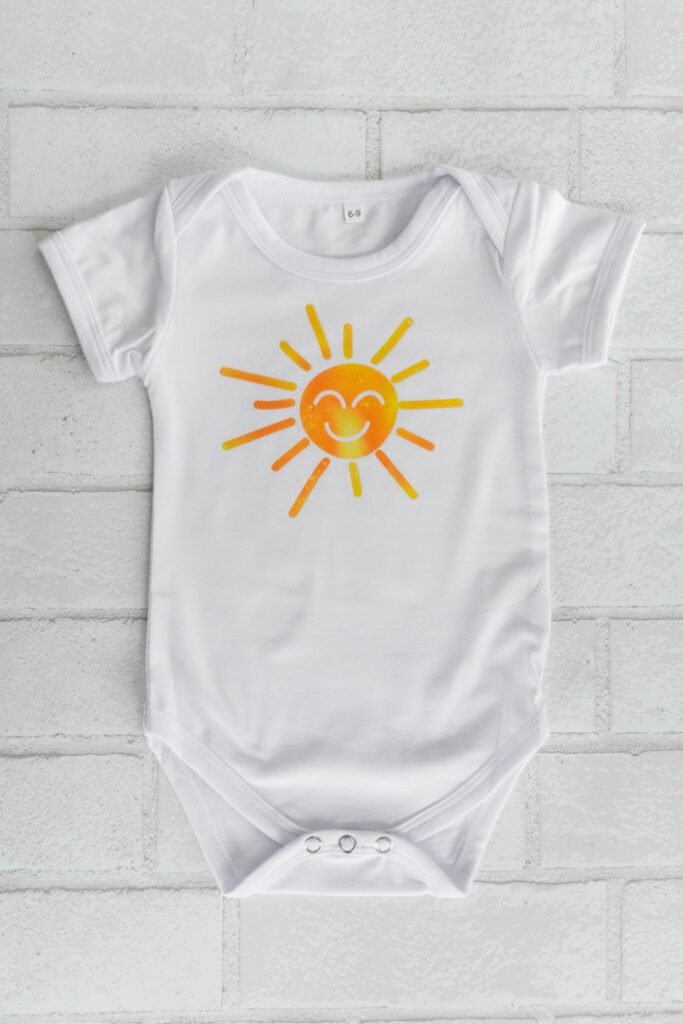
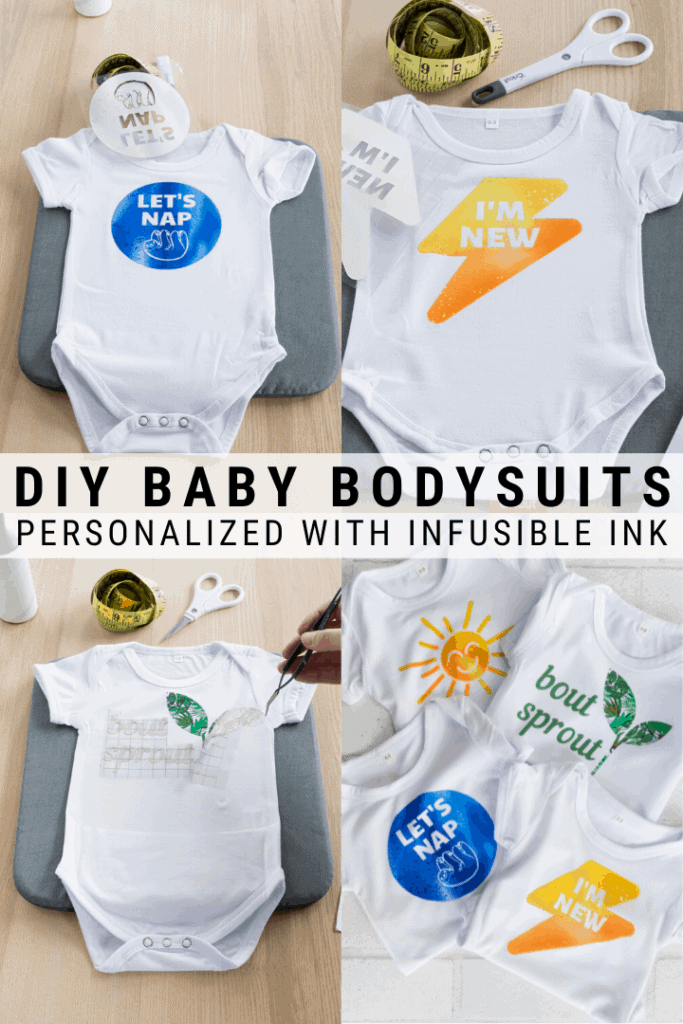
    The first step is to choose the Infusible Ink sheets you’ll use and cut your designs. You can download a few of the designs I used by signing up for my mailing list below! The sunshine one you can grab for free on Canva—just search “sunshine,” and you’ll find it. 🙂

    Infusible Ink is expensive, so treat it like a precious commodity. Size your design in Design Space; then cut a slightly larger piece of Infusible Ink transfer sheets and roll the rest up for another project. No need to waste! I also like to do this because it means I can cut multiple different designs into different colors and patterns on one mat. Time saver.

    Weed your design’s negative space out by gently rolling and folding the sheet to reveal the cut lines. Infusible Ink transfer sheets are incredibly easy to weed; you don’t even need to use a weeding tool.

    Note: If you’re on an Explore machine like I am, make sure to turn your machine’s dial to “custom” first. Then select Infusible Ink Transfer Sheet in Design Space and cut.

     %postname%

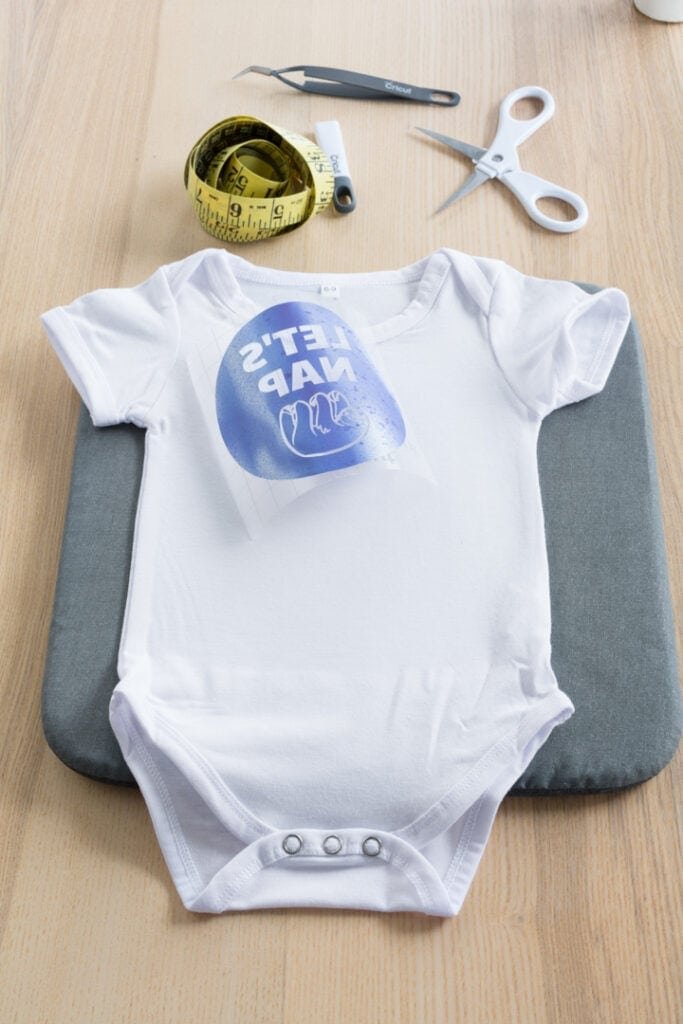
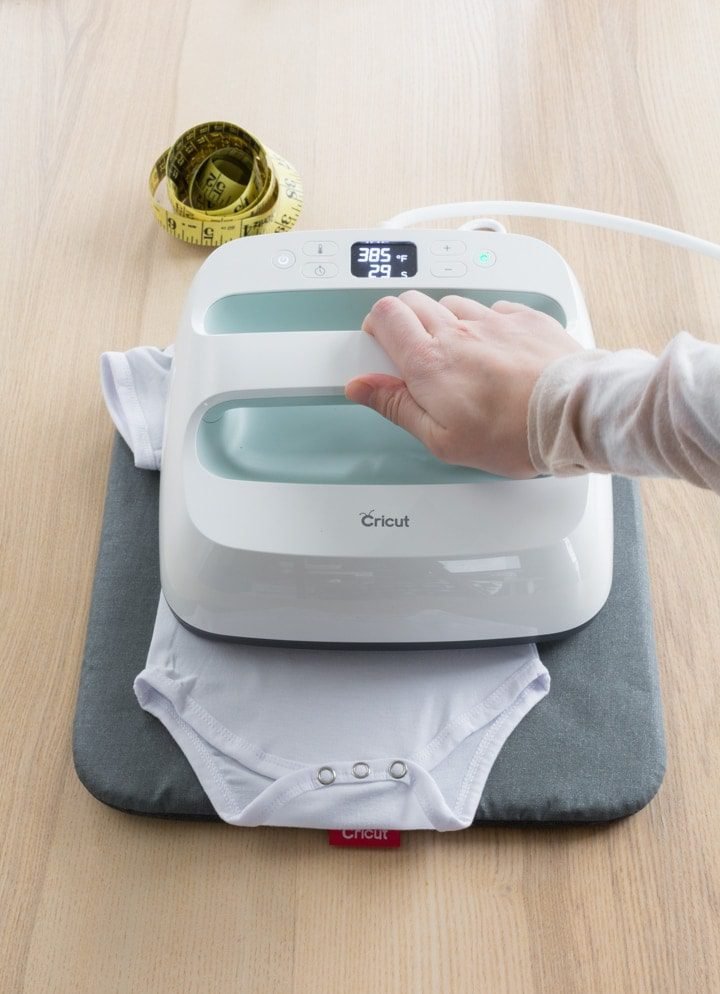
    Use the Cricut Heat Guide to figure out the settings you’ll need. For Infusible Ink, a Cricut Bodysuit, and an EasyPress mat, you’ll use 385 degrees F for 40 seconds. However, there is some preheating and other prep required.

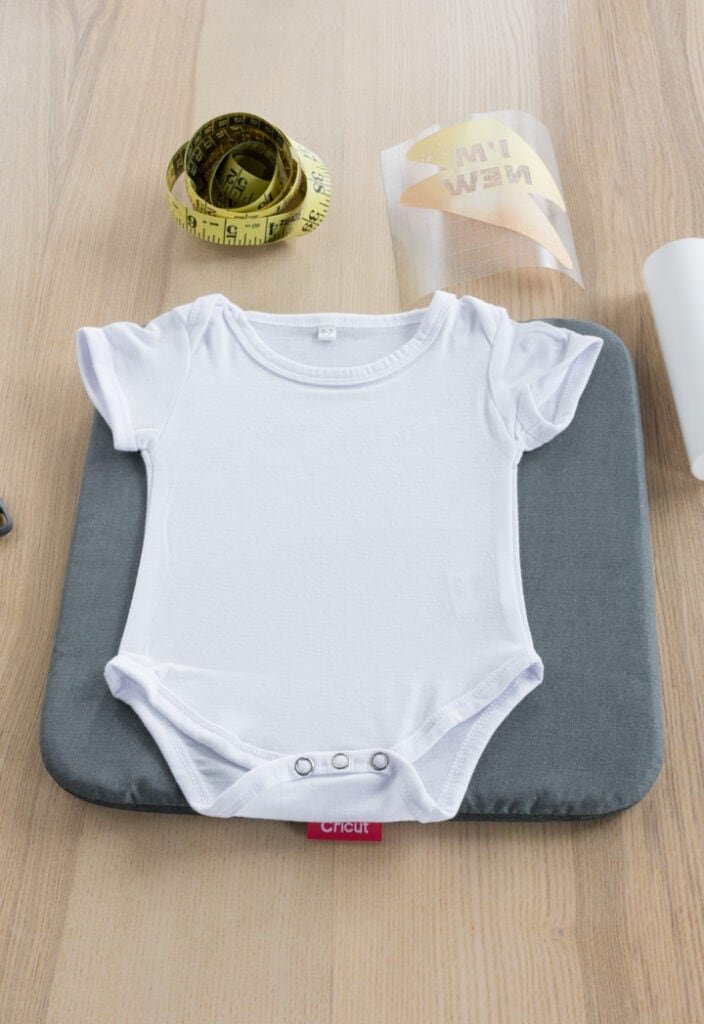
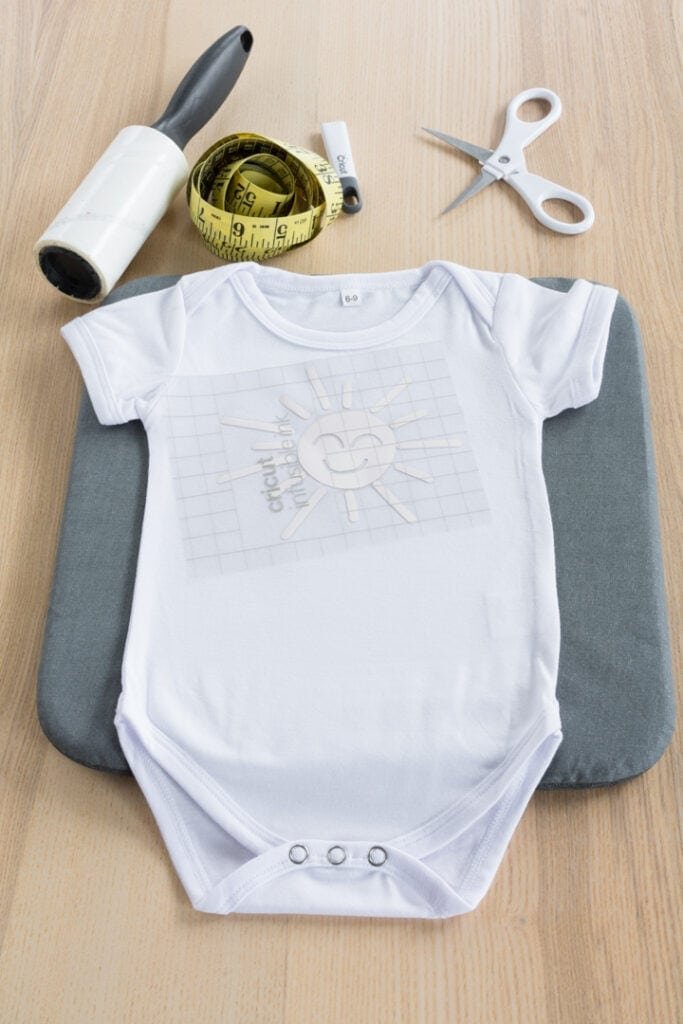
    To prep your baby bodysuit, lay it out over an EasyPress mat and use a lint roller to clean off the area you’ll apply the design to. Even if you don’t see anything. There could be tiny pieces of lint of hair that could interfere with your transfer. Then preheat the bodysuit for 15 seconds and let cool completely.

    Note that Cricut recommends sliding a piece of white card stock into the inside of the baby bodysuit, but I didn’t have any, so I skipped that. It’s just to block any bleed through should it occur, but I’ve never had it happen. Look at me being a risk taker!

     %postname%  %postname%  %postname%

    New to using the EasyPress? Check out my ultimate guide for using the EasyPress 2, as well as my tips for working with the EasyPress Mini!

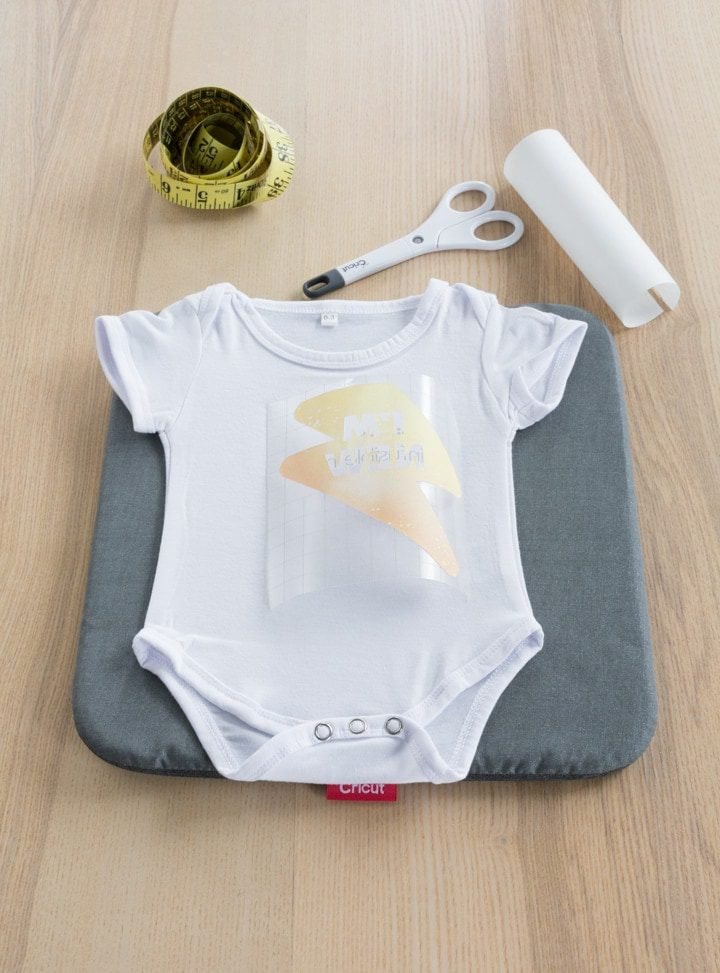
    After the bodysuit has cooled completed, place your design. Cut a piece of butcher paper that will completely cover the design and put it on top. With your EasyPress 2 at 385 degrees F, apply pressure to the design for 40 seconds.
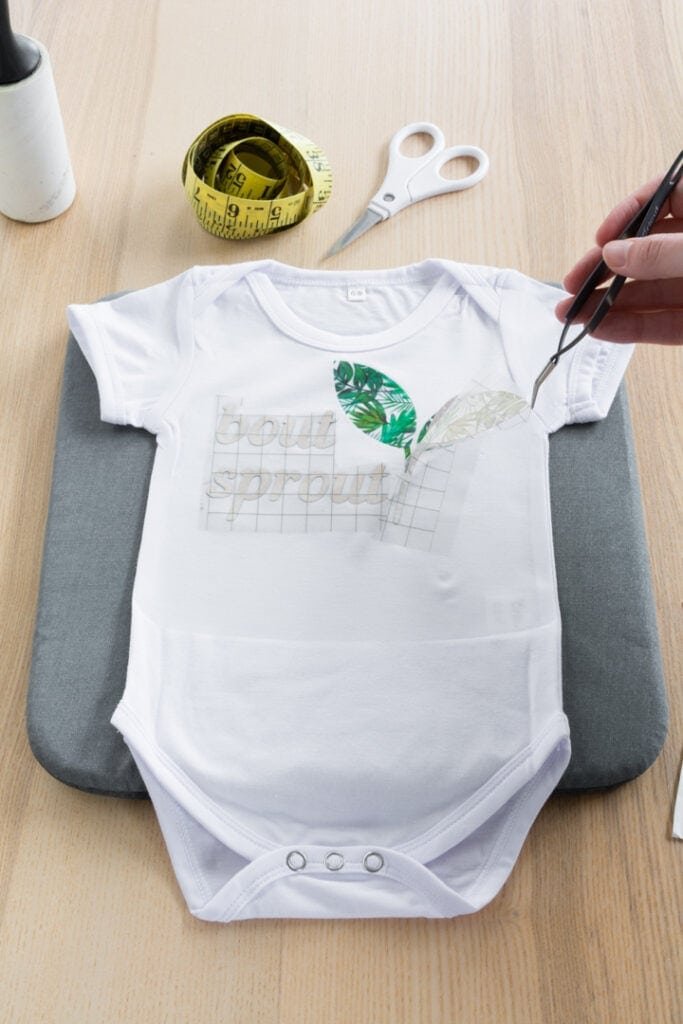
    It is very important that you not slide the EasyPress around at all. Doing so will lead to a “ghosting” or “smudged” effect that ruins your transfer. Instead, place the EasyPress 2 directly down onto the design and hold very still until you remove the EasyPress.

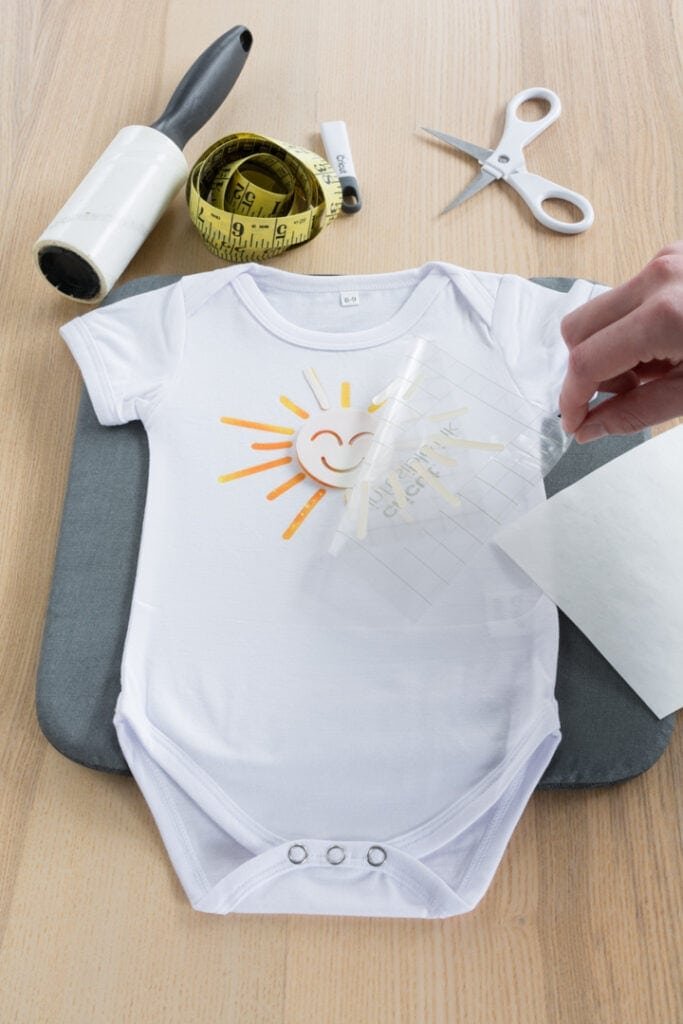
    Once 40 seconds is up, remove the EasyPress. The butcher paper might stay in place, or it might fly off. Gently remove the butcher paper and the cut design. If any pieces of the design remain on your bodysuit blank, use tweezers to carefully remove them. This happens when you have smaller pieces.

     %postname%  %postname%  %postname%  %postname%  %postname%  %postname%  %postname%

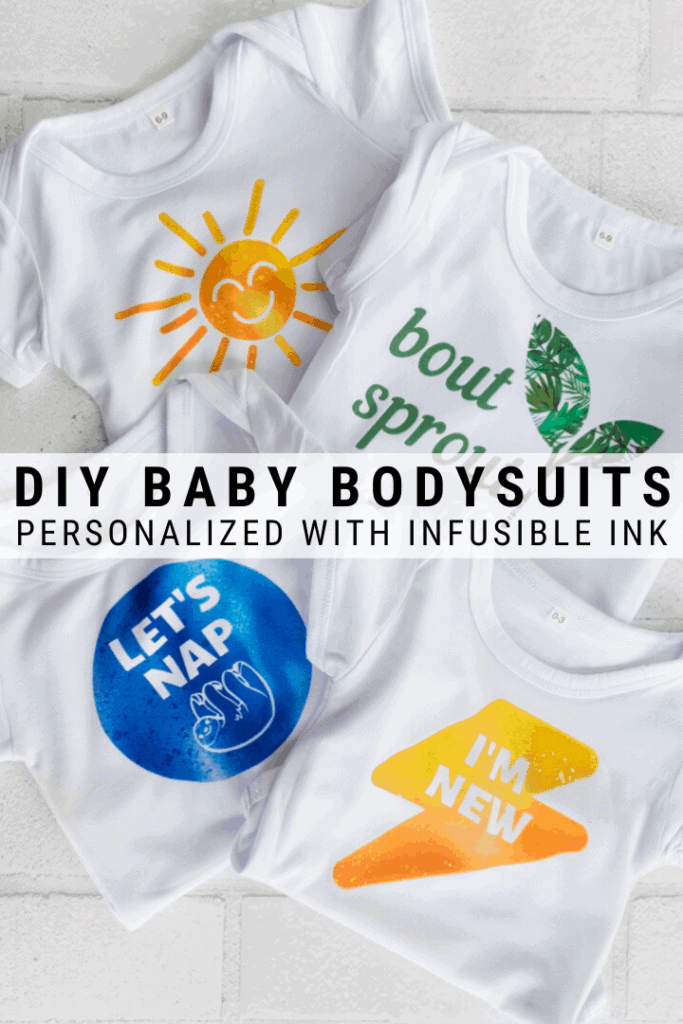
    Finished Personalized Bodysuits for a Baby Boy Using Infusible Ink

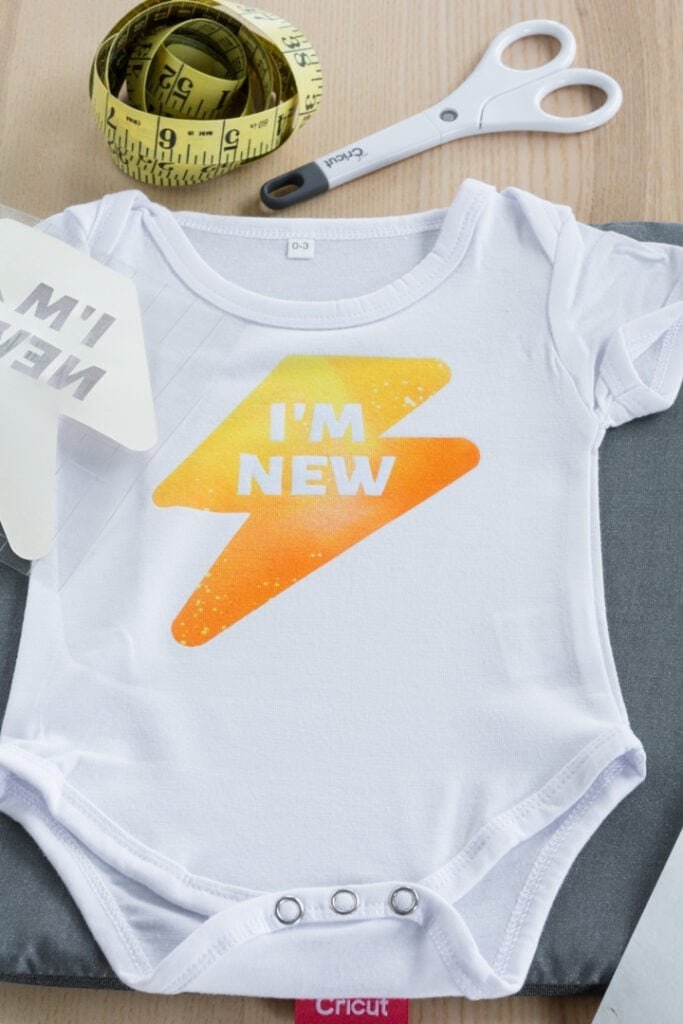
    Aren’t the finished designs beautiful? I really do love how vibrant the colors and patterns on these are. I do think Infusible Ink is very easy to work with if you take the necessary prep steps and do not move the EasyPress at ALL during the transfer. Also make sure to apply enough pressure during the transfer. Check out the finished bodysuits!

     %postname%  %postname%  %postname%  %postname%  %postname%

    Pin my Cricut Infusible Ink bodysuits tutorial!

     %postname%  %postname%  %postname%  %postname%

  • Free Feminism SVG Cut Files for Crafty Feminists!

    This content may contain affiliate links. See my full disclosure here.

    This post shares a fab bundle of free feminism cut files. These cut files include the sayings “women’s rights are human rights,” “support women,” “get in loser, we’re smashing the patriarchy,” and “loud proud feminist.” This SVG bundle is perfect for the crafty feminist! These files are for personal use only.

    Alright, I took a week or so off, but I’m back for an Offbeat Cut File Friday! Today’s theme? Feminism. Feminism means you believe in equal rights for women and men, and I don’t think “feminist” is a dirty word. Despite many people trying to make it so. But those people such, because not believing in equal rights for women and men suck.

    You don’t have to be a woman to be a feminist, either. So if there are any crafty gentlemen reading this, I hope you like these files, too. The bundle has four designs in it: “women’s rights are human rights,” “support women,” “get in loser, we’re smashing the patriarchy,” and “loud proud feminist.” This SVG bundle is perfect for the crafty feminist!

    Looking for tips on using the Cricut EasyPress to create heat transfer designs? See my complete guide to using the EasyPress family of products. I also have a review of the Cricut Maker and its knife blade, how to slice text on your Cricut and how to use Cricut Maker debossing and engraving tips!

    This one is probably my favorite of the designs. If you don’t get the reference, you need to clear your schedule to watch the Great American Classic movie Mean Girls. One of the best documentaries of our time.

    What do you guys think? What would you put these on? I’m dying to put “get in loser, we’re smashing the patriarchy” on a tank top. I’d like to wear it to library play dates with R to instantly weed out the lame moms. (Also feel free to steal that idea for your next potential mom friend screening date.)

    You can grab these cut files by signing up below!

    I use Grow by Mediavine to deliver most of my exclusive freebies. If you want to download all of the files, drop your email in the signup form below! It will unlock a link to my Dropbox folder with all of the files. As a bonus—the link will give you access to all of my free cut files.

    Here is a link to the Dropbox folder with all of my free cut files!

    Update!

    I used my favorite cut file from this bunch on a tote bag using Cricut’s Infusible Ink. It’s gorgeous! 🙂 You can also read more about using Infusible Ink on a tote in this post.

    Share my free feminism cut files on Pinterest!

  • Free printable daily planners with time slots, to do list, notes, and more!

    This content may contain affiliate links. See my full disclosure here.

    Grab my 6 free printable daily planners with time slots, space for a daily to do list, notes, and more. Plus, they have a cute cat theme!

    Hey guys! I am back with a few more printable planners. I mentioned in my last most about my free printable minimal daily planners that I wanted to do something with more structure. And I know a lot of people like planning their day out on a hourly schedule.

    So today I am sharing 6 free printable daily planners with time slots! And spaces for a to do list and notes. The themes are the same as the themes I used in the last round of printable planners—these are just tailored to more of a different audience.

    I’ve included shots of all of the printable planner pages in this post so you can see exactly what you’ll get. The time slots go from 6 AM to 6 PM. I figure that probably covers the widest range of times that most people like.

    I also included a “3 things I’m thankful for” section. Ok, I know this sounds a bit woo woo. But it’s a habit I have been trying to adopt after someone recently told me they were doing it. If you are someone like I am who can tend to get anxious and stressed out, focusing on the negative—this section can be a good reflection.

    Like these? You might like my free printable plant watering tracker and my free plant-themed printable to do lists.

    All but one of the templates have a section for notes, which is a nice free-for-all section that you can use for whatever you want. Want to see something else? Let me know! I want to make printables that are useful for people.

    When you print these, the muted colored boxes are super light. The higher the quality of paper you print them on, the better they will show up. Of course this isn’t a neccesity. I printed a few on a home printer and they work just fine.

    What I generally like to do when I print printables is print a big batch at once using Staples.com order online and pick up. Or a similar option like Fedex Kinkos. You can get them on higher quality, more durable paper, which I really like.

    Also, none of these have a print bleed issue since they are all a white background. Super easy to print. Oh—and all of these are designed to be printed on U.S. letter-sized paper. So that’s 8.5 inches by 11 inches.

    If you have kids, you’ll definitely want to check out my free printable weekly chore charts, my printable sleep trackers, and my 11 free printable potty training reward charts!

    I use Grow by Mediavine to deliver most of my exclusive freebies. If you want to download this and ALL of my printable planner pages and to-do lists, drop your email below! It will unlock a link to my Dropbox folder with all of the files.

    Here is a link to the Dropbox folder!

    Pin my free printable daily planners with time slots!