Category: Uncategorized

  • Free pumpkin SVG files for immediate download!

    This content may contain affiliate links. See my full disclosure here.

    Looking for free pumpkin SVG files? Look no further! I have two you can download and use immediately on all of your personal crafting projects.

    Hey all, and happy almost fall! Everyone loves fall, right? I guess fall looks different based on where you live, but here in Maryland, we have all four seasons. Fall begins in late September and generally lasts until late November, depending.

    I wasn’t too into fall festivals, pumpkins, and all of that stuff until I had a kid, if I’m being honest. Now we actively seek out and enjoy everything fall related. The sweaty and humid Maryland humidity is over, and you can comfortable wear jeans and a hoodie outside—my uniform!

    I have two free files for you today. They are the same shape, but one is designed as more of a print-then-cut pumpkin SVG file with the orange and green. Of course you can upload this to Cricut’s Design Space. Or the software for whatever cutting machine you’re using.

    And create to your heart’s delight! Below I have this file mocked up on a coffee mug to give you an idea of how it will look.

    The second option is designed more for solid cuts. For example, if you want to cut this shape out of any color vinyl, iron-on adhesive, Infusible Ink, paper, or more. The file is black, but that’s just to show the shape of the pumpkin.

    You can cut this in to any type of material you’d like. Below I have it mocked up on a baby bodysuit in a brown color, and I added the text “Little Pumpkin.” This text isn’t in the file—but you can easily add it in your design software!

    For more Halloween stuff, check out my free pumpkin face SVG files, my DIY pineapple Halloween costume for a toddler, and my 25 free printable Halloween candy signs!

    I use Grow by Mediavine to deliver most of my exclusive freebies. If you want to download all of the files, drop your email in the signup form below! It will unlock a link to my Dropbox folder with all of the files. As a bonus—the link will give you access to all of my free cut files.

    The pumpkin files are in the “Cut Files_Pumpkins” folder…download instantly from there! Enjoy!

    Here is a link to the Dropbox folder with all of my free cut files!

    Pin these freebies!

  • Melting Crayons in Silicone Molds: How to Melt Crayons

    This content may contain affiliate links. See my full disclosure here.

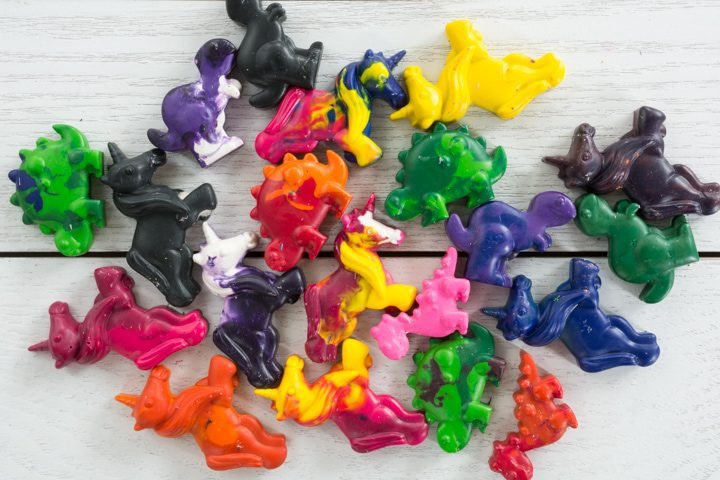
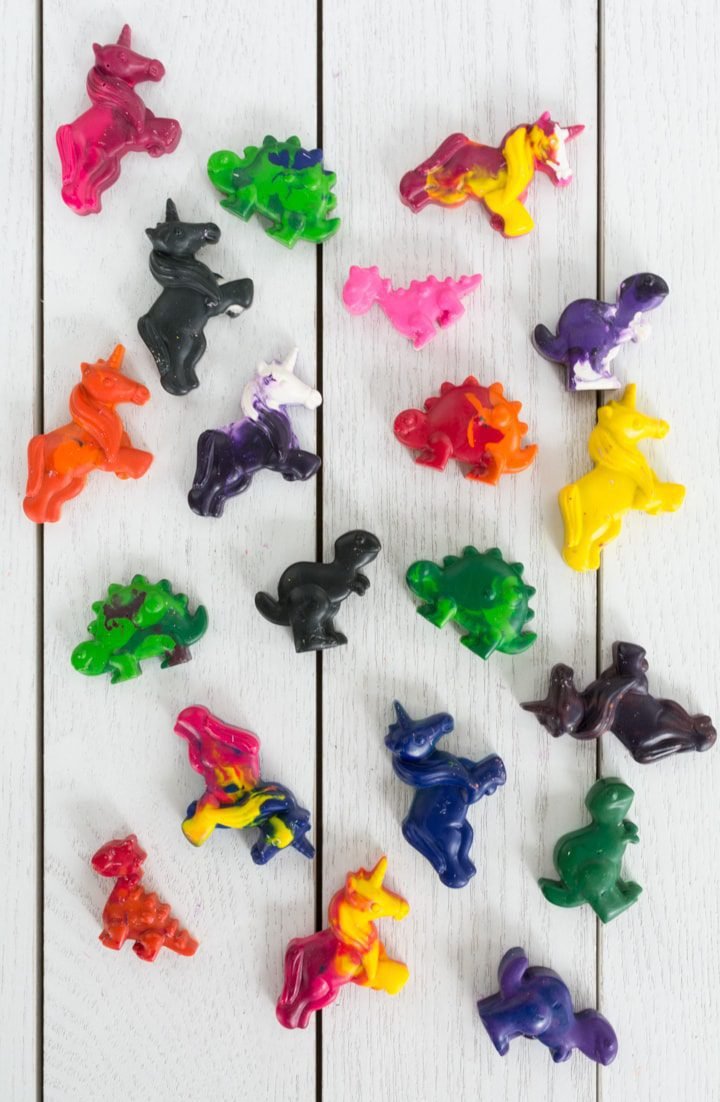
    Wondering how to melt crayons? There are a lot of ways to do it. Today I’m talking about using a heat gun for melting crayons in silicone molds. And, bonus: they’re cute unicorn and dinosaur molds.

    Hey hey, popping in today to share a quick tip about how to melt crayons! Melting crayons in silicone molds is a great way to upcycle old or broken crayons into a fun thing for kids.

    Honestly, these are so cute that they would even make a cute thing to do using new crayons. Especially when you have a 1 year old who has discovered she can break crayons in half…for fun.

    I loved making upcycled melted crayons with my mom when I was younger. We used cupcake tins, but when I saw these adorable unicorn and dinosaur silicone molds on sale for two for $5, I jumped at it! All you need for this project is crayons and a silicone mold.

     %postname%

    • Crayons
    • Silicone molds—I used a unicorn mold and a dinosaur mold I snagged on a great sale at Joann. There are a ton of similar ones out there though.
    • Heat gun, oven, microwave, or doubler boiler method—your choice
    • Gloves, paper towels, oven mitts

    There are a few different ways to melt crayons. First, you could use an oven. If you use an oven to melt your crayons, you can melt them in an oven-safe container for about 10–15 minutes at about 200 degrees Fahrenheit.

    Tip for using a silicone mold: They are floppy, so set them on a cookie sheet to protect against spills. You can also use the microwave.

    I don’t super love this method because you have to check the crayons every 30 seconds or so while they are melting to make sure they don’t overheat. They should require about 2 minutes total to melt.

    Make sure you’re using something microwave safe if you do this method (no metal, obviously). You can melt in a plastic container and then pour the melted wax into your mold, too.

    A double-boiler method is possible, but it’s honestly probably more trouble than it’s worth. It’s the method of choice for making candles. I outlined the method in my DIY beeswax and coconut oil candles routine. (You gotta use that method for beeswax because beeswax is flammable and come into direct contact with heat.)

    Finally, there’s using a heat gun. You definitely don’t have to do this. I just already had the heat gun and figured I’d try it out to see how effective it was. I’ll talk more about using the heat gun in step 2 below.

     %postname%

    Like easy kid crafts? Check out my tips for how to make a glitter sensory bottle and making DIY sidewalk chalk paint. I also have a review of a life-sized colorable cardboard playhouse and 5 different homemade playdough recipes!

    Remember to use the proper safety precautions for whichever crayon melting method you choose, including protecting yourself from burns and protecting your workspace from spilled wax.

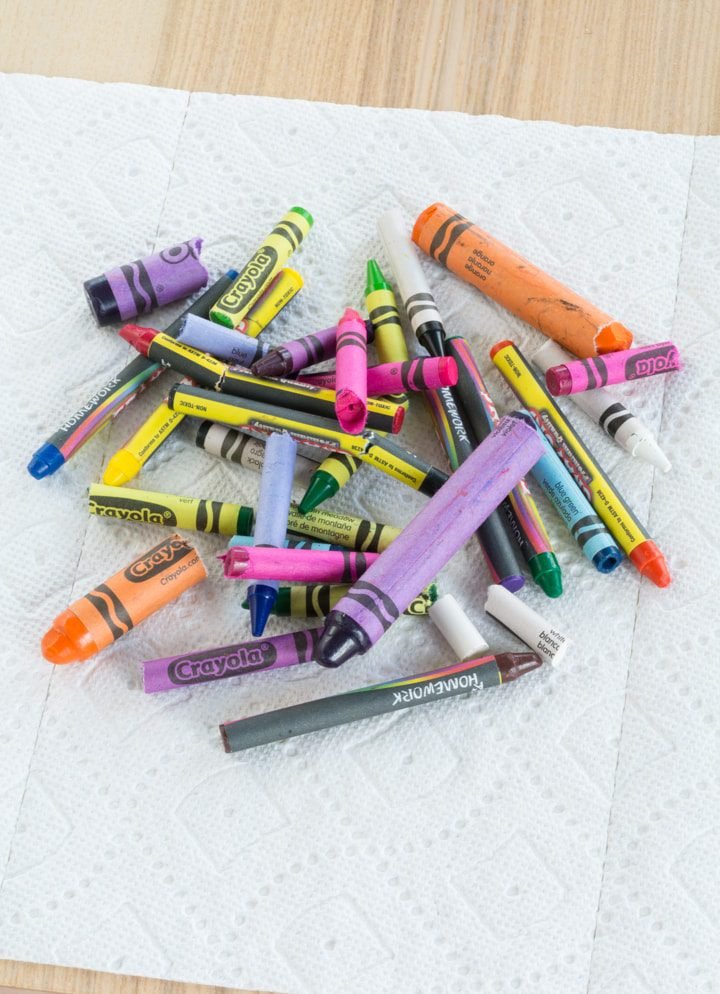
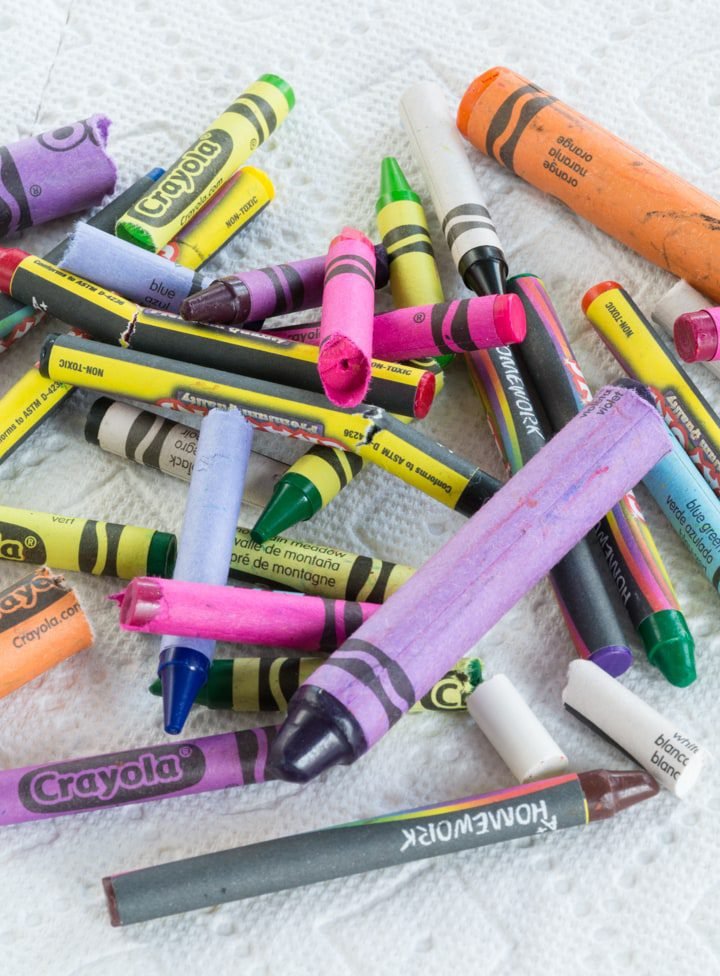
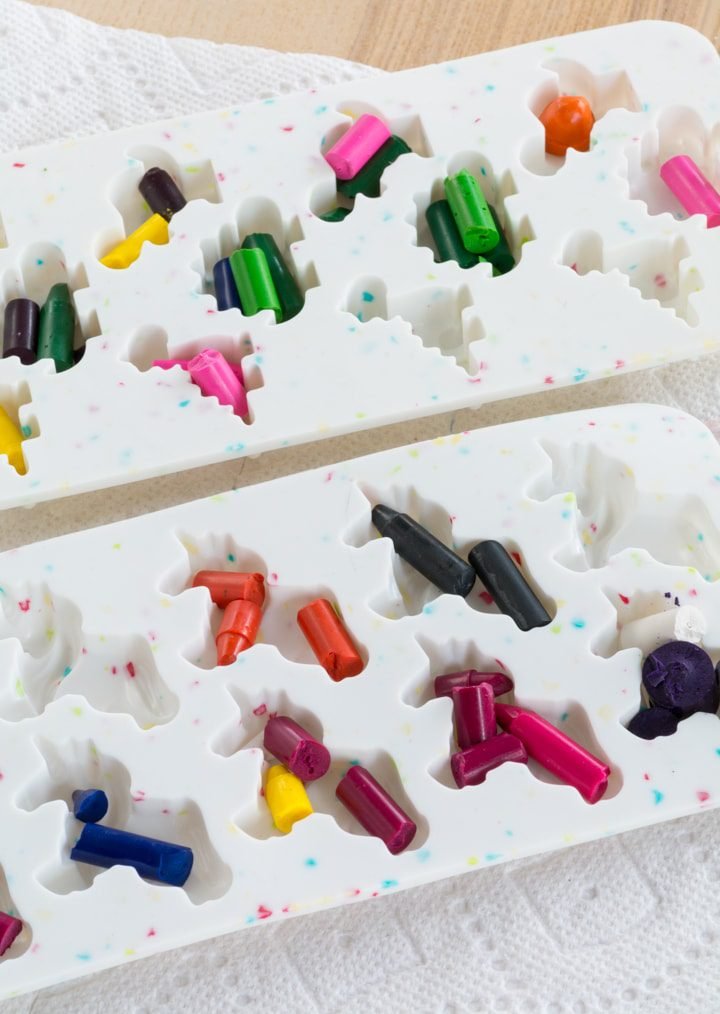
    The first thing to do is gather your broken crayons and remove the wrappers from them. Then you can break them down into smaller pieces using either your hands or a small knife. This depends on the size of your mold pieces.

     %postname%  %postname%

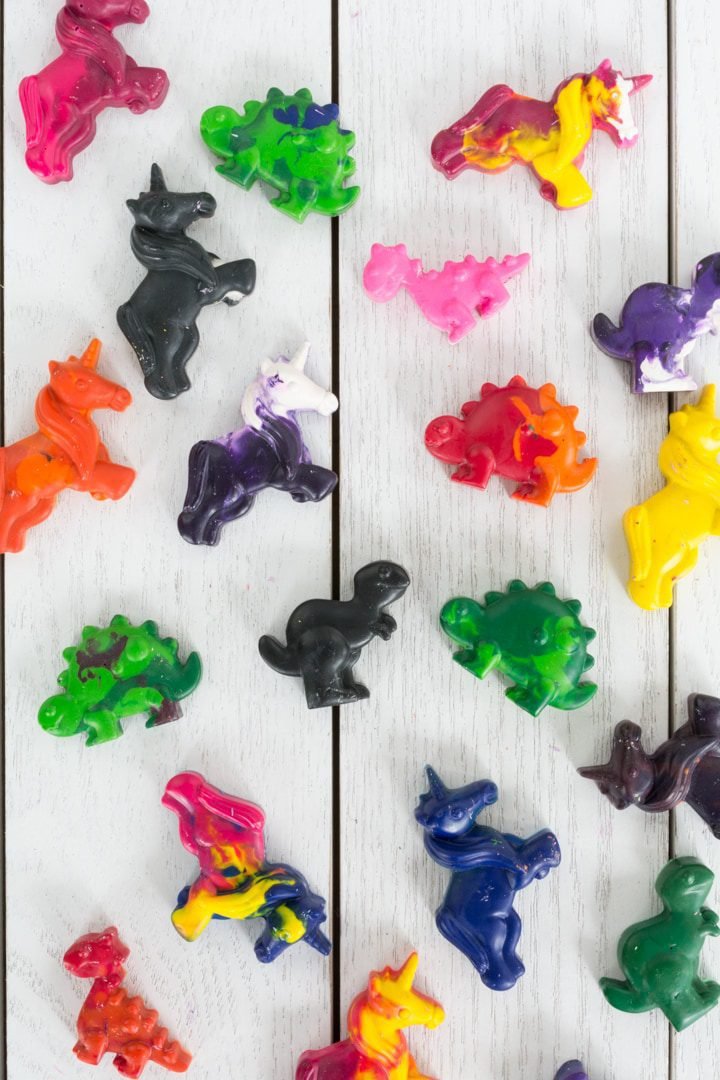
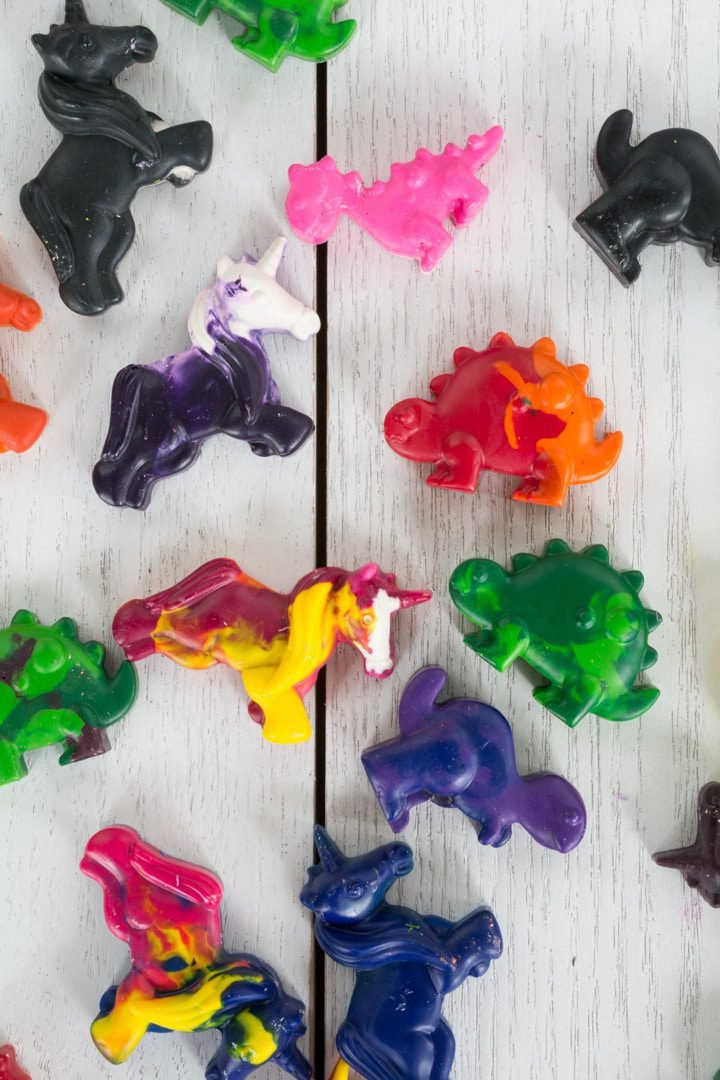
    The next thing you’ll need to do is decide on your color patterns. You can do solid colors or mix and match. I did a bit of both. And I tried to avoid traditional gender-norm colors 🙂 Pink and purple for dinos too.

     %postname%

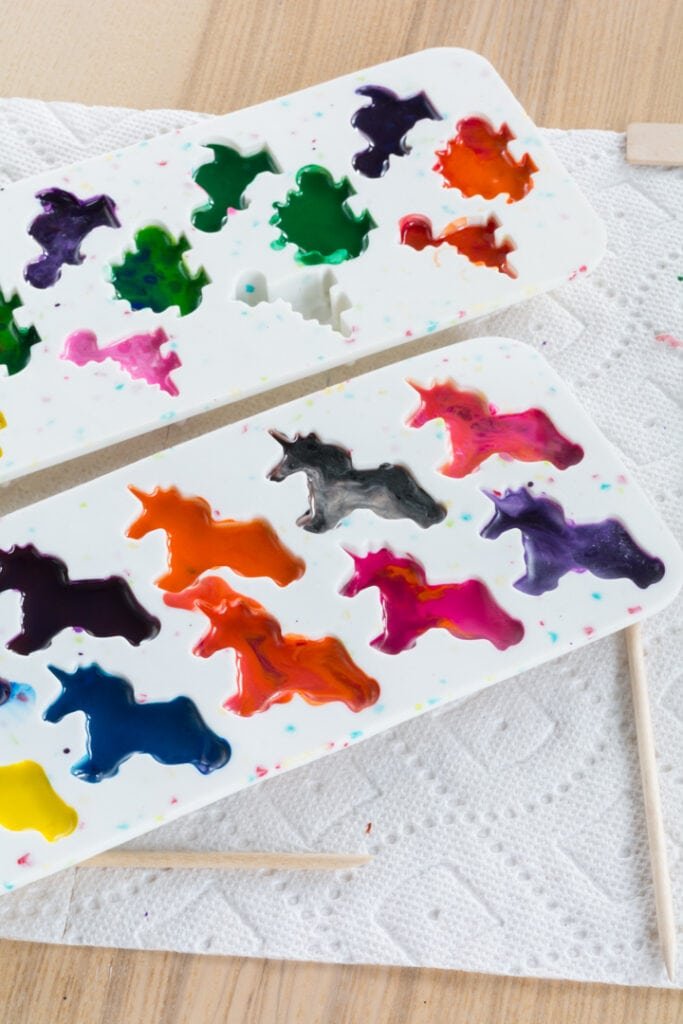
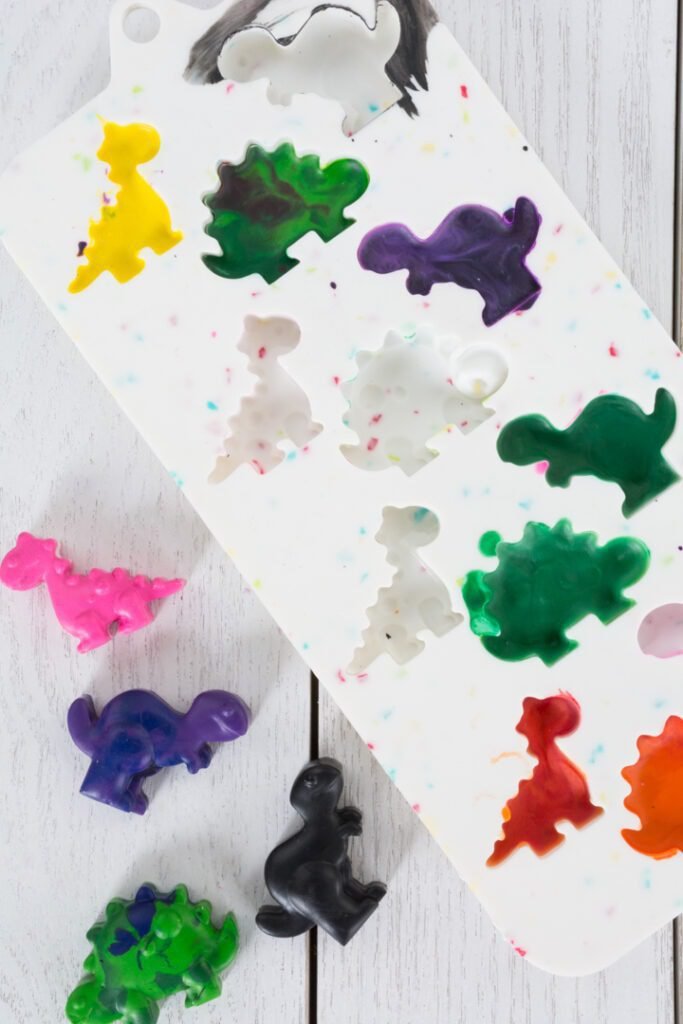
    I decided to use my heat gun to melt the crayons in the silicone molds to see how effective it was. I liked how I could easily melt the crayons in the mold on the table and then just let them cool and solidify in place. For molds, I chose a unicorn mold and a dinosaur mold.

    But I will be honest—while the heat gun was effective, it took a bit longer than I thought it would. Likely because I was experimenting with heat levels and the two different fan levels.

    It would have also been nice to pop these in the oven and go about my business for a few while the crayons were melting. Another thing to keep in mind—a heat gun has a bit of fan on it, so it blew around the colors and mixed them a bit more than the oven would have.

    This definitely makes for a cool-looking product, but it isn’t entirely necessary to have a functioning crayon. 🙂

     %postname%

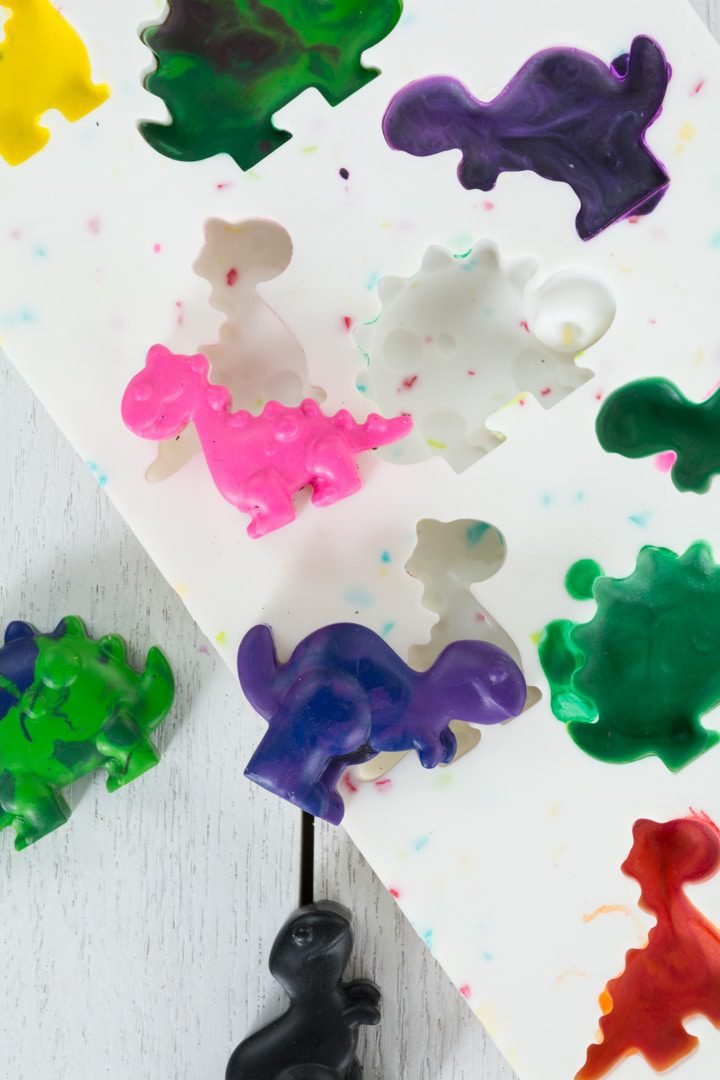
    After everything has totally cooled, pop the new crayons out of their molds and get to coloring! These are almost too adorable to color with.

     %postname%  %postname%  %postname%  %postname%

    For more kid stuff, check out my DIY door knob hanger, my 10 cute free printable weekly chore charts, and my roundup of cute Cricut projects for kids—including my DIY animal fronts and butts matching game!

     %postname%

  • How to Make a Mala Necklace: DIY Mala Necklace or Bracelet

    This content may contain affiliate links. See my full disclosure here.

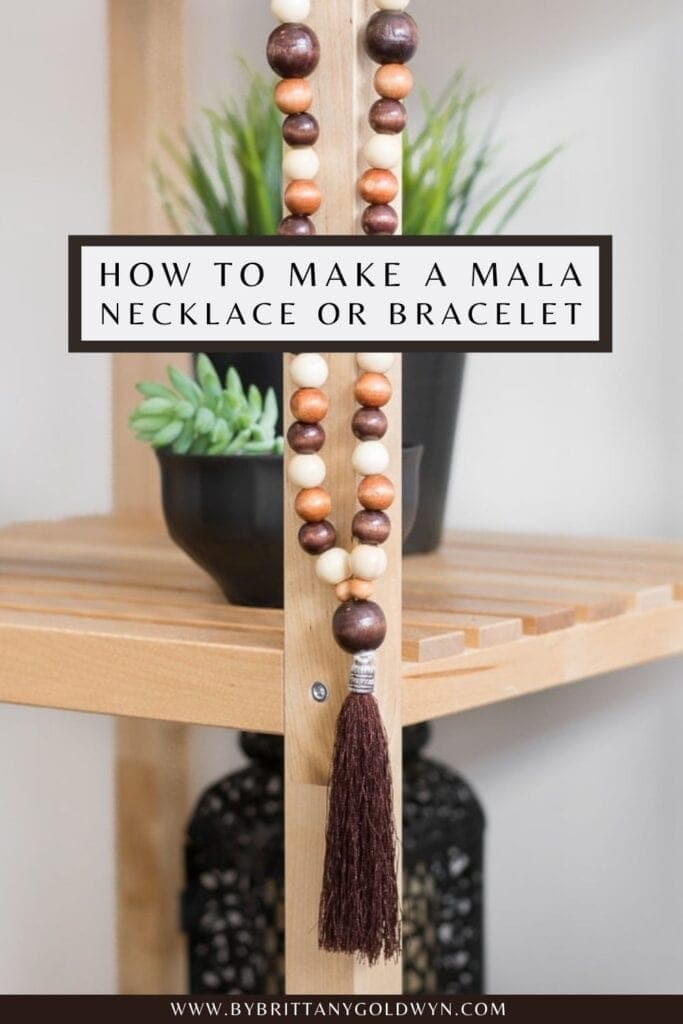
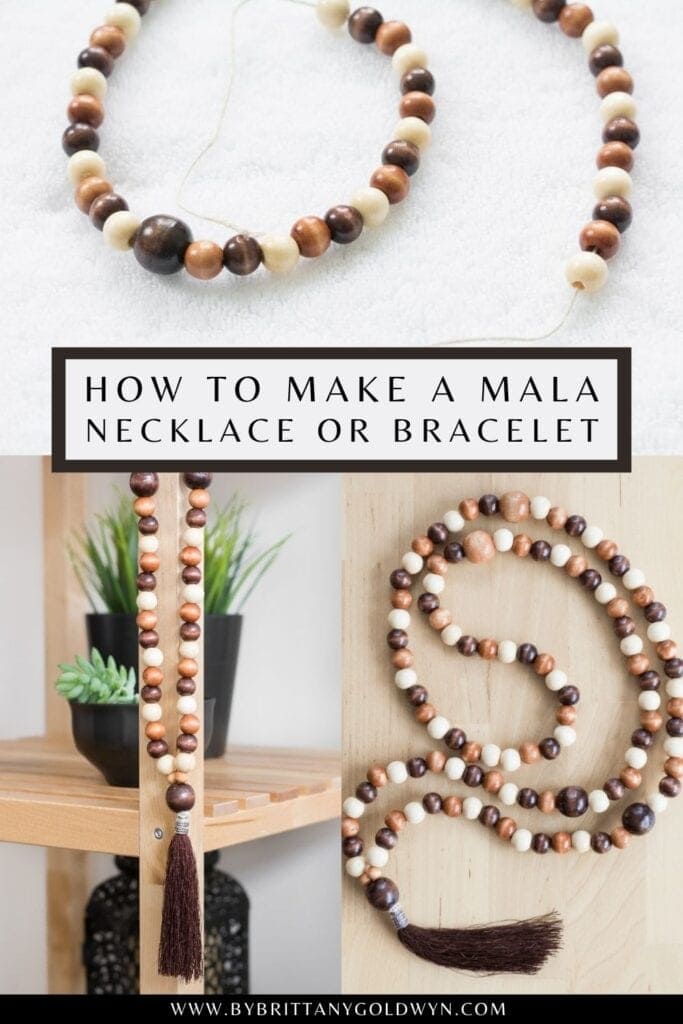
    This simple tutorial will teach you how to make a mala necklace or bracelet—a great addition to your daily meditation routine.

    Today I’m updating an old post, so if you’re wondering why this project looks familiar, that’s why 😉 I thought it was high time I update and re-publish it with new photography and instructions. Plus is gave me an excuse to make a mala, which was a nice way to take a break from home projects.

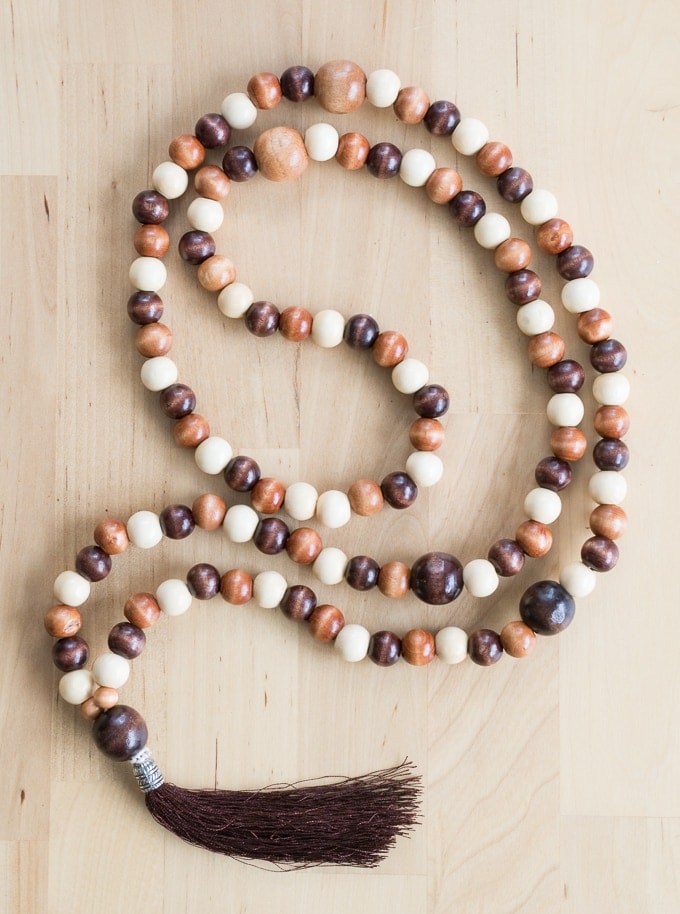
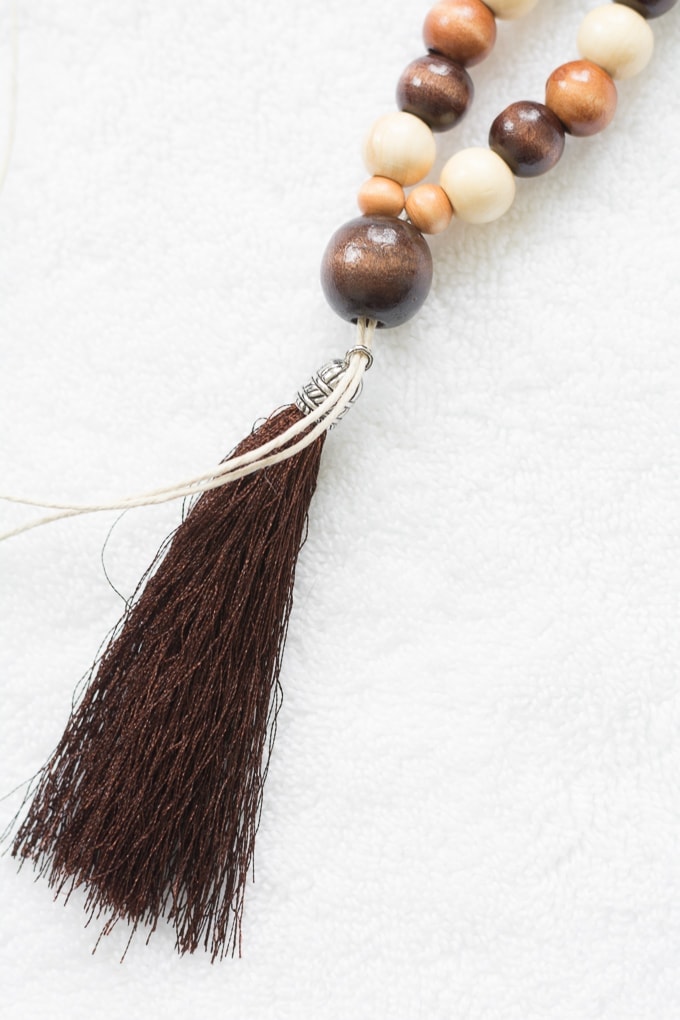
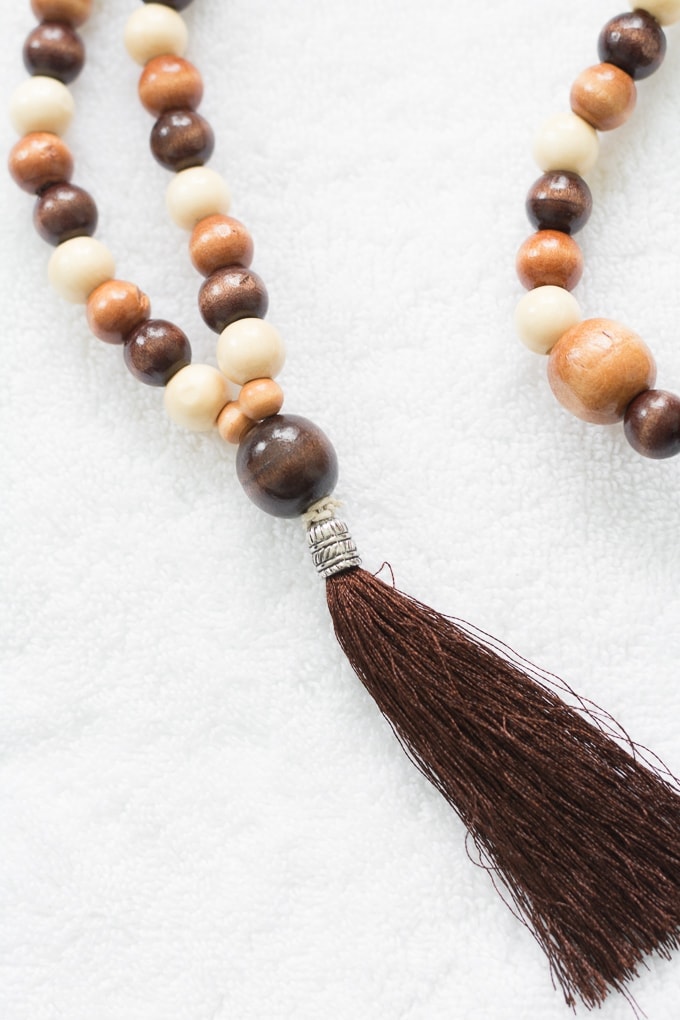
    So what’s a mala? A mala is typically used during meditation to help count mantras. Traditionally, a mala has 108 beads, a guru bead (which is a larger bead at the center), and a tassel. To get a basic overview of the mala and its use, you can read this article.

    When you’re not using your mala, you can wear it as a necklace or hang it somewhere in your room (that’s what I do). That way, it serves as a reminder of why you meditate, what’s important in live, and all that good stuff.

    Want to learn how to make a mala necklace? Read on!

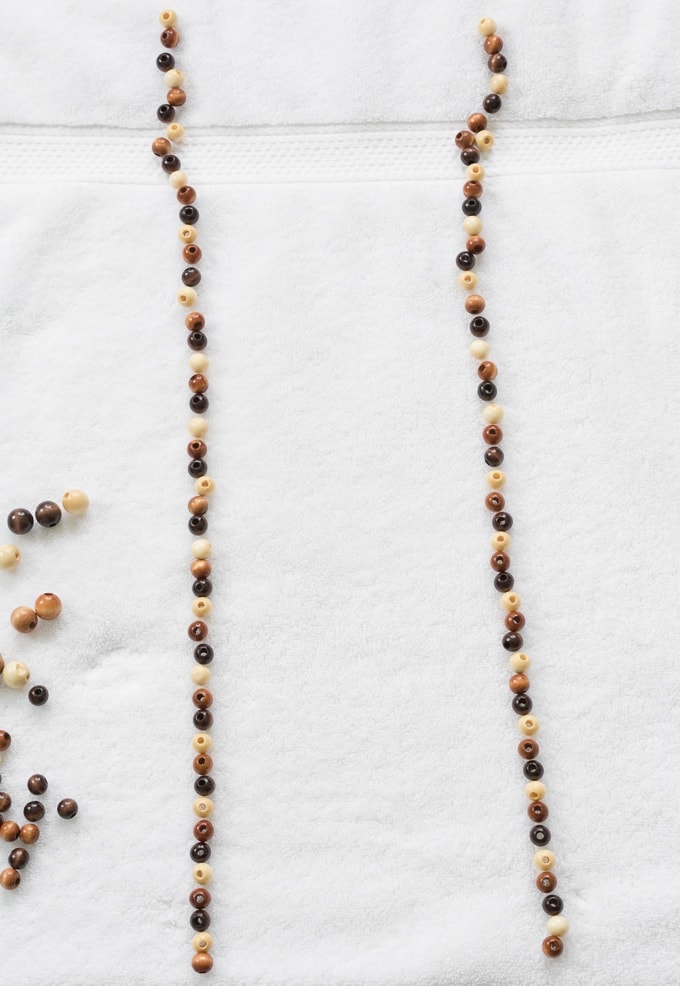
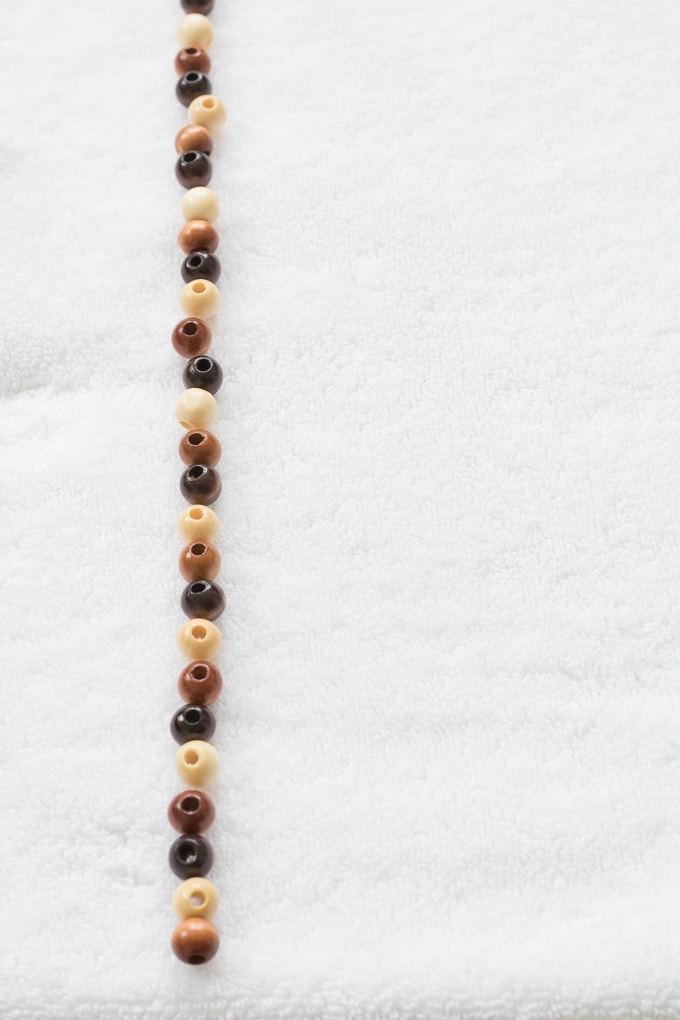
    Step 1: Lay your towel out. The towel is a good alternative to a beading board because it helps to prevent the beads from rolling around as you arrange them. However, it isn’t as precise as a beading board and takes a little patience.

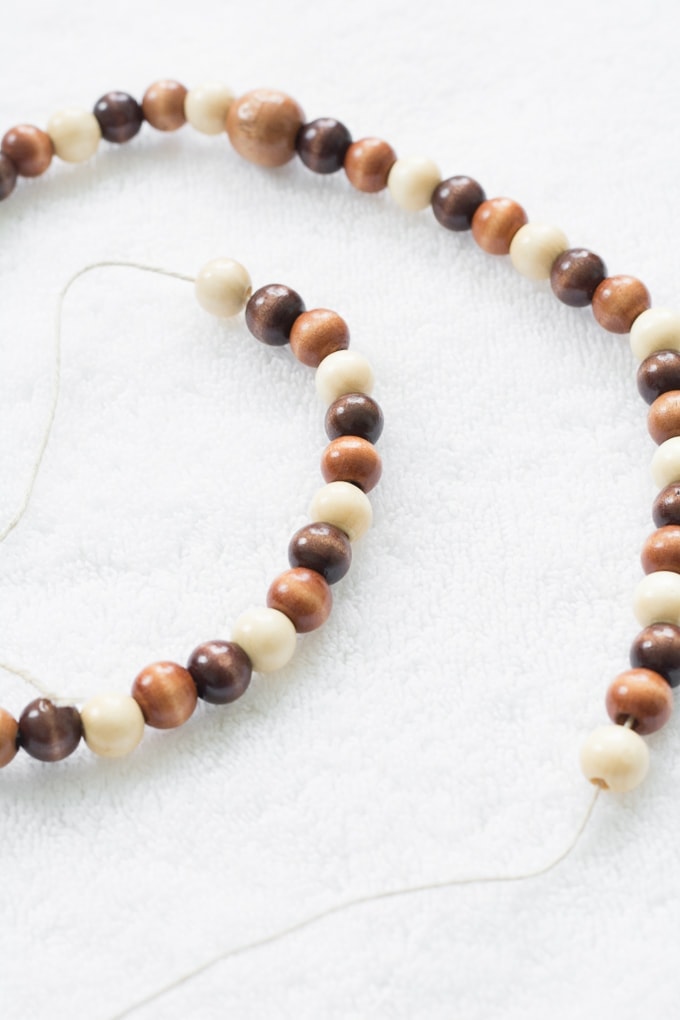
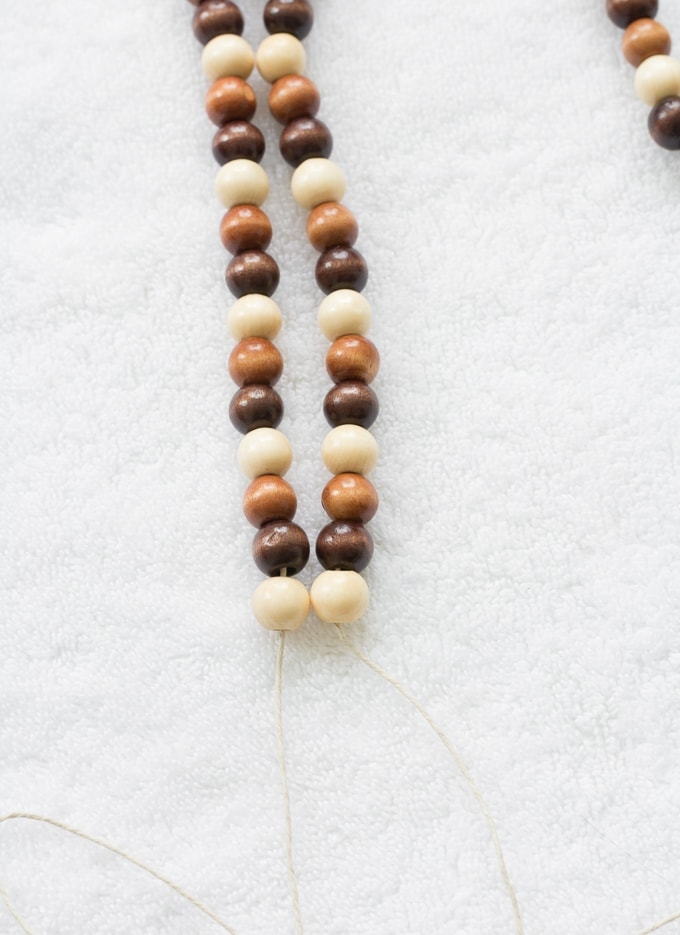
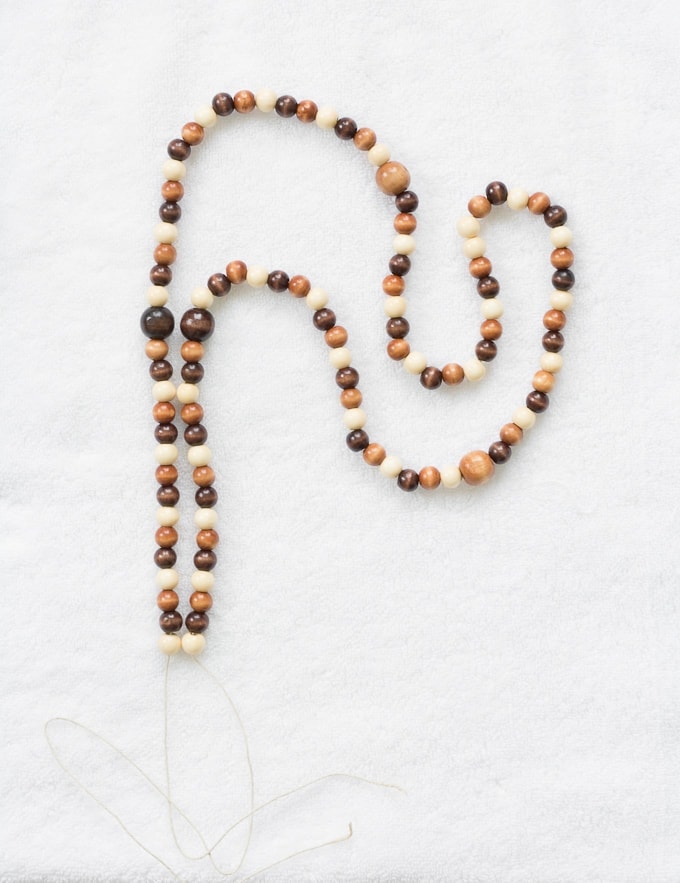
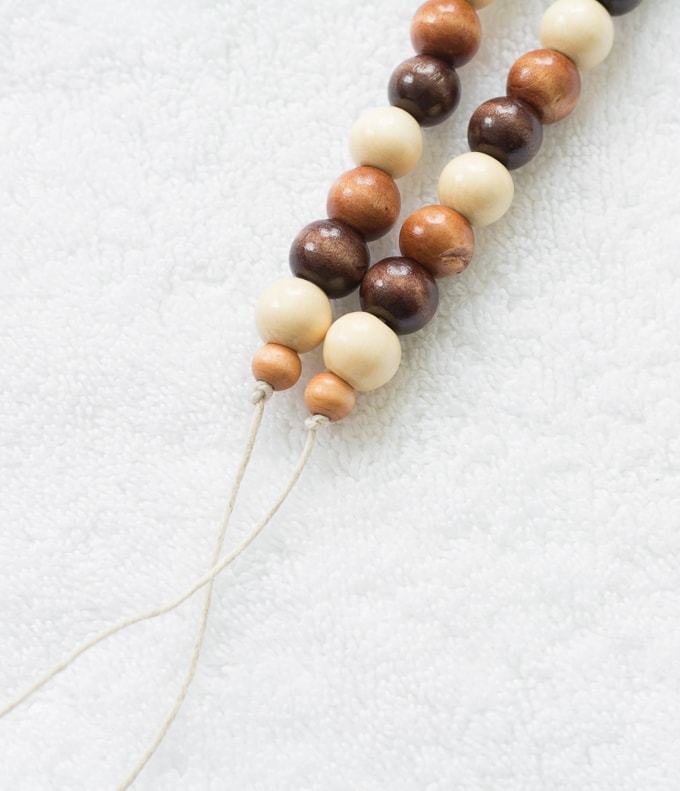
    Begin arranging your beads in the order you’d like to string them. I used wood beads and lined them up in two rows of 54: 52 beads and 2 marker beads on each side.

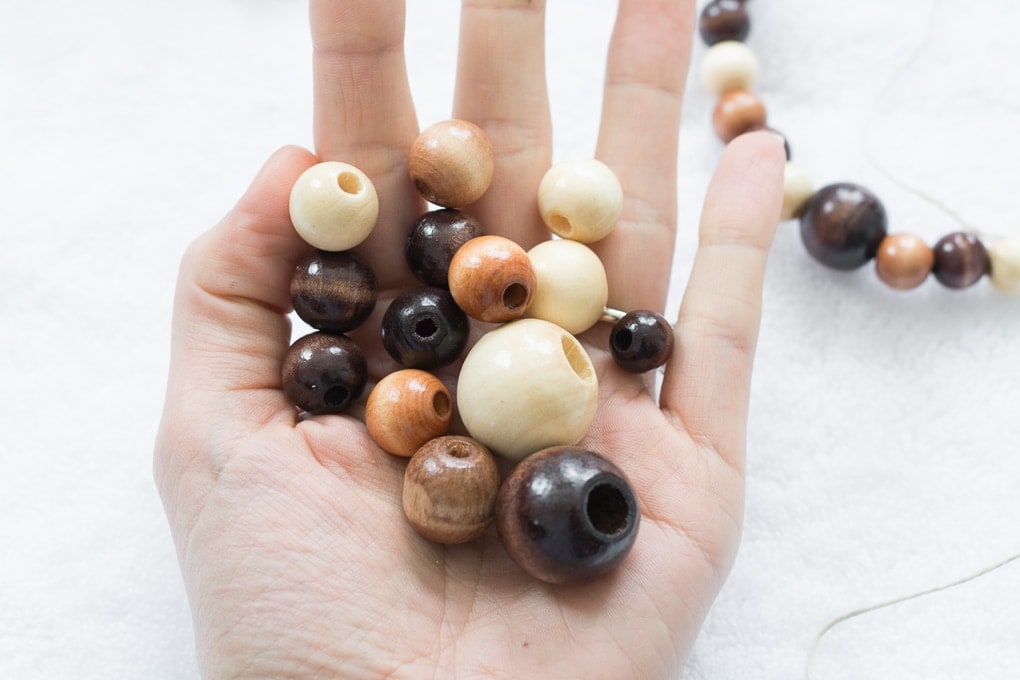
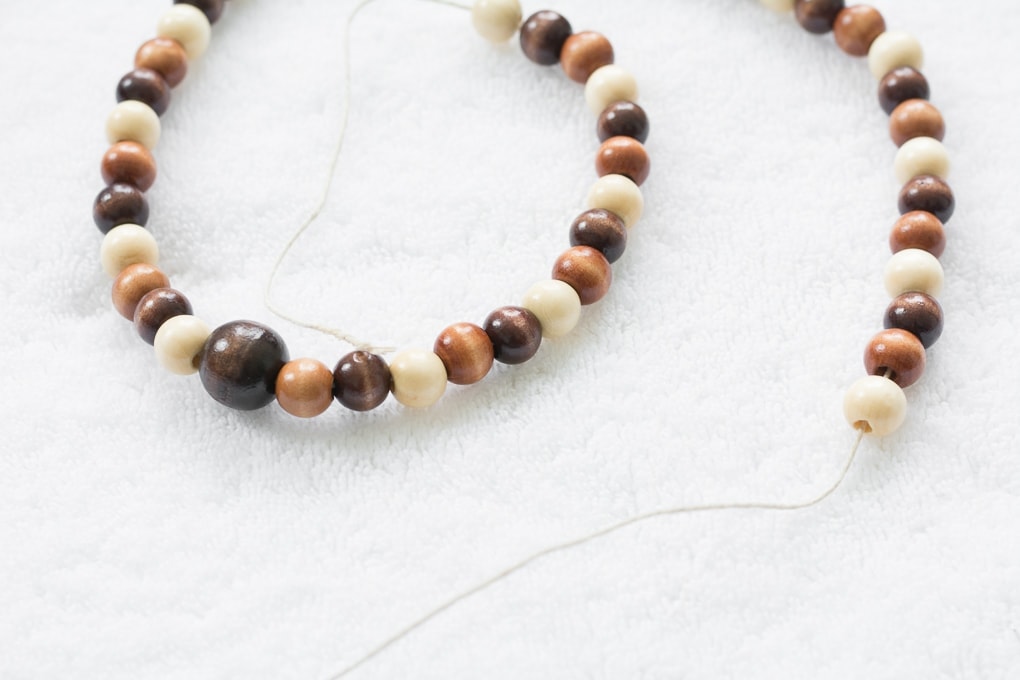
    Step 2: String one of the rows onto one of the ends of your hemp. See the two bigger beads in the show below? Those are the marker beads. I didn’t use a beading needle, but it would certainly speed the process up and make it easier to get the string through the bead holes, especially if the holes on your beads are smaller. When my hemp started to fray, I just snipped the end to start fresh with a clean edge.

    (Note: Mala necklaces are sometimes strung with knots between each bead. This requires a lot of patience and concentration 🙂 I didn’t put knots between each bead.)

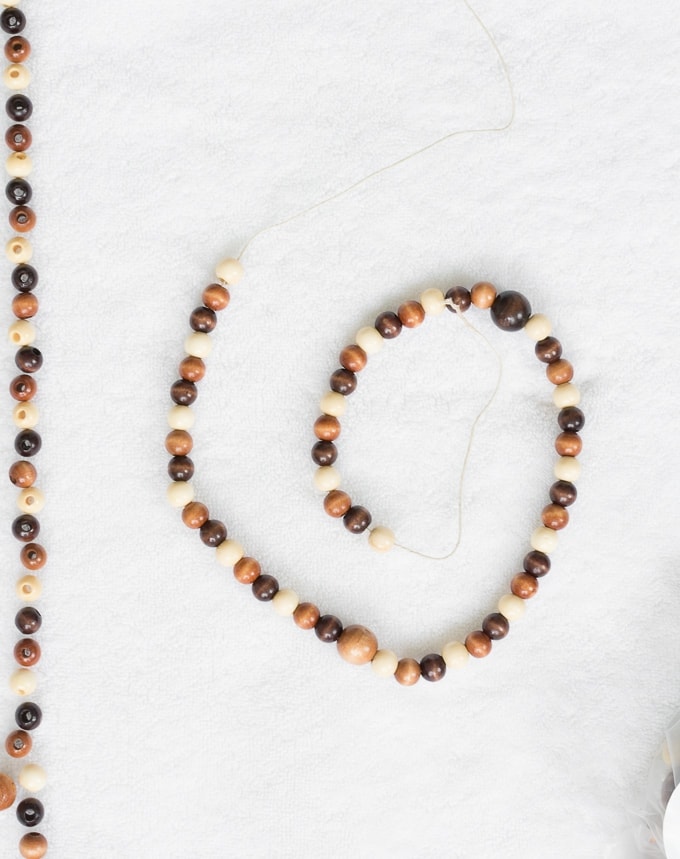
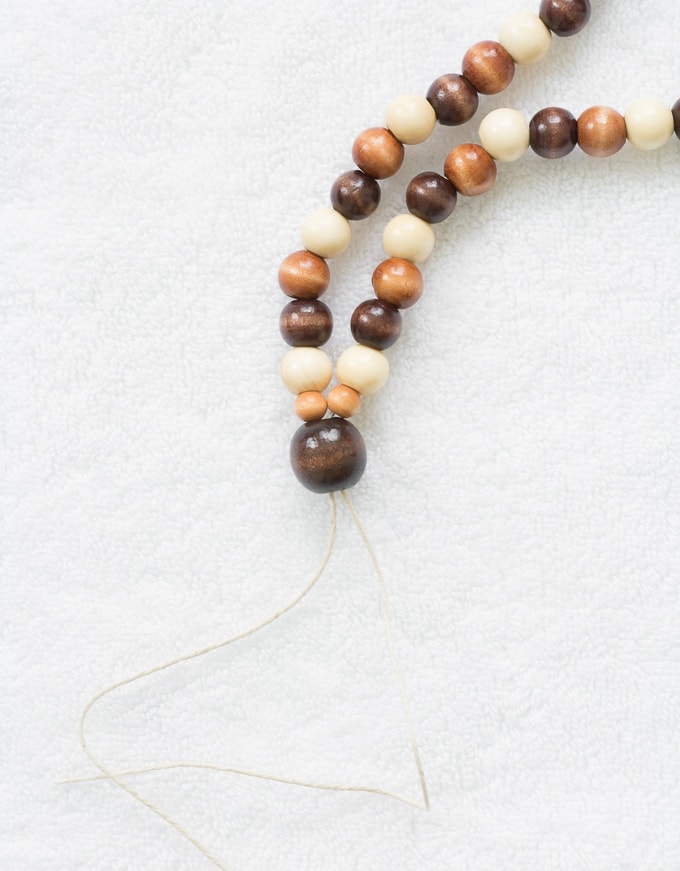
    Step 3: Then string the other side of the beads onto the other end of the hemp. Notice how the beads are symmetrical? That’s the goal.

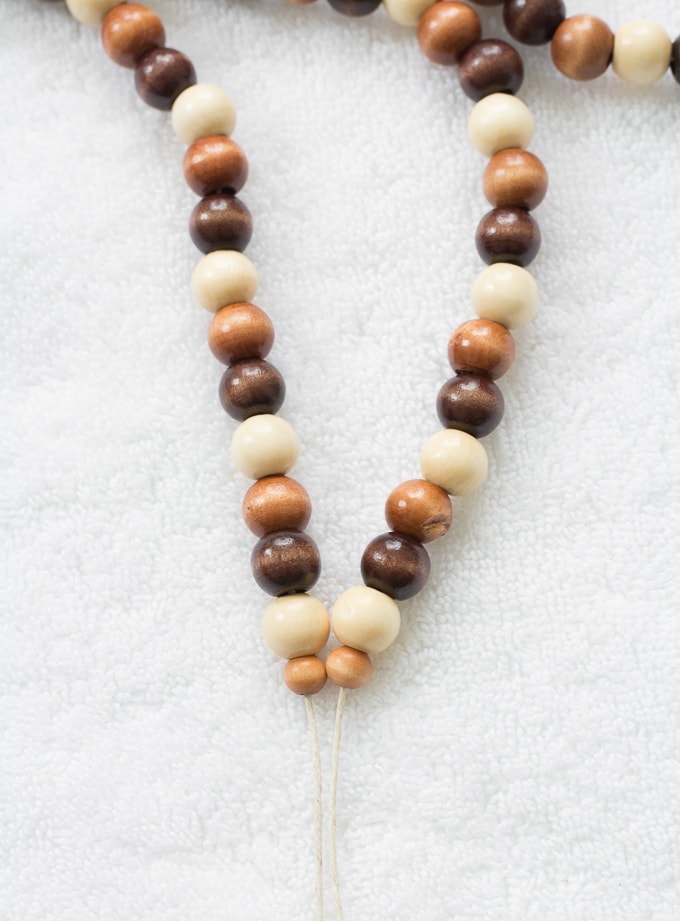
    Step 4: Tie two tight knots at each end. If the holes in your beads are very big like mine are, you might want to add two smaller beads to hold the knots.

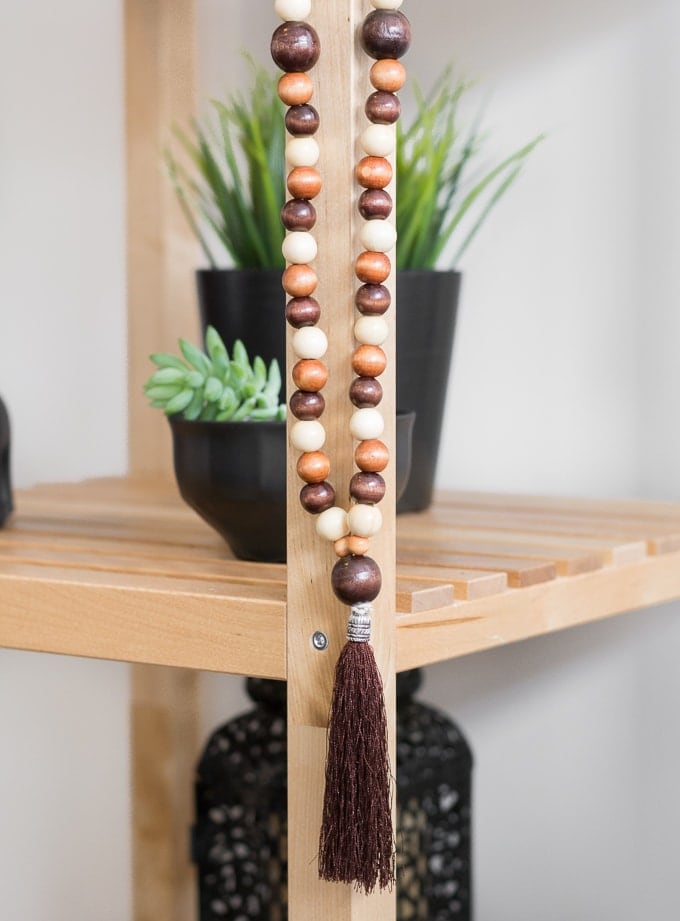
    Step 5: String the guru bead up through both threads, then string the tassel on as well. Tie several tight knots around the tassel to secure everything in place and trim the excess. You might also want to add a dab of glue to secure your knots.

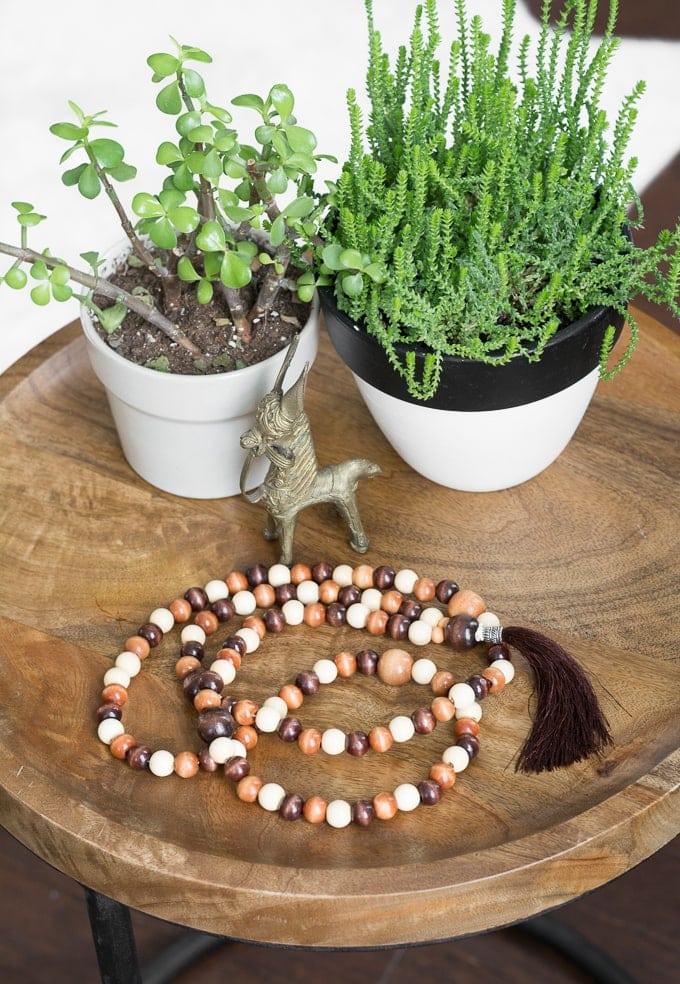
    And that’s that. Now you’ve got a beautiful mala 🙂

    Like this? Check out my DIY carpet powder recipe using rosemary and lavender, my tutorial for making homemade eucalyptus and lavender salt scrub, and my baked bath salts recipe!

    Share my post about how to make a mala necklace on Pinterest!

  • Learn how to make confetti with a Cricut machine!

    This content may contain affiliate links. See my full disclosure here.

    Learn how to make confetti with a Cricut machine! Making personalized confetti is a great touch for any party, and using a Cricut machine makes it a breeze. Learn how to do it with my tutorial!

    Hi all! I’ve been on a bit of a Cricut kick lately, and today I’ve got another Cricut project. We’re talking about how to make confetti with a Cricut machine! Because why not go a bit over the top for your party and make personalized confetti?!

    When I was younger, I used a handheld single hole punch to make confetti 🙂 And that was fun! But it was all just circles. For this confetti, I’m showing you how to use Cricut to cut tiny objects and words out of paper. And I’m using a Valentine’s Day theme for it.

    See this confetti? I would be literally impossible to cut out those intricate words by hand. And the little spirals, too. The hearts would be possible, but not fun. And my Cricut cut all of this out in just a few minutes.

    First I set up my confetti design. I did a combination of works (“love” and “xoxo”), hearts, spirals, and dots. I wanted to see how the machine cut a variety of designs out from simply to fairly complex.

    If you use words, make sure the letters overlap. If they don’t overlap, you’ll need to highlight them and use the “weld” tool. I don’t have a post on using the weld tool, but it’s really handy for projects like this.

    See how the letters overlap? If they didn’t overlap, you’d just be cutting out single letters and throwing them in the air. (For more Design Space tools, check out my posts on How to Slice in Design Space and What Flatten Means in Design Space.)

    Like this? Check out my posts on How to Make a Balloon Arch, a recipe for How to Make Brownie Cake Pops, and my tutorial for How to Make a Cake Topper With Cricut!

    I also wanted to try out a few different off-brand types of paper. Cutting off-brand products is great because the materials are always cheaper. But! They come with a risk.

    That’s because Cricut puts a little Cricut “C” next to all of their materials. And they have extensively tested those materials, so selecting them when it’s time to cut tells the machine exactly how deep the blade needs to cut.

    Since I was using off-brand paper, I had to do a little experimenting. The holographic paper I used was from the Michaels scrapbook section, and the pink glitter paper was from the dollar store (in a 3-pack, no less!).

    But the first few cuts for each were a bust. I knew regular paper wouldn’t be enough to cut this paper since it was a bit heftier, but I thought medium cardstock or poster board would be enough. Neither were! They cut, but they didn’t cut through all the way.

    Ultimately I decided to use heavy cardstock, and that did the trick. So you’ll definitely want to be prepared to experiment and maybe have a few duds if you aren’t working with Cricut-optimized materials.

    I used my Cricut Explore 3 to cut the confetti. I usually stick to my Cricut Explore Air 2 because I am a creature of habit and it’s my favorite machine…but man, the speed is so much better on the Explore 3!

    It cuts faster than the Explore Air 2, and it’s smoother and quieter, too. Definitely a plus for intricate, time-consuming cuts like cutting out a bunch of tiny custom confetti pieces.

    Depending on how the paper peels off the mat, you could peel off the negative space, leaving the confetti on the mat. You can use the spatula tool to gently peel/pop the confetti pieces off. It worked really well.

    Is it over the top? Yes. Am I going to do it for every party? No. But man is it a cute extra touch! And that’s all there is to it. Just remember to buy extra paper to experiment with if you’re using off-brand stuff!

    Pin my tutorial for how to make confetti with a Cricut machine!

  • Modern playroom organization for small spaces using Ikea finds!

    Looking for playroom organization ideas? Our is in the main living area, so it’s extra important to stay organized! See how we keep the mess to a minimum using mostly Ikea finds—plus labeling, of course!

    I typically keep most of my home stuff on my other blog, but I thought this one would be better suited to Let’s Craft Instead. Why? Because it’s a kid project. A playroom organization project that talks about organizing kids toys, kids crafting and art supplies, and more.

    We don’t actually have a real playroom. Instead, it’s a play nook. We have a super open floor plan with just a bit open area. So that’s another big reason why organizing toys, craft supplies, and other kid stuff is super important. If it’s out, it’s in my field of vision.

    Before in this little nook, once upon a time, I had my desk. Then we switched things up and moved R’s toys in it. That meant a little DIY desk I built for her, as well as an art easel and sometimes her little play table. And a few shelves that we kept toys on.

    But it quickly became clear that the two 11″ storage cubbies in the desk and the shelves were not cutting it! She also had painting and drawing stuff in two kitchen drawers and one of the cabinets—and we really wanted to reclaim that kitchen space.

    I felt like we could make better use of this little play nook, and I wanted to do it using Ikea—every small-space organizer’s dream store! So Mo and I hit the road one weekend to Ikea and got some supplies.

    After patching the holes and painting the wall light gray to lighten things up a bit, I decided on a 16-cube Kallax organizer. Originally I wanted a wood tone but realize it would be easiest for me to mix and match bins and accessories if I went with a white one.

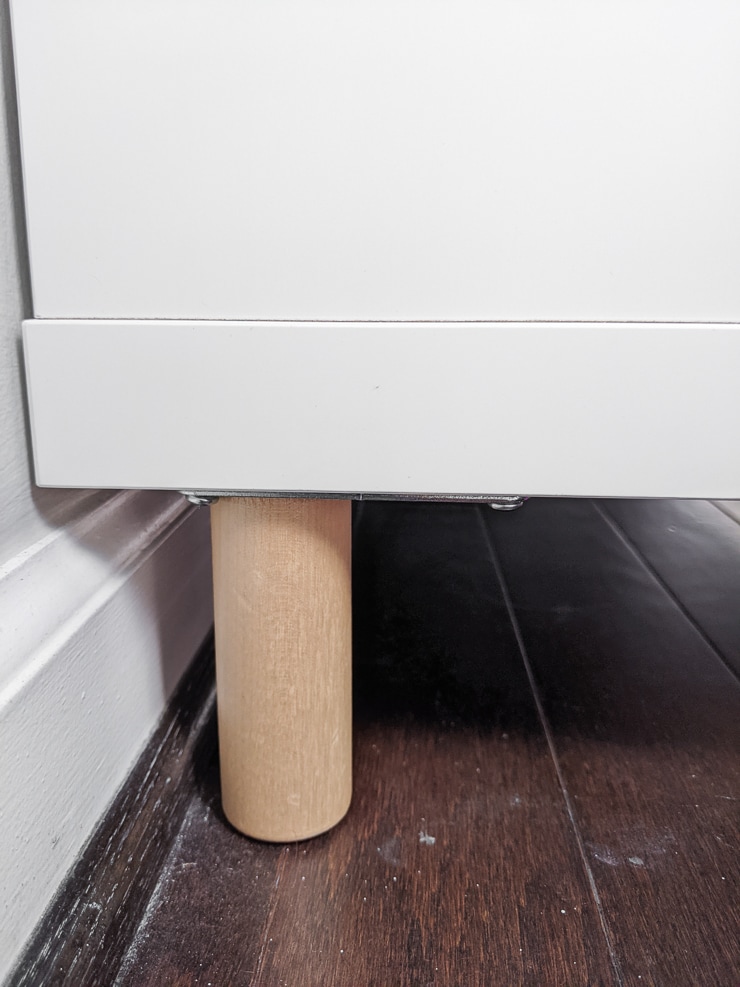
    I already have a smaller Kallax unit in high-gloss white, which I love! But it is more expensive, and the Kallax inserts only come in regular white. Not high-gloss white. So regular white it was! And I grabbed some wood legs to elevate the unit.

    Although they are designed for the Eket furniture line at Ikea, they work really well on the Kallax units, too! I really love the nicer look them give the piece.

    Like kid stuff? Check out our review of 5 popular DIY Slime Recipes, our experience with a Colorable Cardboard Playhouse, and my free Morning Routine Printable for Kids!

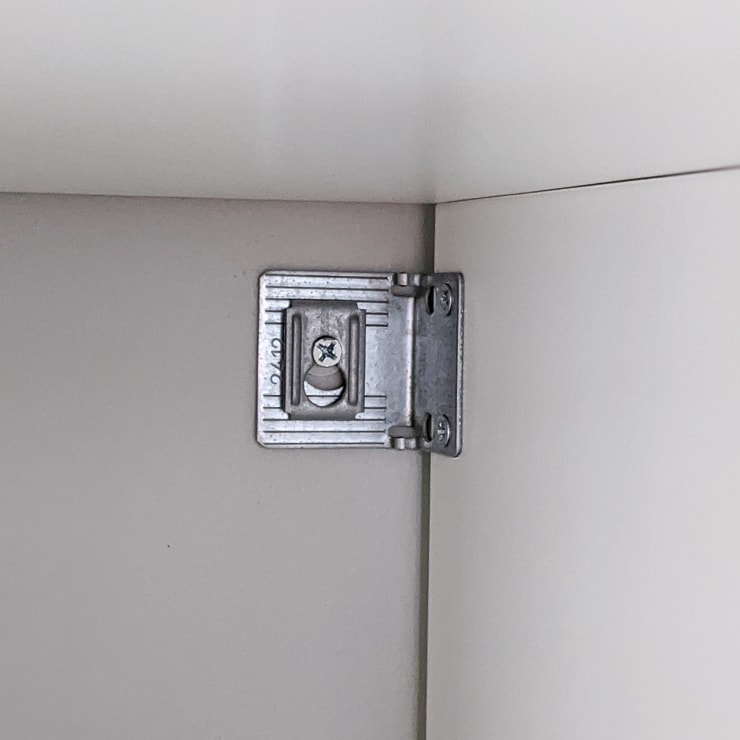
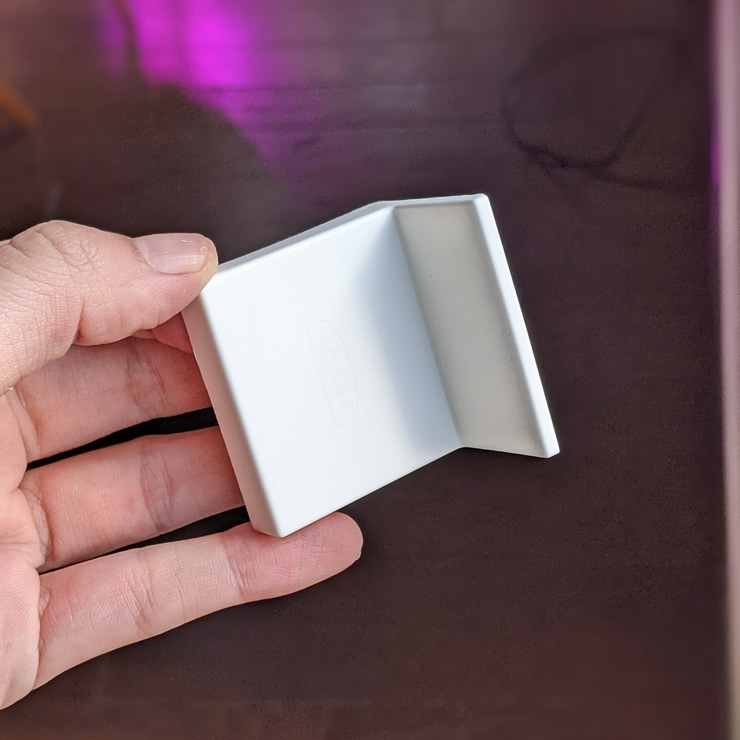
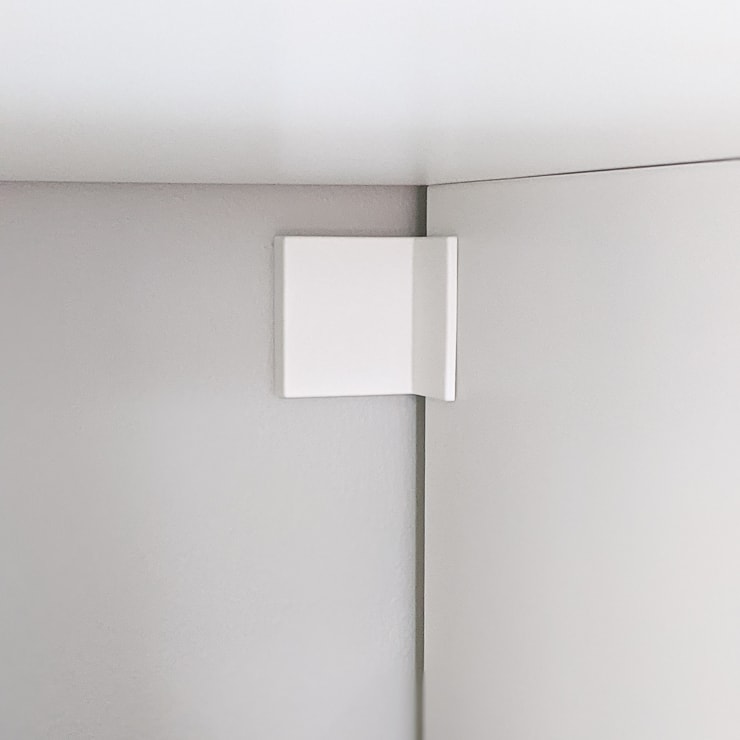
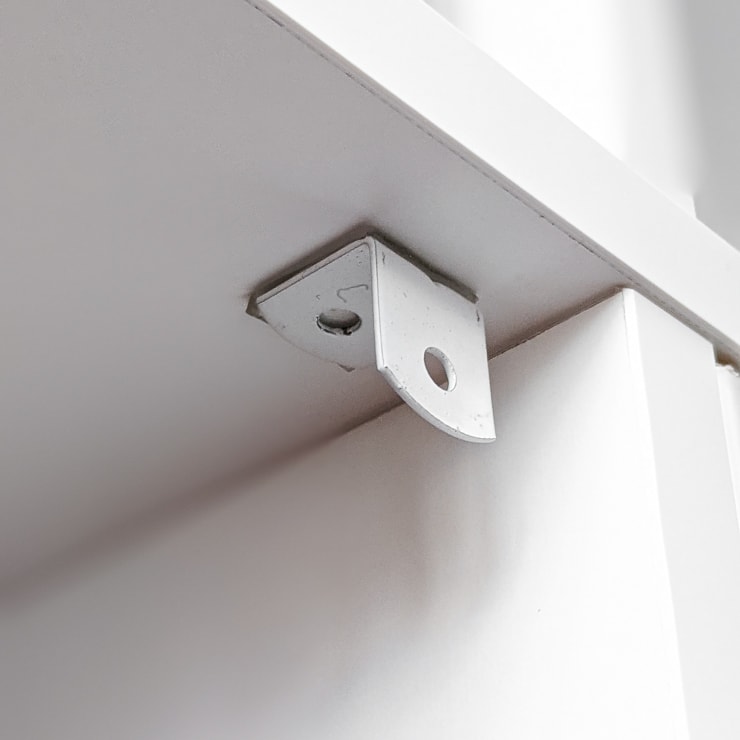
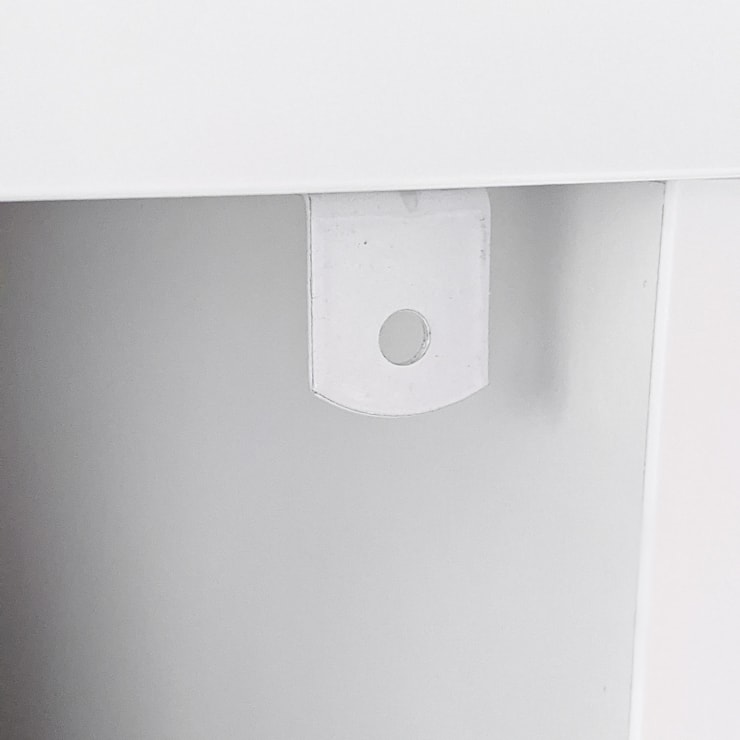
    As everyone and their brother knows, it’s extremely important to anchor large furniture with children. The Kallax unit comes with the anchoring supplies you need minus the screws (since different walls have different requirements).

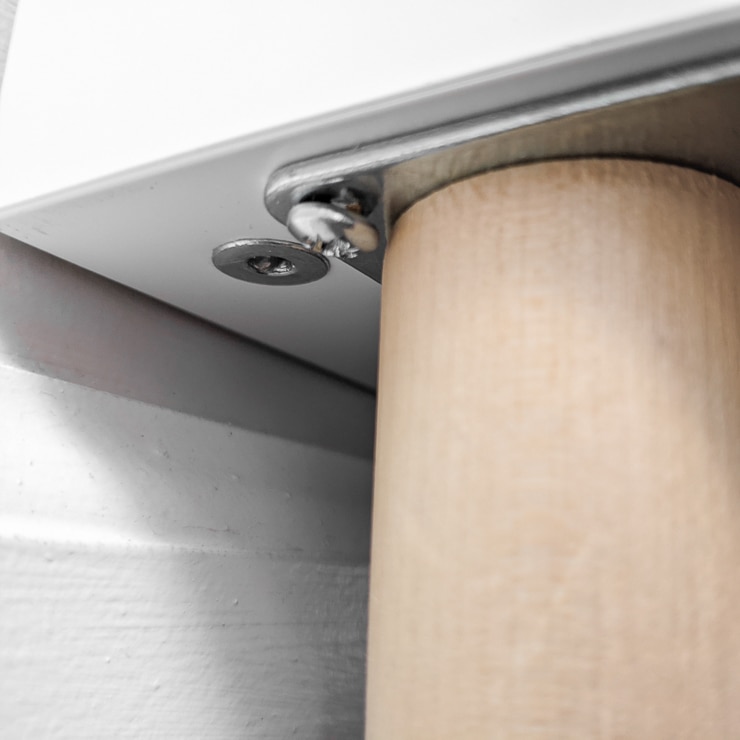
    However, we have both baseboards and shoe moulding, meaning that we can’t put furniture flush against the wall. Booo. However, anchoring was a necessity, so I got creative.

    The wooden legs I put on the unit helped with this. Basically, I decided to screw the legs on flush with the front of the unit’s bottom. However, on the back, I bumped them up a bit over an inch to cheat some space. This way, the legs would lift the unit above the baseboards and create enough extra space to push the unit up against the wall.

    Does that make sense? Here is a picture if it doesn’t. I wasn’t able to line the anchor areas up to studs, so I used heavy duty drywall anchors and screws. I also love how the Kallax unit comes with the white covers for the metal wall brackets, too!

    Once I had the unit assembled, the legs on, and the whole piece anchored, I got to the fun part: organizing! I put all of the craft supplies, coloring books, crayons, markers, paints, stickers, and other things that needed to be sorted and organized on the table.

    Then I decided which bins to put them in. I got a few different Kuggis boxes. I really like these boxes because they are stackable. If you get the smaller ones, you can stack two on top of the bigger Kuggis boxes, too! Talk about a great used of space.

    Speaking of a great use of space, I highly recommend grabbing a few of the Kallax shelf inserts, too. They are amazing! Super easy to assemble, and they essentially just split the cube in half by adding a shelf. This is perfect for coloring books or bins with loose papers, which is exactly what I used one for!

    • 1 large bin for Play-dough and Kinetic Sand stuff (it fits her little craft caddy that I have Play-dough stuff in)
    • 1 large bin for misc craft supplies (pom-pons, pipe cleaners, glue, scissors, etc.)
    • 1 large bin for misc games and puzzles
    • 1 large bin for colored craft paper and loose coloring sheets
    • 1 small bin for stickers (yes we have a lot lol)
    • 1 small bin for paints and painting supplies

    I used my Cricut machine and some lavender vinyl to add labels to these bins. Not only to help keep things organized, but to help my daughter learn the words for things and where they go 🙂

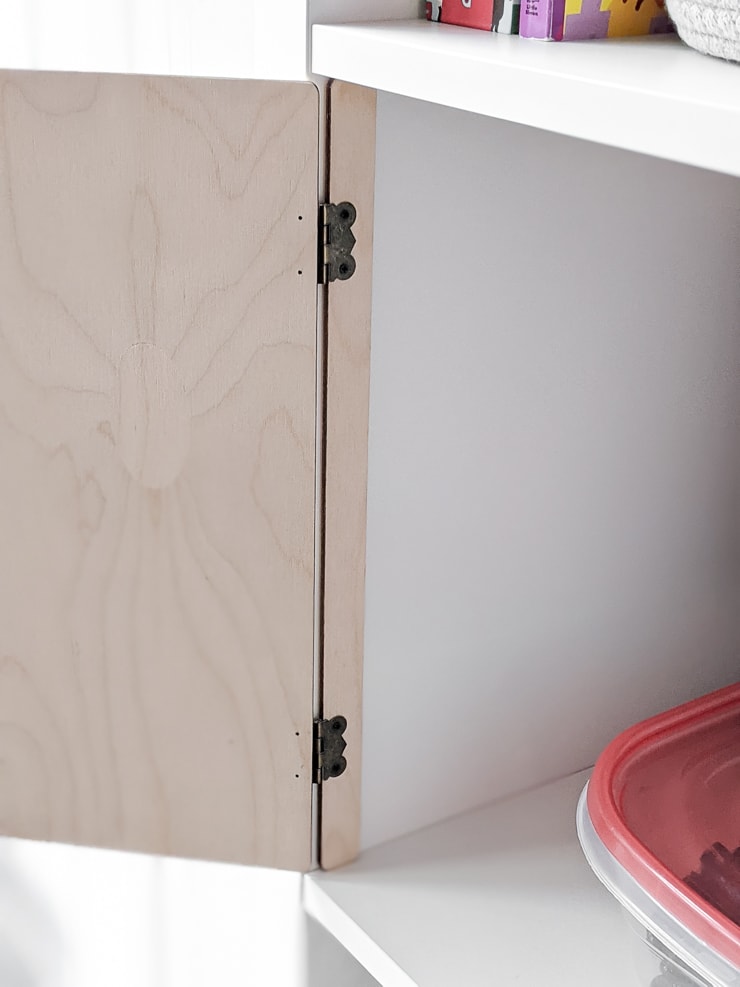
    Things were looking really great and already much better! But there was still a lot of stuff I wanted to organize and put away. After researching online, I decided to order four no-tools wood Kallax cabinet doors. They took a while to get to me since they came from a small business in Canada, but I like them.

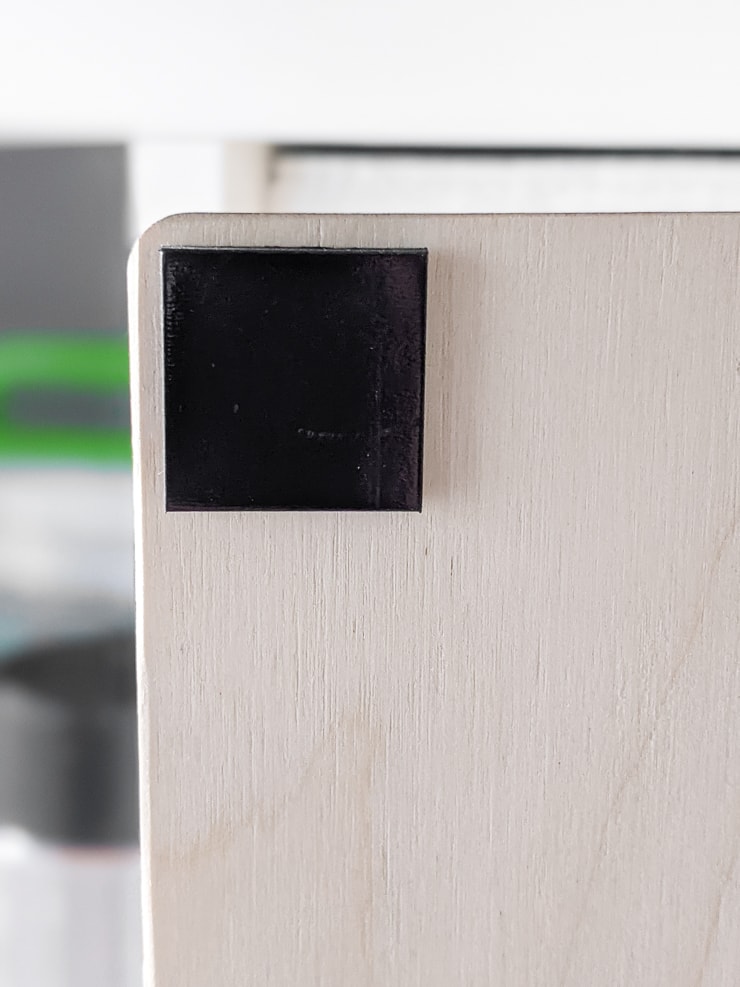
    One even has a cat-face-shaped cutout for a cat bed! I have something similar upstairs, and R wanted one for her cubbies, too. These are high quality and were super easy to install. They just use little adhesive squares that are very sticky.

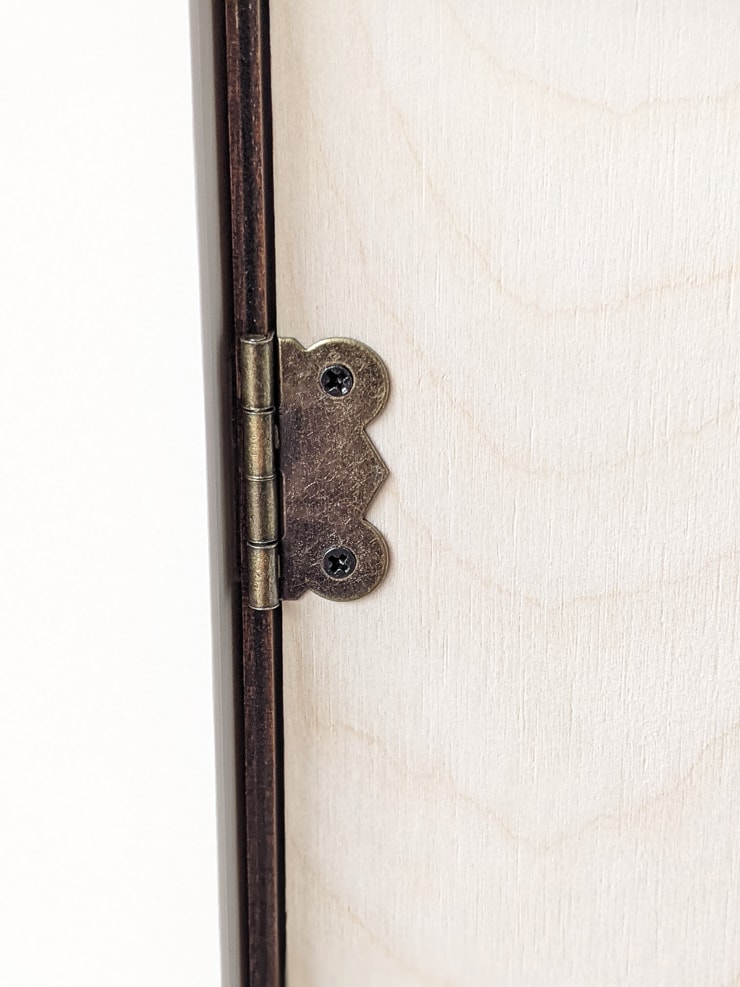
    They come with a small finger hole in them to open the doors, and they stay closed with a little magnet catch. I think they also help to add some nice warm wood tones to the otherwise white/gray corner. And they match perfectly with the Ikea Moppe wooden organizer I got for smaller items: beads, trinkets, Woodzeez, etc.

    I decided to place them randomly. Originally I wanted to do the bottom four cubbies, but these cabinet doors are a tight fit. They actually were just a hair off size-wise on some of the cubbies. So I just went with random cubbies, and I am very pleased with how it looks!

    Like these no-tools wood doors for Kallax units? See the cat-shaped cutout door and the regular door with a finger hole for more!

    After deciding on the placement for the wooden cabinet doors and Kuggis boxes, I wanted to add a bit more hidden storage in. So I grabbed two 13″ fabric bins in a very light green color. They are from Target. I wanted a light pink, but there was only one left—boo hoo.

    These are great for bigger things that have smaller pieces. So, the horse stables play set that also has a couple horses, play food, small carrots, and fence pieces. And other puzzles, books, and stuffed animals that just need to be corralled and thrown somewhere.

    R’s little play table and chairs also fits great here. And her step stool to get to the higher cubbies. There is plenty of room. It’s the perfect little area for her to get into and find something to do! Ikea to the rescue…again!

    Pin my DIY playroom organization ideas from Ikea!

  • Modern Easter Egg Decorating Ideas // Monochrome Painted Wood Eggs

    This content may contain affiliate links. See my full disclosure here.

    This post shares modern Easter egg decorating ideas. My monochrome painted wooden easter eggs are sure to inspire you if you’re a little non-traditional 🙂

    Popping in today to share a project that it actually took me longer to photograph than it took me to make! One day I was really wanting to do a small painting craft, so Mike took R down to the park for about a half hour so I could get a little crafting therapy in.

    I didn’t have any plans or projects on the to-do list, but I had some plain wood eggs I’d picked up, as well as some paints and brushes from my craft stash. So I just started painting for fun. I’m sharing the five painted wood egg ideas I came up with on the fly.r

    Want to dye eggs? Check out my post on how to dye eggs with food coloring and create a marbled effect with shaving cream!

    • Wooden eggs
    • DecoArt acrylic paint in White
    • DecoArt acrylic paint in Black
    • Galaxy Glitter by DecoArt in Clear Ice Comet
    • Small brushes
    • Frogtape

    For the black dipped effect, I used Frogtape and black paint to paint only the top portion of an egg. Yep, it’s that easy for this one. But I love the combo of the black and the natural wood.

    For the all white shimmer, I painted an egg using white paint, then once that dried I used two coats of DecoArt’s Galaxy Glitter in Clear Ice Comet. This glitter paint is subtle. The glitter is a bit holographic, so it doesn’t hit you in the face.

    For the lady egg, I used a fine-tip paint brush and black paint to paint a face design on to an egg. You could stop here, but once that paint was dry, I put on a thin coat of the DecoArt Galaxy Glitter in Clear Ice Comet. I put this paint only on the painted eyelashes and lips, though. A little glam, a little draggy. Perfect.

    I loved the overall white shimmer effect, so I decided to try a dipped effect on the bottom of am egg. I used Frogtape, white paint, and the Galaxy Glitter paint to “dip” the bottom of an egg. This one is a combo of number 1 and number 2 in this post.

    For this one, I did a brush stroke effect. But I kind of hated it, so I decided to do a dipped brush stroke effect using black paint. You don’t have to keep DIYs you hate. 🙂

    And here are some glam shots of all five final eggs. I think they look adorable, and this was a really great spontaneous craft session! Not too shabby for a quick little 30 minutes while monster mo was at the park with Mike.

    For more simple projects to do with kids, check out my piggy bank jar upcycle, my DIY sidewalk chalk paint experiments, and my tutorial for how to make a glitter sensory bottle!

    Share my modern Easter egg decorating ideas on Pinterest

  • 21 gorgeous Cricut mug ideas using vinyl and Infusible Ink!

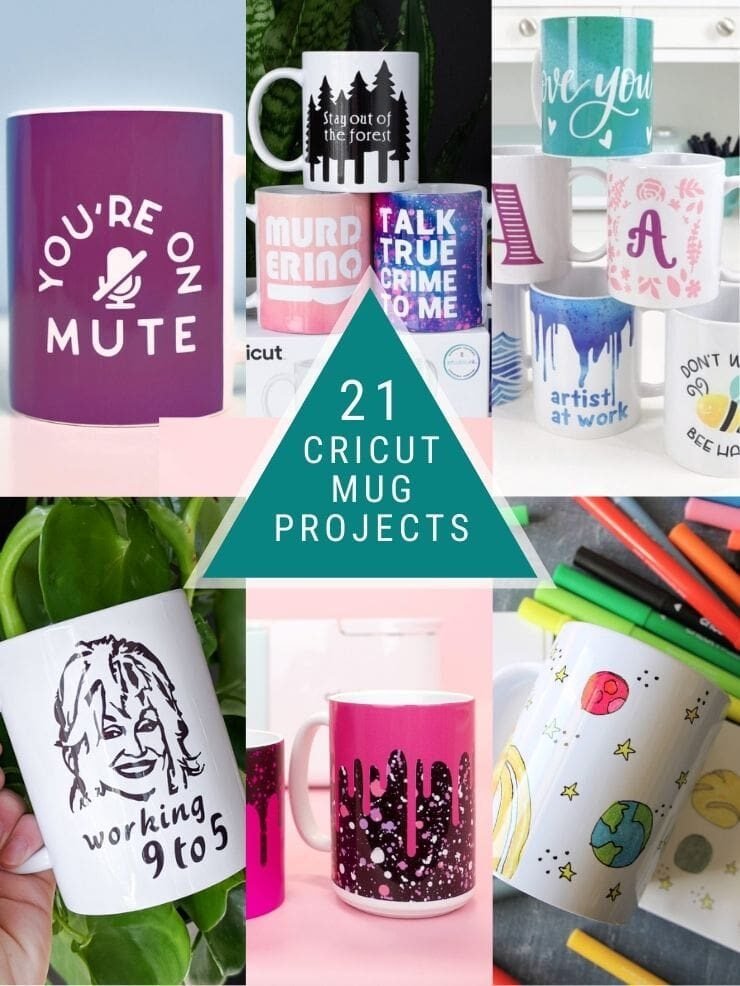
    Looking for Cricut mug ideas? Whether you’re making an adhesive vinyl mug or an Infusible Ink mug with your mug press, I’ve got you covered with 21 amazing designs to replicate! These images are shared with the permission of their respective owners. Enjoy!

    Hey all! Today I’ve got a roundup of 21 different Cricut mug ideas for you. I have made my fair share of DIY Cricut mugs throughout my crafting life. I started off making mugs with vinyl, but when the Mug Press came out, I went a little nuts.

    Because I’m a true crime but, I made a few cute true-crimed-themed mugs with bright patterns and fun sayings that I’m including in this list. They went over super well with all of the other nuts out there who are obsessed with true crime! You’ll see them in a bit—but for now, let’s get started with a few others.

     %postname%

    Ok, as someone who is still working fully remotely in my office job, this is an absolute must. I love it! You’d think that after doing this remote this for well over a year and a half that we’d know how to click the unmute button when we talk.

    This you’re on mute mug design by Mad In Crafts will do the talking for you. It would also make a fun gift for a coworker in the remote environment 🙂

    These bride and groom gift by The DIY Mommy use gold foil adhesive and have a super simple design. I love that—you don’t need to do too much. Sometimes just a bit is enough.

    These custom long-lasting designs by my friend Cori at Hey Lets Make Stuff are so freaking cute! Cori used the Infusible Ink pens to draw designs on paper, which she then infused onto Cricut mug blanks.

    They turned out so cute! If you’re able to draw freehand, you’ll love the option to use the Infusible Ink pens to create a design and permanently infuse it into your mug. Check out her tutorial for all of her tips.

    This pretty make art mug by 100 Directions by Jen Goode is a coffee mug, but it makes the perfect pencil holder! (Honestly, I use some of my mugs for pencil and hair tie holders because, let’s be honest—we are two adults and do not need 20 mugs for coffee.)

    This mug would make a cute gift for mom—Lydia from Lydi Outloud shows you how to use adhesive vinyl to make this project. Since the designs are so small, it would also be perfect for smaller vinyl scraps! (Which I seem to talk about all the time…I hate wasting even tiny scraps!)

    And now for dad—this gift for dad by Ideas for the Home by Kenarry is a simple but cute message. You could have one of the kids help to make these, too! It’s Infusible Ink, but you could also easily do black adhesive vinyl!

    If you’re into silly mugs, these funny sayings coffee mugs by Happiness is Homemade are a great option. She has a lot of different options to choose from!

    Sustain My Craft Habit made these awesome sister sayings mugs using Infusible Ink and her mug press. And the best part is that it looks like she used her weeded vinyl from one mug to do a design on another mug!

    Amy Latta Creations made some amazing mugs using infusible ink transfer sheets, and they really showcase how stunning some of the Infusible Ink colors and patterns are! Some of them also illustrate how you can mix and match different Infusible Ink pieces for a more dimensional design (like the cute bee!).

    My friend Lindi at Love Create Celebrate is one of my favorite Canadians 😉 These Canada mugs she made show just how much Canadians love Canada! And who can blame them? Lumberjacks. Syrup. Universal healthcare. I’m here for it folks.
    This monogrammed teacher gift by Sew Much Ado is a cute idea, and she also has a “best teacher ever” file. Make sure you also throw a Starbucks of Amazon gift card in there, though, because coffee mugs don’t pay the bills for our underpaid teachers! 🙂
    This cute bicycle with a basket by Steph at Crafting in the Rain is such a cute design! Head to her post for a full tutorial on how to use Infusible Ink and a mug blank to create a design…WITHOUT a mug press! It’s a fantastic tutorial.

    If you like these Cricut mug ideas, check out these Cricut felt projects, these Cricut earring projects, and my roundup of Cricut projects for babies and kids!

    Okay guys, it’s time for my true crime mugs! I made a series of true-crime-themed mugs that say things like “talk true crime to me,” “murderino,” “introverted, but willing to discuss true crime,” and more. If you are a fan of any true crime podcasts (including My Favorite Murder), you’ll love these!!

    And I also have to spotlight my Dolly Parton “working 9 to 5” mug. I made this file of Dolly myself, and I’m really proud of it! I use this mug most days of the week and love showing it off 🙂

    Lydia from Lydi Outloud made this cute “get the Christmas spirit” mug that you can put together yourself using adhesive vinyl. Just in time for the holidays!

    I am REALLY impressed with these super simple photo mugs from The Country Chic Cottage! She outlines how to make photo mugs using the Cricut Mug Press. You do need a sublimation printer and sublimation paper, but it’s a great tutorial that you should definitely check out!

    I love this idea—before I even did any other mugs, I made some kid art Infusible Ink mugs like this one this one from Ginger Snap Crafts with our neighbor. When things were still pretty nasty with socializing and she was doing virtual learning, her mom asked me to watch her one day during a meeting.

    We decided to make some art on copy paper using the Infusible Ink markers and infuse it on the mug using the Mug Press. I love this idea as a personalized gift from kids to parents!

    These mugs with fun colors and pattern combinations by Happiness is Homemade really showcase how stunning the Infusible Ink colors and patterns are. They are so incredibly vivid once they are infused.

    I kind of love this cute stay groovy retro design by Tiffanie Anne, especially the background in this picture, lol. And the donut. Makes me want to go on vacation instead of craft.

    And another fun artsy design by 100 Directions by Jen Goode—this one uses a full mug wrap design with a pre-cut and pre-sized Infusible Ink sheet for mugs. I love the mug wraps because they maximize the area of the mug that takes on the Infusible Ink patterns and colors, leaving white space at a minimum.

    And as a last project, these colorful beachy designs by Cori at Hey Let’s Make Stuff are very cute. I love the design of the octopus tentacles.

    Pin my 21 Cricut mug ideas!

  • Free printable baby shower advice cards: 15 for instant download!

    This content may contain affiliate links. See my full disclosure here.

    Are you organizing a baby shower and looking for one less thing to have on your list? Download my 15 free printable baby shower advice cards to hand out to guests!

    I have a baby and I didn’t have a traditional baby shower. Do I regret that? Never! We had what basically amounted to a party at a restaurant/bar. It was during the brunch hour and we had family and friends there.

    But since we were having a non-traditional baby shower, that also meant we didn’t really do anything traditional. None of the games or anything. Including the “advice for mom” type cards that a lot of baby showers have.

    That worked well for us! We wanted to include everyone and just relax for a bit. I tend to get a little overwhelmed with big planned events that have a lot of things to worry about. Even though I wasn’t putting the shower on, it still stressed me out 🙂

    Like these? Check out my 25 Free Printable Thank You Tags, my 21 Free Printable Tumbler Care cards, and my 7 Spread Love Not Germs Free Printables!

    BUTTT…I have attended my fair share of wedding and baby showers! So I know the drill. And giving advice to parents-to-be—especially moms-to-be—can be really valuable. Because all you really get when you’re pregnant is unsolicited advice from strangers.

    And the people you might really want to get advice from are your friends and family. (Well…most of your family. Haha.) If anything, they could be fun to read and a nice keepsake to have.

    So I put together 15 free printable baby shower advice cards. They are each sized at 4.25″ by 5.5″ so they can be printed two to a printer page. I have options that use a lot of ink and options that are black and white and easy to print at home.

    The screenshots of all of the advice cards are in this post. And as you can see, there’s something for everyone’s style! From bright a bold to pastels and chic black and white options. So are you ready to grab them?

    To get all of the 15 printables, CLICK THIS LINK to get to my Dropbox! I have them saved there because they are bigger files. Enjoy!

    Pin these freebies for later!

  • Dollar Store Foam Pumpkins: From Gaudy to Glam Using Only Paint!

    This content may contain affiliate links. See my full disclosure here.

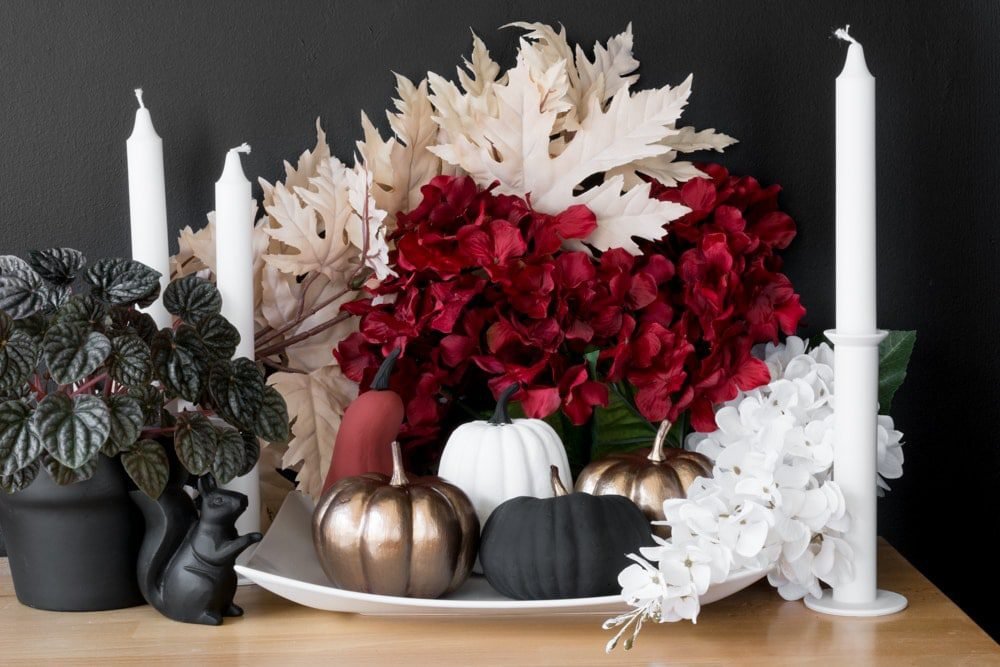
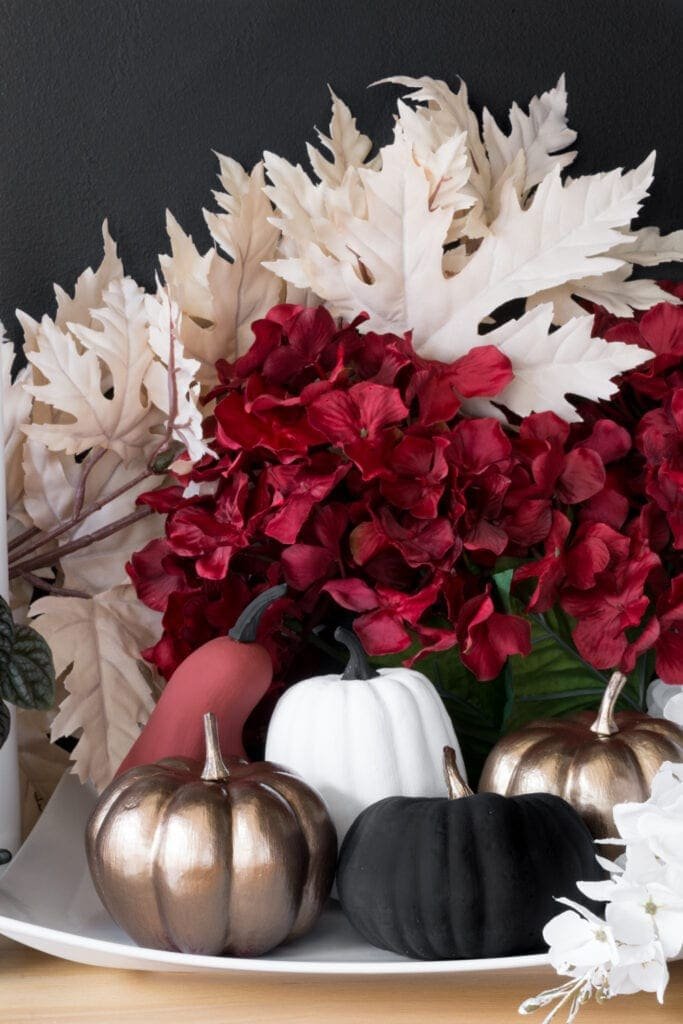
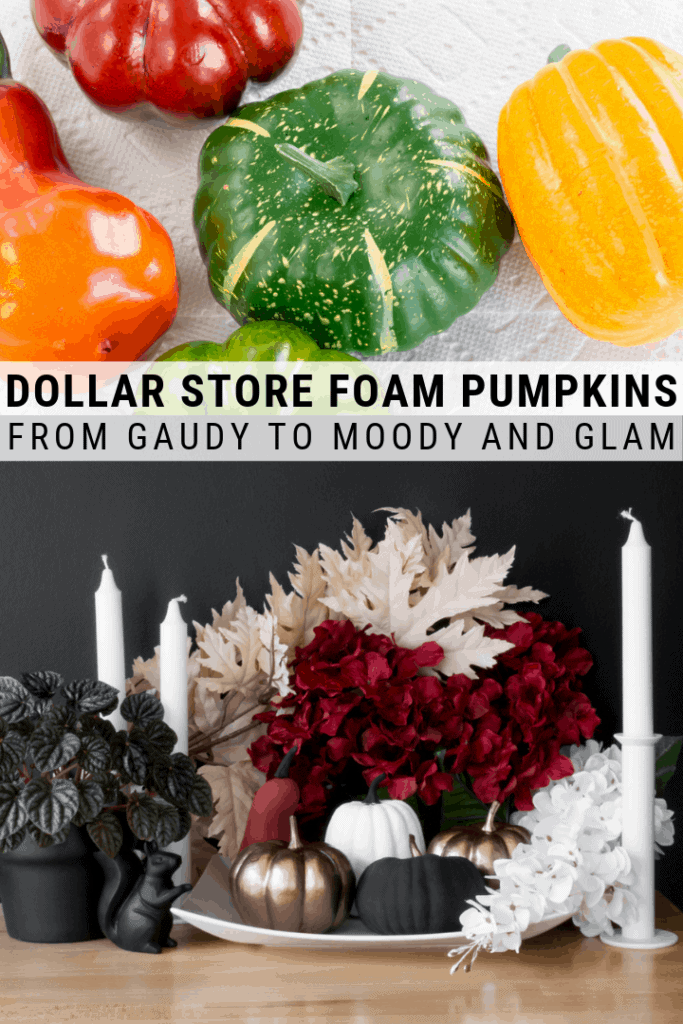
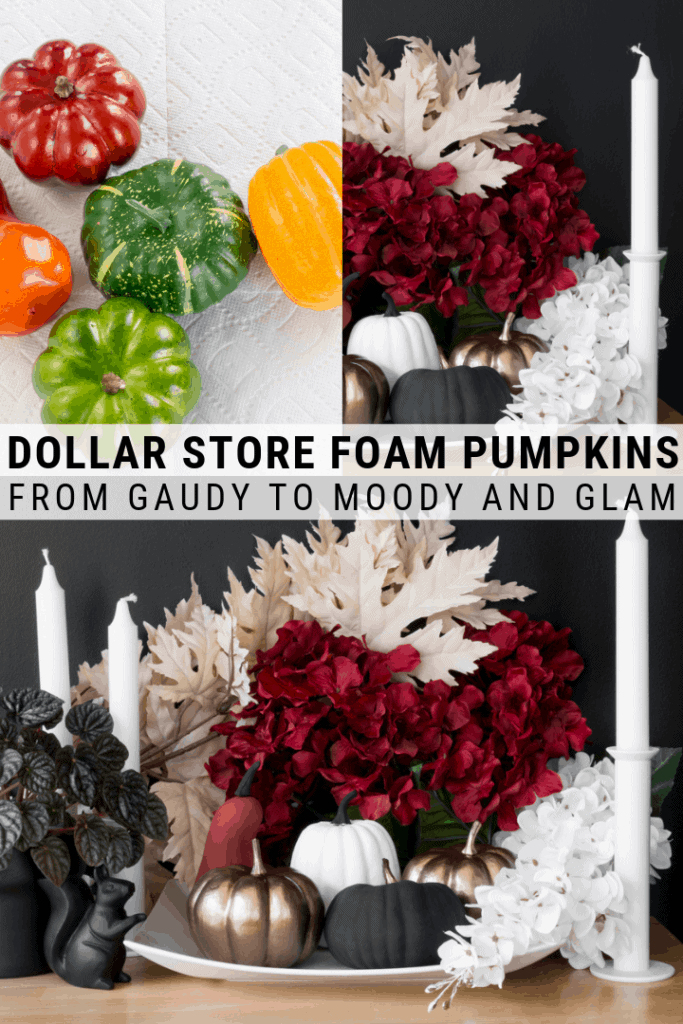
    This post shares my dollar store foam pumpkins DIY. I used DecoArt Chalky Finish and Metallic paints to take these from gaudy to glam. This post is sponsored by DecoArt and originally appeared on bybrittanygoldwyn.com.

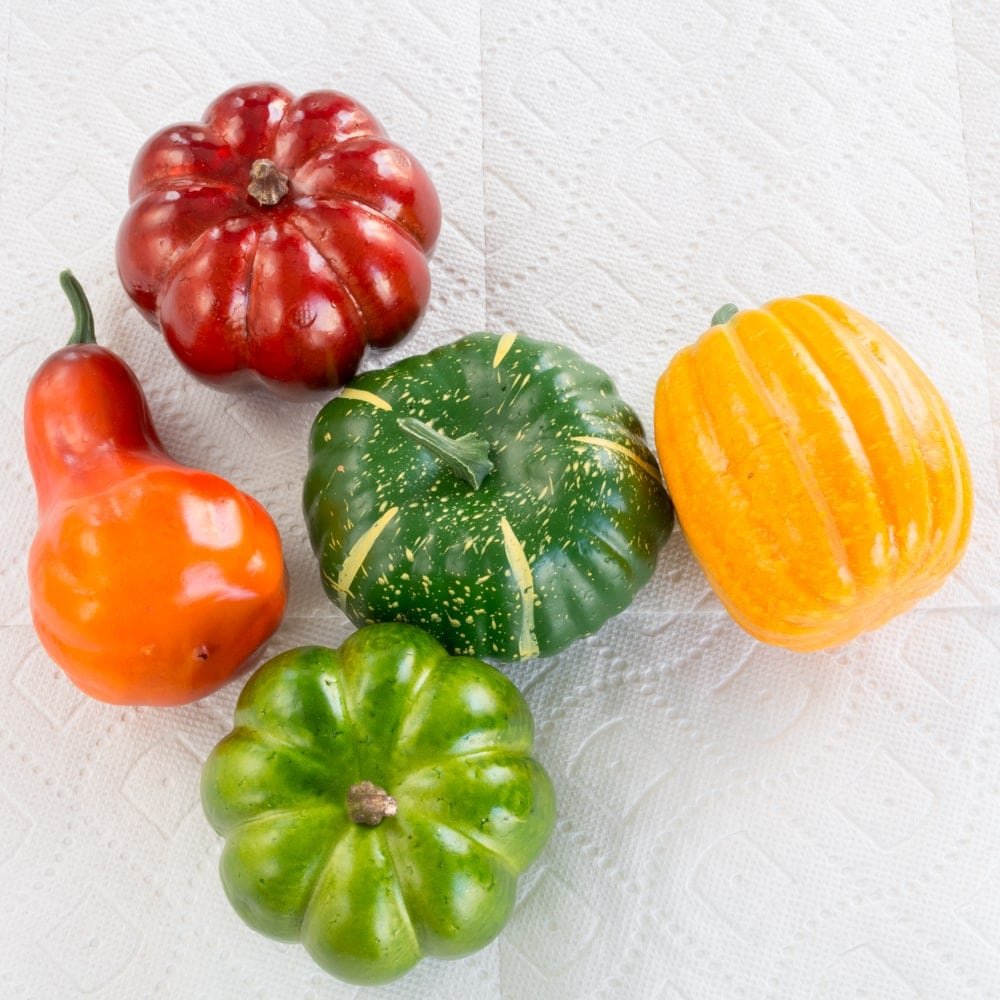
    This post shares all about how to paint dollar store foam pumpkins. It’s a cheap and easy DIY that will take your fall decor from gaudy to glam in an afternoon. This post is sponsored by DecoArt.

    Hi all, it’s about that time for another DecoArt Core Blogger post! I’m going projects every other month using DecoArt projects—I love working with DecoArt because I love their products! I tend to get stuck in a DIY rut sometimes, too, so it’s nice that they have so many different paint lines to choose from when I want to try something new.

     %postname%

    This month’s project theme was mixing paints from their Chalky Finish line with their Metallics line. I love both, but I haven’t used their Chalky Finish paints in a while. So I was excited to dust off my chalky finish jars and put them to good use.

    I was also excited to use the Metallics because this line has one of my favorite metallic colors—Antique Bronze. It’s a lovely high-sheen color that is the perfect amount of gold and bronze without being brassy. And the coverage is great, especially for a metallic paint.

     %postname%

    For more thrifty paint projects, check out my posts on painted wine bottle upcycled into a bud vase, how to paint thrifted clay pots, how to turn a tea tin into a planter, and how to paint glass jars!

    Since it’s now officially October, I don’t feel bad about sharing fall content. In Maryland is can stay well into the 90s in September, so it doesn’t feel very fall like. It can even stay very warm into October. But October is officially fall in my eyes. So, painted dollar store foam pumpkins it is for this project! 

    I took R with me to our nearby dollar store to do some scouting, but you can replicate this project with any inexpensive pumpkin. Check thrift stores! We chose the dollar store because I wanted to get R a pair of $1 sunglasses to replace the ones we lost. Girl loves her sunnies.

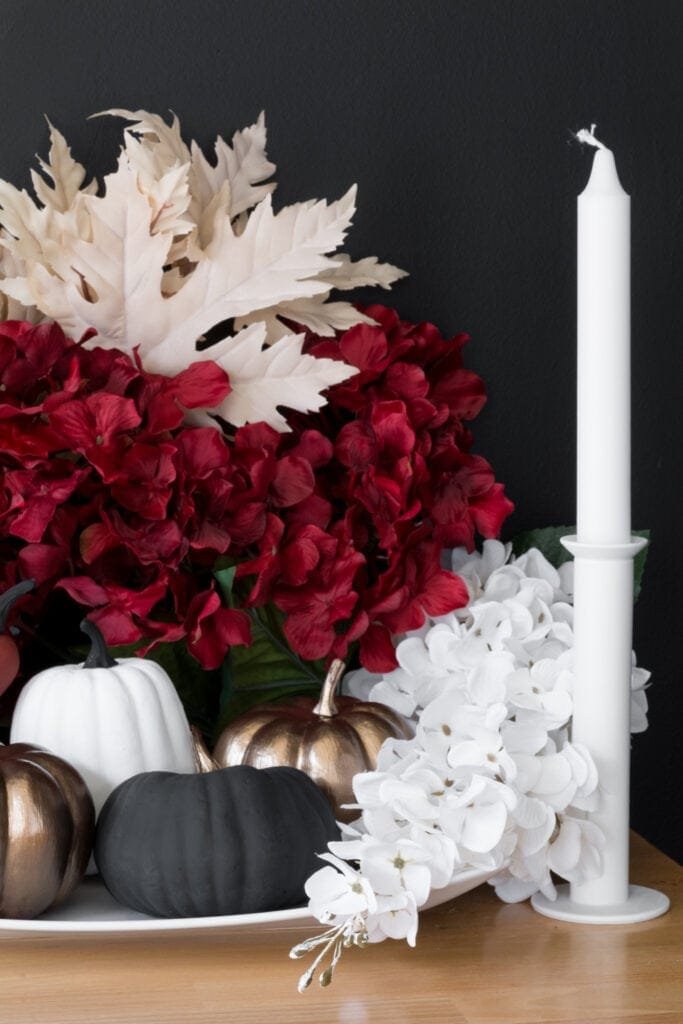
    Here’s a peek at the before and after shots. I absolutely love how the matte chalky finish colors look next to the metallic bronze. So beautiful, very glam, and a bit moody if I do say so myself. 

     %postname%  %postname%

    For the full tutorial, including all of the colors I used, head on over to the DecoArt blog!

    Share my painted Dollar Store Foam Pumpkins on Pinterest!

     %postname%  %postname%

  • 25 Awesome Personalized Cricut Projects for Kids and Babies

    This post shares a roundup of awesome personalized Cricut projects for kids and babies! Cricut machines and materials are an amazing way to help you make custom gifts for all the little ones in your life. This post is sponsored by Cricut and originally appeared on bybrittanygoldwyn.com. These images are shared with the permission of their respective owners. Enjoy!

    Hey guys! Today I’m popping in to share a roundup of some great personalized Cricut projects for kids. Customized gifts make amazing gifts, and if you have a Cricut, the possibilities are endless. I talked a bit about this in a post I did a few months ago on how to make a custom reusable tote bag using Cricut’s Infusible Ink.

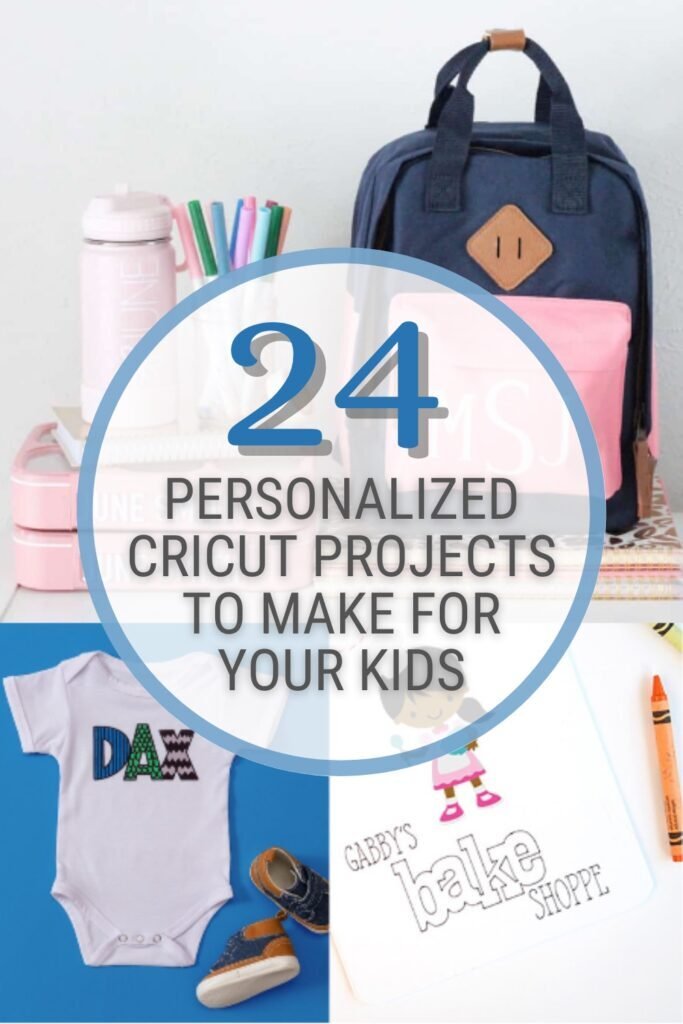
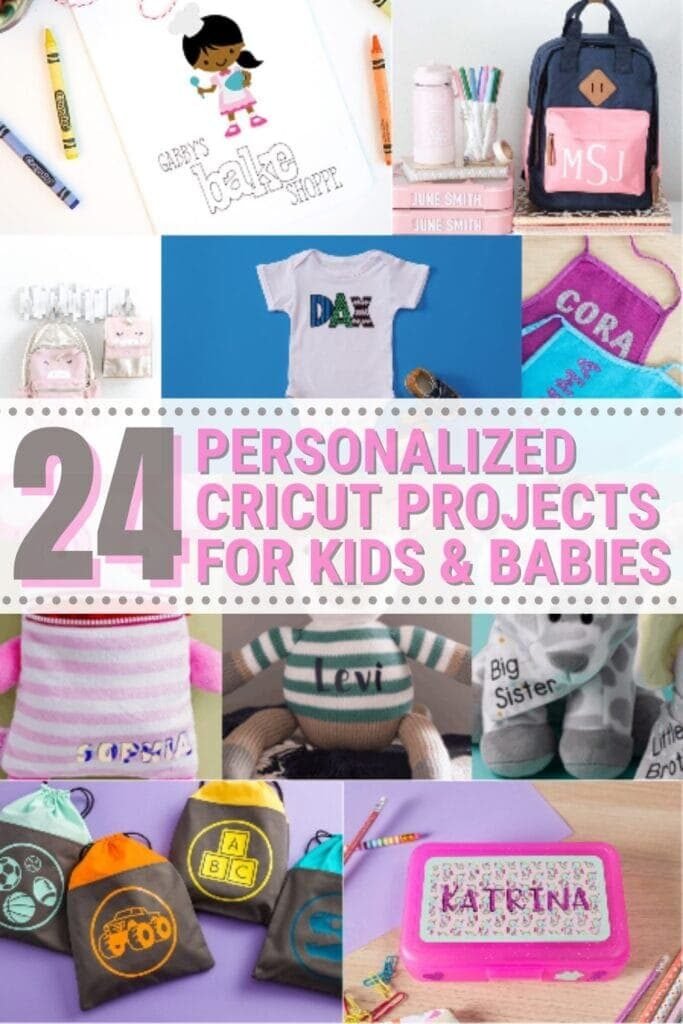
    When it comes to custom projects for kids, there are a ton of options. From school supplies to stuffies to backpacks and more, your Cricut and the variety of materials available will help you create stunning, professional-looking pieces. Let’s look at a roundup of 24 I’ve selected to inspire you!

    Note: Many of these projects link to Cricut’s Design Space, so if you don’t already have a Design Space account, you’ll need to make one. If you have one, make sure you log in!

    This personalized ocean pencil box is on Design Space and is so cute! It uses a layering technique to create this adorable personalized pencil box for kids. Pencil boxes are cheap to buy and easy to customize, too.

    This personalized coloring book is so cute! I actually hired an artist on Fiverr to design a custom coloring page for my daughter’s daycare teacher. It was her Christmas gift. I wish I had enough talent to design a personalized coloring book! Maybe next year. 🙂

     %postname%

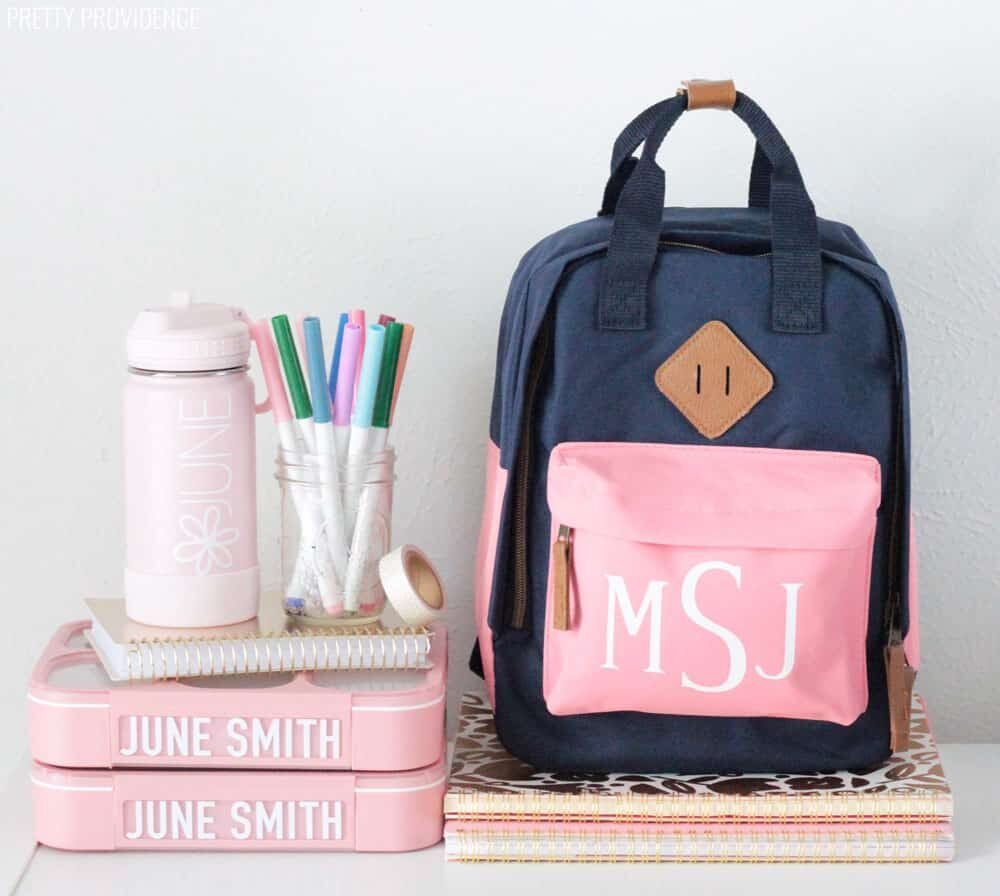
    I love this personalized backpack and lunch gear from Pretty Providence. It’s so simple but so cute. You could easily replicate this project on many different surfaces.

     %postname%

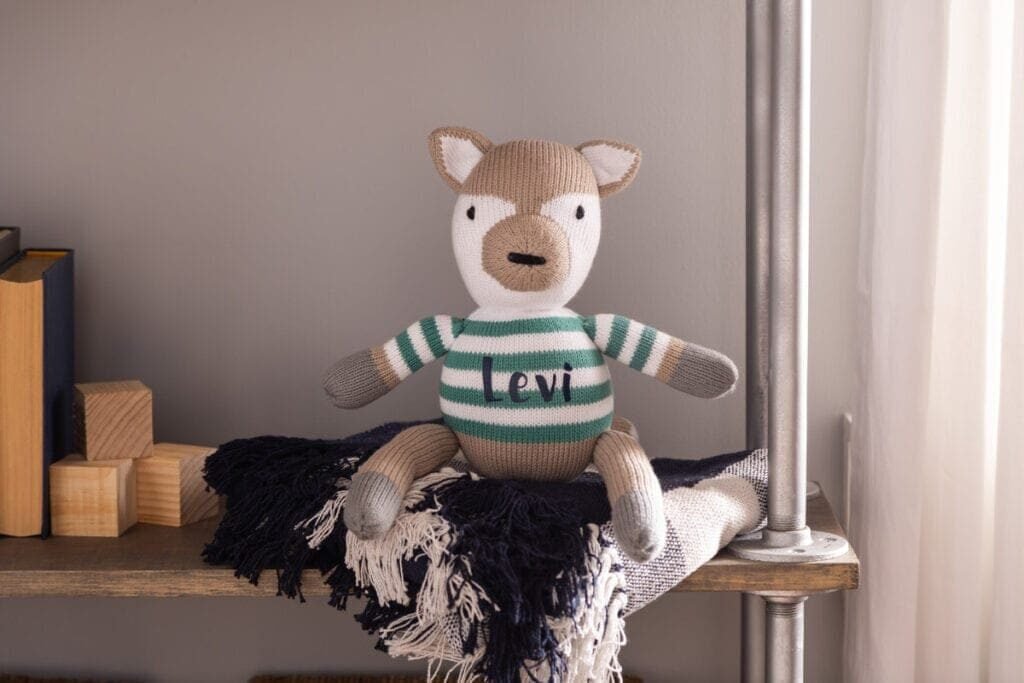
    I love how cute and simple this personalized stuffy is! This would make a great gift for new parents. Probably best for kids with shorter names, though. 🙂

     %postname%

    My friend Cori at Hey Let’s Make Stuff has some really awesome project ideas, including these customizable tooth fairy pouches using her Cricut. I love these because you could probably just upcycle old bags/pouches from something else and make something fun for your kids.

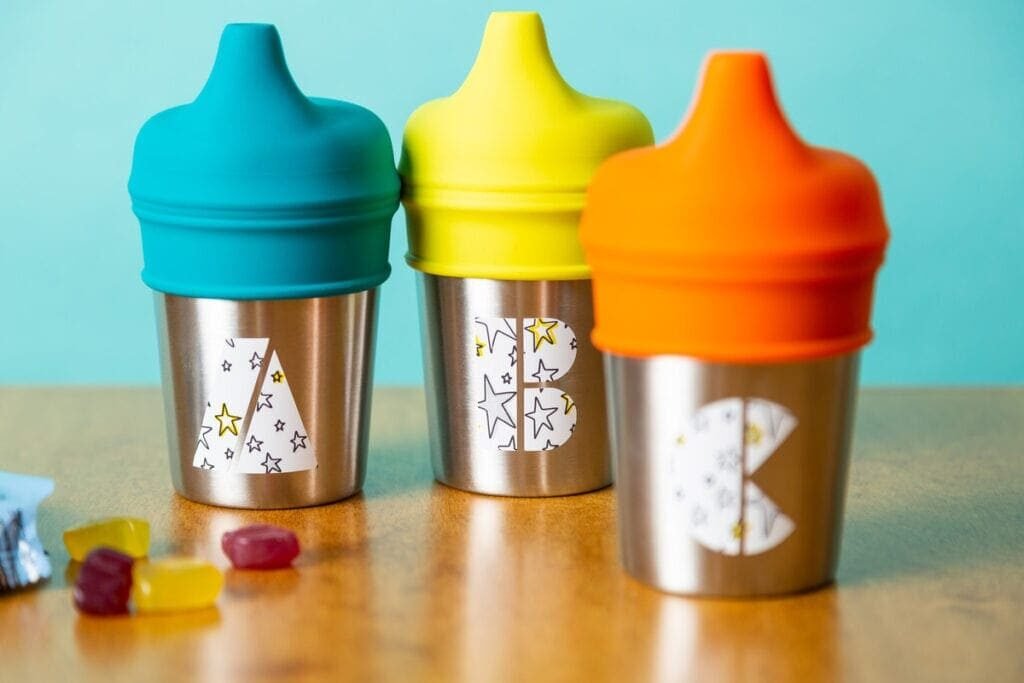
    This monogram sippy cup project is available on Design Space and would be a really cute idea for the daycare kids out there! Sure, you could use a label paper to label their sippy cups…but why not go all out?!

     %postname%

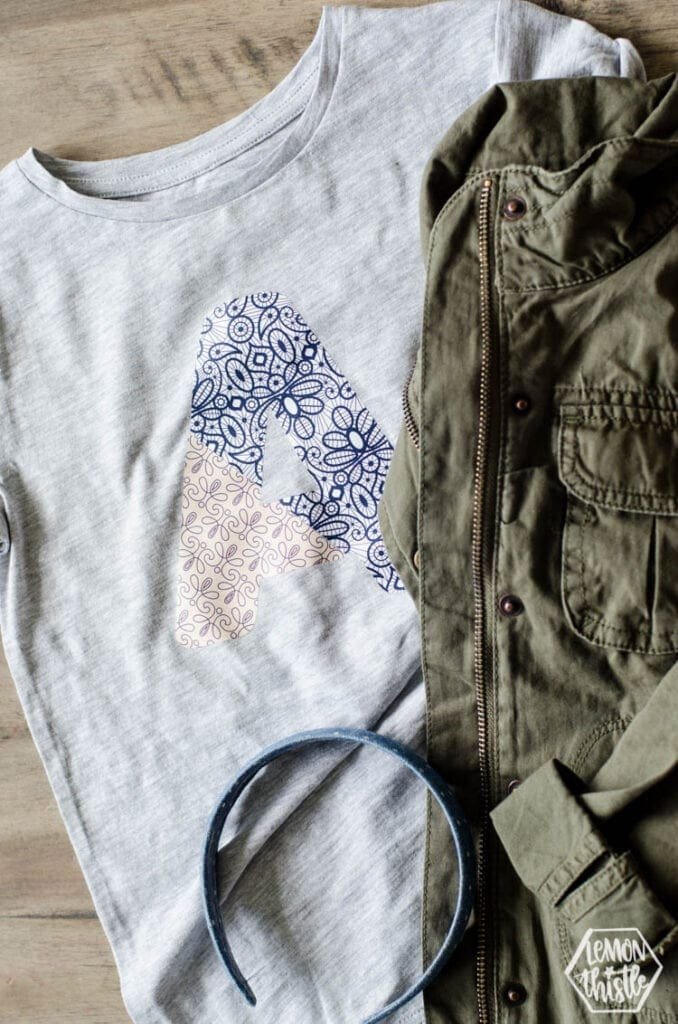
    My friend Colleen at Lemon Thistle made these adorable patterned latter t-shirts for her kids using her Cricut. She has a very chic and modern style, and I love how she adapted that style to make these kid and baby items. The tutorial also includes a tutorial on using the Cricut Design Space’s slice tool to get that layered look.

     %postname%

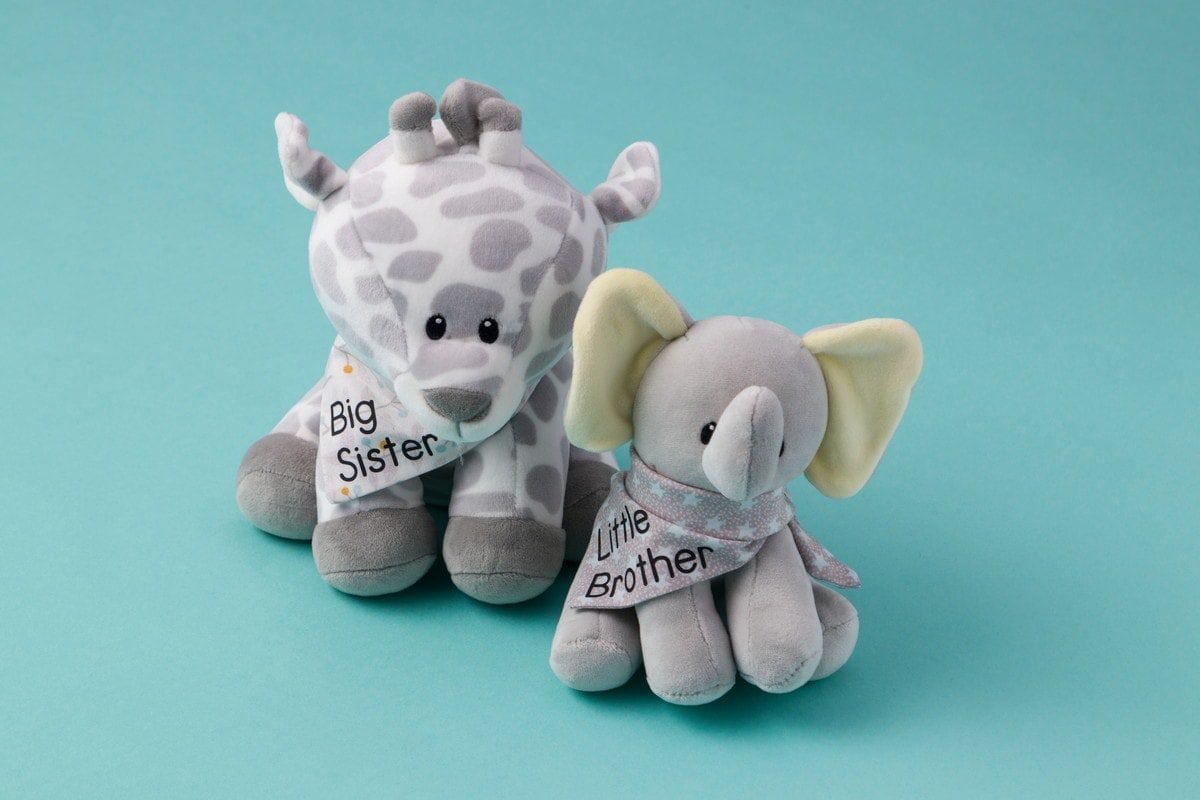
    These personalized sibling stuffies are another great example of an easy project you can make using things you might already have. You could easily customize them for your kids.

     %postname%

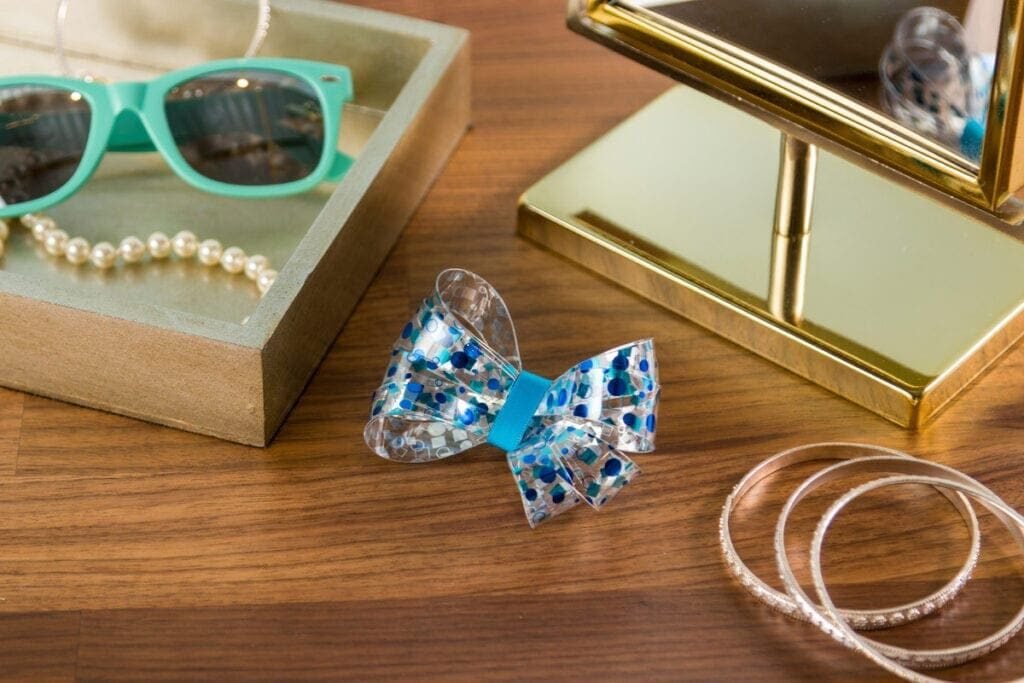
    While these acetate hair bows made using the Cricut Maker aren’t personalized with a name, they can be easily personalized by making different cuts, colors, and patterns. They are very cute!

     %postname%

    Another backpack and lunch bag combo…and these are super girly! I love how April Go Lightly used Cricut’s holographic iron-on to personalize this already cute backpack and lunch sack.

    For my customized unicorn and dinosaur backpacks, check out my post on how to personalize plain backpacks using your Cricut machine!

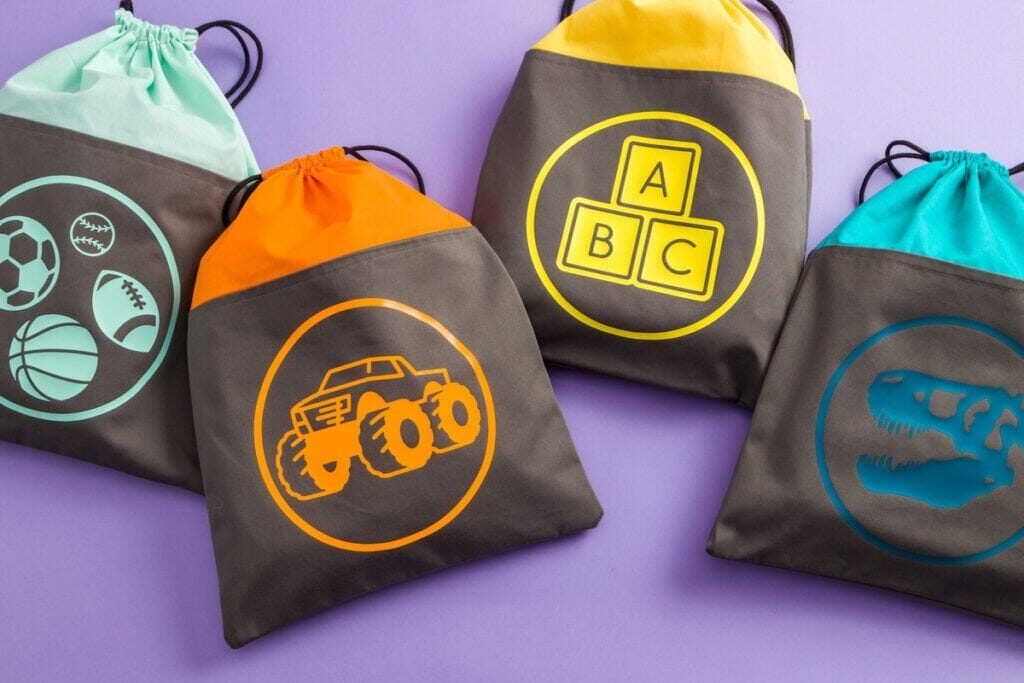
    These really cute toy storage bags also don’t have names on these, but they can be easily customized based on your kid’s favorite toys! You can check out the full tutorial on Design Space.

     %postname%

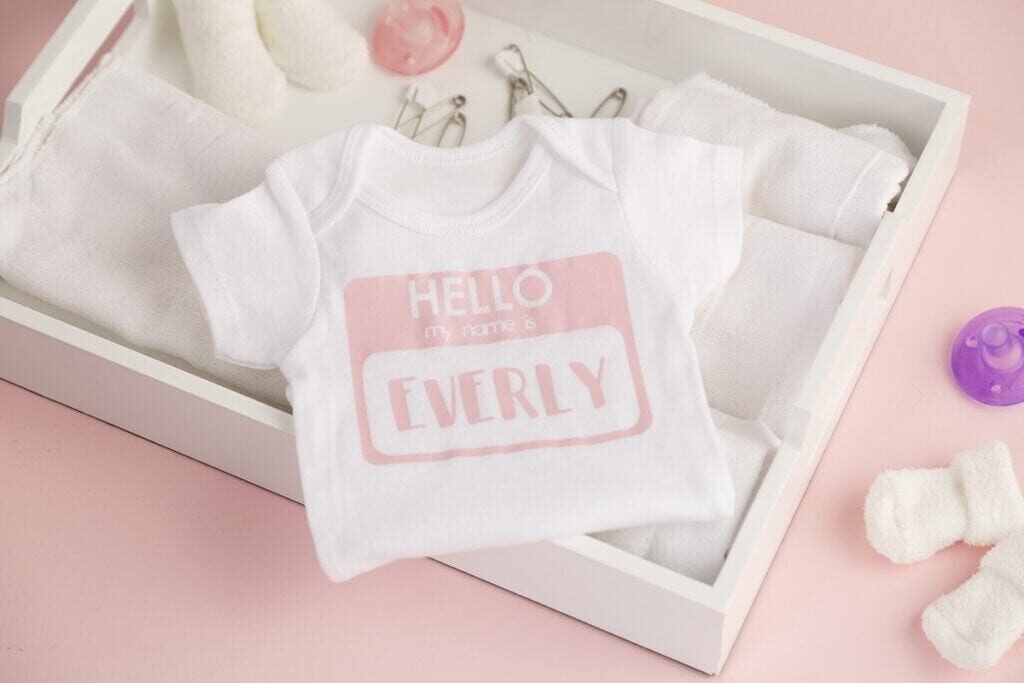
    I really love these hello my name is… cut files! You could easily customize them to be as girly (like this one) or gender-neutral as you’d like. Really cute.

     %postname%

    Personalized storage boxes are great for kids because they have tons of little trinkets that they love sorting and storing. Even my 2-year-old daughter would love something like this to fuss around with!

    This DIY Puzzle made with the Cricut Maker by The Country Chic Cottage is DEFINITELY on my to-do list right now. I love this—it’s genius! R is big in to puzzles right now, and she’d love something personalized with photos of things she likes.

     %postname%

    Like this? Check out my post on how to personalize a cheap LCD tablet for a kid, my tutorial on how to cut DIY wall decals for my daughter’s room, and my cute customized monster art caddy!

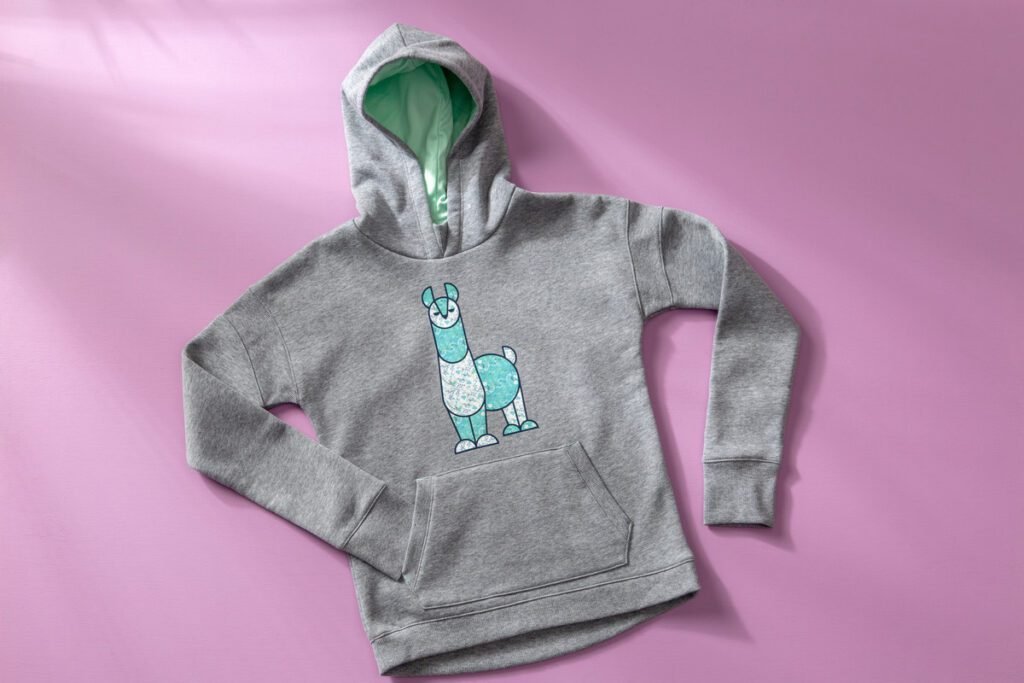
    Okay, so maybe I included this one just because it’s amazing. This llama hoodie isn’t just for kids, either. I would wear this! It’s so cute, and I love the mixed-and-matched patterns.

     %postname%

    I am loving Infusible Ink, and this project is no exception. This one mixes a few different patterns of Infusible Ink to make a monster name baby bodysuit.

    I made this DIY workbench for R a few months ago. At the last minute, I decided it would be even cuter if I added her name to it. Making it a personalized workbench makes it that much cuter. 🙂

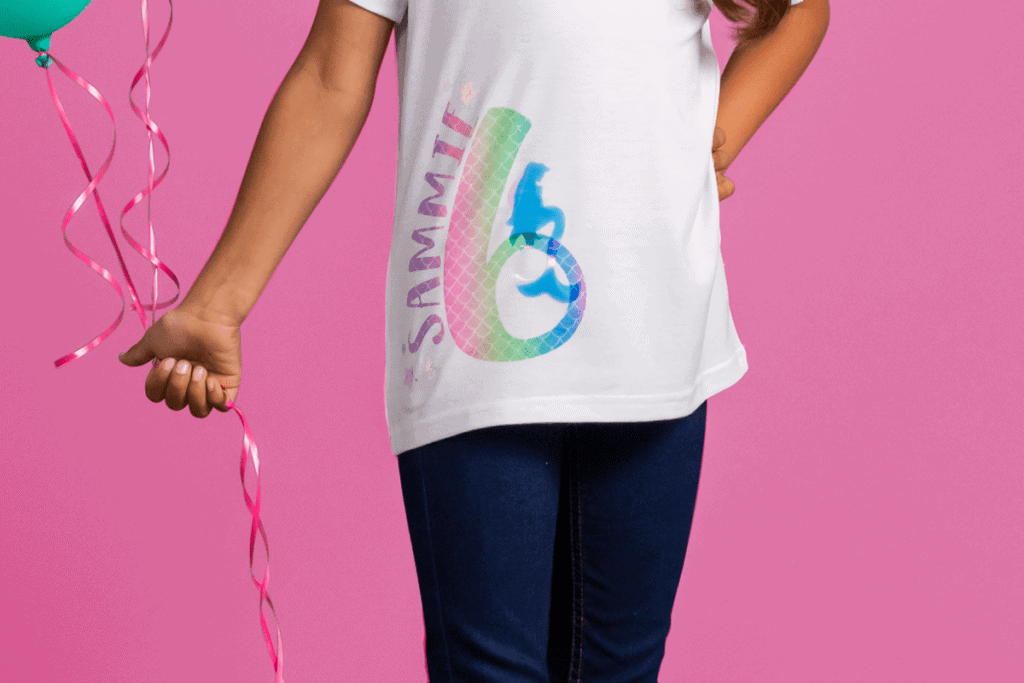
    This personalized mermaid age shirt using holographic material would be cute for any birthday! In fact, as I write this, R has a 2nd birthday on the horizon…maybe I should make her something with a 2 on it.

     %postname%

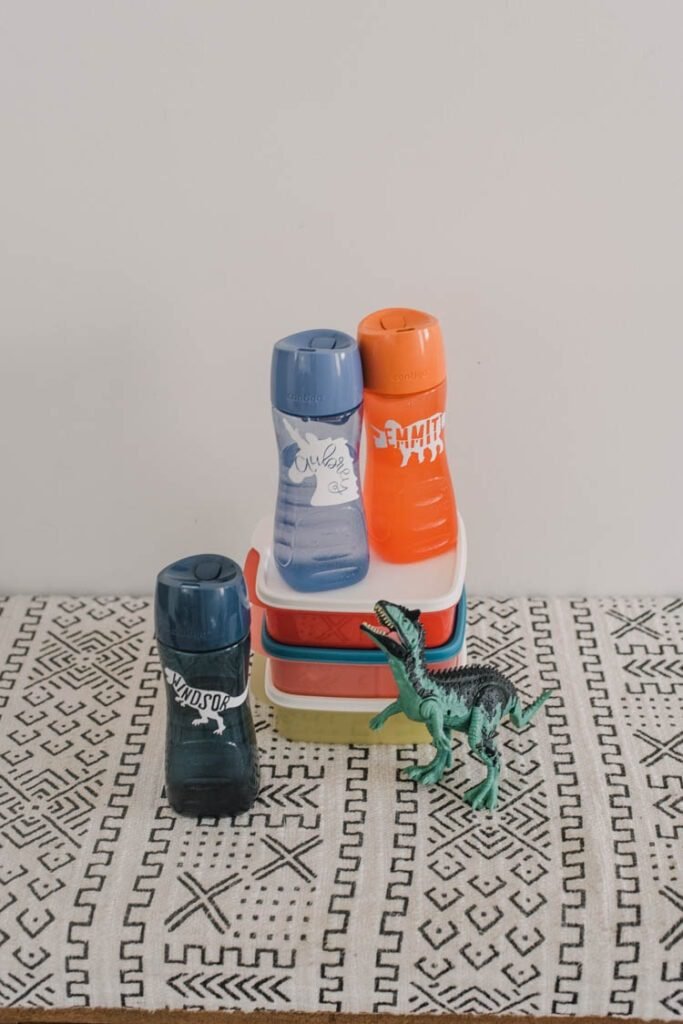
    Another project from my friend Colleen at Lemon Thistle. She’s sharing these cute personalized water bottles, as well as a tutorial about how to knock out words in shapes in Design Space. Great tips!

     %postname%

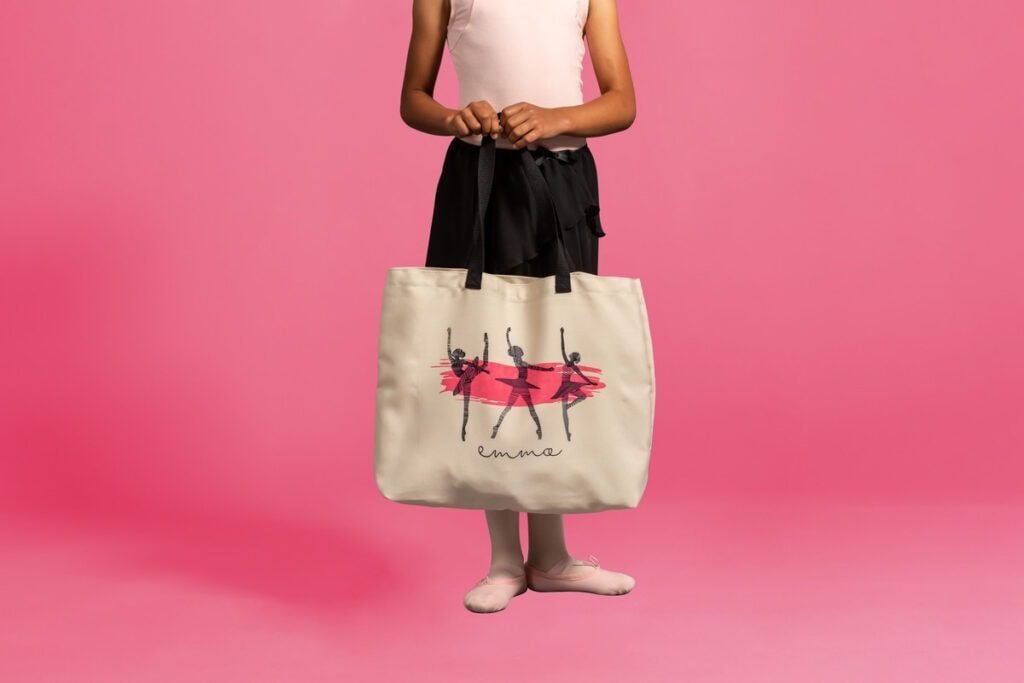
    A personalized dancer tote bag is a great gift for the little dancers in your life. If you don’t have a kid who dances, you can easily customize this project to showcase other hobbies.

     %postname%

    These DIY leather cord organizers using the Cricut EasyPress Mini by my friend Emily at Small Stuff Counts are best for older kids, but who doesn’t have devices with cords these days? Cords can be so annoying, too, so these are a fantastic solution!

    I had to include these baby softie blocks made using the Maker because they are just so cute. While they aren’t personalized with a name, they can be personalized using different fabrics and colors. They are adorable!

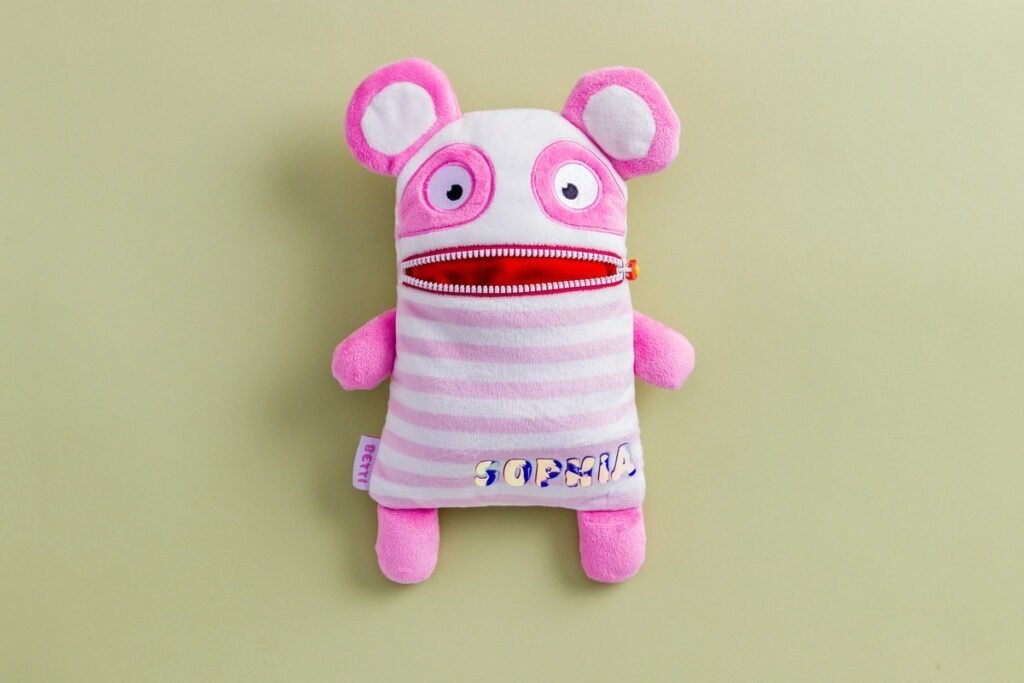
    Sophia’s worry monster is one of my favorite projects on this roundup! It’s so adorable. The holographic iron-on is so beautiful, and the colors look great on this little monster.

     %postname%

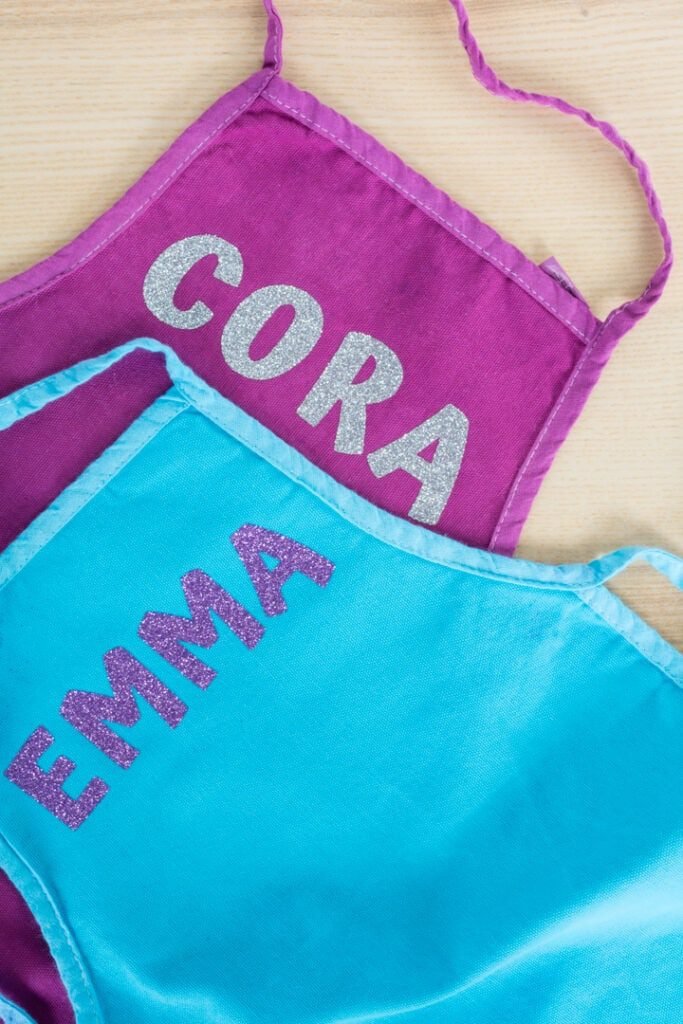
    The final project in this roundup—some dyed and personalized kids aprons I made for my friend’s daughters! I used glitter iron-on to personalized two aprons. Reports are that they love them 😉

     %postname%

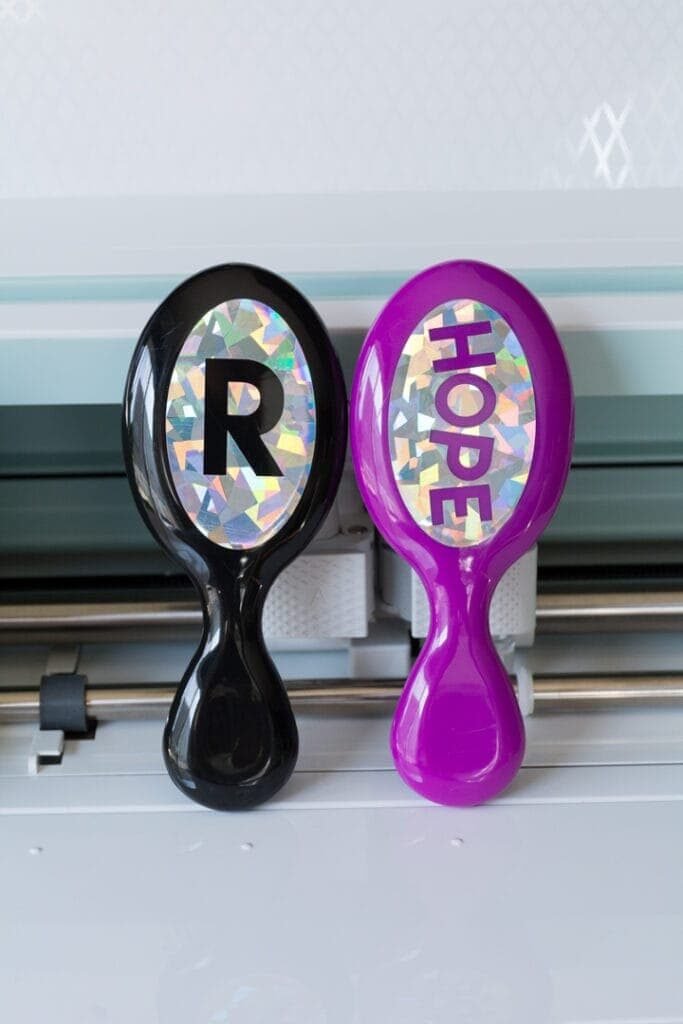
    I made these personalized kids brushes as a way to illustrate how to use the slice tool in Cricut’s Design Space. They turned out so cute!

     %postname%

    Share my roundup of Personalized Cricut Projects for Kids and Babies on Pinterest!

     %postname%  %postname%