Category: Uncategorized

  • How to make popsicles with juice, a fun and easy summer DIY!

    This content may contain affiliate links. See my full disclosure here.

    Wondering how to make popsicles with juice? It’s incredibly easy and the perfect healthy summer treat—also perfect for sick kids! We used fresh-squeezed orange juice for ours. Learn how.

    This is one of those posts that I wondered…should I even write a post about it? But, if I had a question about it at some point, I’m guessing someone else did, too. So I’m writing it!

    It’s one of those projects that is so easy that you’ll think you’re doing it wrong. Surely every homemade thing takes 900 steps and is harder than just buying the damn thing…but these? These are not! 

    Making orange juice popsicles at home is super easy, and it’s a fun activity for kids to do, too. I mean, the pouring of the juice is really the only step. The waiting for the popsicles to freeze up is the longest part of the process, and kids hate waiting. 

    But getting them out and eating them knowing you made them is also fun for kids! Especially if you use fun molds like we did. My daughter loved the flamingos, and picking them out at Joann was half the fun.

    • Molds designed for popsicles. We got ours on clearance at Joann for just a few bucks. They were from their “place and time” summer line. If you can’t find fun popsicle molds, you could always pick up a fun silicone mold and set a popsicle stick down in it.
    • Fresh juice. We bought a thing of pulpy fresh-squeezed orange juice from the store because I definitely did not have the patience to squeeze it on my own.
    • Freezer

    When we were younger, we used to just fill up ice cube trays and add toothpicks in them. My how options have changed! You can buy any number of cute or plain popsicle molds online or at Target, Walmart, etc.

    As I mentioned, ours came from Joann. It’s a silicone flamingo mold that makes two popsicles, and it comes with the sticks! Since silicone is somewhat hard to keep stable, I set the mold on a plate first. You don’t need to add anything special to the molds before pouring.

    I recommend using a pulpy juice since the pulp freezes really nicely and adds a bit of a “bite” to the popsicle. It reminds me of the fruit juice pops you buy in stores. These of course have sugar because they are made with juice, but they don’t have the added sugar that many of the store-bought pops have.

    If you are using a fresh-squeezed juice or a bottle of juice from the store, you do not need to add anything to it. Simply pour the juice in and let it freeze.

    If you’d like to use a can of frozen juice concentrate, make sure to dilute it with up to 2 cans of water in a bowl before pouring. You can test to see how strong the flavor is after 1 can and add more water to dilute accordingly. 

    Like this? Check out my review of 5 different popular DIY slime recipes, our adventures with DIY sidewalk chalk paint, and my tutorial for melting broken crayons in silicone molds!

    My daughter was home sick on the day we made ours, so we poured the OJ in and popped them in the freezer around lunch. She took a nap, and by the time she woke up, they were plenty frozen enough.

    I knew we would be eating ours immediately, so I didn’t worry about freezer burn. However, if you’ll be letting them sit or storing them longer term, make sure to put a freezer bag around them.

    The orange juice popsicles are a bit more fragile than the store-bought ones (I accidentally broke one of the flamingo necks off) but they are easy to eat! Enjoy!

    Pin my post about how to make popsicles with juice!

  • 25 gorgeous free printable thank you tags, download instantly!

    This content may contain affiliate links. See my full disclosure here.

    If you’re looking for free printable thank you tags, I have 25 gorgeous options for you to check out! From bold to minimal, there’s something for everyone. Sign up today to instantly download all 25 for free!

    Hey all! Today I’ve got a monster of a freebies post—25 gorgeous free printable thank you tags! Each of the 25 options has a sheet of tags that can fit anywhere from 6 to 12 per page depending on the style of the tag. And you can print as many of them as you’d like for your personal use!

    Got a wedding shower or wedding coming up that you need to do favors for? How about a baby shower or favors for a birthday party? Honestly, these could be used for anything. I tried to make them as generic as possible (with the exception of the one that has a baby shower theme, lol).

    Do you have kids? Check out my free printable daily sleep tracker, my free morning routine printable, my free printable potty training reward charts, and my 6 free reading trackers!

    And here are some peeks at them! There are square ones that have images and designs on them. They don’t have a hole on them, so you can punch a hole using a hole punch anywhere you’d like. The more traditional ones shaped like tags have a hole marker at the top, and they are less showy and more minimal.

    The images of the printable thank you tags in here are mocked up to look pretty. Don’t worry, when you grab the PDFs and PNG files of the thank you tags, they will be high-quality and ready for printing on 8.5 x 11″ paper. If you don’t have a great color printer at home, I’d recommend printing them at a Staples or Office Depot.

    Honestly, I rarely print at home. I sometimes do black and white, but I like to avoid it just because the color ink runs out so quickly. So instead I always put in print pickup orders using staples.com—and I usually choose a higher quality paper or cardstock that I don’t keep on hand at home.

    Yes! I am a Cricut user, so I will speak specifically to Cricut. However, it’s super easy to upload an image file to Design Space and then say it’s a print-then-cut image. You do have to have the appropriate materials at home for this, whether it’s paper or cardstock. Or vinyl if you want to stick these on something.

    I’m going to be doing a print-then-cut tutorial post soon, but until then, just know that I have the PNG files available as well as the PDF files! PDF files are the best to use if you’re just printing and cutting by hand.

    Like these? Check out my free printable daily planner pages and my free printable to do lists!

    If you want to download these, it’s super easy! I use Grow by Mediavine to deliver most of my exclusive freebies. By signing up below, you will unlock a link to my Dropbox folder that has all of the files. Enjoy!

    Here is a link to the Dropbox folder with all of the files!

    Pin my free printable thank you tags!

  • Free messy bun SVG files for instant download!

    This content may contain affiliate links. See my full disclosure here.

    Looking for free messy bun SVG files? I have a few options you can download instantly and use for all of your personal crafting projects!

    Hello hello! I have been doing a bit of research lately on the SVGs people are searching for. Because, let’s be honest…I have about a million ideas pop into my head throughout the day about things I want to put together for the blog.

    However, I want to make sure it is stuff that people actually want. Things that people are searching for and using. And this is one of those files! Free messy bun SVG files. Who would have thought?

    You typically see these types of images on “mom-style” things…they might say things like, “messy bun, getting stuff (or sh!t) done,” “mom life,” etc. Since there are so many different options for these, I decided to give away just the files of the bun silhouette with no text.

    You will see text saying “#momlife” in a few of the coffee cup mockups below, but I just added those for the mockups. The files you’ll get for free don’t have any text. (Get creative, add your own and send it to me to see!)

    When I see these files, I often see the type of “messy bun” style often associated with a white woman’s hair—fine, straight hair pulled up into a wispy messy bun. But I wanted to make sure these files were more inclusive, so I did a little searching.

    My hair is thick, fine, and straight—very much white girl hair. But how great did these messy bun files with a black woman’s curlier hair turn out? Both of the hair options have a bow-style headband tying up the bun.

    For more free SVG files, check out my Dolly Parton SVG file, as well as my plant lady SVG cut files!

    AND! I am adding an additional two files that have sunglasses option, too. So, when you sign up, you’ll get the two different hairstyle options with the closed eyes look, as well as the oversized sunglasses look. Your choice!

    These are SVG files and can be uploaded directly to cutting machine programs (I use Cricut, so Cricut Design Space for me) and manipulated from there. You’re welcome to use them for all of your personal projects and add other elements to them, including text or whatever else you want.

    For some Cricut basics, check out my post about which Cricut you should buy, as well as my tutorial posts for the Cricut Mug Press and the Cricut Easy Press!

    I use Grow by Mediavine to deliver most of my exclusive freebies. If you want to download all of the files, drop your email in the signup form below! It will unlock a link to my Dropbox folder with all of the files. As a bonus—the link will give you access to all of my free cut files.

    For these files, just look for the folder called “cut files_messy bun.” I would LOVE to see what you make!!

    Here is a link to the Dropbox folder with all of my free cut files!

    Pin these freebies!

  • Cutting Leather With the Cricut Maker & Explore Air 2

    This post shares details about cutting leather with the Cricut Maker and Explore Air 2! It includes details on cutting garment leather, tooling leather, Cricut brand genuine and metallic leather, faux leather, and more. Learn all about the different blades and techniques you need to ensure your Cricut leather cutting project is a success!

    Are you looking for information about cutting leather with the Cricut Maker or with the Explore Air 2? You’re in luck! Because today I am sharing all about how to do it. Including info about the different blades you might need and the different types of leather you can cut. 

    It can be a little overwhelming to sort through all of the information out there. So, much like I did with my post on how to use the Cricut Maker’s knife blade to cut wood, I’m doing a deep-dive for you guys on the tools Cricut has to cut leather, faux leather, metallic leather, and more!

    First up: cutting real leather. There are three different types of real leather you can cut. Garment leather, tooling leather, and Cricut brand genuine/metallic leather. If you’re cutting garment or tooling leather, you’ll need to use the Cricut Maker because you’ll need the knife blade. However, Cricut brand genuine/metallic leather can be cut on either machine, depending, because you can use the Explore Air 2’s deep point blade. 

    Let’s talk about garment and tooling leather first. What are the differences between the two? Garment leather is treated with softeners, so it’s often softer and more flexible than other types of leather. If your leather is dyed, it’s probably garment leather. When purchasing garment leather, look for uniform pieces that are smooth and will adhere well to the Cricut mat. You can check craft stores or specialty leather stores for garment leather.

    Tooling leather, on the other hand, is typically tanned and less flexible than garment leather. This isn’t hard to find, but it isn’t as easily accessible as garment leather. Check online or in a leather specialty store for tooling leather you can use for crafts.

    DIY LEATHER POUCH BY LEMON THISTLE

    Want more info on working with Cricut materials? See my guide to cutting chipboard with Cricut machines, my tips for working with holographic mosaic vinyl, and my roundup of awesome wood and chipboard projects you can make on a Cricut machine.

    Here are the different thicknesses you can cut with the Cricut Maker knife blade:

    • 2–3 ounce
    • 4–5 ounce
    • 6–7 ounce (tooling leather only)

    The largest size of garment or tooling leather that you can cut with your Cricut Maker is 10.5” by 11.5” or 10.5” by 23.5” depending on the mat you use. Cuts should be no smaller than ¾” by ¾” though, and cuts should not be narrower than the diameter of a pencil. 

    That means that, like cutting wood on your machine, very intricate designs are probably not the best idea. If you choose to try cutting a design with a more intricate pattern, monitor the project while your machine is cutting it. If any small pieces pop out, make sure to remove them immediately so they don’t mess up your cut.

    DIY FAUX LEATHER KEYCHAINS BY THRIFTY & THRIVING

    Whether you’re using garment or tooling leather for your project, conserve material by cutting it down to the size you need for your project. Use a purple StrongGrip mat to cut both of these leathers. And make sure to place the smooth size of the leather face down on the mat. If your design needs mirrored, don’t forget to mirror it!

    Cricut recommends using a brayer to create a firm bond between the leather and mat, but I didn’t do that because I don’t have a brayer. I simply rolled my hands over the surface of the leather to encourage a solid bond. Then I used tape to paint all four edges of the leather down onto the mat. I used scotch tape—painter’s tape is recommended, though.

    If your leather piece is wrinkled and needs flattened before cutting, you can wet the leather piece down on its unfinished side and place it between two towels. Then apply pressure from above using a stack of books. Make sure the leather dries completely before cutting it on the machine, though.

    Before cutting, make sure you move your machine’s white star rolls all the way to the right so they don’t interfere with or imprint anything on your leather. The star wheels are there to help keep materials in place while your machine is cutting them. However, since leather is a thicker material, the wheels aren’t necessary and actually might mess with your project.

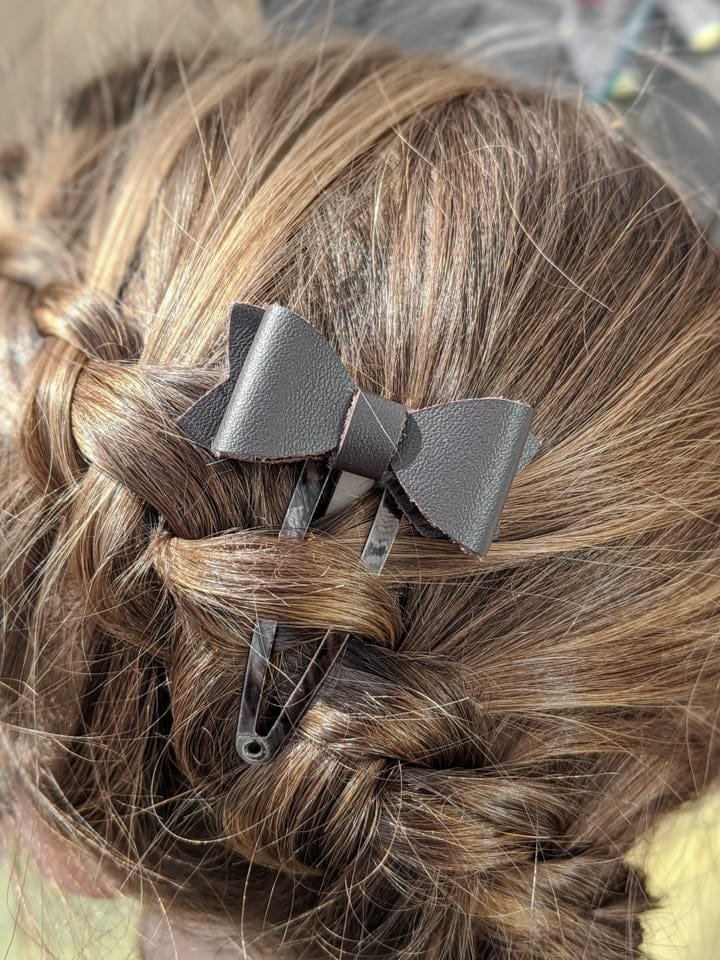
    Unlike thinner materials like vinyl and paper, your machine cuts leather by taking multiple “passes” of your design. Each pass cuts a bit deeper until the design is done and completely cut out. When I made my hair bows, it took many passes for my machine to cut all of the bow’s pieces out.

    When your machine is getting ready to cut your design, Design Space will calculate how long it things the cut will take based on the material, blade, and design. You’ll then see a projection on your screen with a time estimation. As well as an estimation of the number of passes your project will likely require.

    While your Cricut Maker is cutting garment or tooling leather, you can monitor the completion progress on your screen. You should also monitor the project completion in real time. Make sure you remove any stray pieces that your blade cuts out. If you want to pause your machine to check your cut, you can do so. But generally Cricut’s estimations of the number of passes is accurate!

    Before you offload your cut from the machine, make sure to check that your blade has been able to cut all of the way through. Design Space will prompt you to check so you don’t forget. If you need to do another pass on your design, you can press the Cricut symbol on your machine. If your design is completely cut out, you can offload your mat. Don’t be alarmed if you see marks from your knife blade on your mat. This is totally normal. 

    DIY LEATHER CORD KEEPER BY TODAY’S CREATIVE LIFE

    If the edges of your cut design are really rough, you might need to replace your blade with a fresh one. A dull blade can lead to rough-cut edges. If your leather is moving while you cut it, your mat might be at the end of its life. Does your machine continue to stall in the same area? I’ve had this happen with the knife blade and chipboard—so frustrating, I get it! 

    It might be a rough spot in the material, or there might be debris from the cutting process in the way. Pause the cut and clean up the material (without offloading it) to see if this helps. If it’s just a spot in the material you can’t get through, unfortunately you might have to start over with a new piece. 🙁

    See my post, “Which Cricut Should I Buy?” for a detailed review and comparison of the Cricut Maker, Cricut Explore Air 2, and Cricut Joy machines. Also check out my tips for how to convert files into .SVG cut files for use in Cricut’s Design Space!

    Now let’s talk about how to cut Cricut brand Genuine Leather, which you can cut using a Maker or an Explore machine. One nice thing about the Cricut Genuine Leather is that it comes in small packages with a few pre-cut sheets of leather. This leads to less waste and less leftover after small projects.

    I used the Cricut brand Genuine Leather in dark brown for the cute little hair bows I made. I used one sheet for each of the bows, but you could probably tweak the layout of the pieces and get two out of each piece.

    As with other heavier materials, you can get the best results by using a fresh, sharp blade and a cutting mat free of debris. You’ll use your purple StrongGrip mat for cutting Cricut Genuine Leather as well. To cut this leather, you adhere it to the mat face down. It’s very clear which side of the leather is the “good” side, so that’s an easy one.

    I ensured it was adhered firmly to my mat by using a scraper tool (the kind usually used for vinyl). I simply ran it over the piece, pressing it down into the mat. You’ll also need to move the star wheels all the way out of the way to the right when using this type of leather. Same reasoning—it’s thicker, and the star wheels could lead to imprints on the design you’re cutting.

    You’ll use a deep point blade on both the Maker and Explore machines. The deep point blade can cut leather up to 6 ounces. (Note: I didn’t find it officially recommended anywhere, but I did end up cutting my Cricut brand leather with my knife blade on the Maker because I didn’t have a fresh deep point blade around. It was fine!) 

    When you’re ready to cut, you need to tell your Cricut what type of leather you’re using. If you’re cutting on a maker, you’ll simply select “Browse All Materials” and select “Genuine Leather.” It will have the Cricut symbol next to it. On an Explore machine you’ll turn the dial to “Custom” first. Then in Design Space, select “Browse all Materials” and “Genuine Leather.” 

    Your cut will take a bit of time to complete. When it’s done, don’t offload the mat. Make sure to check that the blade has cut all the way through. If it hasn’t, you can do another pass at the design. You can actually do as many passes as you need to; you’ll tell Design Space to complete them one at a time.

     %postname%

    The steps for cutting Cricut brand Metallic Leather are pretty much the same as cutting the Cricut brand Genuine leather. 

    1. Start with a clean largely free of debris and a fresh, sharp deep point blade.
    2. Place the metallic leather face down on the mat and create a firm bond using a brayer or a scraper to apply pressure.
    3. Move star wheels all the way to the right to prevent them from creating unwanted imprints on your project.
    4. For Maker: Select “Browse All Materials” and choose “Metallic Leather” in Design Space. For Explore: Turn the machine’s dial to “Custom” first. Then choose “Browse All Materials” and choose “Metallic Leather.”
    5. When the cut is done, make sure it has cut all the way through before offloading the mat. You can tell Design Space to take another pass if you need to!

    DIY METALLIC LEATHER PASSPORT HOLDER BY LEMON THISTLE

    Want more Cricut? Check out my post about my DIY Cricut stands, my complete guide to using the Cricut EasyPress, and my tips about using the EasyPress Mini and tips for using iron on with wood!

    I am well aware that leather isn’t for everyone! That’s okay. Whether it’s a personal choice due to it being an animal product or simply the cost, the Cricut Maker and Explore Air 2 can both cut faux leather as well. There are just a few differences when cutting the Cricut brand Faux Leather.

    Like the other leathers, it goes face down on the mat. However, since it’s lighter weight, you can just use a green StandardGrip mat and a regular fine-point blade. Not a deep point blade or a knife blade. Yay.

    To tell your machine that you’re cutting Cricut Faux Leather, on an Explore Air 2 machine, turn the machine’s dial to custom and then select “Faux Leather (Paper Thin).” On a Maker machine, go to “Browse All Materials” and select “Faux Leather (Paper Thin).”

    DIY METALLIC LEATHER JOURNAL COVER BY BROOKLYN BERRY DESIGNS

    Pin my tips about Cutting Leather With the Cricut Maker & Explore Air 2!

  • How to Convert JPG to SVG for Cricut Crafts: Two Ways to Do It!

    Wondering how to convert JPG to SVG for Cricut projects or use in Cricut’s Design Space? There are a lot of different ways, and today I’m going to show you two easy methods!

    Hey guys! Time for a Cricut post today—yay. I am going to be showing you guys two of my favorite ways to convert JPG or PNG files to SVG files for Cricut projects.

    There are a ton of different ways to convert image files to SVG files, and these are just two of them. If I sound like I’m speaking a different language, here’s a quick overview of what some of these terms mean.

    JPG (or JPEG) and PNG are simply different types of image files. They can typically be identified by the file extension at the end of an image’s file name (for example, Image.png). JPG stands for Joint Photography Group and is a file type commonly used for web images.

    That’s because JPG files are smaller and slightly lower quality. Typically this doesn’t compromise the image—it just allows it to load faster on websites and devices. PNG stands for Portable Network Graphics and is another common type of image on the web.

    However, PNG files are usually larger and higher quality. That means that they are better for printing and not as good for use on the web. Since they are larger, they can load slower. PNGs also allow you to have a transparent background.

    An SVG file, however, is a graphic file. It stands for Scalable Vector Graphic, and it is required for your Cricut cutting machine. You can upload SVG files straight into Cricut Design Space, or you can use upload images and convert them to SVGs with varying levels of success (more on that in a bit).

    SVG files allow your Cricut to “read” where it needs to perform different activities (for example, where to cut). In Cricut world, a lot of times you’ll just hear “SVG” files referred to as “cut files.”

    Getting your feet wet with Cricut? Check out my detailed Cricut machine comparison post looking at the Cricut Joy, Cricut Explore Air 2, and Cricut Maker! I also have a tutorial guide for the EasyPress 2 and an overview of how to use the Cricut Mug Press.

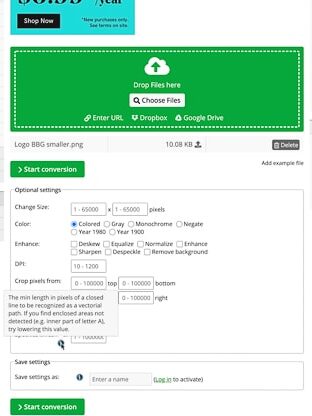
    So how do you convert JPG or PNG to SVG? There are a ton of ways, but I am going to share a free and simple resource with you that meets 95% of my needs! It’s a website called Online-Convert.com, and it has resources for converting loads of file types.

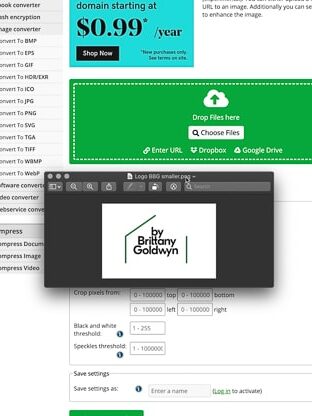
    There are many websites like this one. All are probably about the same in terms of features and usability.  I’m going to use a JPG version of my blog’s logo to show you guys how these work. 

    I realize these screen captures are kind of hard to see, but hopefully they will at least give you an idea of how easy this is. For the full experience, definitely check out the video I made about this conversion process too.

    My logo converted to SVG using the website!

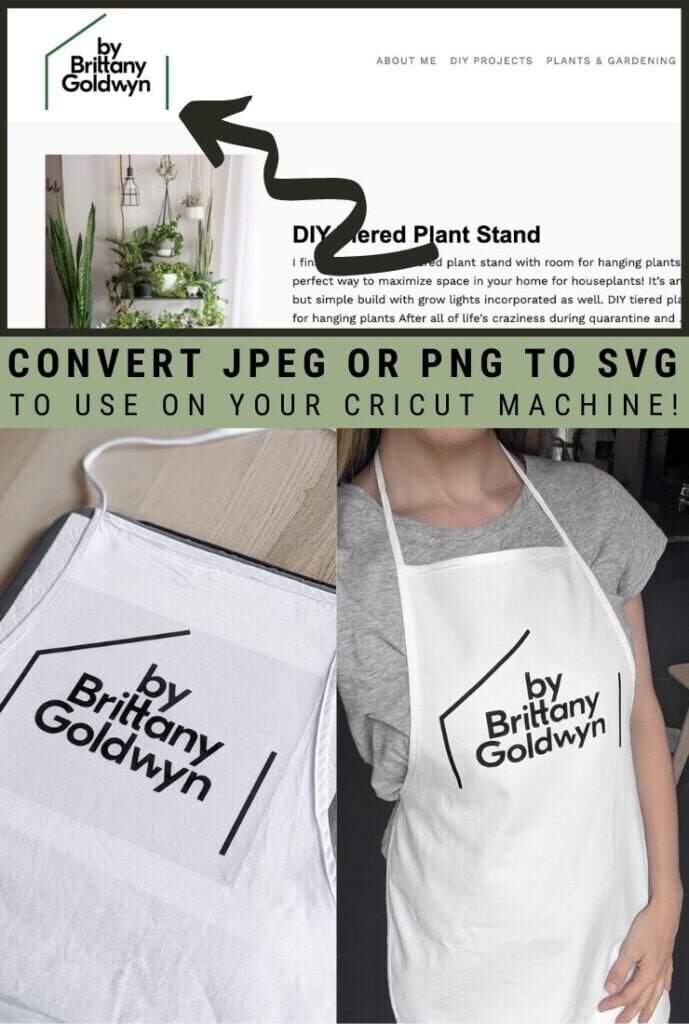
    As you can see, it does a really good job. You can mess with the settings to help you achieve a better outcome if you have a slightly more complex image. This is perfect for simpler images like my logo. I’m planning to upload this into Cricut’s Design Space to cut it out of iron-on vinyl for a crafting apron. And this file will do just the trick!

    However, what if your image is smaller, lower quality, or has less contrast between the different color and lines? Well, the free solution won’t work as well. It’s free, so we can’t complain too much, can we?

    But I want to show you how the website worked on a smaller version of my logo. After I uploaded it and ran it through the conversion from JPG to SVG, I ended up with this. (This is without changing any of the settings.)

    Crappy logo.

    Yikes. That is definitely not going to look good on my apron! So this file probably isn’t going to work with this image convertor. However, I want to flag one feature that has helped me with some of my past conversions: speckles threshold.

    If you scroll down in the image settings (before converting it), there is a field for “speckles threshold.” This is the minimum length in pixels for a closed line to be recognized during conversion.

    So, for example, if you try to convert a JPG file of the letter “A,” you might find that it doesn’t detect and outline the little triangle in the A. You need to lower your speckles threshold.

    The lowest threshold for this free software is “8,” so I usually just pop that in as a first stab to see if it helps. I’d say 75% of the time it fixes the issues with not detecting certain spots in an image. However, in this case, this is what I got.

    Almost certainly because it was a smaller, lower-quality image to begin with. Lowering the speckles threshold helped, but it still kinda looks bad. Not nearly as crisp as my logo is.

     %postname%

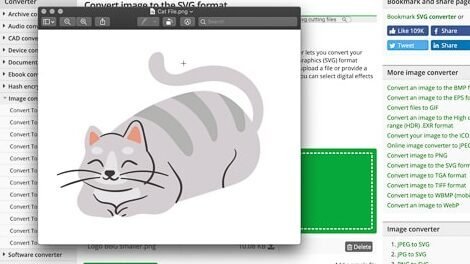
    When using software like this, it’s also best to use simple, high contrast images with clear delineation between colors and clear lines. Let me show you what I mean with this picture of a cat. See what happened when I ran it through the software? Not good! I mean, unless you want an abstract cat.

     %postname%  %postname%

    Another resource to check out is Canva’s Image Converter tool. I am a Canva user for my websites, for personal projects, and for my day job. I love Canva! It’s super user-friendly, and many features are free.

    However, if you pay for a Pro membership, you can upload images and convert them to SVG format. While this isn’t free, Canva is a reputable and less buggy resource than some of the free websites out there. So if you’re converting lots of files, it’s worth it.

    Alright, the second way to convert a JPG or PNG to SVG for use in Cricut is by doing so directly in Cricut’s Design Space software. The software is free, and you need it to use your Cricut anyway, so you already have it if you’re a Cricut crafter.

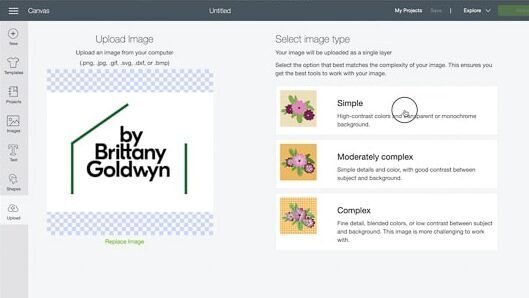
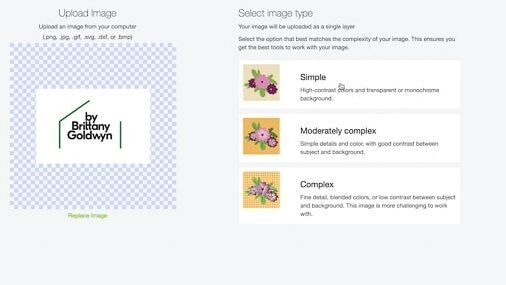
    Step 1: In Design Space, click “Upload” on the left-hand sidebar. Then upload your JPG or PNG image. It will look something like this. Choose an image complexity based on the descriptions Cricut gives. I chose “simple” for mine and it did a pretty good job.

     %postname%

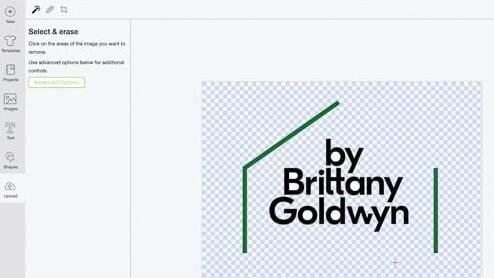
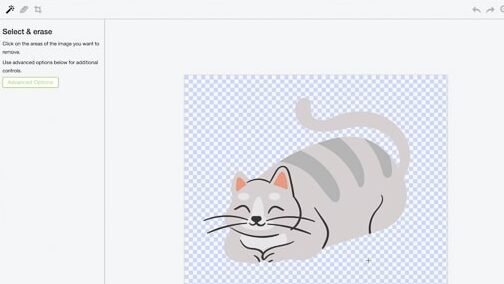
    Step 2: It will then direct you to an editing screen where you’ll have three editing options: the magic eraser, an eraser brush, and a cropping tool. In the image below, I’ve used the magic eraser to click the white background to remove it. It removed almost all of the white background at once because it was able to “reach” all of it with one click.

    Notice that it didn’t remove the white background on the areas inside of the letters like the B, a, etc. For those, I had to click each enclosed area individually to remove the white.

    If you have an image that you want to remove large areas of but it doesn’t have great color differentiation, you can use the eraser too and increase its size. Decrease its size to do more fine-tuning.

     %postname%

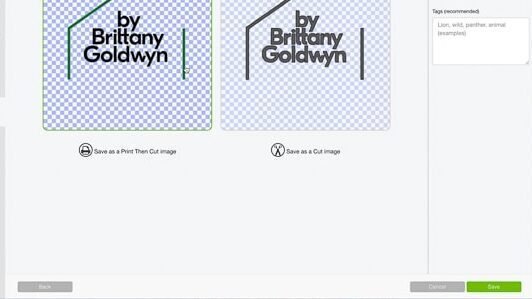
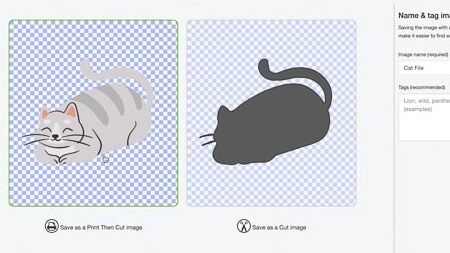
    Step 3: When you’re done removing the parts of your image that you don’t want, you’ll have the choice to select a print-then-cut image or a cut image. As you can see below, the print-then-cut image retains the color because you’ll use this to print and then cut it out. For example, if you were making stickers on your Cricut.

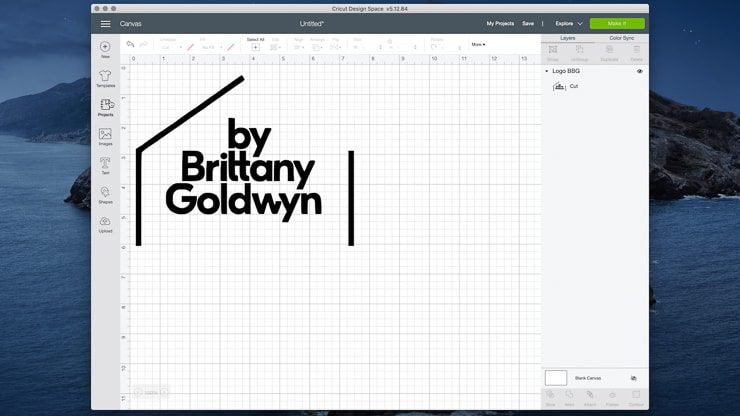
    The cut image is what I want for my project, though. I don’t care that the color is gone because I’m going to be using it to cut my logo out of iron-on vinyl anyway. I can cut it out of whatever color vinyl I want. So I clicked that option and then save! The new file appeared on my Design Space canvas.

     %postname%  %postname%

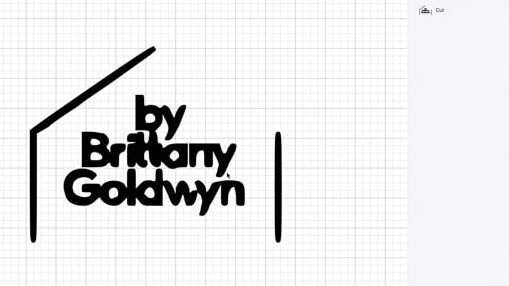
    Since I showed you guys what a difference image size and quality made for the converter website, I want to show you the Design Space differences too. When I tried this same process using the smaller version of my logo, the result was similarly unimpressive.

     %postname%  %postname%

    And then here’s how Design Space fared with the cat image. As you can see, I was able to easily remove the background of the image wit one click, meaning it’s a perfect candidate for print then cut in Design Space! However, the lack of clear lines and differentiation in the coloring meant it just turned into a cat blob with the “save as a cut file” option.

    convert-jpg-to-svg-for-cricut-steps-13-edited-8798241 convert-jpg-to-svg-for-cricut-steps-14-edited-2675813

    One of the limitations to be aware of when converting files in Design Space is that you can’t save them off. You can save them for future use in Design Space—and you can even share them with others in Design Space.

    But you can’t save them off and email them like you would be able to do with an actual SVG file. This isn’t a big deal at all if your ultimate goal is using the file to make a Cricut project.

    For more Cricut tips and tricks, check out my post on how to slice text and objects in Design Space, how to layer iron-on vinyl, how to use the Maker’s knife blade to cut wood, and how to use the Maker’s debossing and engraving tips.

    After I compared the files, I ended up liking the converted version of my logo from the converter website. The difference was slight, but the lines were just slightly more crisp. Since I wanted to do black iron-on on a white apron, I went with that one. 

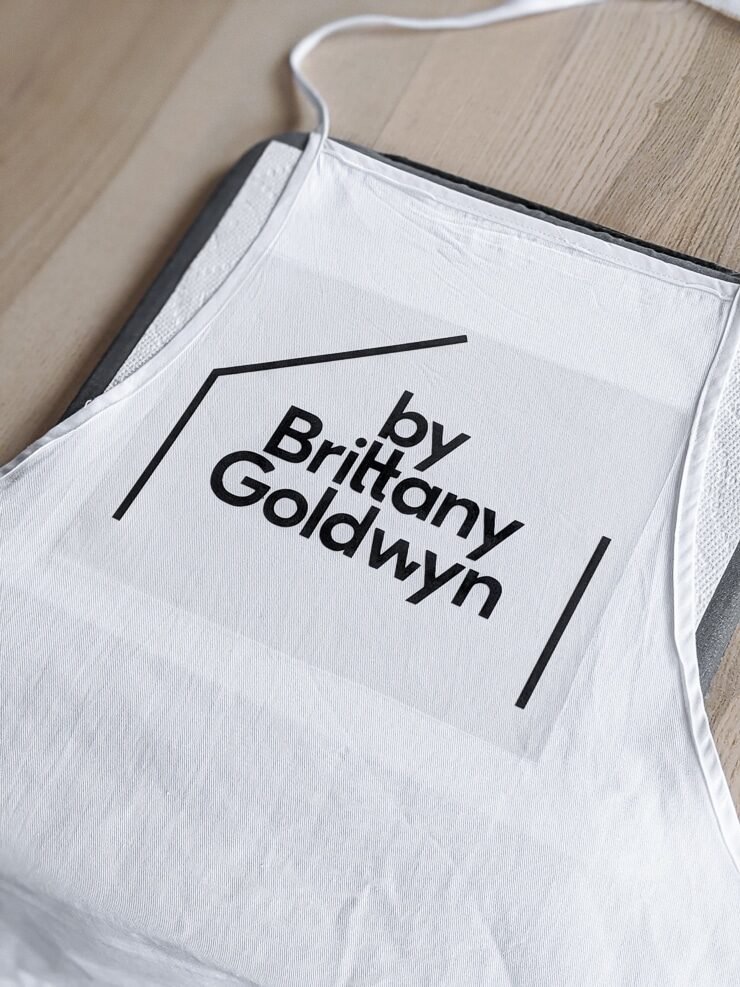
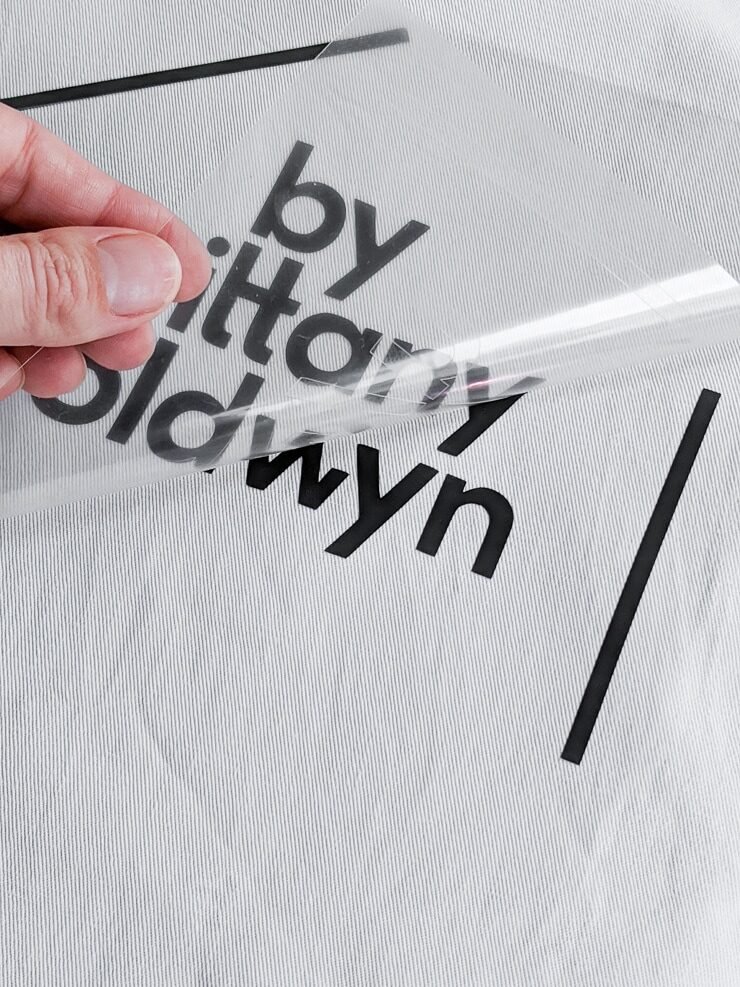
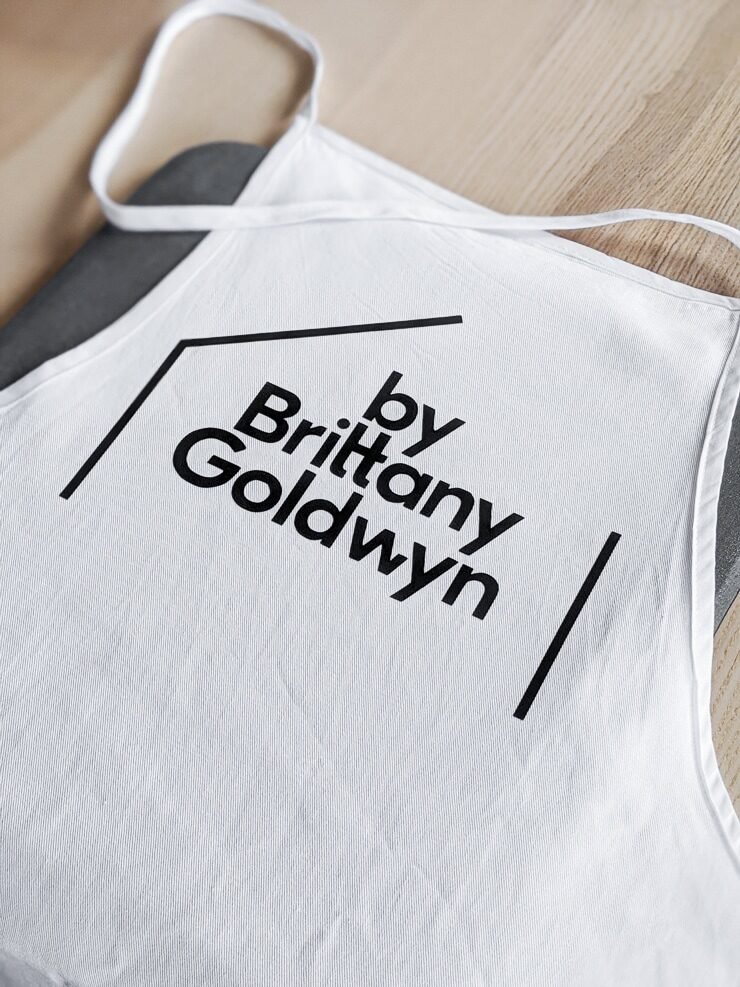
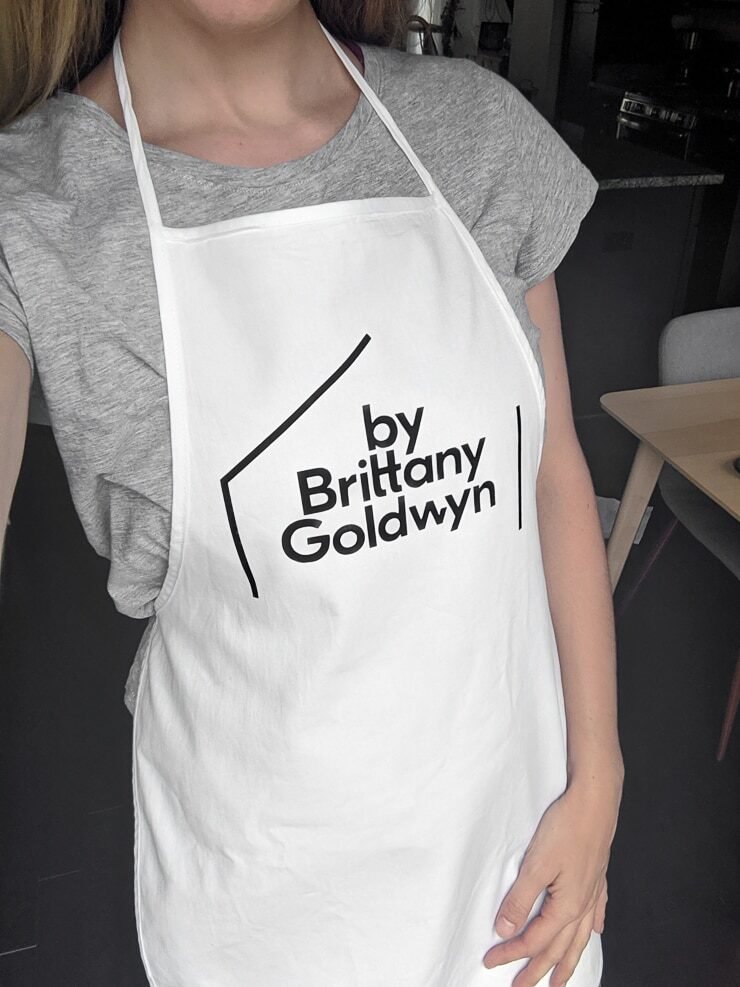
    The design cut beautifully on my Cricut Explore Air 2 using black Everyday Iron-on material, and it looks lovely transferred to the apron! I can’t wait to wear this when I’m doing crafting or woodworking tutorial videos. Not only will it protect my clothes, but I’ll look professional doing it!

    convert-jpg-to-svg-for-cricut-1-4483628 convert-jpg-to-svg-for-cricut-2-8239223 convert-jpg-to-svg-for-cricut-4-6942390 convert-jpg-to-svg-for-cricut-6-9414334

    Now that you know how to convert a JPG or PNG file to SVG for your Cricut crafting, remember that you should only be doing it for images you have the legal rights to use. For example, it would definitely not be kosher to find an image of a Disney character, convert it to an SVG, and start selling t-shirts with them on it.

    You don’t own the copyright to the image, and Disney is notoriously strict on who they license their content to. It’s simply not worth the risk.

    Look for free images that come with a personal or commercial license if you’re just making projects for yourself. However, if you’re using files to make things that you’ll be selling or putting on a money-making website, definitely read the commercial use license closely to ensure that you can alter images and reproduce them in another format. Stay legal, folks!

    Pin my tips about how to convert JPG to SVG for Cricut crafts:

    jpg-to-svg-pin-689x1024-1-5665534

  • How to use Cricut Infusible Ink on Square Coaster Blanks!

    This post shares all about how to use Cricut Infusible Ink on coasters, including an overview of what Cricut Infusible Ink is, how it works, and how you can create a professional project at home using the Cricut brand coaster blanks! This post also contains affiliate links, which you can read more about here.

    Let me tell you what. I am amped to finally be trying out Cricut’s newest addition to their materials—Infusible Ink. Some of my friends had early access to trying it out, and I’ve been loving the projects I’ve seen. 

    Today I’m sharing everything I’ve learned about Infusible Ink so far and walking you through the step-by-step process of creating an Infusible Ink project using the Cricut square coaster blanks. Let’s chat about the ink first.

    Cricut’s new Infusible Ink allows you to create professional-quality ink-based heat transfers at home. They create similar-looking products to the more traditional iron-on vinyl. However, the major difference is that while iron-on material is attached to the top of a base material using melted adhesive, Infusible Ink becomes part of the material. 

    The sheets aren’t wet or messy like you might imagine. They come packaged in a solid state. When you apply heat at the right temperature, the ink turns into a gas and transfers cleanly to your design. The ink becomes solid again and is immediately dry. (Though it might be hot to the touch because of the heat transfer.)

    Since the ink becomes part of the base material, the transfer is seamless and never peels, wrinkles, or cracks through use and washing. (Though I’d imagine it fades after long periods of time and a lot of washing, much like any piece of clothing.) The ink comes on transfer sheets that look a lot like a sheet of vinyl or paper, and they come in patterns and solid colors. There are also Infusible Ink pens for creating your own designs by hand. 

    You might be wondering why you’d choose Infusible Ink over iron-on or heat transfer vinyl. Especially since Infusible Ink is more expensive. Here are a few guidelines to use when choosing whether or not Infusible Ink or iron-on/HTV is the best option.

    • Iron-on can be applied to many surfaces, while Infusible Ink products should be used only with compatible blanks. This limits what you can use. Infusible Ink can’t be used on 100% cotton, either, if you have a clothing preference. 
    • Iron-on can be applied to any color garment. Infusible Ink should be used only with compatible or light-colored fabric. 
    • Infusible Ink requires an EasyPress (or a heat press that reaches 400 degrees Fahrenheit). I highly recommend using an EasyPress for iron-on/HTV products, but you can use a household iron in a pinch.  
    • Iron-on comes in a seemingly endless array of prints and decorative finishes like glitter, holographic, and shimmer. Infusible Ink is more limited, but the colors and print available are truly beautiful. And it’s likely more will roll out as demand increases. 
    • Infusible Ink is designed to last about a year when stored properly (before you transfer it!). Iron-on doesn’t have a short shelf life like that.

    So, this list makes it seem like iron-on/HTV is your best bet. So why use Infusible Ink at all? Because, my friends, it’s permanent. It’s professional. It’s polished. It never cracks, peels, or flakes like iron-on/HTV can when it begins to wear. It’s just really freaking cool.

    New to Cricut? Check out my detailed Cricut machine overview post covering the differences between the Cricut Joy, Cricut Explore Air 2, and Cricut Maker! I also have a detailed guide for using the EasyPress 2 and EasyPress Mini, as well as the Cricut Mug Press!

    One of the things that was really confusing to me when I first started learning about Infusible Ink was the “blanks” concept. I know what blanks are…but I wasn’t used to having to use special blanks for projects. Infusible Ink can’t just be used on any blank.

    Cricut’s Infusible Ink works by infusing directly into the fibers of blanks. There is no adhesive. But it needs certain types of fibers to infuse properly. Because Infusible Ink is on the pricier side, Cricut guarantees best results only when using Cricut-brand blanks design for Infusible Ink.

    In fact, they say the following: “Infusible Ink designs are guaranteed to create permanent transfers on all blanks bearing the Infusible Ink compatibility badge.” Right now Cricut has tote bags, coasters, baby bodysuits, and men’s, women’s, and kids’ shirts. They plan to gradually roll out more blanks designed for use with Infusible Ink, including things like notebooks, key chains, dog tags, and more. 

    I mean, I’m not going to tell you how to live your life, but I am going to tell you Cricut’s official guidance 😉 And that is to use Infusible Ink designated blanks. This isn’t to say that you can’t buy your own blanks and use Infusible Ink on them. It’s just to say that it might not work as intended.

    The Infusible Ink heat-transfer sheets require polymer or polyester-based blanks to enable a permanent bond. I have heard rumors saying that you can use Infusible Ink on sublimation-compatible blanks. I haven’t tested this yet. Whatever you do, if you’re trying to use Cricut Infusible Ink on a regular shirt, know that Infusible Ink will not transfer to 100% cotton. Don’t bother trying it.

    Infusible Ink projects are optimized for use with Cricut’s EasyPress. If you have access to heat press that reaches 400 degrees Fahrenheit, you can use that, too. You unfortunately might get varied results using Cricut’s original EasyPress, though. It could take longer and may not result in as vibrant colors. 

    Getting the best results with Infusible Ink requires precise heat transfer settings—both temperature and time. Using the EasyPress and Cricut’s Heat Transfer Guide tells you exactly what to do, which will result in the most vibrant colors possible.

    As with all EasyPress projects, Cricut recommends the EasyPress mat. Honestly, if you’re going to invest in an EasyPress, I wouldn’t cheap out on the mat. They are pretty cheap and very handy. Unlike a towel, the mat helps appropriately distribute and direct heat to the Infusible Ink design during the transfer. 

    Cricut also doesn’t recommend making an Infusible Ink design that is larger than your EasyPress’s heat plate. That’s because Infusible Ink should receive only one heat application. If you try to move your EasyPress around, you might overheat or underheat some areas. 

    I’m not going to talk a ton about the Infusible Ink pens and markers because I won’t be using them for this tutorial. But there are a few points worth mentioning. These pens and markers are essentially the same as the Infusible Ink transfer sheets, but the process of using this is a bit different. 

    • They use a heat-activated process to bind the ink with the compatible blank. 
    • Unlike fabric pens, they don’t wrinkle, crack, flake, or bleed over time.
    • Each pen lasts a minimum of four full 8.5” x 11” pages of writing/drawing. 

    So here are the differences. Cricut does not recommend using the Infusible Ink pens and markers to draw directly onto a compatible blank or directly onto Infusible Ink transfer sheets. Instead, you’ll need to create your design on laser copy paper.

    The pens fit in your machine just like Cricut’s normal writing pens do. So you can put the laser paper on a light grip mat and have your machine draw for you! Remember to mirror. This piece of paper is then used to transfer the design.

    Laser paper is ideal because it can handle high heat and it has a coating that helps prevent ink bleeding. You can use heat-resistant tape to hold your design in place. Even minor shifting could blur the transfer. Also keep in mind that the colors might look dull on the piece of laser paper. They’ll perk up when transferred. 

    Absolutely! If you want to layer Infusible Ink over Infusible Ink keep in mind that the colors will blend where the sheets overlap. Cricut recommends using a “slice and set” technique. Here’s a great video tutorial to walk you through it. Also, apply the darkest colors last.

    If you want to lay iron-on vinyl and Infusible Ink, you’re in luck. You can do that, too. Just make sure Infusible Ink is the bottom layer. Never layer Infusible Ink on top of the iron-on. It won’t be able to set properly, and it might damage the iron-on by overheating it.

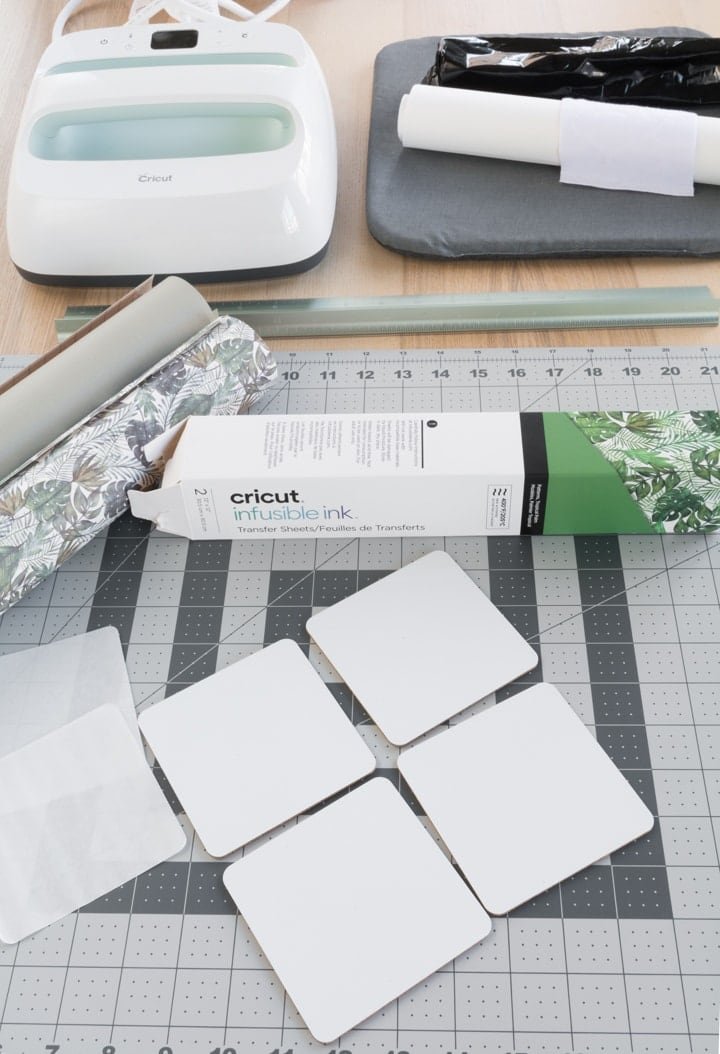
    Now I want to show the Infusible Ink in action! I was so excited to start this project you guys. I decided to make plant-themed coasters because, obviously. So here’s how to use Cricut Infusible Ink on coasters!

    SUPPLIES

    Want more Infusible Ink? You’re in luck! I have posts on using Infusible Ink on a women’s t-shirt, creating a customized Infusible Ink tote bag, personalizing cosmetic bag and pillowcase blanks, and making personalized baby bodysuits.

    Personalize your cut file as desired and cut it using your Cricut and Design Space. I cut a few plant-lady-themed designs I mocked up using the free commercial use font Certhas and a few free images from Canva. You can download the free .png files I used here!

    The transfer sheet should be placed liner side down on a green StandardGrip mat. Make sure to mirror the design! Load mat and let your Cricut do the cutting for you for whatever design you’re making.

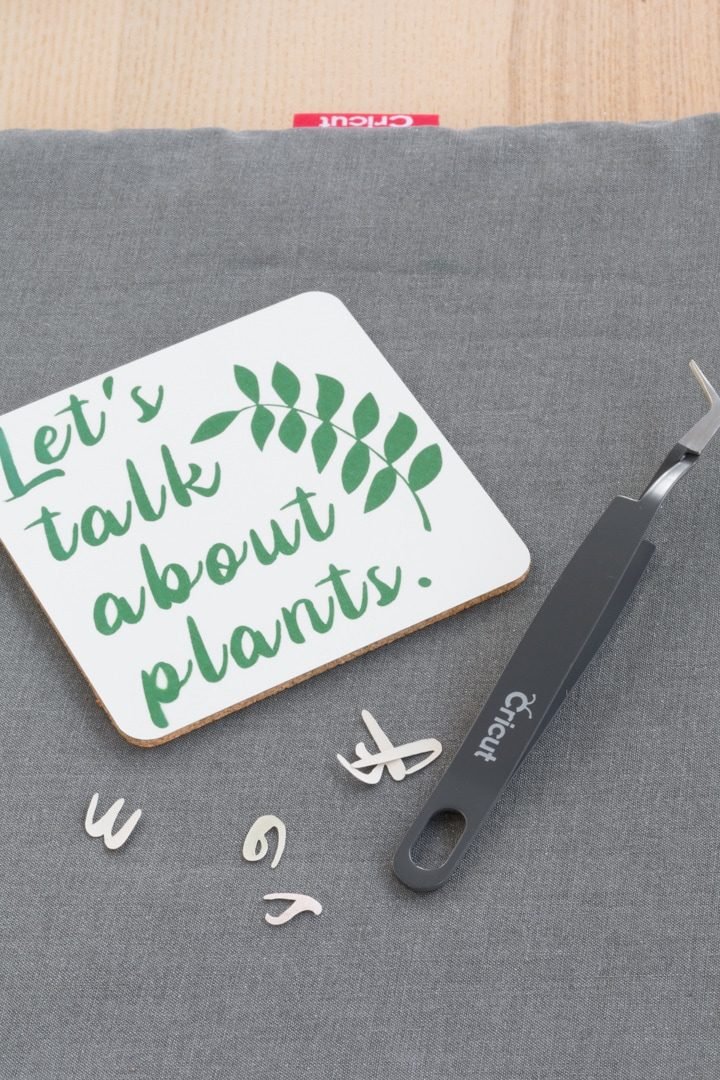
    When your cut is done, remove the transfer sheet from the mat carefully. Trim excess off and then find a spot where the transfer paper has started to separate at a cut. Use tweezers to remove negative pieces from your design. 

    I wasn’t sure which part of my designs I wanted to be the negative space on some of these, so I just rolled with it and chose whatever came off first. 🙂 Just make sure to leave the design you want to imprint on the coaster on your liner! 

    Make sure your leftover clear liner isn’t larger than your EasyPress’s heat plate. Also, no worries if your machine cuts through the liner in some spots. The sheets are very thin, and the design will still transfer fine.

     %postname%

    Preparing your square coaster blank will help you achieve the best possible transfer results. First, put your white cardstock on your EasyPress Mat. Then use a lint-free cloth to wipe down your coaster. A lint-free cloth is very important, because a regular cloth probably has some lint on it even if you don’t see it! The ink infusion process will press the lint into the blank and cause blue speckles in your design.

    Place your design face down on the coaster, then cover it with a fresh sheet of butcher paper. Butcher paper comes with the Infusible Ink transfer sheets and must be larger than your EasyPress’s heat plate. 

    Note: Cricut does not recommend reusing butcher paper because it absorbs ink that is lost in the transfer. This ink may then get on other projects, your EasyPress’s heat plate, or your mat.

     %postname%

    Use Cricut’s EasyPress heat guide to figure out what temperature to set your EasyPress to, as well as how long to apply heat. If you have a large EasyPress, you can transfer designs to multiple coasters at once, too.

    While you’re applying heat with your EasyPress, don’t move a muscle! Everything must stay completely still. When the time is up, carefully remove the butcher paper and transfer paper liner. Use tweezers to remove any part of the design that separated from the liner. Don’t use your fingers—if could result in smudging.

    Note: The designs are not reusable. Once you transfer the design, you gotta chuck it. Even though it looks like it’s still usable, the magic has happened. Sorry! 

     %postname%

    To care for your neato new coasters, wash them with warm water and glass cleaner. Don’t use anything rough on them. How beautiful did these turn out? The colors are stunning, really. Cricut isn’t lying when they say the colors are dull on the sheets but vivid once they are transferred.

    I’m excited to try out a few more colors and patterns to see how they turn out, too. Also excited to try these Infusible Inks on some of the fabrics—Cricut’s tote bags and shirts. As well as a few non-Cricut-branded blanks to see how things pan out!

    Share my post about how to use Cricut Infusible Ink on Coasters!

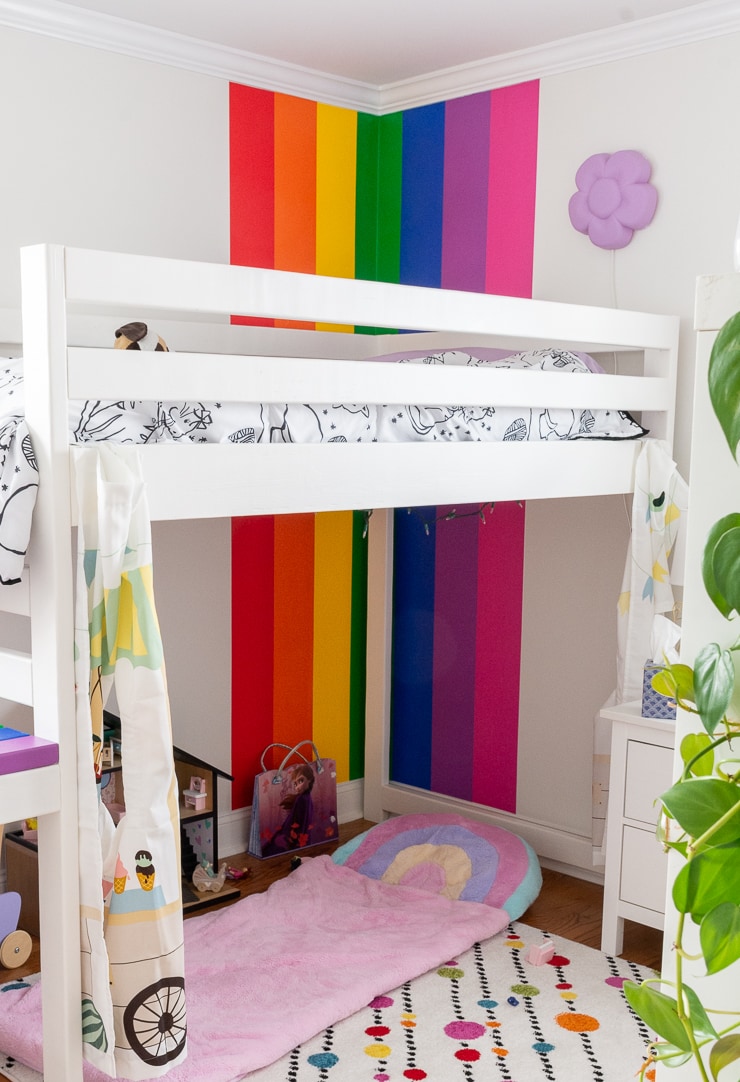
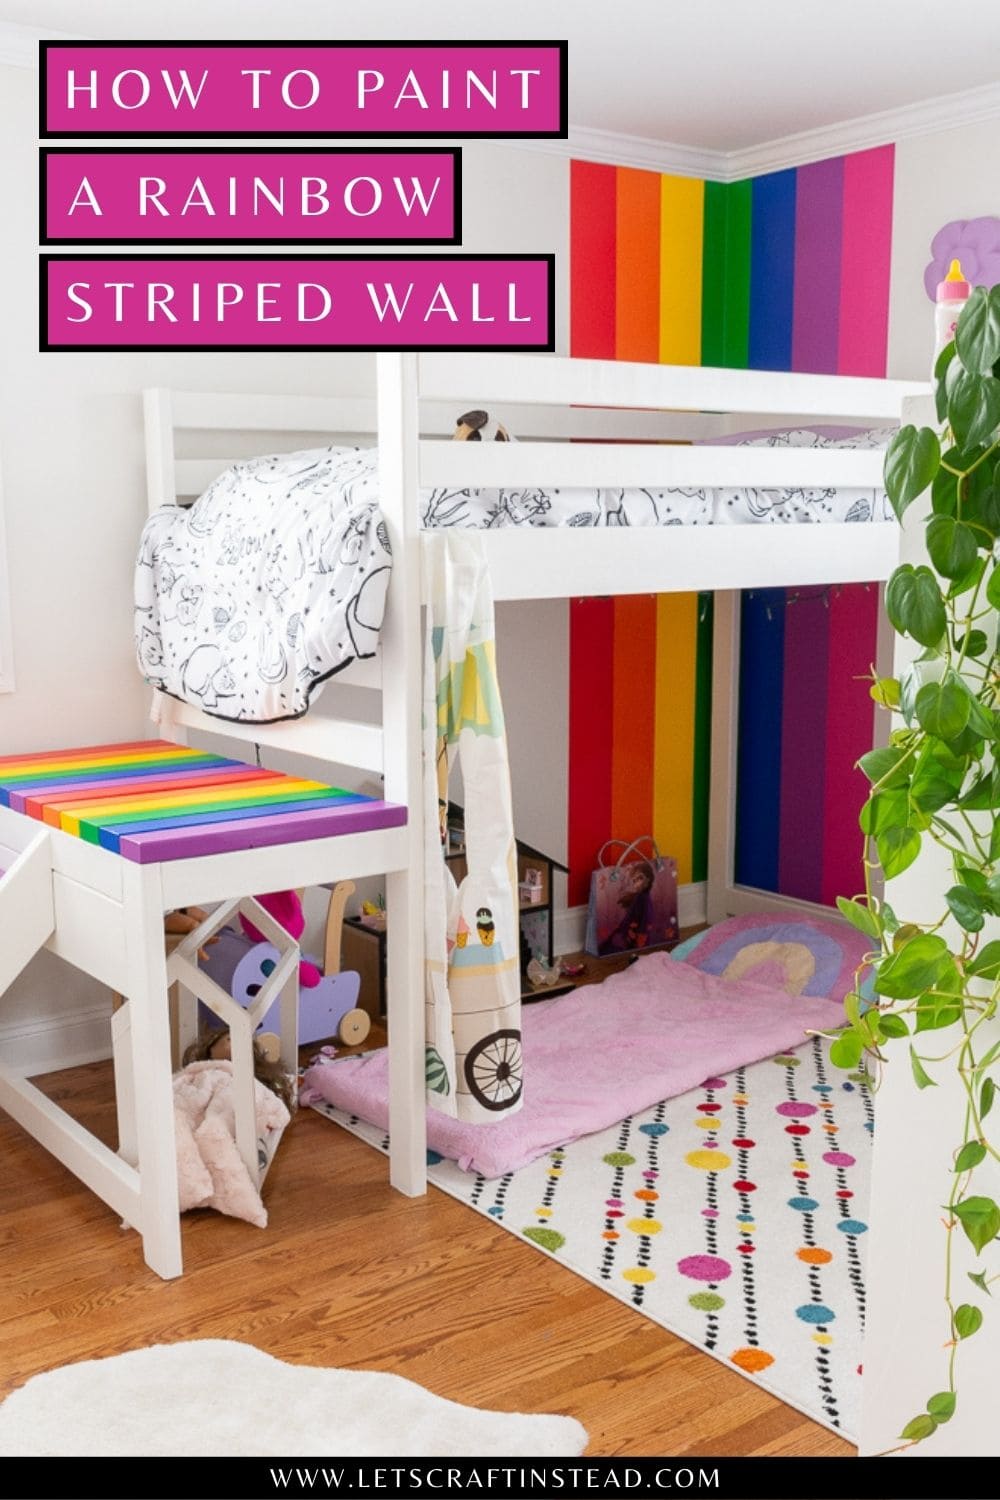
  • Learn how to paint a gorgeous rainbow striped accent wall!

    Adding a painted accent wall is the perfect way to dress up a plain room without too much effort. Learn how to paint a rainbow striped wall to bring some cheer to any room!

    It’s been a while since I’ve done a paint project. That’s what being in a house that’s mostly done means…not a lot of projects! But today I am sharing a project I completed recently—and one that is WAY out of my comfort zone.

    Because it has a lot of color, and that’s something I typically don’t play around with much—at least on walls. Today’s post is all about how to paint a rainbow striped wall as the perfect accent piece in any room! A kids room, in this case.

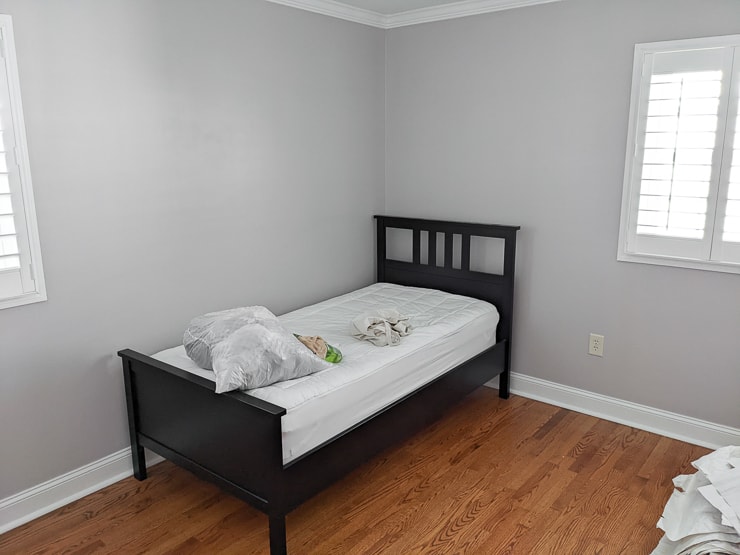
    This is the room before…the first order of business was to paint the walls with white as the base. I used Behr’s Silky White, and it’s a beautiful slightly warm white.

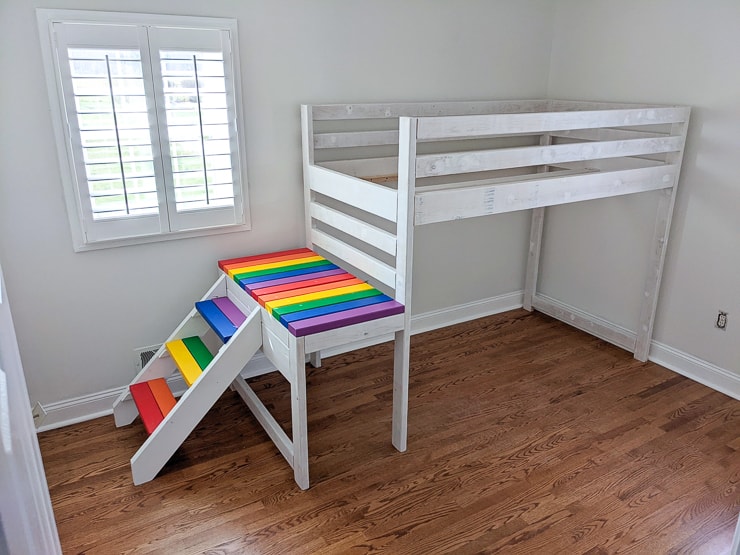
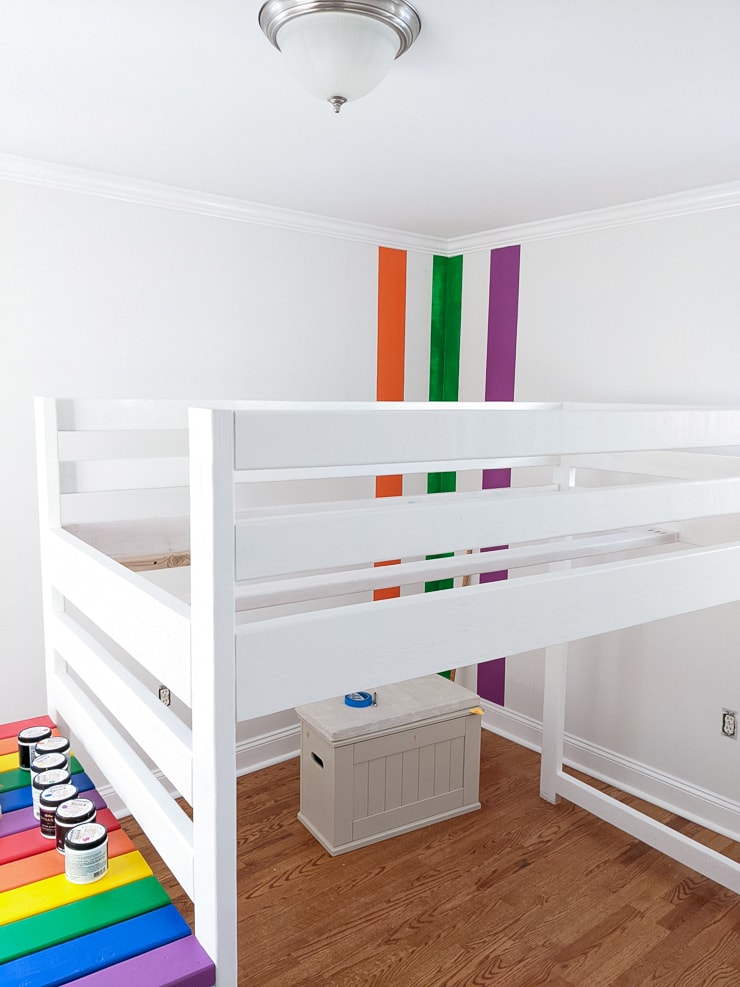
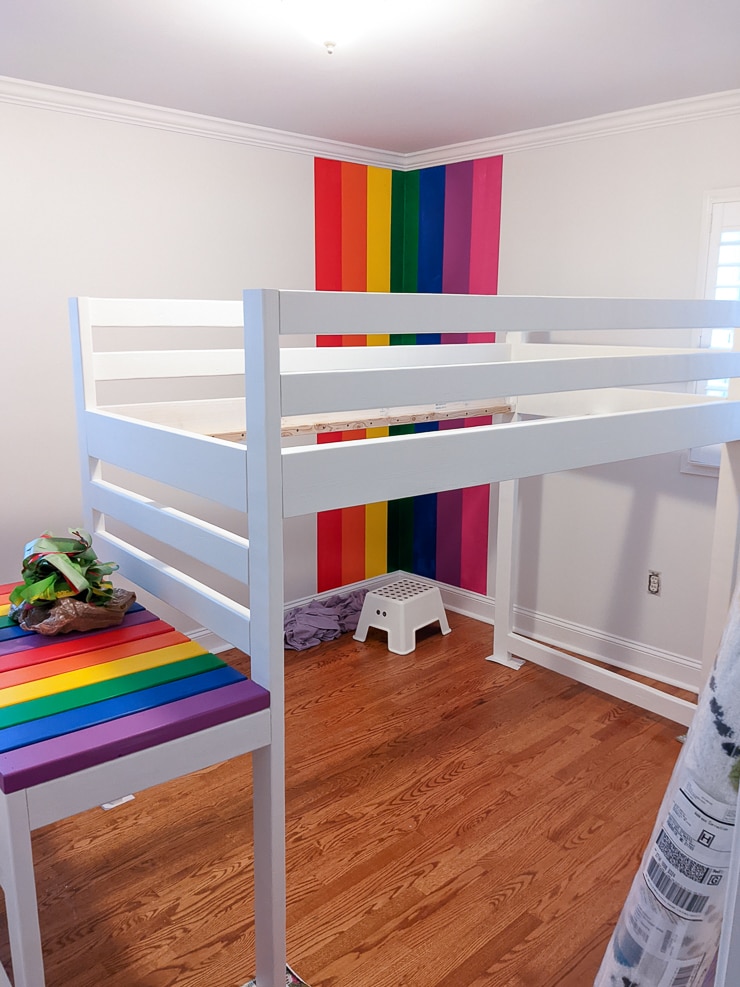
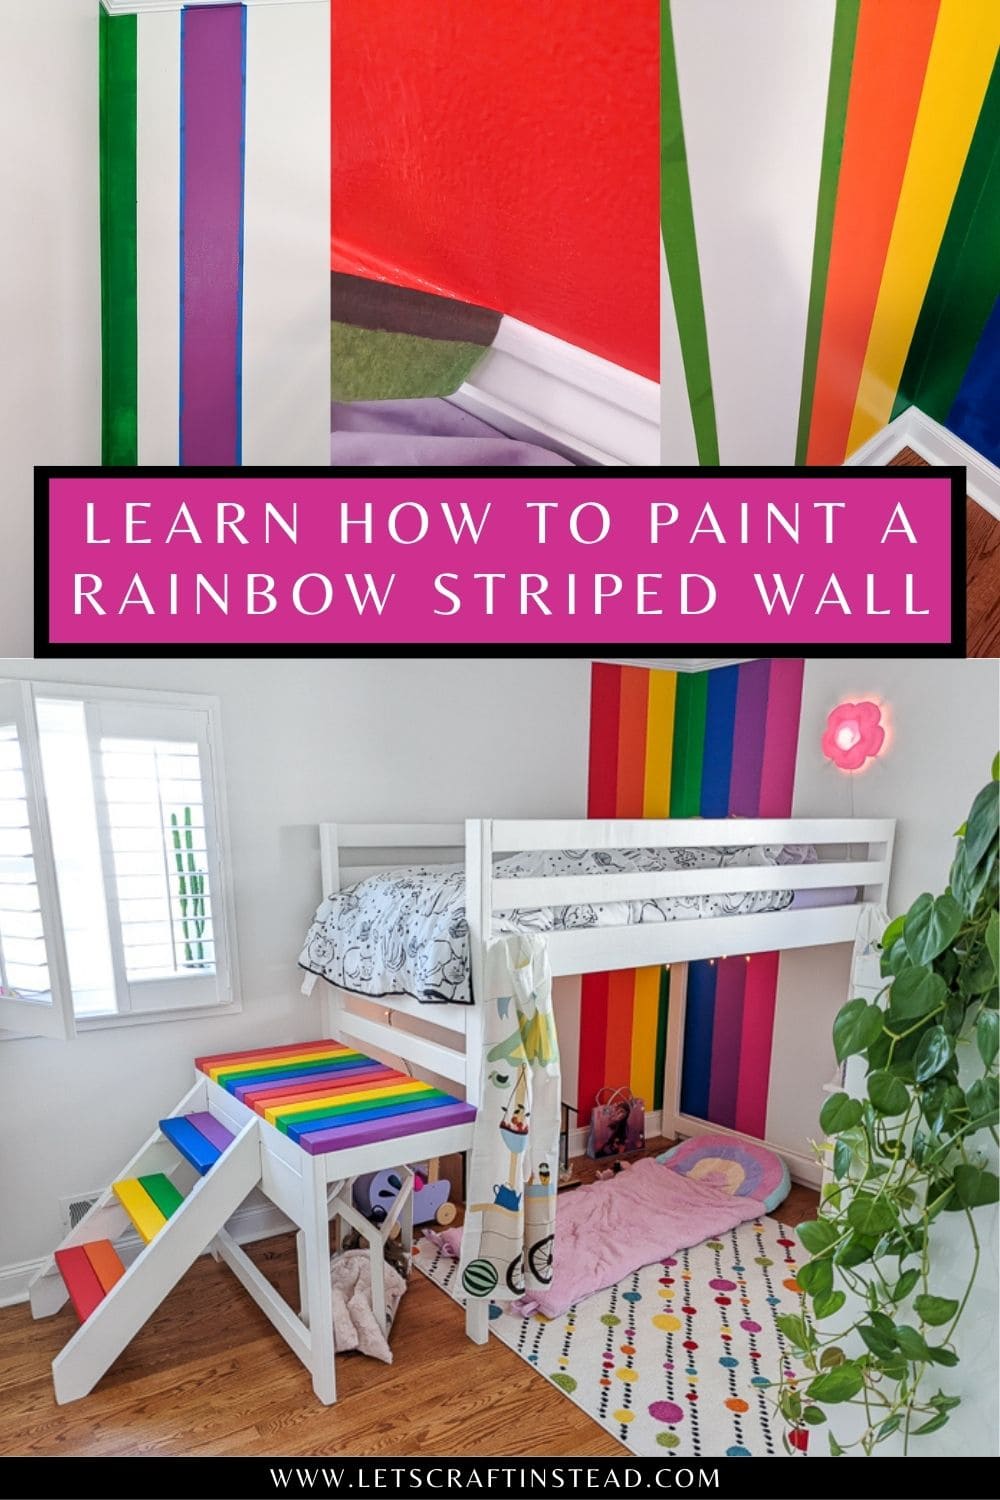
    And then this is the room painted with the rainbow loft bed mostly painted. (The body just had patching and primer at this point, and it needed a few coats of white paint to clean it up.)

    I thought a rainbow wall in the corner opposite of the rainbow stairs and loft bed platform would be the perfect balance. And I was so right…but you’ll have to wait to see the final room!!

    • Behr paints in the following colors, eggshell finish: Whip Lash (red), Emergency Zone (orange), Laser Lemon (yellow), Paradise of Greenery (green), Beacon Blue (blue), Chakra (violet), and Beauty Queen (magenta)
    • FrogTape
    • Small roller and paint brushes
    • Measuring tape or yardstick and pencil

    I decided to do the rainbow-striped wall in a corner of the bedroom using floor-to-ceiling vertical stripes. And instead of using the seven traditional rainbow colors, I ditched indigo and added magenta on the end of the rainbow. I wanted seven colors so I could center one in the corner and then have three on either side—all of these are Behr paints:

    • Whip Lash (red)
    • Emergency Zone (orange)
    • Laser Lemon (yellow)
    • Paradise of Greenery (green)
    • Beacon Blue (blue)
    • Chakra (violet)
    • Beauty Queen (magenta)

    I chose eggshell finish for all of the paints, and a sample size jar of each color was more than enough. I had leftover paint even after painting all of the stairs and slats on the bed. Maybe I’ll finish it up with a wall art piece, too 🙂

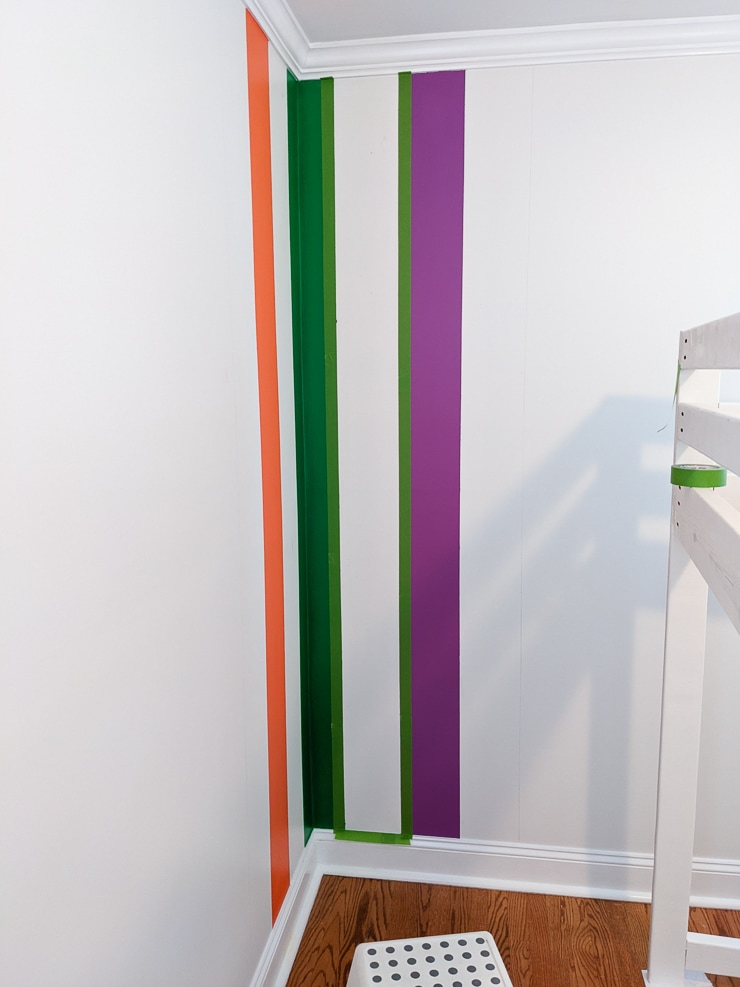
    I decided to make the center stripe, the green stripe, 8 inches wide. Since the corner makes it look a bit smaller, I would then make each of the six remaining strikes 7 inches wide. So let’s get started with the first stripe!

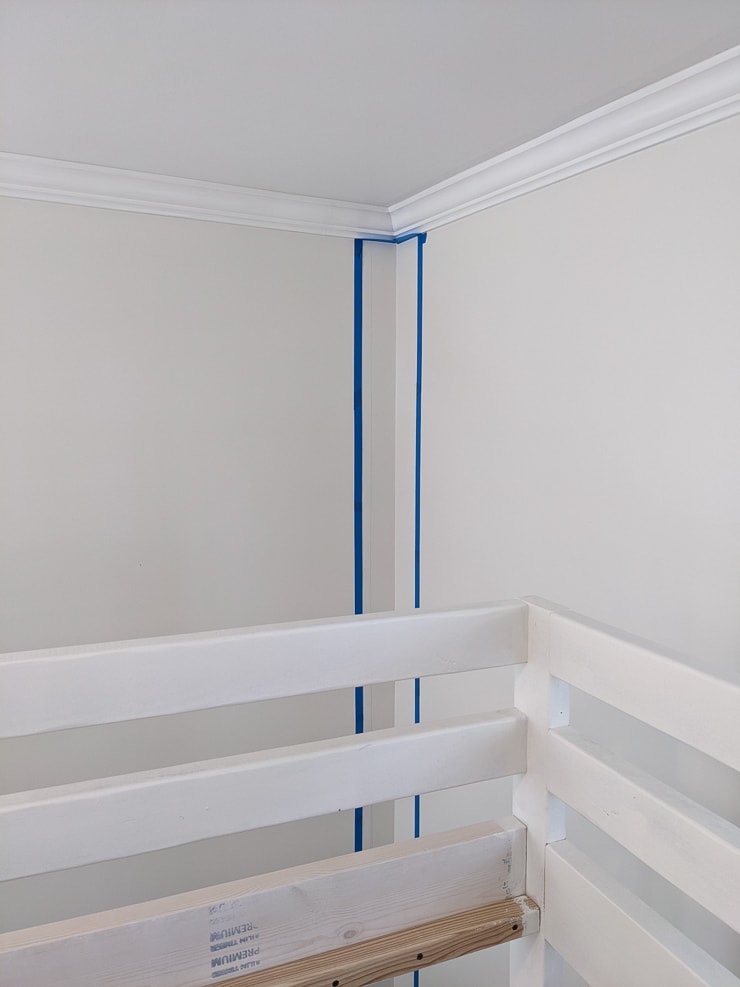
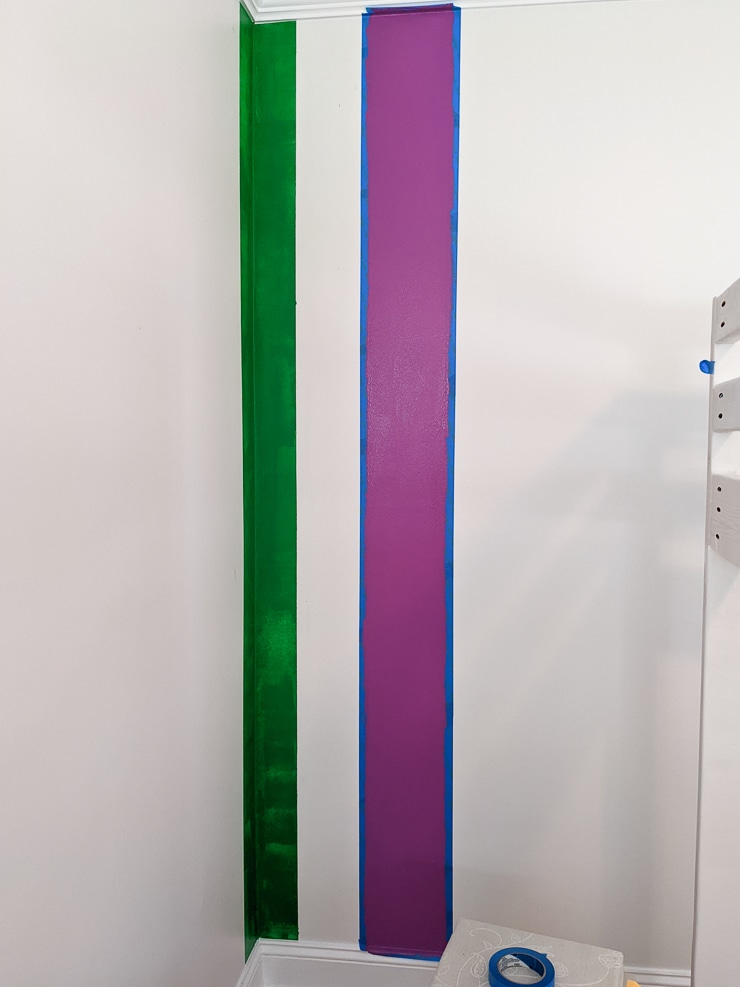
    I measured and marked 4 inches out from either side of the corner. To get a straight line, you can use a level. Or simply measure 4 inches at multiple points and use something like a yardstick to connect them in a straight line.

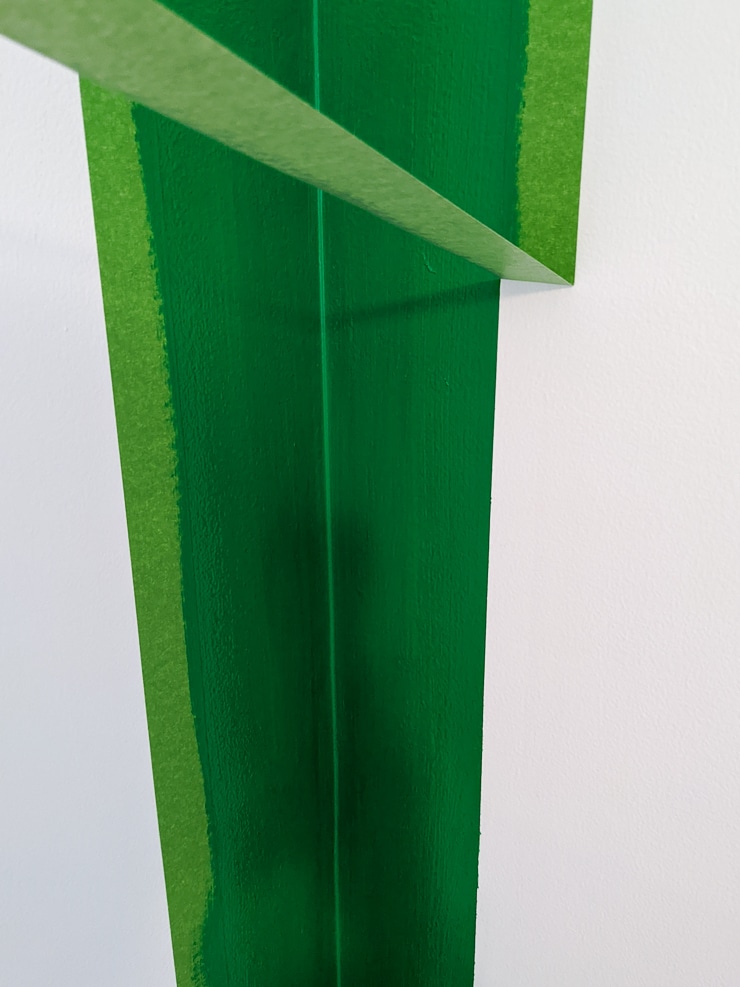
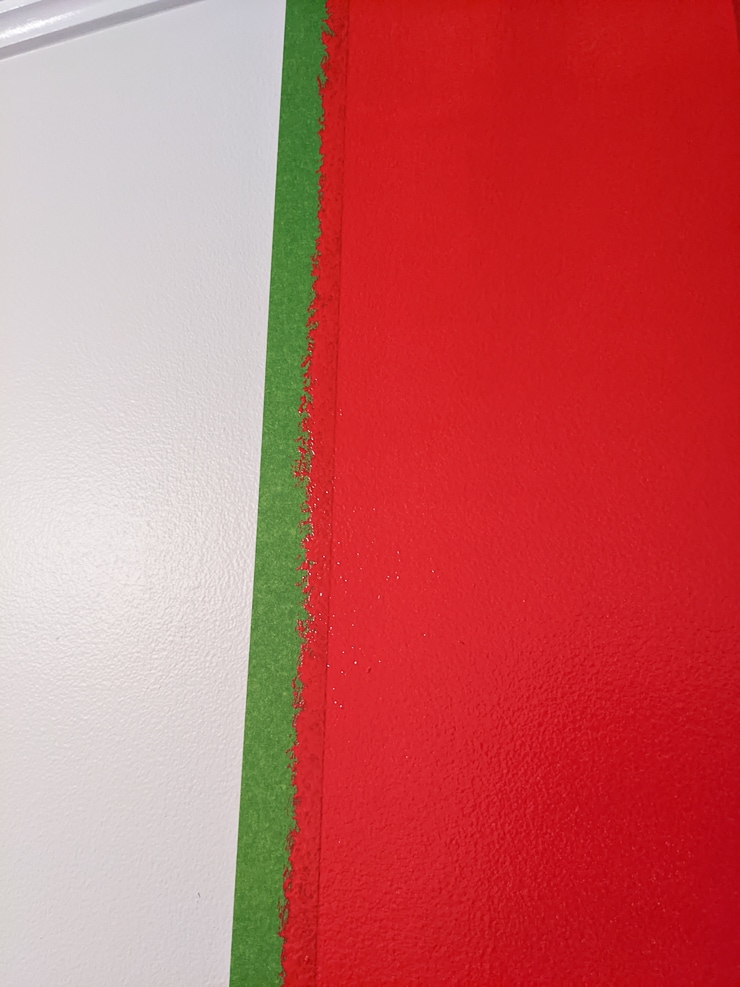
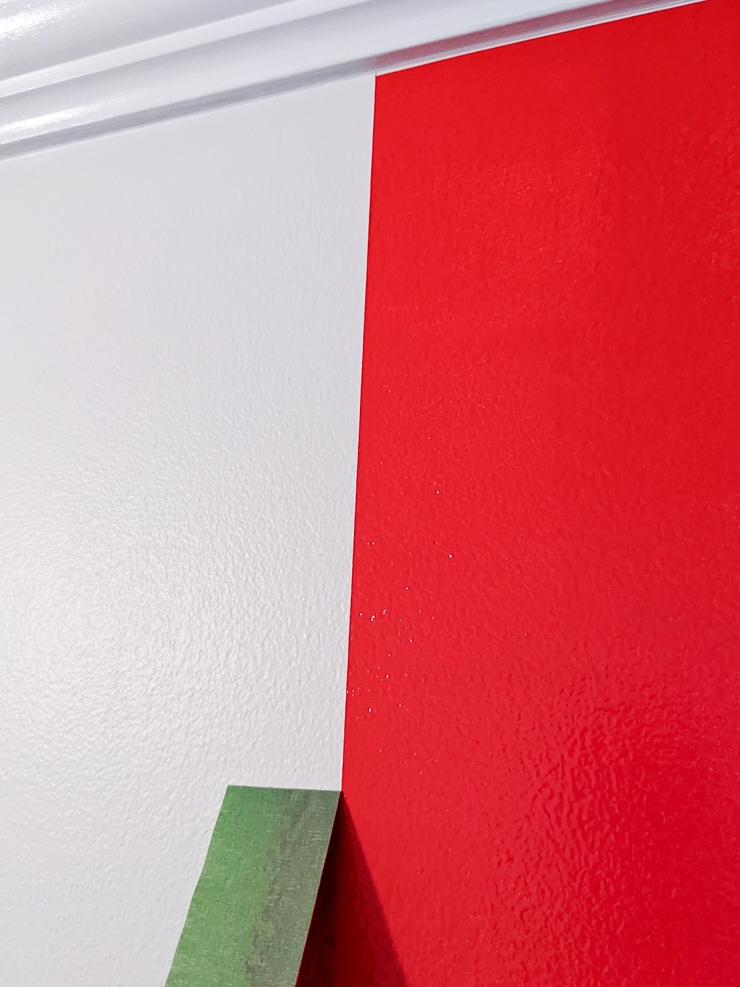
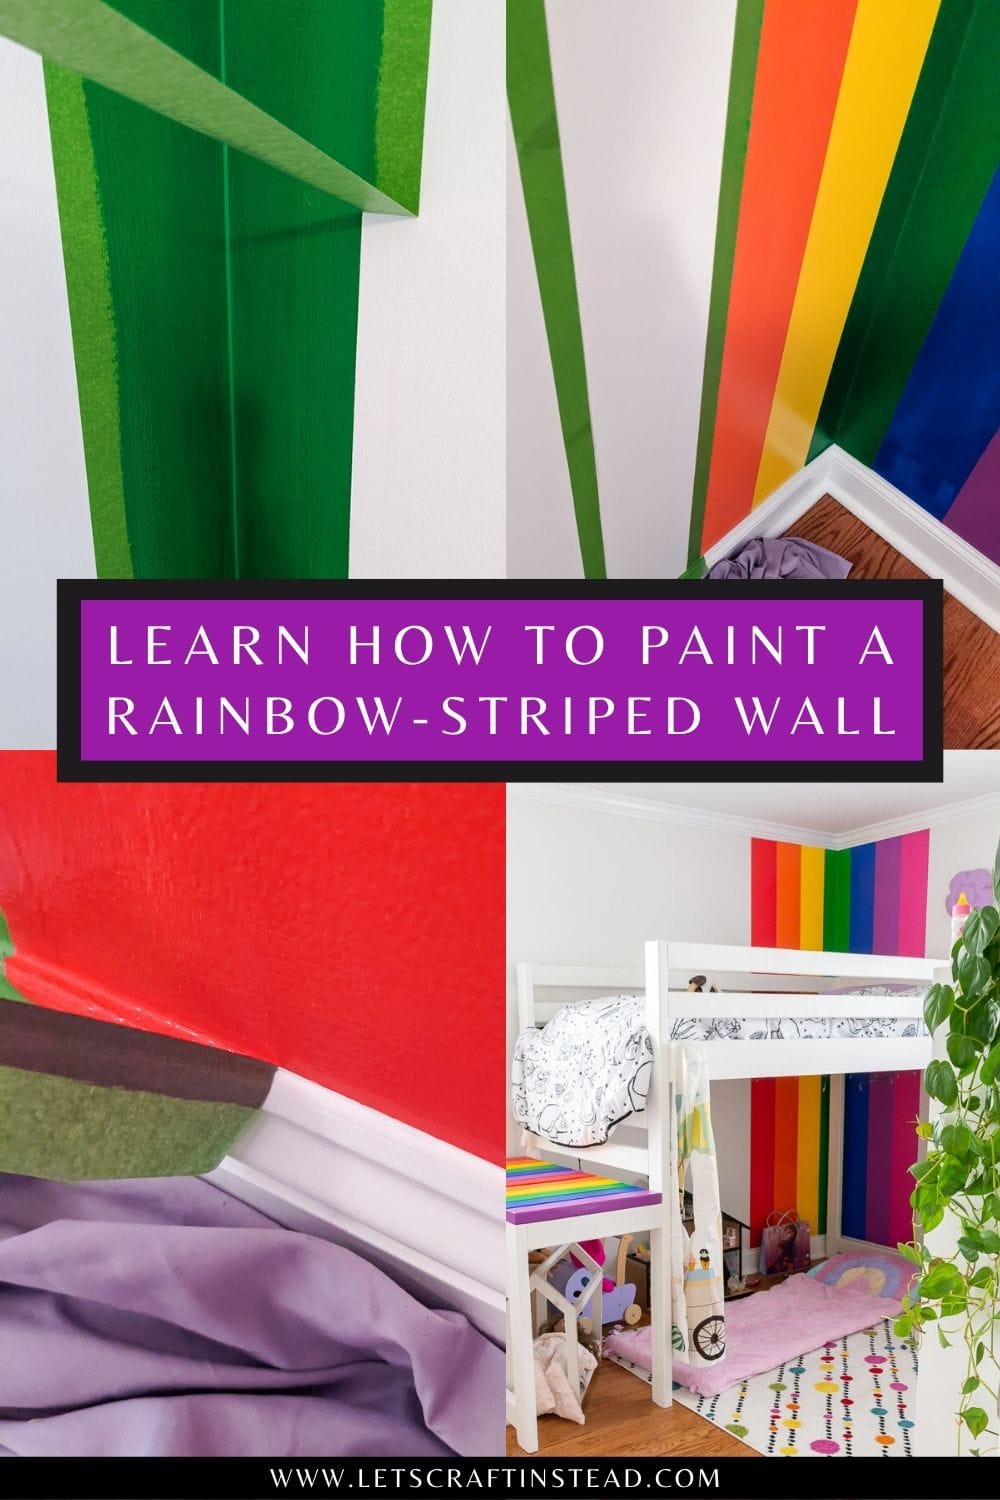
    I then added painter’s tape along the pencil lines, as well as along the top and bottom trim. And a note on the painter’s tape…Scotch Blue did not do the job! I used it for the first few stripes, but I ended up having to do a tone of touchups.

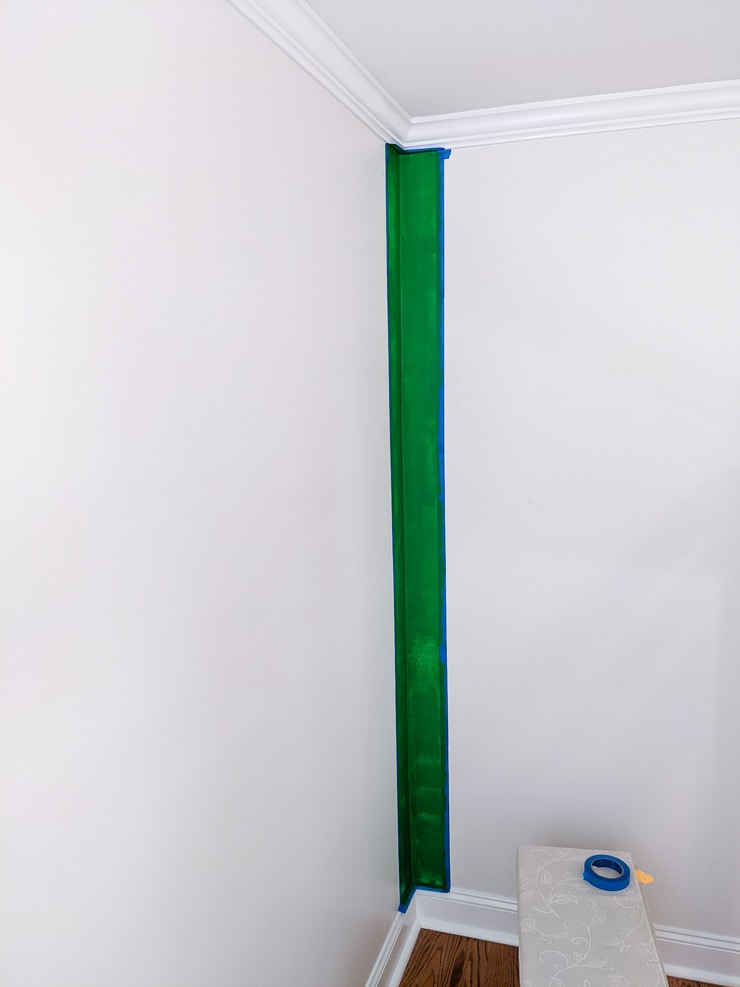
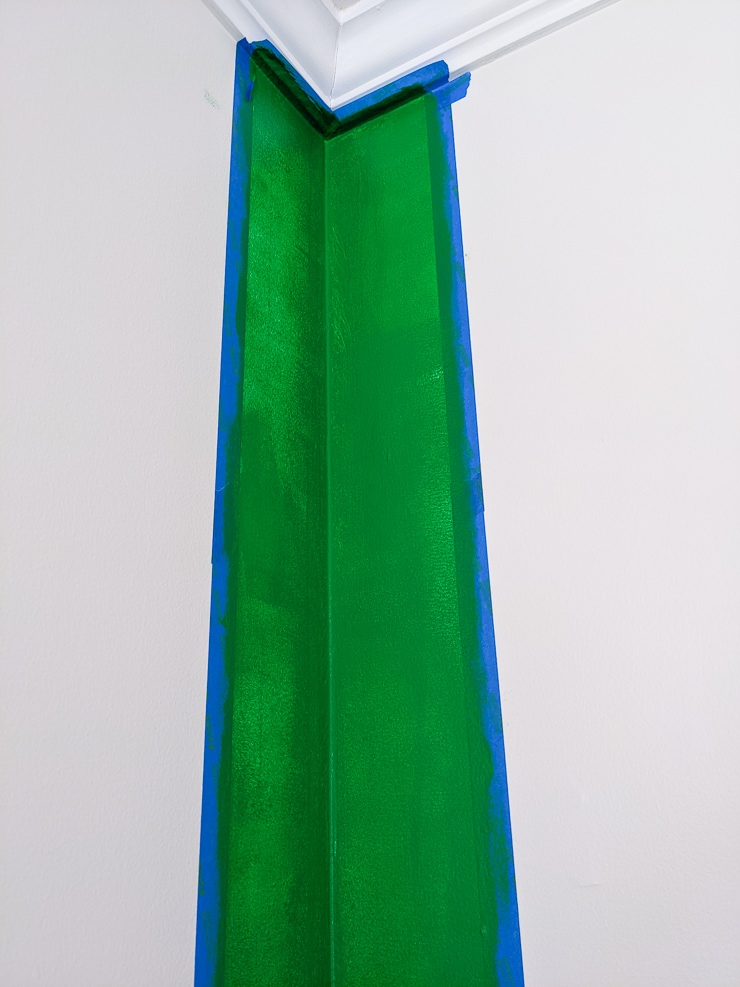
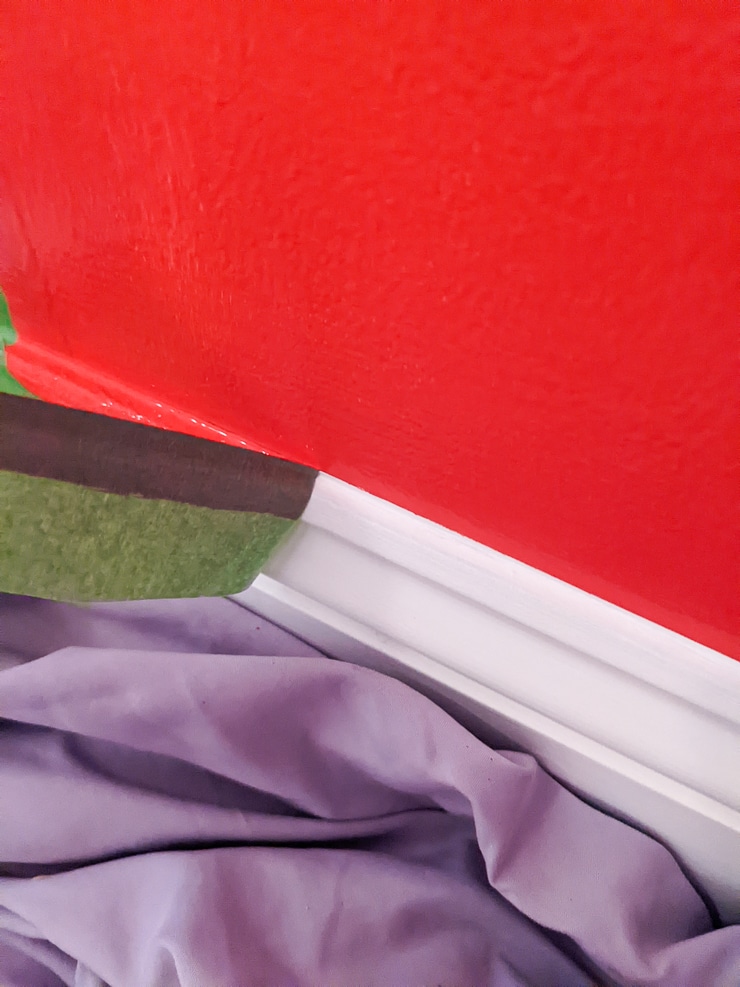
    When I switched to FrogTape, I got the super crisp lines that I really wanted. Perfect! So let’s talk how I painted the colors. First up in the order was green. I used a small brush and a small roller to paint in the green as evenly as I could—but I knew these bright colors would need two coats!

    I removed the tape almost immediately, right after I painted in the stripe. This is something I always do when painting with painter’s tape to help keep the lines crisp. If you let the paint dry partially, pulling the tape up might pull some paint with it.

    Tip: Have a trash bag ready for the tape, because the combo of tape and wet paint is messy!

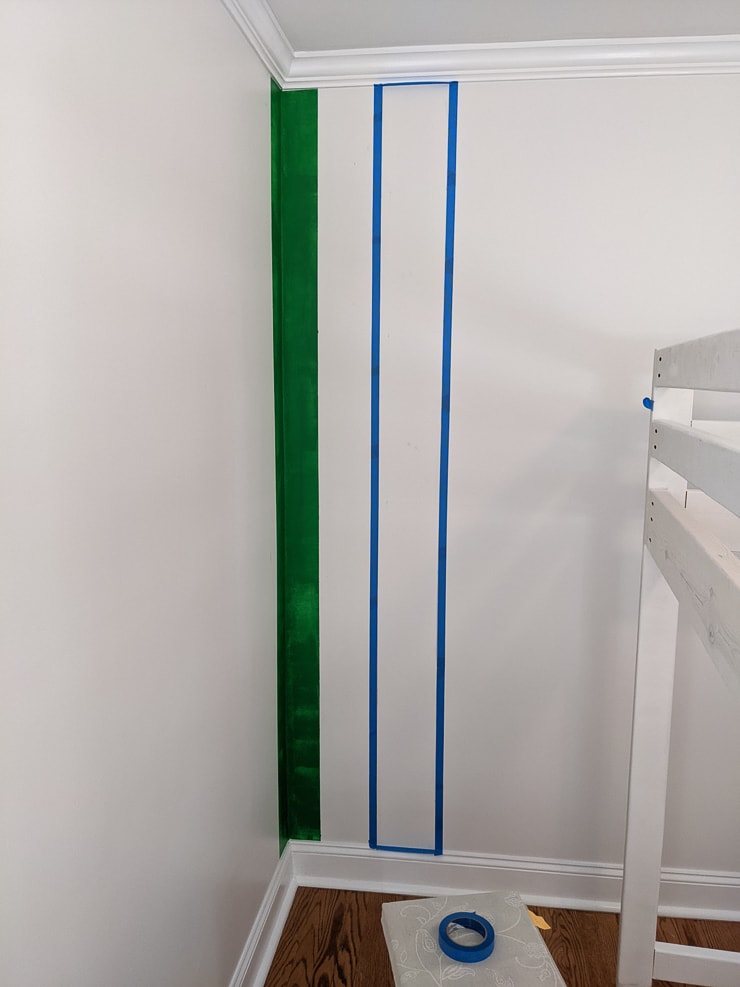
    Once the tape was off the green, I measured and marked 7 inches to the left and right of the stripe. Then another 7 inches from those marks. This gave me the measurements for where to add the tape for the next stripes.

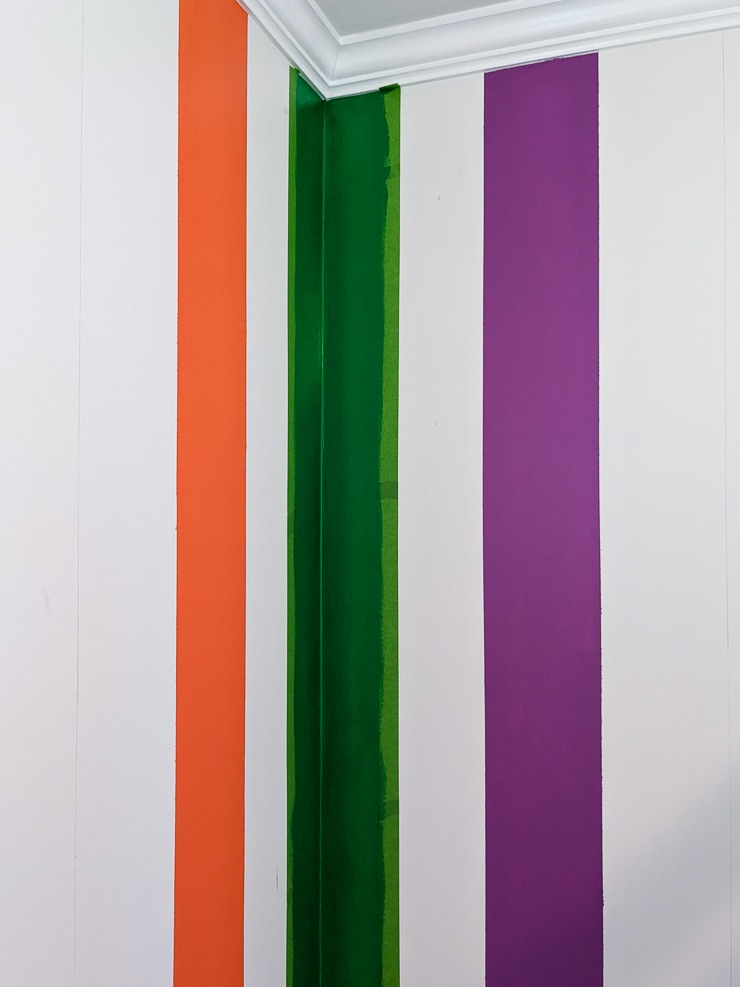
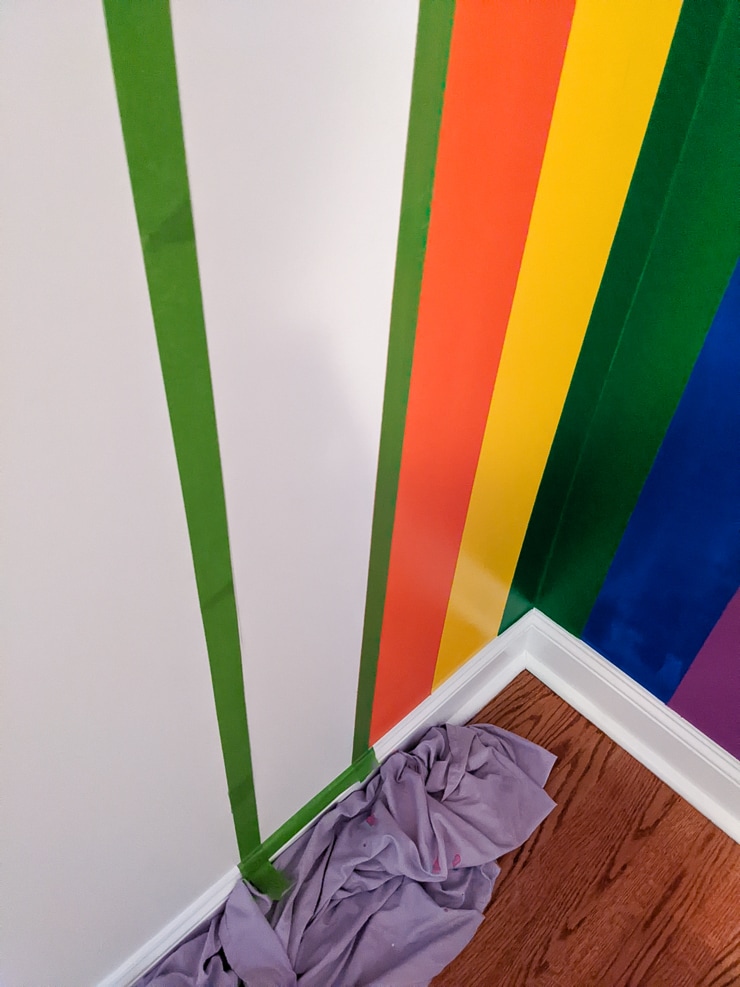
    I wanted to maximize my time, so I painted three colors first. Then once they were completely dry, I painted the remaining four alternate colors. But let’s not get ahead of ourselves. Here’s what I did after green…violet and orange.

    Want more rainbows? Check out my tutorial for How to Make a Rainbow Balloon Arch, my 21 free printable Rainbow Quotes for Kids, and my tutorial for How to Make Rainbow Homemade Bath Salts!

    Before I moved on to the alternate colors of red, yellow, blue, and magenta, I waited for the first coats of paint to dry, reapplied the tape, and painted in the second coat.

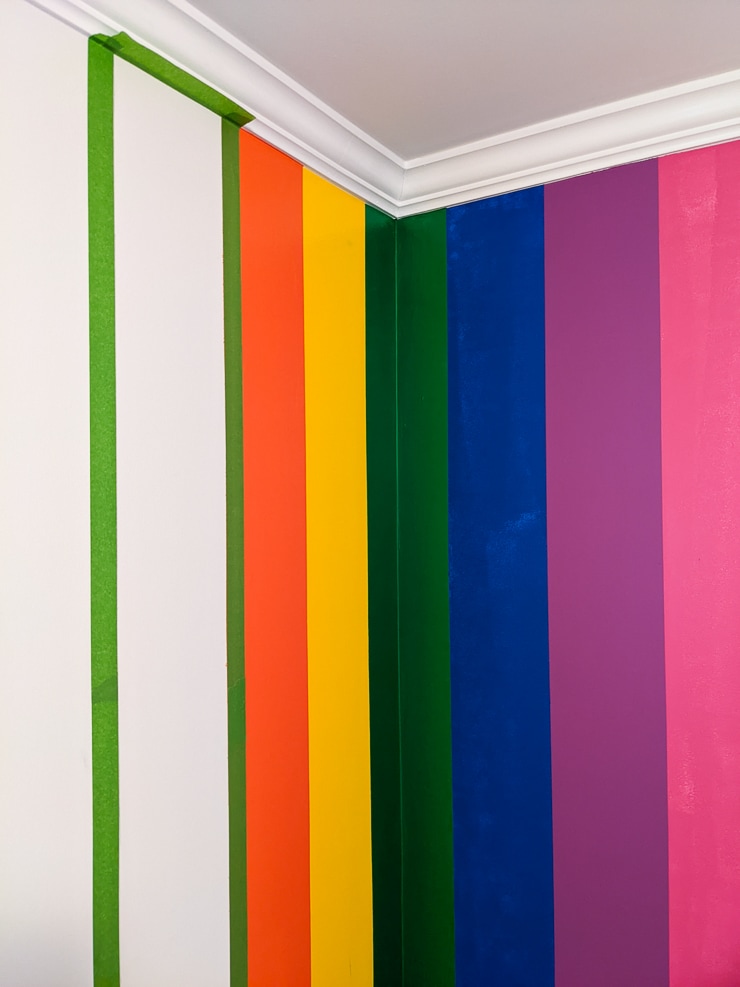
    Next I started on the alternate colors: red, yellow, blue, and magenta. I could REALLY see the vision coming together now…I just hoped all of the other colors looked as good as the orange, green, and purple did!

    And here’s the finished wall right after I finished painting the second coat on the alternate colors. The paint was still wet in this picture, but it looked GREAT! I couldn’t wait to get the bed in place and add everything else to see how it came together.

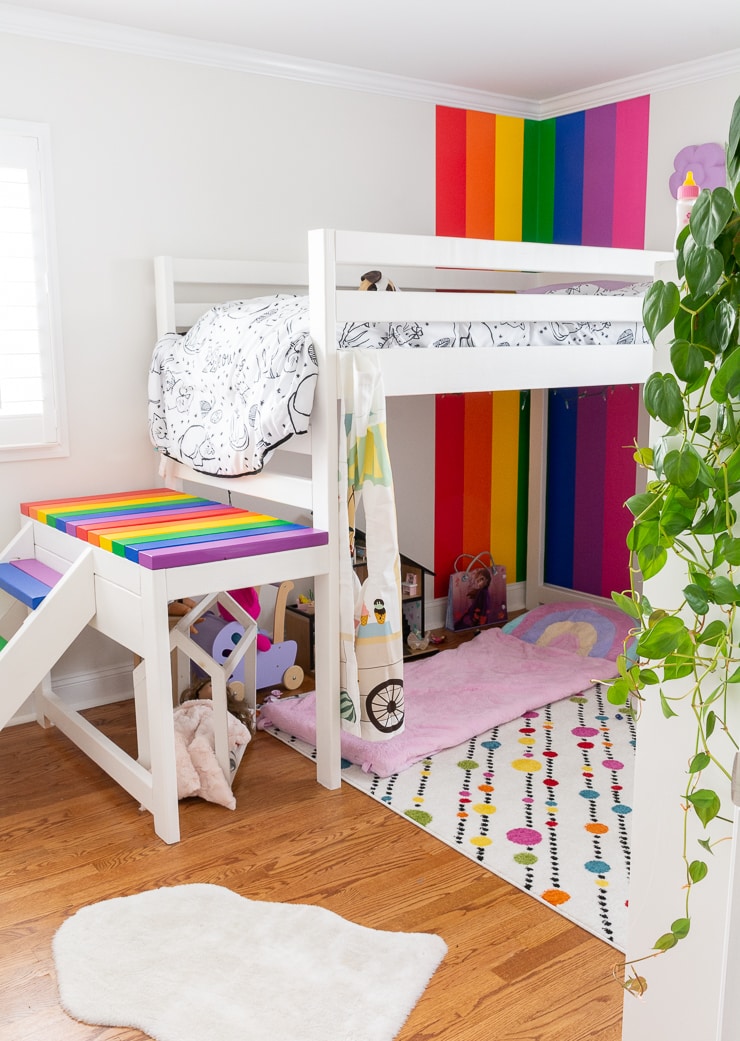
    And here it is! After I took these pictures, I couldn’t stop looking at them. The wall looks SO good! I swear it looks even better in person, too. For such a small room, it has a lot to offer. The bold rainbow wall is the perfect complement to the rainbow stairs and slats on the loft bed.

    I hope this inspires you to paint a rainbow stripe wall somewhere in your home. Just remember to have patience. All of that painting, taping, and re-taping gets old pretty fast. But man was it worth it!!!

    Pin my post about how to paint a rainbow striped wall!

  • Upcycled Tea Tin Planter: What Kind of Paint to Use on Aluminum Cans?

    This content may contain affiliate links. See my full disclosure here.

    This post shares my upcycled tea tin planter, including what kind of paint to use on aluminum cans. For more of my DIY planters to help you decorate with plants, check out this post!

    Hey all, it’s time for another month of the 10-Minute DIYs series! This month’s theme is spring, but I kind of feel like my project is a hybrid theme of the last two month’s themes: planters (February) and upcycling (March). I’m turning an old loose leaf tea tin into a little planter for my propagated succulent pieces.

    I’ve been propagating succulents from leaf clippings for a while now, and many are just getting big enough to be planted on their own. (I’m working on a post about propagating succulents that I’ll be sharing soon!) Plus these little looseleaf tea tins are so cute that I had to upcycle them for another use. 😉

    (Remember to wear an appropriate mask while working with paints, stains, and finishes. Follow the directions and warnings from your particular brand.)

    Step 1: Remove any old labels using olive oil and a paper towel. (See the recent quick tip post I did on removing stubborn sticker residue here.) Clean thoroughly with soap and water.

    Step 2: Tea tins are typically made of aluminum or tin, and spray paint makes a great paint to use on them. You typically won’t need a primer when painting al aluminum can. I did not use one, but I did use a nice spray paint. Those often have primers built in.

    Paint the entire tin a base color. I used black. After it dries, apply Frogtape to paint your design. I taped around the rim of the tin.

    And then once that’s dry, plant a cute little plant. This little tin is the perfect size for some of the succulents I’ve been propagating from one of my very prolific plants. They are growing quickly themselves, so once they outgrow the tin, I’ll just transfer them into something bigger.

    Step 3: Use extra tape, scrap paper, or a paper towel to help cover any areas you don’t want painted and paint your accent color. I used Krylon gold, which is my favorite gold spray paint.

    For more thrifty paint projects, check out my painted wine bottle upcycled into a bud vase, my post on how to paint thrifted clay pots, my scrap wood mini plant stand tutorial, and my post about how to paint glass jars!

    Share my upcycled tea tin planter, including what kind of paint to use on aluminum cans!

  • How to make a tutu with tulle (and no sewing machine!)

    Learn how to make a tutu with tulle! It’s an easy project that you can do at home, even if you don’t have a sewing machine or sewing skills!

    We have been working our way through my list of indoor crafts and projects to get us through winter. It’s only mid-January and we’ve already made some great progress on it! We tested a bunch of homemade playdough recipes, did an easy intro to acrylic painting project, and made a bunch of stickers using our Cricut machine.

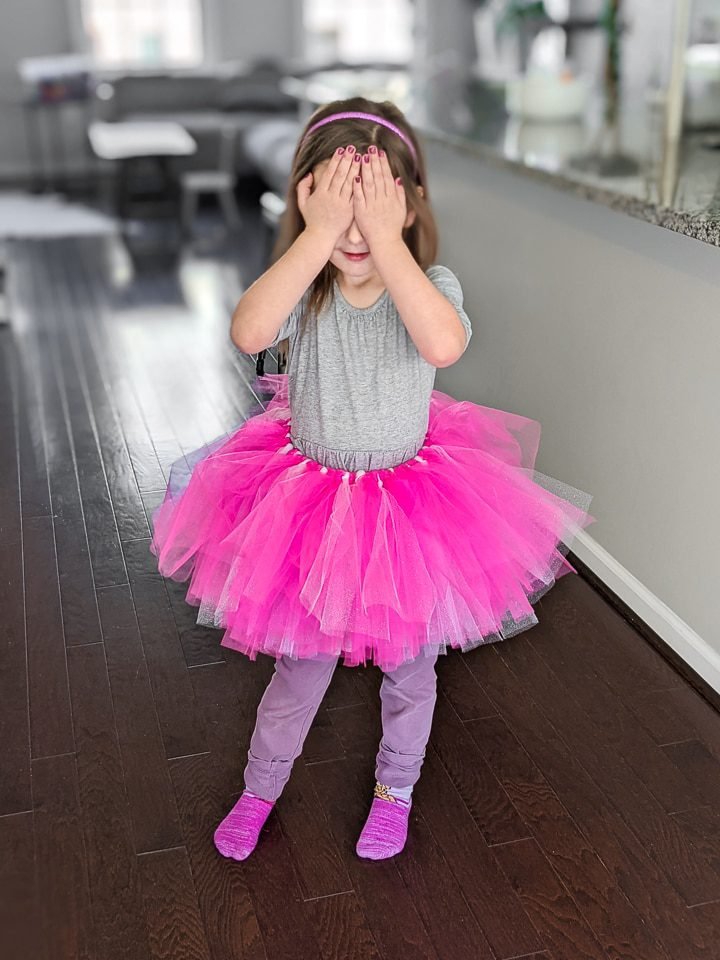
    We haven’t done many sewing of fabric-related projects recently, though. And my daughter has been really into the idea of ballerinas and ballet lately, so we decided to make a hot pink tutu for her! The great thing about this project is that it requires very minimal sewing skills.

    I can’t say it’s totally no-sew, but there is just one step that requires sewing by hand using a needle and thread. And I can also give you some no-sew options to tackle this step if you really don’t want to deal with any sewing. So let’s take a look at the supplies you need.

    There are a lot of different ways you can approach measuring and cutting the tulle. Tulle is very cheap, especially if you but it by the yard off of a big bolt at the fabric store. If you use this method, you can also choose what width to cut.

    And you can also fold the tulle in such a way that will allow you to cut multiple strips at once. While saving time is always tempting, I felt like this approach was overthinking things.

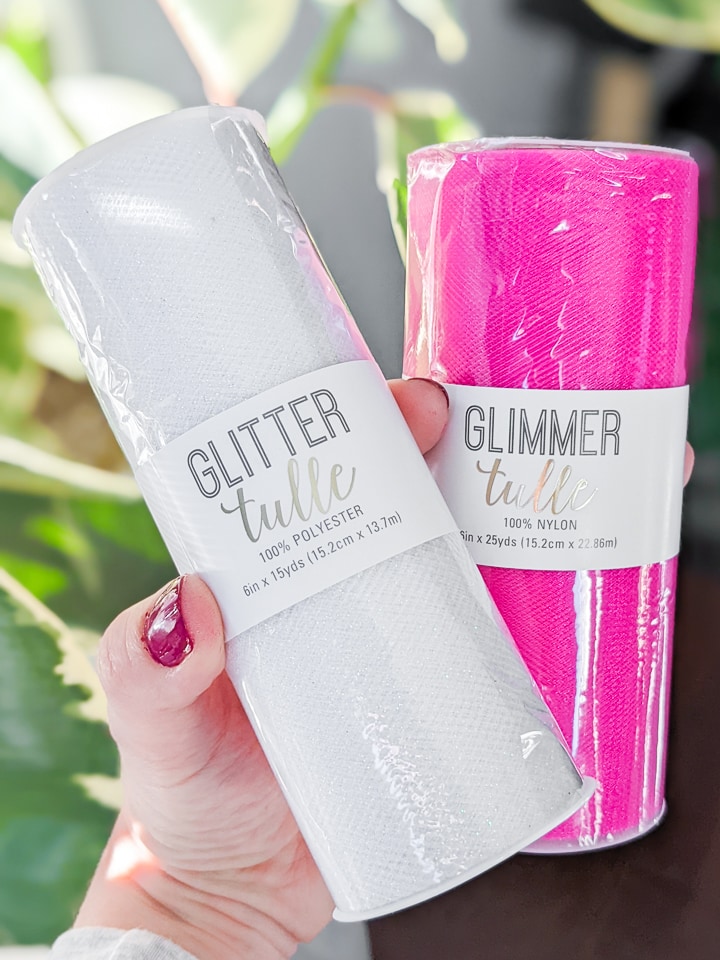
    So I decided to use 6″ rolls of tulle instead. This width seemed like the perfect width for the tutu strips. And it meant that I didn’t have to worry about messing up the cut measurements.

    While the pre-cut 6″ rolls of tulle are a bit more expensive, they aren’t that bad. You can use craft store coupons, and I happened to buy mine on a day when Joann was running a buy two get one free sale. So I think it was around $10 for all of the tulle I needed.

    I wasn’t sure how much tulle I needed and actually thought I’d have leftovers to make a matching one for R’s doll. However, I ended up using all of the tulle I bought! Here’s what I got:

    • (2) 25-yard rolls of hot pink tulle
    • (1) 15-yard roll of white glitter

    HUGE heads up here—I didn’t realize that glitter tulle sheds EVERYWHERE. Don’t get glitter tulle unless you’re okay with glitter…literally everywhere. 🙂

    This amount of tulle was perfect to make a tutu for a 4-year-old. Keep in mind that I made my tutu very full, too—so the amount of fullness you want will impact the amount of tulle you use.

    These are the steps I took to make my tutu. I will give you tips for how to adapt the instructions for your child’s size—it’s not difficult!

    You can use many different sizes of elastic. I chose 1-inch elastic because I already had some in my sewing drawer left over from a previous project.

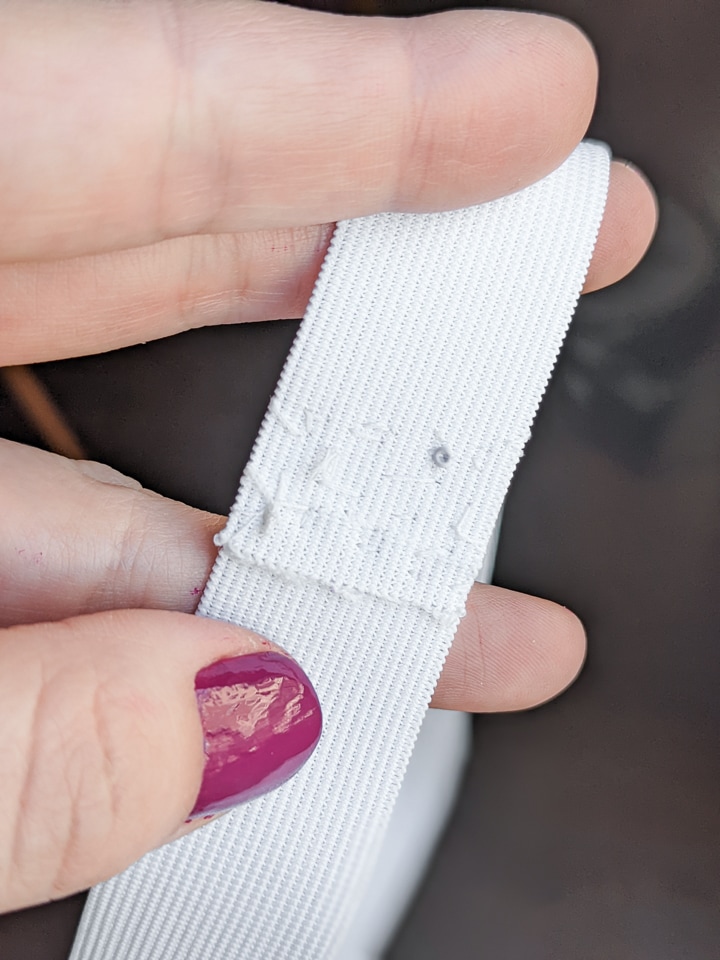
    To determine the length to cut, I measured my daughter’s waste and subtracted 2 inches from that. The I cut a piece of elastic, folded the ends over one another about an inch, and sewed them together.

    So essentially the waist measurement minus 3 inches. My elastic stretched a bit more as I was tying the tulle on, so I do recommend doing 3 inches so the finished skirt stays tight enough to stay up.

    To sew the edges of the elastic together, I just went back and forth a few times by hand using a needle and thread. This took me a few minutes to do while watching TV. Make sure to tie off the thread with several knots to ensure it stays put!

    If you don’t even want to sew by hand, there are a few different options. When I was looking around at the fabric store, I noticed some elastic headbands that would work for small waists, too. This would be very easy but would depend if it fits your child.

    You can also use a piece of ribbon. Instead of tying the tulle pieces on elastic, you’d tie them on a ribbon. Then, to put the tutu on your child, you’d tie the ribbon off behind their back.

    If you choose this option, definitely choose a pretty piece of thicker ribbon so it’s sturdy. And it will show, so be mindful of the color and finish!

    Next it’s time to cut tulle! First you have to decide how long you want your tutu to be. I decided this length by holding the tulle up to my daughter, understanding that the finished tutu would be fluffier and appear shorter.

    My 4-year-old is very tall for her age, so keep that in mind. Ultimately I decided to cut 24″ strips of tulle. Once I folded each in half—then looped and knotted them—this was the perfect length!

    Since I had to make more individual cuts using the 6″ rolls of tulle, I used a tape measure to measure everything. I simply pulled the tape out and locked it just over 24 inches. Then I rolled the tulle out and used my super sharp sewing scissors to cut each piece.

    This went pretty quickly because the pieces don’t have to be exact as they do with other clothing projects. Each piece can be a bit over or a bit under 24 inches. Just make sure they are as close as possible!

    Once you cut everything, you’ll have a big mountain of tulle! (And a ton of glitter everywhere if you used glitter tulle.) The next step is to actually make the tutu by looping and tying each individual piece of tulle on.

    The easiest way to do this is to put your elastic waistband on something to hold it in place while you tie. I grabbed a plastic Kuggis storage bin from our playroom storage and wrapped the elastic waistband around that. You can use anything, though.

    Just make sure whatever you use isn’t too much bigger than the waistband’s size. If you stretch it out too much and tie all of the tulle pieces on a stretched-out waistband, it might be too big for your kid’s waist.

    Because I had a total of 50 yards of hot pink tulle and 15 yards of white glitter tulle, I decided to do a pattern. I looped and tied three pink tulle pieces for everyone one white glitter tulle piece. So that pattern was 3 // 1 // 3 // 3 etc.

    This ensured the skirt was mostly hot pink but had lovely white glitter accents. Below is an illustration of how I tied each piece on. I looped each one around the elastic waistband, and then I tied a knot below the loop to secure it in place.

    Keep looping and tying each of the tulle pieces around the waistband. The more you scrunch them together, the larger and pouffier the tutu will be. You’ll see what our finished tutu looks like using a total of 65 yards of tulle with the strips cut to 24 inches each.

    You can adjust as necessary if you want it to be more like a skirt and less like a tutu. Ours is a bit excessively poofy, but that’s what we wanted!

     %postname%

    Pin my post about how to make a tutu!

  • All About How to Use the Cricut Maker's Knife Blade to Cut Wood!

    This post shares my ultimate guide to using the Cricut Maker’s Knife Blade to cut wood. It also shares a bit about the Cricut Maker, what else the knife blade can cut, and the differences between using different types of wood on your Cricut. This post originally appeared on bybrittanygoldwyn.com.

    Hey guys, today I am sharing a long post on using the Cricut Maker’s Knife Blade to cut wood! I love this option because it feels like where all of my worlds meet: woodworking, crafting, and DIY home projects. 🙂

    But there is a lot to share before jumping into the knife blade, including a bit about the Cricut Maker—the only Cricut machine you can use the knife blade on—and its capabilities.

    I have and love the Cricut Explore Air 2 (especially because I have a matte black one…so chic and blends in really well on my desk when I’m not using it). But the Cricut Maker has some significant differences—dare I say horsepower?—that really take things to the next level.

    Both the Cricut Maker and the Explore Air 2 machine are easy to work with. They both also have Bluetooth technology, which I love—fewer wires! And more flexibility with where I can set up to work on a project if my desk feels crowded. They can both cut, write, and score 100 popular craft materials (vinyl, paper, etc. etc.).

    Both also use the Cricut Design Space as the vehicle to upload and create projects. Speaking of uploading, the Explore Air 2 and the Maker both give you the flexibility to upload your own designs.

    You can use your own images—ones you’ve either created or downloaded elsewhere—and fonts for free. I do this all the time. There are a ton of free cut file, image, and font resources out there.

    So, both of the machines are great, but the Maker kicks it up a notch. The Cricut Maker is a commercial grade machine for serious crafters. It cuts the most materials out of all Cricut machines—hundreds of materials from delicate paper to leather.

    The Maker’s Adaptive Tool System is a professional cutting technology that isn’t available on other machines. This system controls the direction of the blade and the pressure of the cut based on your material. It does the thinking for you.

    Speaking of tools, there are a few tools I want to highlight in addition to the Cricut Knife Blade. These tools are available only on the Cricut Maker.

    And with that, I want to jump in to everything you need to know about using the Cricut Knife Blade to cut wood. I’m using the knife blade to show you how much power and capability the Cricut Maker really has. So let’s get started!

    For overviews of different Cricut materials, check out my post on how to cut chipboard with a Cricut machine, tips for working with holographic mosaic vinyl, and how to cut leather on a Cricut machine to make a hair bow!

    Before we talk about using the Cricut Knife Blade to cut wood, I want to cover everything you need to know about the blade. First and foremost, it can only be used with the Cricut Maker.

    If you’re wondering what you need the Cricut Knife Blade for, here’s a list. It’s typically just thicker materials, for obvious reasons. More to cut through = the need for a knife. So even if you get the knife blade to cut wood, it’s a handy tool for other things, too.

    • Balsa wood in thicknesses of 1/32in, 1/16in, and 3/32in
    • Basswood in thicknesses of 1/32in and 1/16in
    • Cricut Chipboard in thicknesses of 1.5mm, 2mm, and 3mm
    • Craft Foam in thicknesses of 1.5mm, 2mm, and 3mm
    • Leather—see a list of types you can cut here
    • Matboard, 2 ply

    According to Cricut, the knife blade is ideal for cuts with up to moderate detail. That means that cuts should be no smaller than 3/4in—including interior cuts. Areas smaller than 3/4in may separate, fall apart, or be crushed due to the multiple passes and pressure required to use the knife blade.

    These guidelines on how you should size your cuts come directly from Cricut. Proceed at your own caution when cutting projects with thinner or more detailed areas. 🙂

    • Max size: 10.5” x 11.5” or 10.5” x 23.5”
    • Min: 0.75” x 0.75” (includes interior and exterior cuts)
    • Width of cuts should not be smaller than the diameter of a pencil (aka .75”)
    • Make sure all cuts are at least .25” away from the edge of the wood (the blade will probably be damaged if it crosses the edge of the wood)
    • Smaller, more intricate images may not cut well—shoot for only moderately complex cuts and monitor the cutting process

    Unlike paper and vinyl, your Cricut Maker doesn’t cut thicker materials like wood in one pass. Instead, your machine will take multiple cut passes, so cutting thicker materials takes longer.

    When you select a material to cut and get everything loaded, Design Space will give you an estimate of how long the cut will take, including the number of passes.

    However, remember that time estimates can vary depending on your project. Make sure your computer doesn’t get bored and go to sleep while your machine is cutting! Cricut also suggests removing small pieces as the machine cuts to avoid them coming off and interfering with the knife blade.

    Because of all of these reasons, you can’t use fast mode cutting with using the knife blade. This project took about 20ish minutes and about 14 passes to cut out. The material was the Cricut-brand basswood.

    Want more? Check out how to slice text in Cricut Design Space, my EasyPress 2 guide, my debossing and engraving tip tutorial, and my tutorial for the EasyPress Mini and using iron-on with wood!

     %postname%

    Once all passes are done, do NOT immediately remove the mat from your machine. Removing the mat will cancel the project, and you won’t be able to do any additional cut passes if you need to.

    Check to ensure all cuts are good to go and that you don’t need to run the material through for more passes. You can inspect your cuts by using a weeding tool to gently pick at the cut areas.

    Make sure cuts have gone all the way through the wood. If you find an area needs to be cut more and can’t be delicately separately with a small hand-held tool, simply click the Go button in Design Space to begin another pass.

    Be warned that cutting too deep can go down through your mat, so use your best judgment on whether another pass is needed. A small knife tool might be easier to use if there is only a small amount still attached along the cut lines.

    Now that you know a bit about using the Cricut Knife Blade to cut wood, there are three steps you need to take if this is the first time you’re using it on your Maker. I’m going to walk you through those steps now to help ensure your first project is a success!

    The materials you’ll cut with the knife blade are thicker than the paper and vinyl products you might normally cut on your Maker. To ensure you provide proper clearance for the thicker material, move the star wheels (the small white rings) on the Maker’s roller bar all the way to the right.

    These wheels are an important part of helping materials stay in place while you’re cutting, but they can leave track marks on thicker materials. (Don’t worry, using a strong-grip mat and a tip in the next step helps keep your materials in place without the star wheels.)

    If it’s your first time moving your star wheels, you might have to use a bit of pressure. Also, when you move the star wheels all the way to the right, they will still overlap about 1in on your mat. Therefore,

    Cricut recommends cutting about 1in off of the right side of your material so it won’t interfere with or get caught up in the star wheels. Make sense? The Cricut basswood is actually only 11in by 11in, not 12in by 12in, for this reason.

    That brings us to step 2: how to prepare your material and mat for cutting with the Cricut Knife Blade. I always try to cut down material before cutting to minimize waste. Make sure the material you’re cutting is not wider than 11in because of the issue with the star wheel overlap outlined in the previous step.

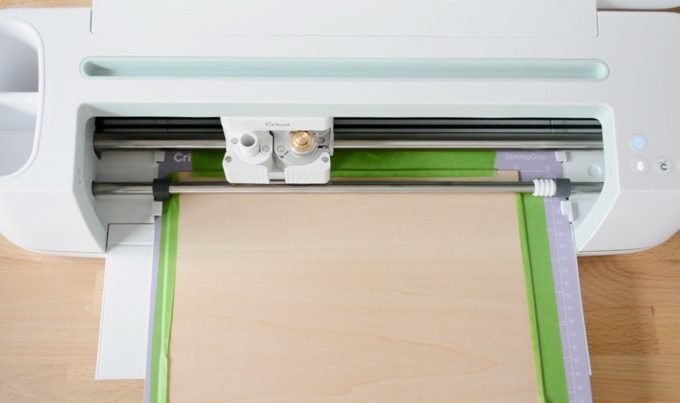
    Once you’ve cut your material to the appropriate size, you can use painter’s tape to tape the mat down on all four sides. (Use a StrongGrip Mat.) Make sure the tape doesn’t overlap into any of your cutting areas.

    Cricut’s mats are typically pretty fool-proof without any additional adhesion. But the knife blade cuts with 10 times more pressure, so the tape helps keep everything in place.

    Painter’s tape is the best choice because it has a light adhesive. It’s a delicate balance between finding something that will help your material stay in place but won’t leave any sticky residue on your project!

    You also don’t want to damage your material using a tape that is too strong. Here are a few other tips for preparing your material and mat:

    • If the material bows at all, place it on the mat in the position that ensures the curved areas go down toward the mat.
    • Apply firm, even pressure across the material to ensure it is evenly adhered.
    • Mirror images when cutting so that if you end up with any uh-oh spots, you can just flip the cut wood over.

     %postname%

    If it’s your first time cutting with your Cricut Knife Blade, you must calibrate the blade. This process is essential because it teaches your Cricut Maker that the knife blade housing is now attached to the machine—it needs to know how to use what’s attached to it. You can’t cut with the knife blade if you haven’t calibrated it first, so let’s get to calibrating.

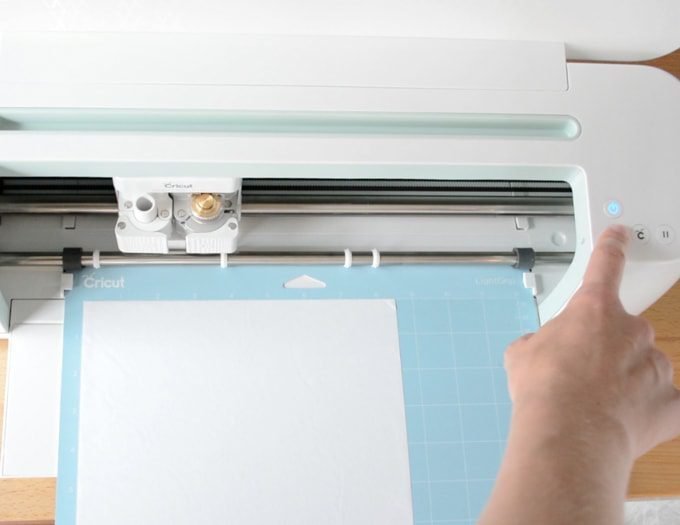
    In Design Space, select account menu, Calibration > Knife Blade. Attach the knife blade to your machine, insert a piece of plain white paper on a mat, and click Continue. Press the Go button to begin.

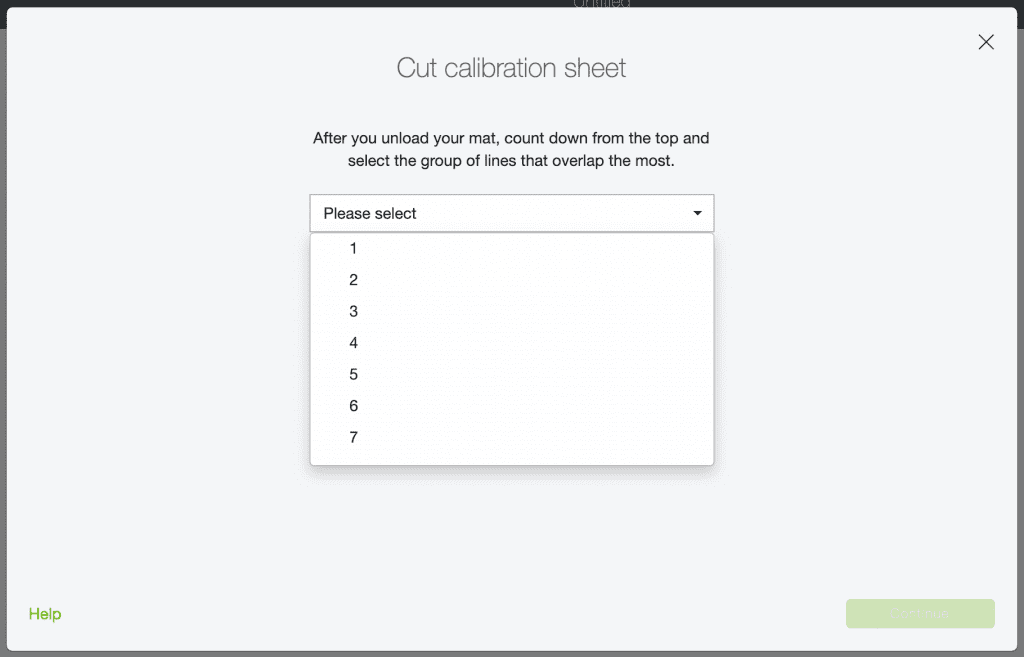
    As your machine begins calibrating, it will cut seven sets of lines with some overlap. When this process is done, simply remove the mat from the machine and find the set of lines with the best overlap. “The best overlap” just means that the cuts appear as a single cut line—there is no gap between lines.

    Count which set this is (from 1 through 7) and select the appropriate response in the prompt on Design Space. And you’re done!

     %postname%  %postname%  %postname%

    Alright, you know all of the critical information about the knife blade’s capabilities, and you know how to set up your machine, material, and mat to use the blade. So let’s expand on all of that to talk about using the Cricut knife blade to cut balsa wood and basswood.

    Balsa wood and basswood are similar woods. They are both very lightweight and are used in a variety of different crafting and modeling projects. Balsa has a high strength-to-weight ratio and can be bent by soaking it in water and then holding it in place as it dries. (Note that basswood can also bend, and you don’t have to soak it in water.)

    Balsa is the less expensive of the two and can be found easily in craft and hobby stores. Since you want to avoid knots in your material, it’s best to take a peek at balsa in person before buying it. Or, at the very least, read the reviews online.

    Basswood, on the other hand, is not as prone to warping and is denser and more durable than balsa. It can’t be crushed nearly as easily as balsa can—it’s less fragile. Basswood has a smooth, even wood grain that the Cricut Knife Blade deals with very well.

    You can cut either wood on the Cricut Maker machine. Whichever you choose, just make sure it doesn’t have any knots. If a piece as a knot, make sure the knife blade will not have to go through the knot when cutting your pattern.

    Luckily Cricut has a line of 1/16in basswood with a lovely finish designed specifically for the knife blade. Obviously, since it’s Cricut-brand basswood, you’ll probably get the best results using it. But the tips below go for either wood!

     %postname%

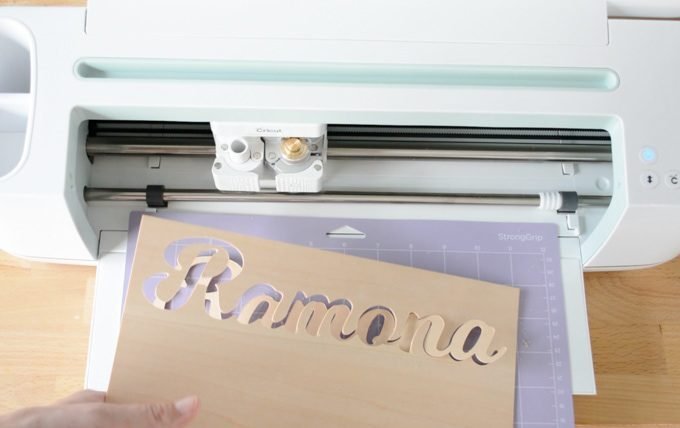
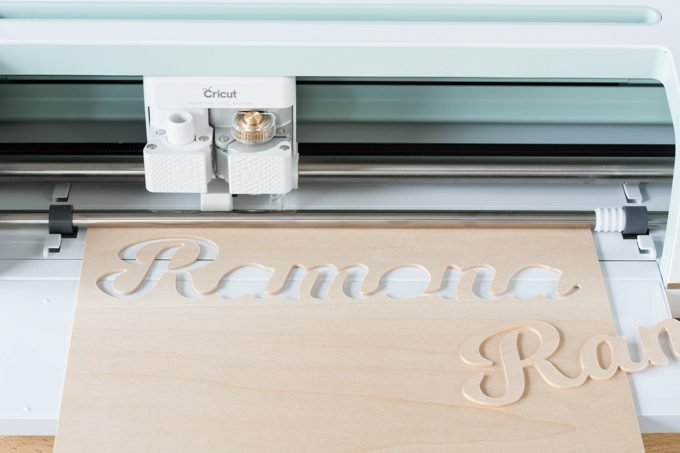
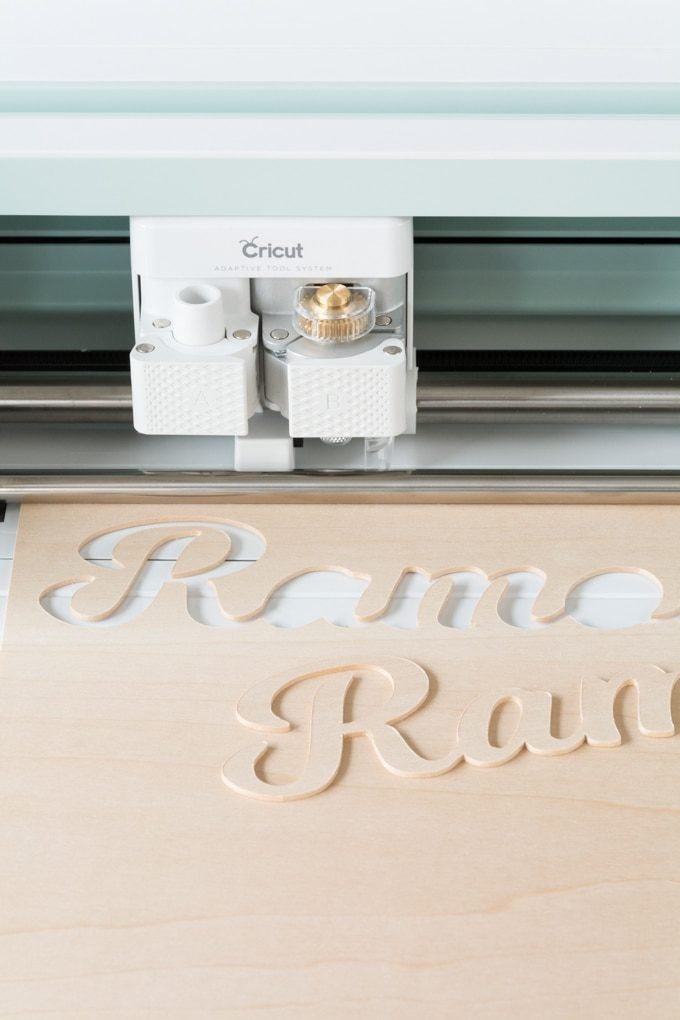
    Today I’m cutting a simple cut file I made myself by uploading it to Cricut Design Space and removing the negative space. It’s just a brush script of my daughter’s name.

     %postname%

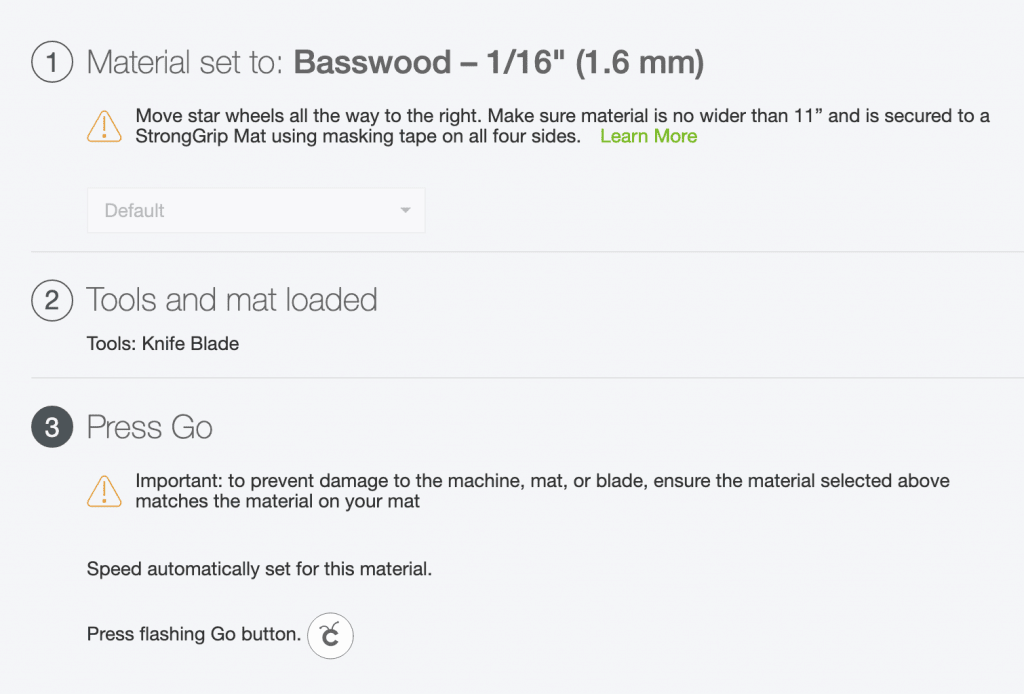
    After I’d followed all of the previous steps to prepare my machine and knife blade, set up my material and mat, taped everything down, and load my cut file in Design Space, I started cutting. Here are the warnings Design Space gave me just before starting to cut my project. You can see that it reminds you of all the things I’ve outlined in this post.

     %postname%

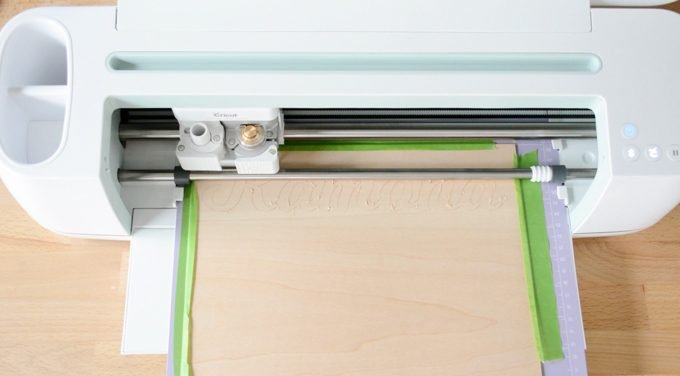
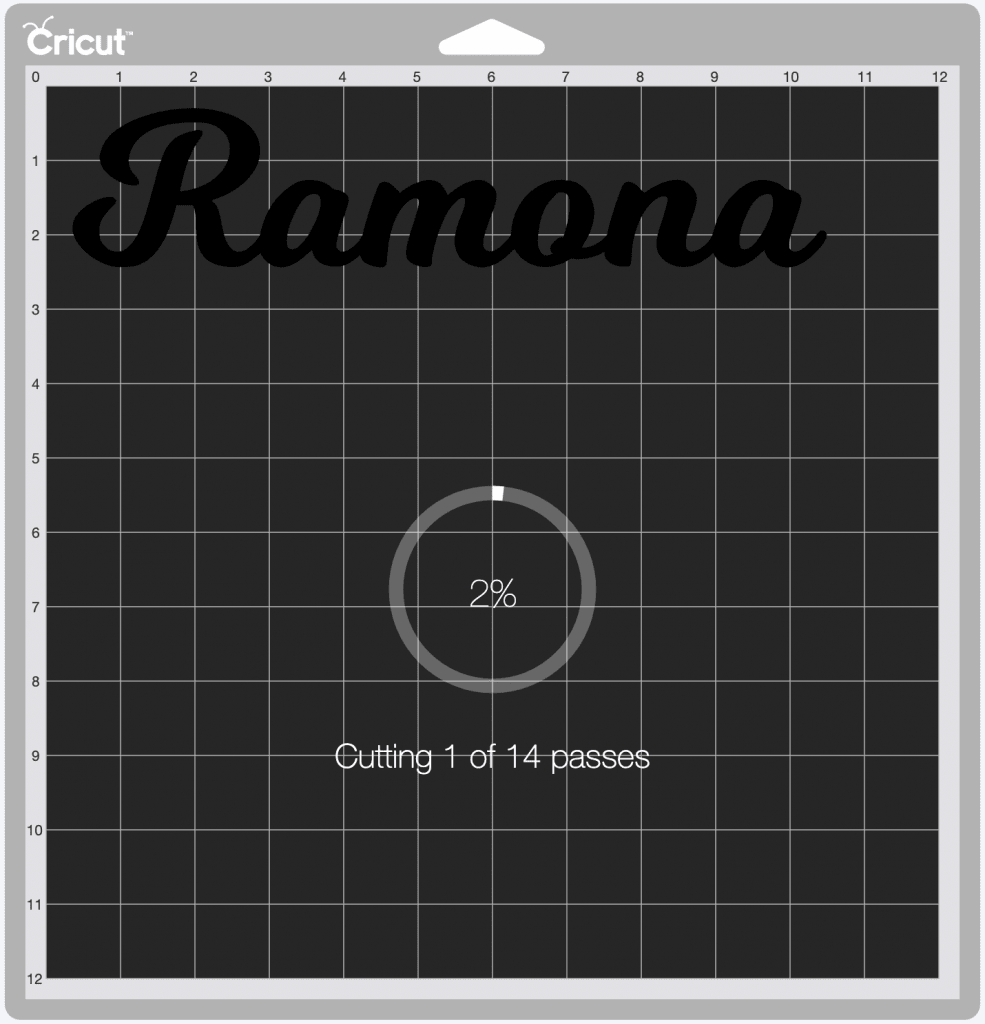
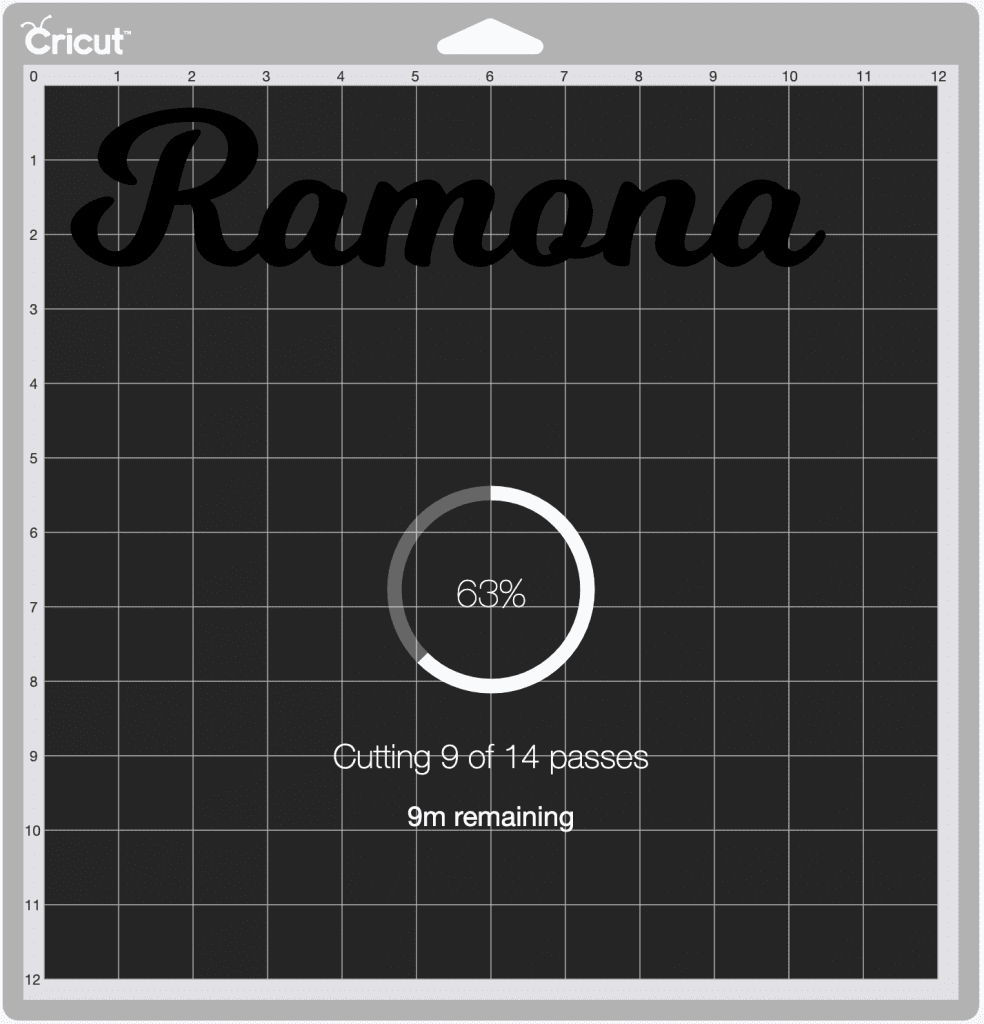
    Next I began cutting. This is the first screen I got. It estimated 14 passes and was on the first pass, which was only about 2% of the way toward being done with cutting the file. Once this pass was done, Design Space gave me an estimate of how much time was left for the cut.

     %postname%  %postname%

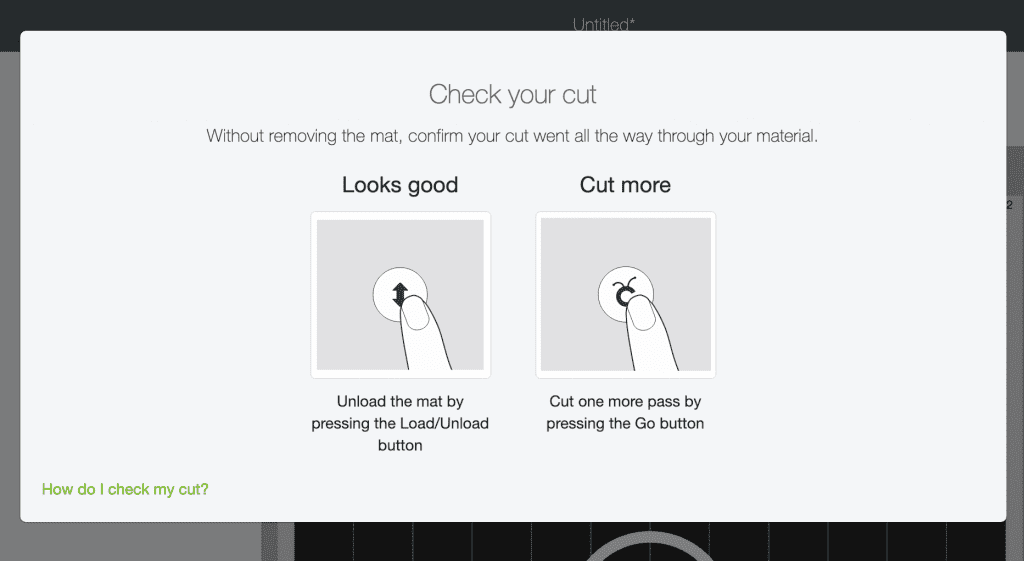
    All of the passes took about 20ish minutes to complete. I checked periodically while I went about my business. Once it was done, I got this screen on Design Space, which asked me to make sure my cuts were good before unloading the mat.

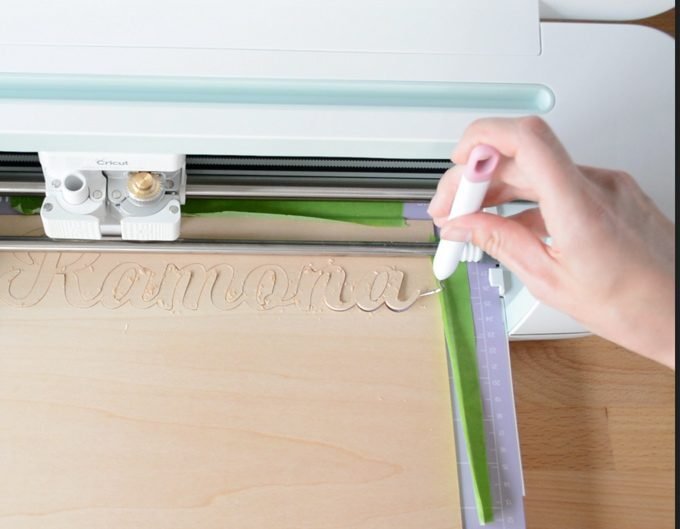
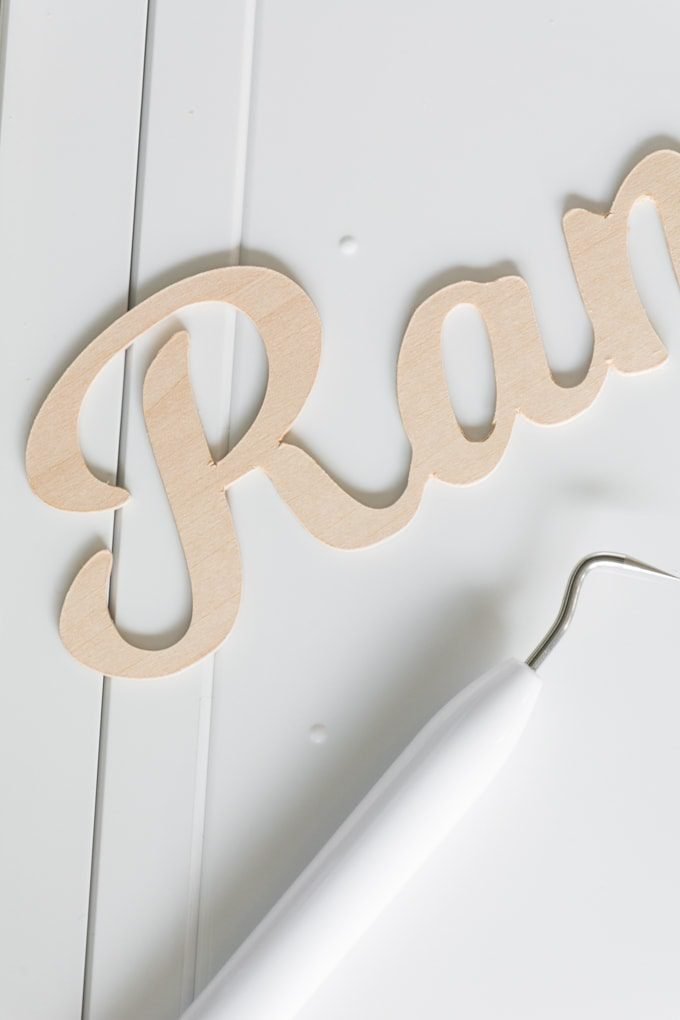
    I used a weeding tool to gently lift the “a” at the end of the cut to see if it made it all the way through. It lifted with ease, so I took a gamble and assumed the rest of the project was good. Then I gentle removed the outline.

     %postname%  %postname%  %postname%  %postname%

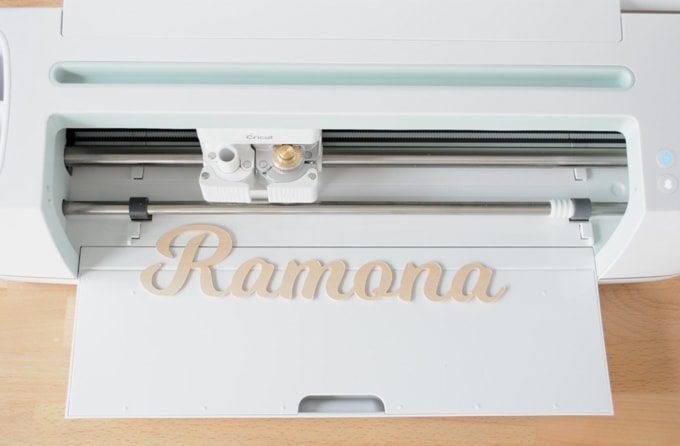
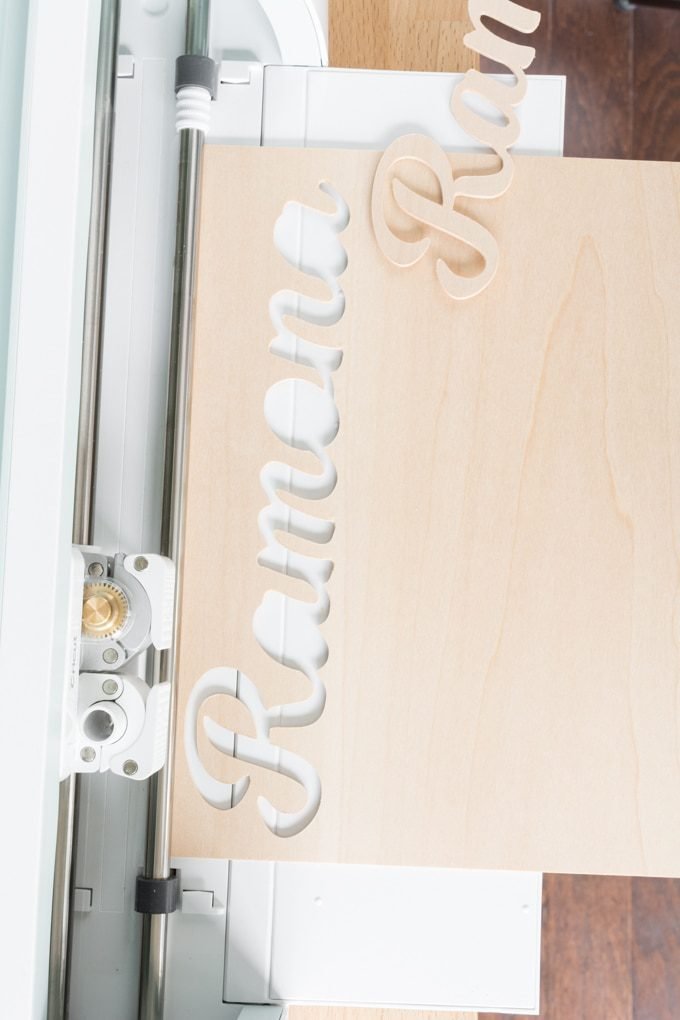
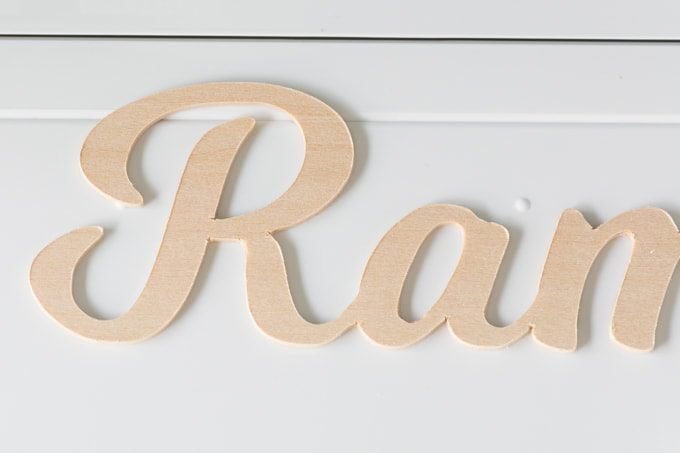
    Beautiful! And this is before doing any sanding at all. Please remember that you need to be very very careful with handling cut basswood with connections of this size. It can break easily.

    HERE ARE A FEW DETAIL SHOTS!

    I hope you enjoy working with your Cricut Maker and all of its fancy new blades, and I hope this tutorial was helpful!

     %postname%  %postname%  %postname%  %postname%  %postname%

    Pin my tutorial about using the Cricut Maker’s Knife Blade to cut wood!

     %postname%