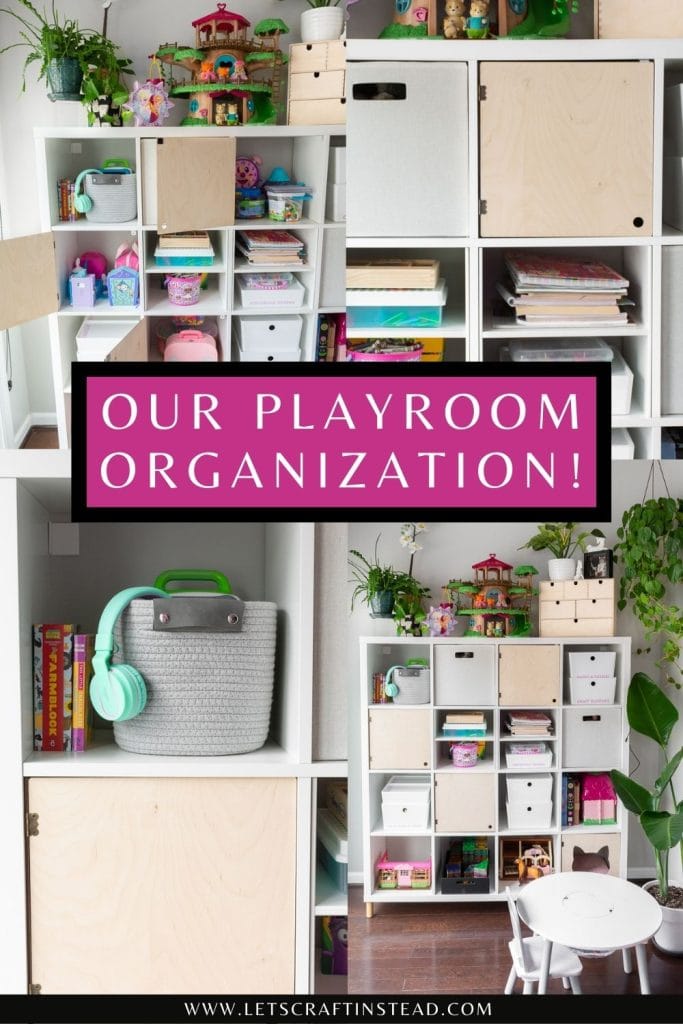
Looking for playroom organization ideas? Our is in the main living area, so it’s extra important to stay organized! See how we keep the mess to a minimum using mostly Ikea finds—plus labeling, of course!
Small playroom organization ideas with Ikea finds
I typically keep most of my home stuff on my other blog, but I thought this one would be better suited to Let’s Craft Instead. Why? Because it’s a kid project. A playroom organization project that talks about organizing kids toys, kids crafting and art supplies, and more.
We don’t actually have a real playroom. Instead, it’s a play nook. We have a super open floor plan with just a bit open area. So that’s another big reason why organizing toys, craft supplies, and other kid stuff is super important. If it’s out, it’s in my field of vision.

What we had before…
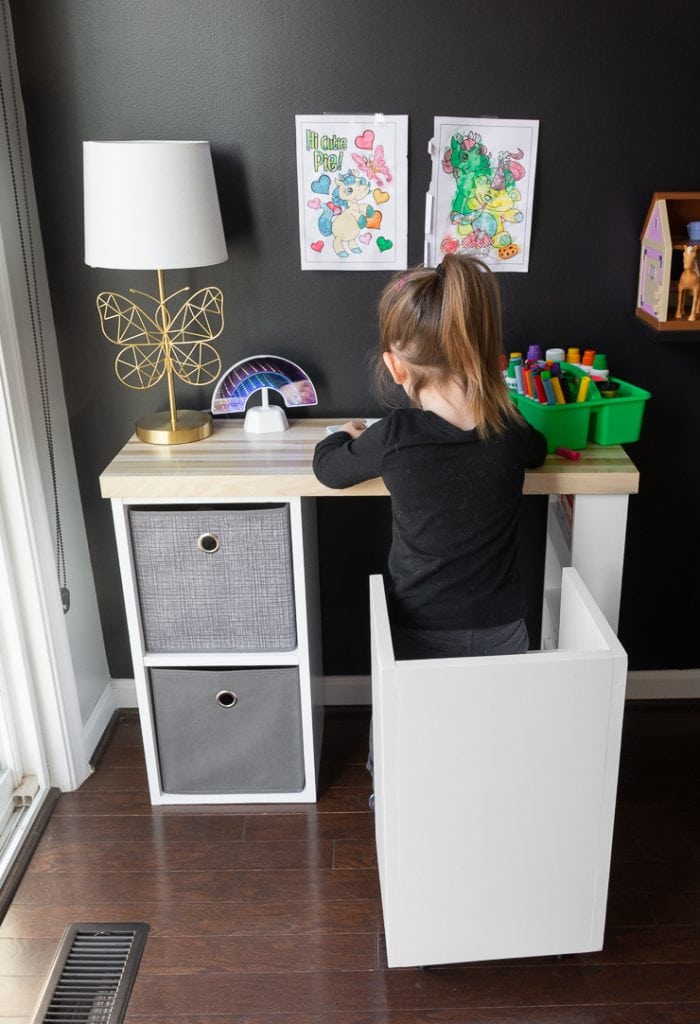
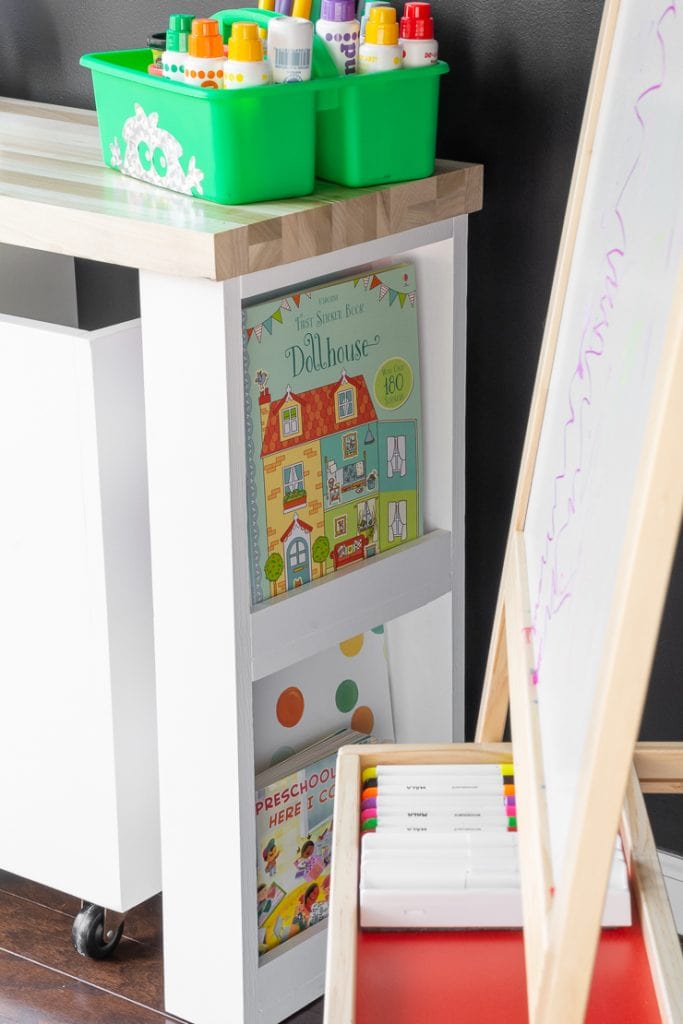
Before in this little nook, once upon a time, I had my desk. Then we switched things up and moved R’s toys in it. That meant a little DIY desk I built for her, as well as an art easel and sometimes her little play table. And a few shelves that we kept toys on.
But it quickly became clear that the two 11″ storage cubbies in the desk and the shelves were not cutting it! She also had painting and drawing stuff in two kitchen drawers and one of the cabinets—and we really wanted to reclaim that kitchen space.


I felt like we could make better use of this little play nook, and I wanted to do it using Ikea—every small-space organizer’s dream store! So Mo and I hit the road one weekend to Ikea and got some supplies.
So here’s what we used for our little DIY playroom organization!
- Kallax unit, 16 squares, white
- Shelf insert
- Wood legs
- Kuggis boxes
- Kallax doors
- Cat door
- 13″ fabric storage cubes
- Moppe organizer
- Cricut machine
- Lavender vinyl
- Transfer tape
Step 1: Set up the Kallax unit
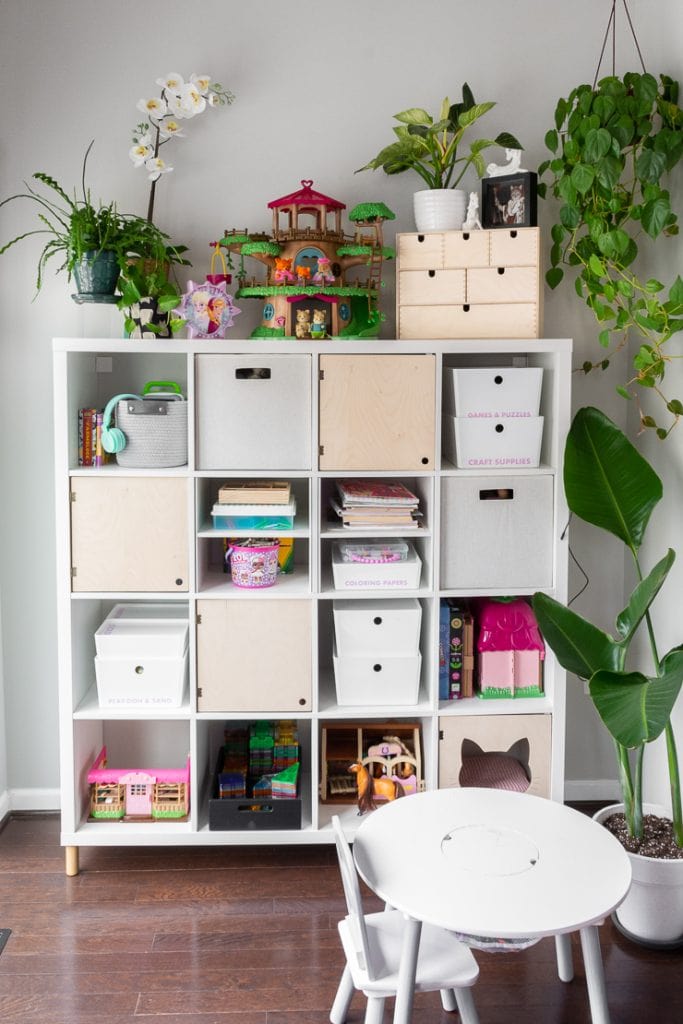
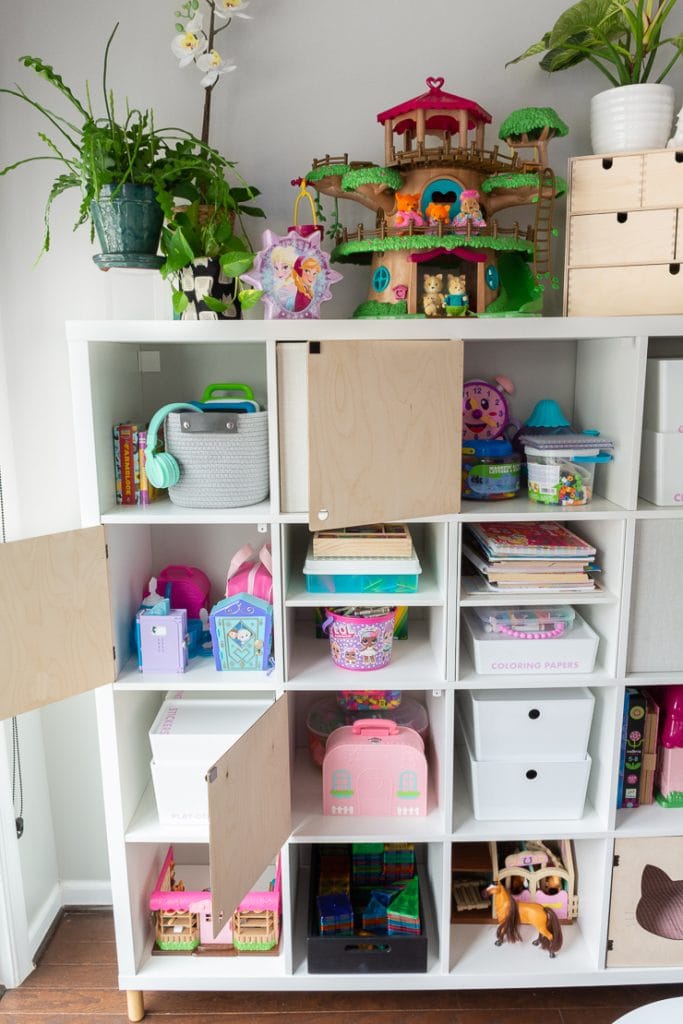
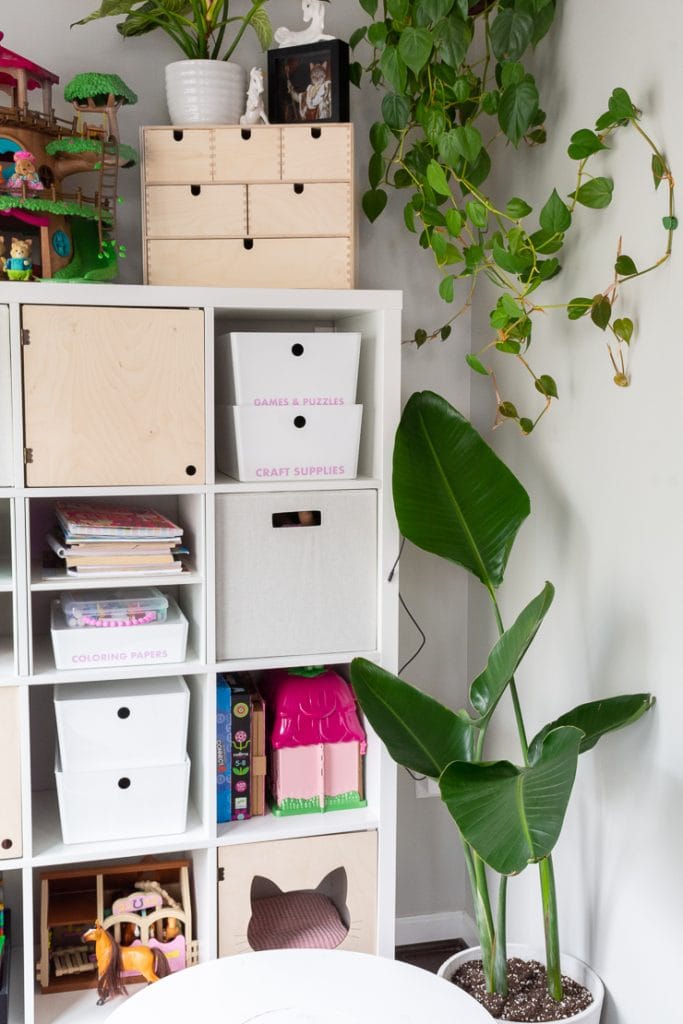
After patching the holes and painting the wall light gray to lighten things up a bit, I decided on a 16-cube Kallax organizer. Originally I wanted a wood tone but realize it would be easiest for me to mix and match bins and accessories if I went with a white one.
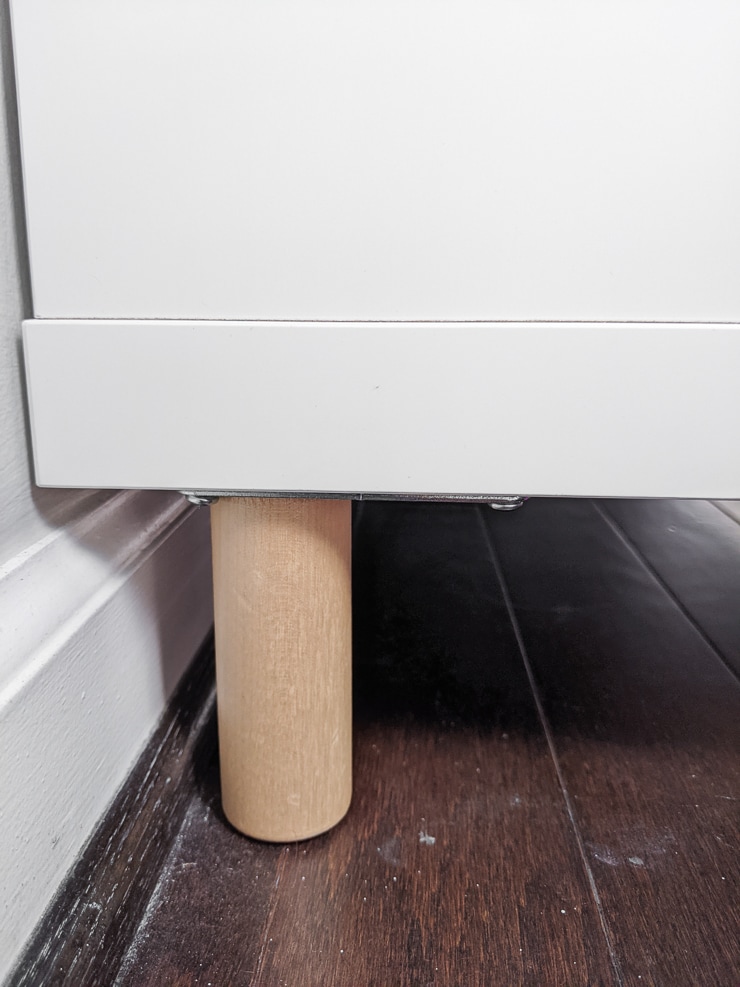
I already have a smaller Kallax unit in high-gloss white, which I love! But it is more expensive, and the Kallax inserts only come in regular white. Not high-gloss white. So regular white it was! And I grabbed some wood legs to elevate the unit.
Although they are designed for the Eket furniture line at Ikea, they work really well on the Kallax units, too! I really love the nicer look them give the piece.

Like kid stuff? Check out our review of 5 popular DIY Slime Recipes, our experience with a Colorable Cardboard Playhouse, and my free Morning Routine Printable for Kids!
Tips for anchoring the unit if you have baseboards
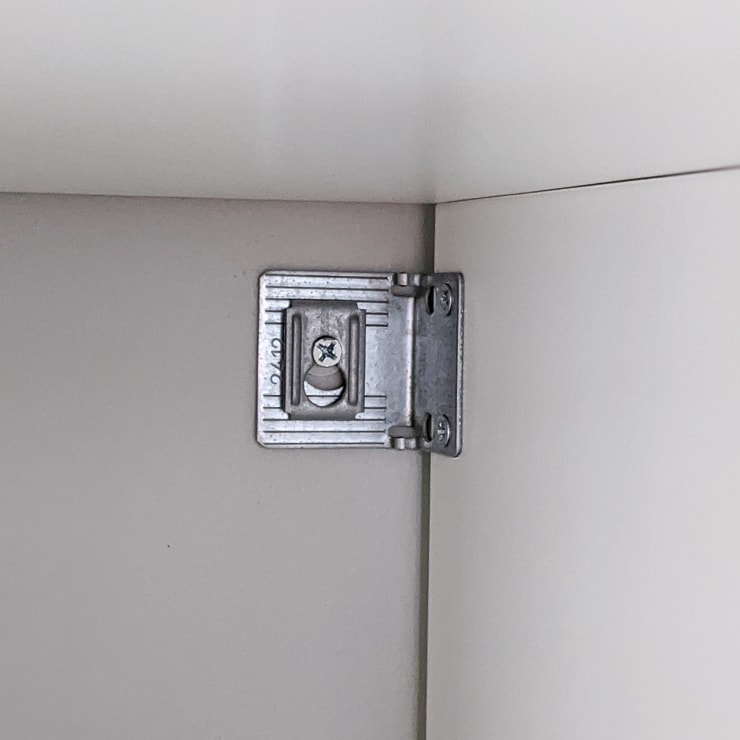
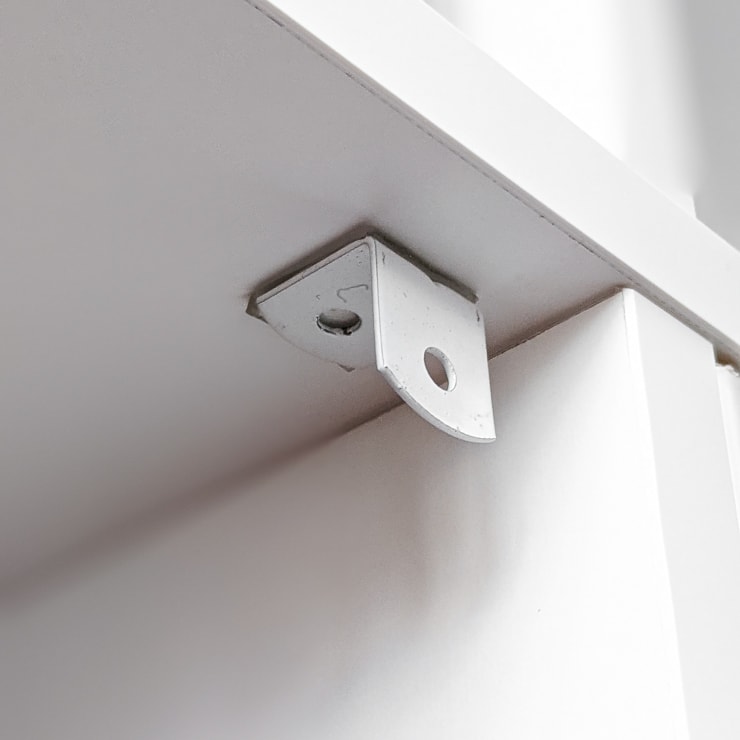
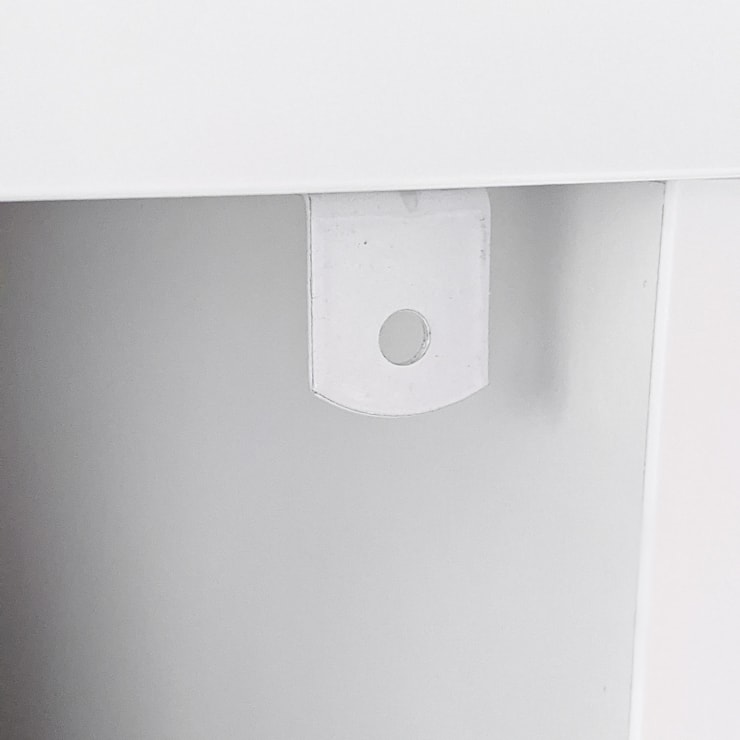
As everyone and their brother knows, it’s extremely important to anchor large furniture with children. The Kallax unit comes with the anchoring supplies you need minus the screws (since different walls have different requirements).
However, we have both baseboards and shoe moulding, meaning that we can’t put furniture flush against the wall. Booo. However, anchoring was a necessity, so I got creative.
The wooden legs I put on the unit helped with this. Basically, I decided to screw the legs on flush with the front of the unit’s bottom. However, on the back, I bumped them up a bit over an inch to cheat some space. This way, the legs would lift the unit above the baseboards and create enough extra space to push the unit up against the wall.
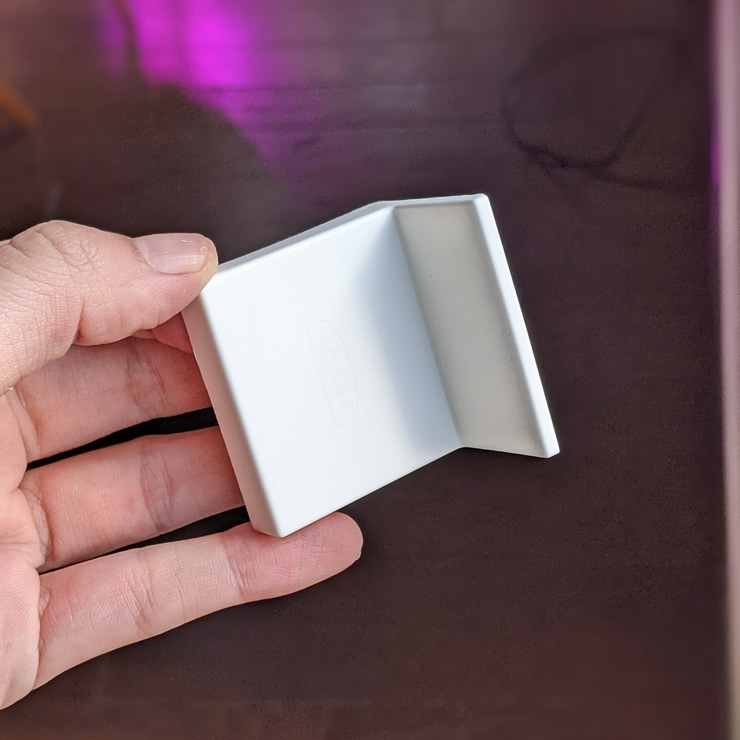
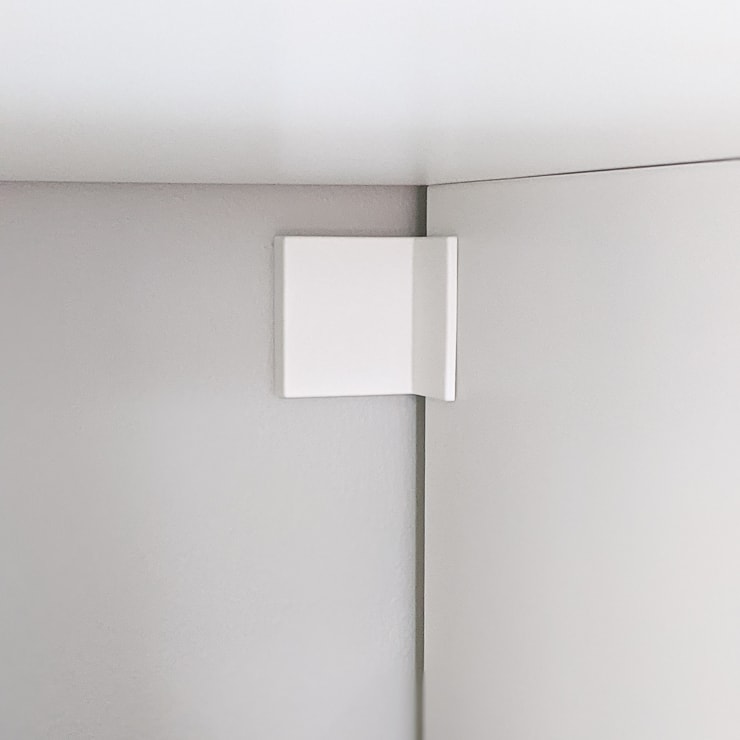
Does that make sense? Here is a picture if it doesn’t. I wasn’t able to line the anchor areas up to studs, so I used heavy duty drywall anchors and screws. I also love how the Kallax unit comes with the white covers for the metal wall brackets, too!


Step 2: Plan out the bins and add labels
Once I had the unit assembled, the legs on, and the whole piece anchored, I got to the fun part: organizing! I put all of the craft supplies, coloring books, crayons, markers, paints, stickers, and other things that needed to be sorted and organized on the table.
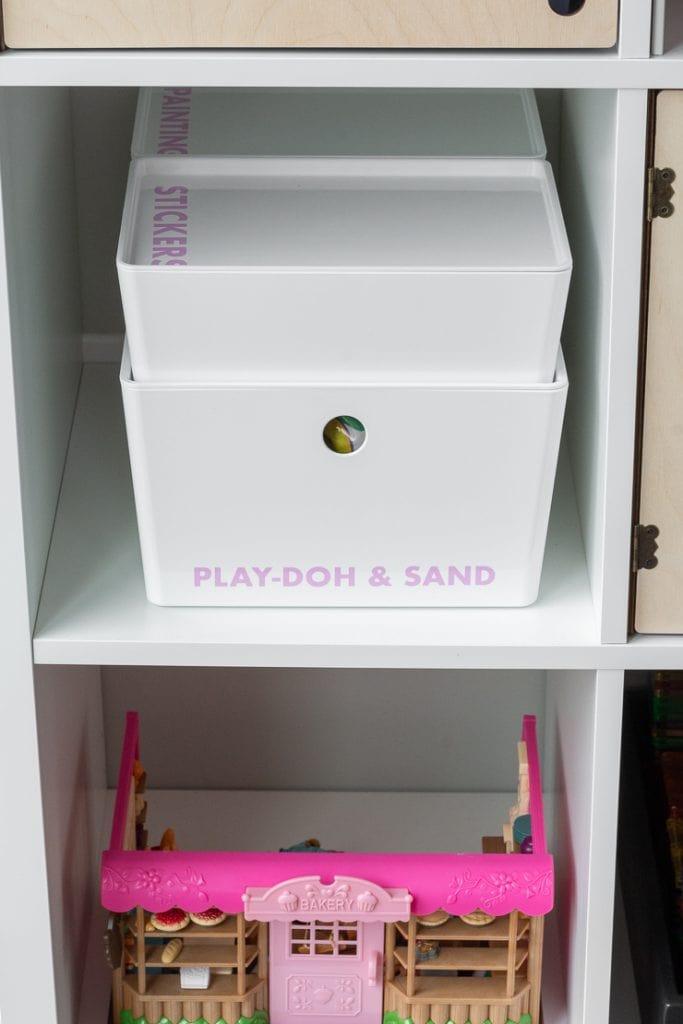
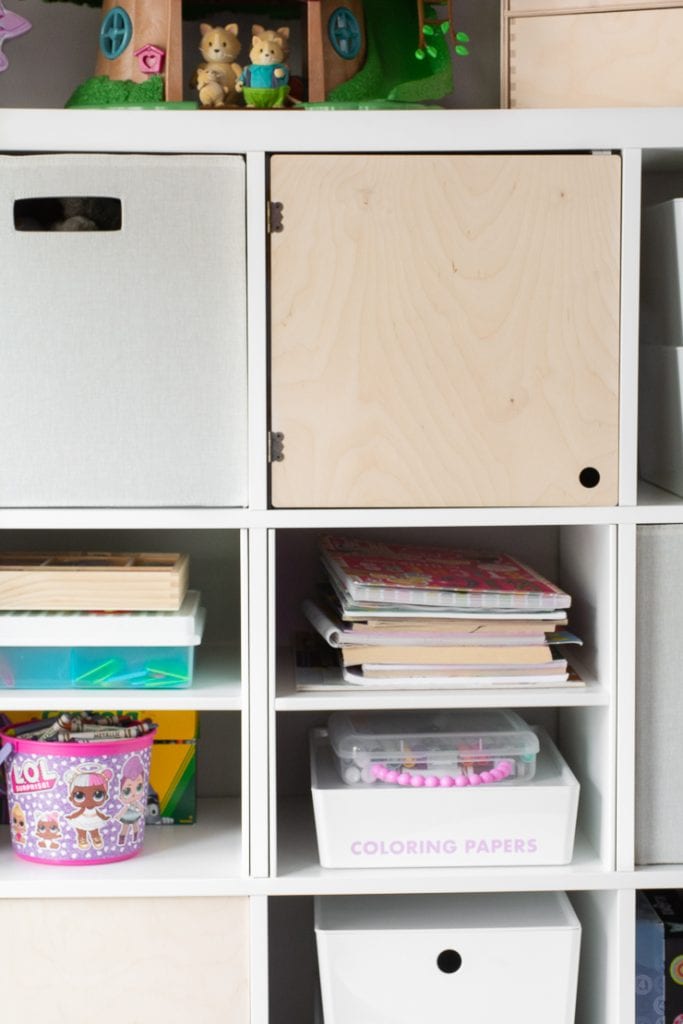
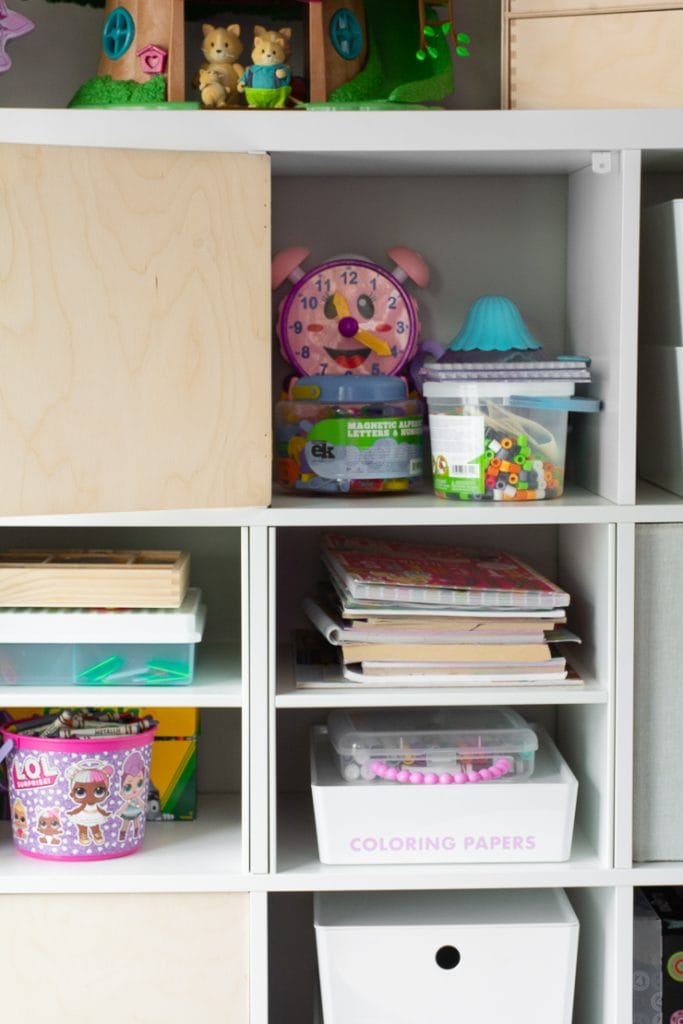
Then I decided which bins to put them in. I got a few different Kuggis boxes. I really like these boxes because they are stackable. If you get the smaller ones, you can stack two on top of the bigger Kuggis boxes, too! Talk about a great used of space.
Speaking of a great use of space, I highly recommend grabbing a few of the Kallax shelf inserts, too. They are amazing! Super easy to assemble, and they essentially just split the cube in half by adding a shelf. This is perfect for coloring books or bins with loose papers, which is exactly what I used one for!
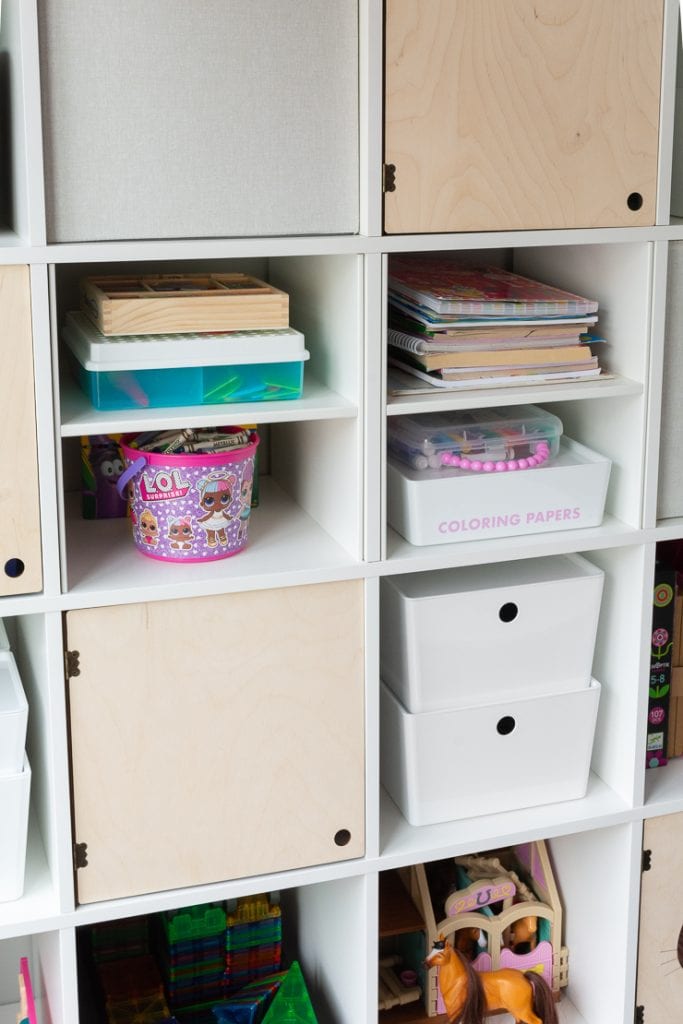


Here’s my Kuggis bin breakdown:
- 1 large bin for Play-dough and Kinetic Sand stuff (it fits her little craft caddy that I have Play-dough stuff in)
- 1 large bin for misc craft supplies (pom-pons, pipe cleaners, glue, scissors, etc.)
- 1 large bin for misc games and puzzles
- 1 large bin for colored craft paper and loose coloring sheets
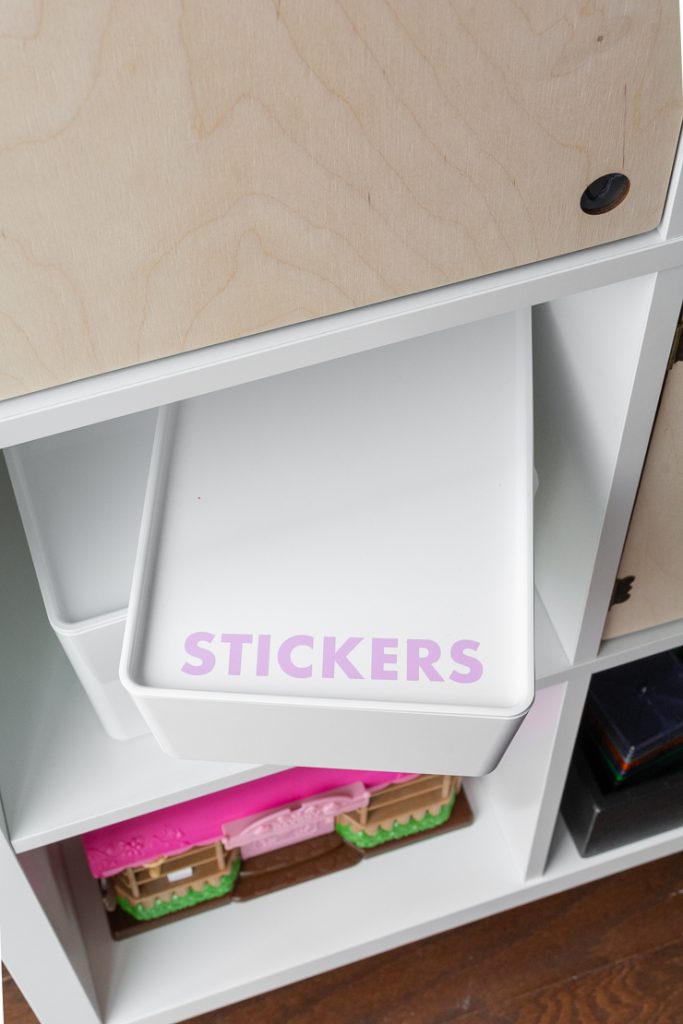
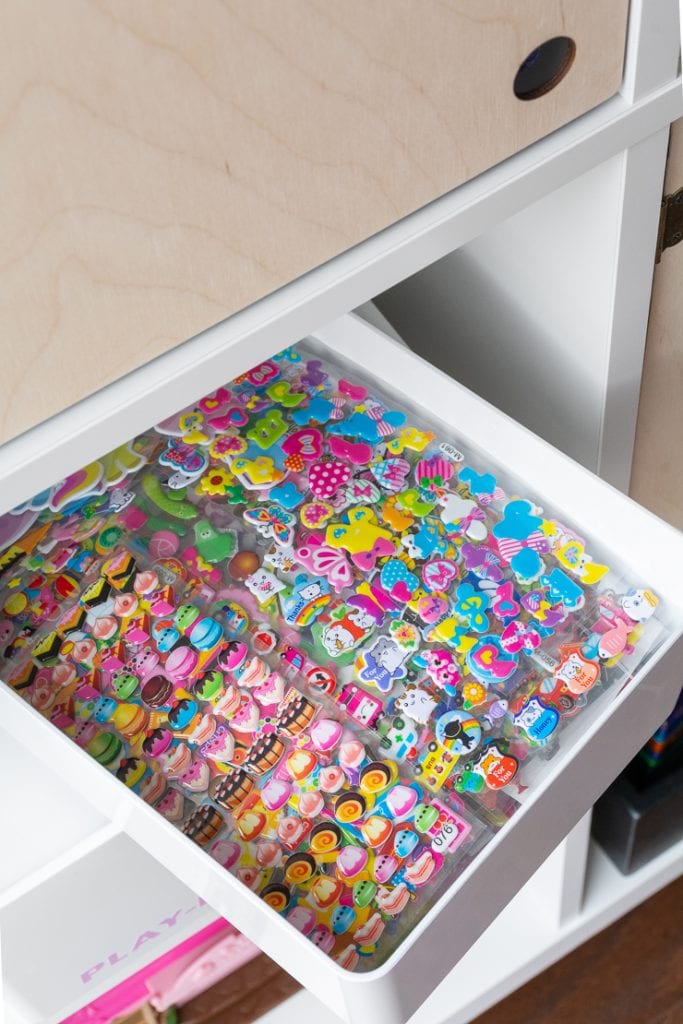
- 1 small bin for stickers (yes we have a lot lol)
- 1 small bin for paints and painting supplies
I used my Cricut machine and some lavender vinyl to add labels to these bins. Not only to help keep things organized, but to help my daughter learn the words for things and where they go 🙂

Step 3: Add wood cabinets
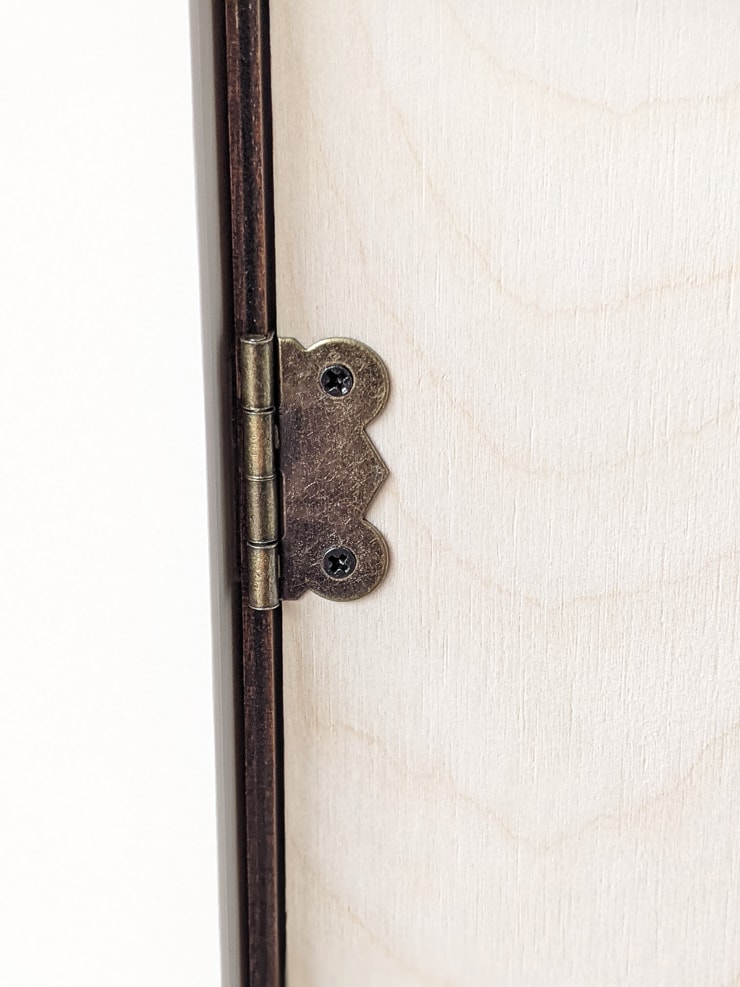
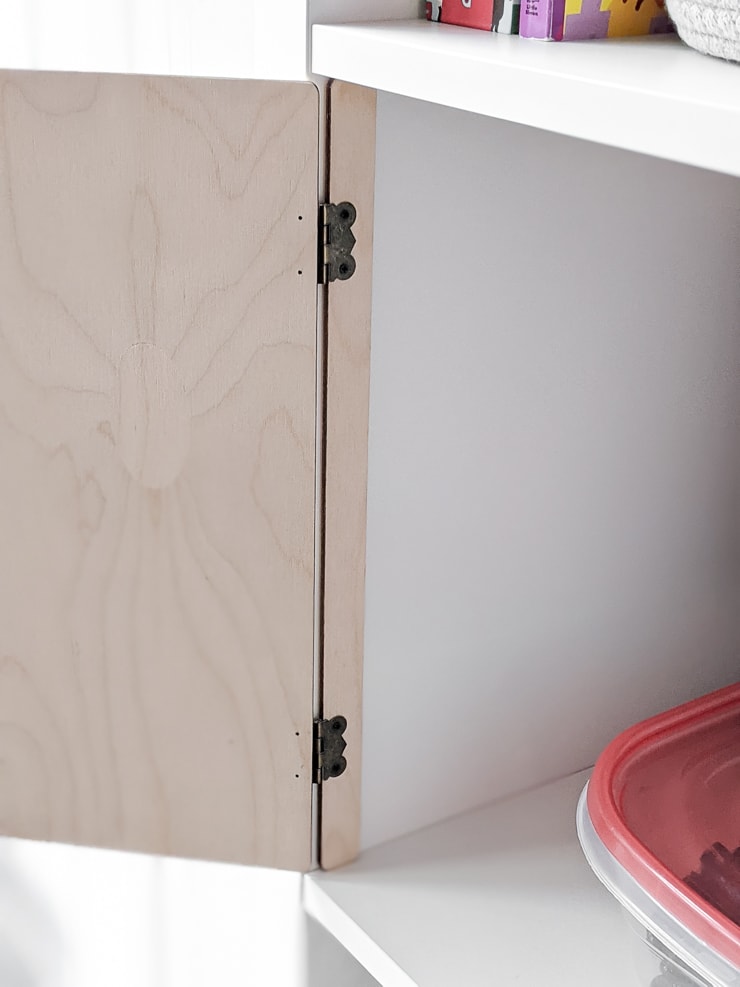
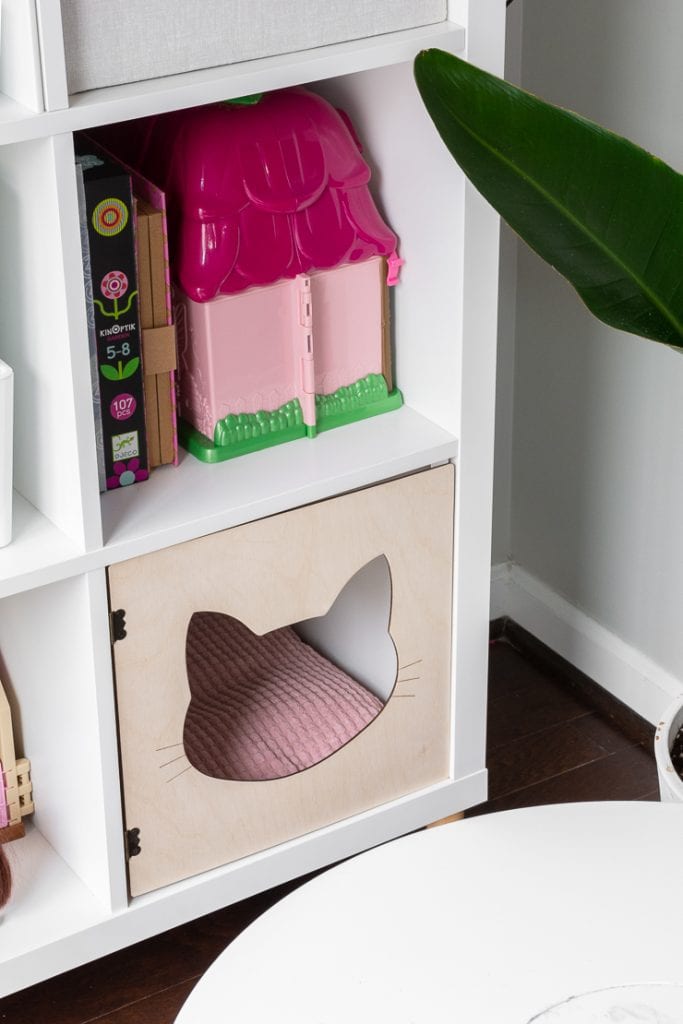
Things were looking really great and already much better! But there was still a lot of stuff I wanted to organize and put away. After researching online, I decided to order four no-tools wood Kallax cabinet doors. They took a while to get to me since they came from a small business in Canada, but I like them.
One even has a cat-face-shaped cutout for a cat bed! I have something similar upstairs, and R wanted one for her cubbies, too. These are high quality and were super easy to install. They just use little adhesive squares that are very sticky.
They come with a small finger hole in them to open the doors, and they stay closed with a little magnet catch. I think they also help to add some nice warm wood tones to the otherwise white/gray corner. And they match perfectly with the Ikea Moppe wooden organizer I got for smaller items: beads, trinkets, Woodzeez, etc.
I decided to place them randomly. Originally I wanted to do the bottom four cubbies, but these cabinet doors are a tight fit. They actually were just a hair off size-wise on some of the cubbies. So I just went with random cubbies, and I am very pleased with how it looks!
Like these no-tools wood doors for Kallax units? See the cat-shaped cutout door and the regular door with a finger hole for more!


Step 4: Add fabric bins
After deciding on the placement for the wooden cabinet doors and Kuggis boxes, I wanted to add a bit more hidden storage in. So I grabbed two 13″ fabric bins in a very light green color. They are from Target. I wanted a light pink, but there was only one left—boo hoo.
These are great for bigger things that have smaller pieces. So, the horse stables play set that also has a couple horses, play food, small carrots, and fence pieces. And other puzzles, books, and stuffed animals that just need to be corralled and thrown somewhere.


And that’s my finished playroom organization approach!
R’s little play table and chairs also fits great here. And her step stool to get to the higher cubbies. There is plenty of room. It’s the perfect little area for her to get into and find something to do! Ikea to the rescue…again!


Pin my DIY playroom organization ideas from Ikea!