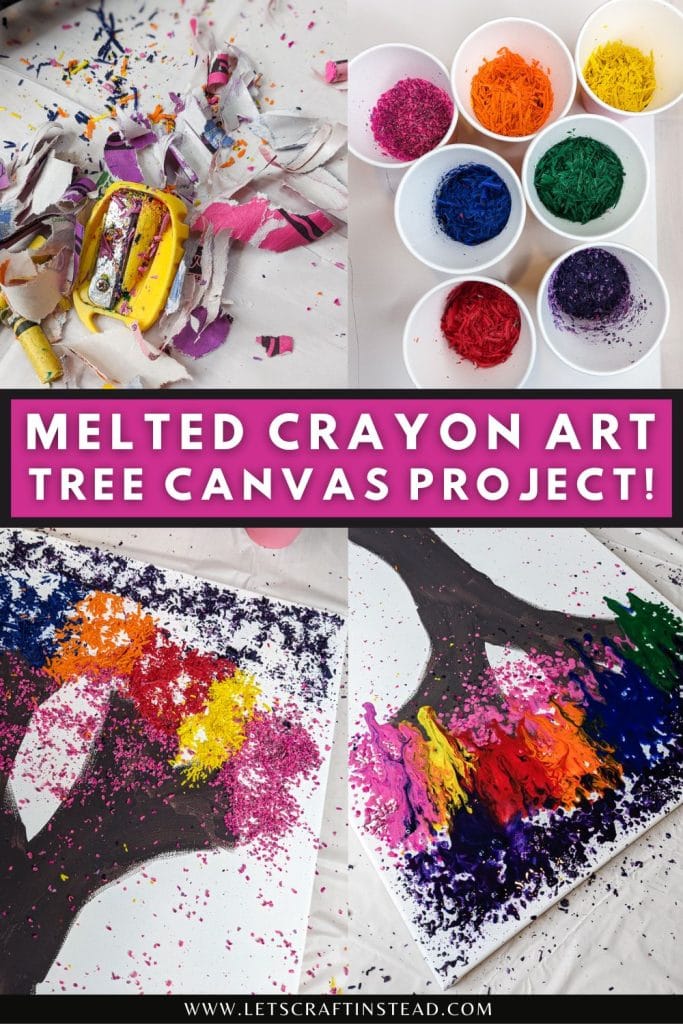
Want to learn how to make melted crayon art? Check out my tutorial for our family tree canvas project as inspiration—perfect to do with kids!
How to make melted crayon art with kids!
Does anyone else hoard broken crayons? I’ve had a little bucket stored in the closet waiting for the perfect craft. I have a post about broken crayons already—how to melt broken crayons in silicone molds. This one is a bit different.
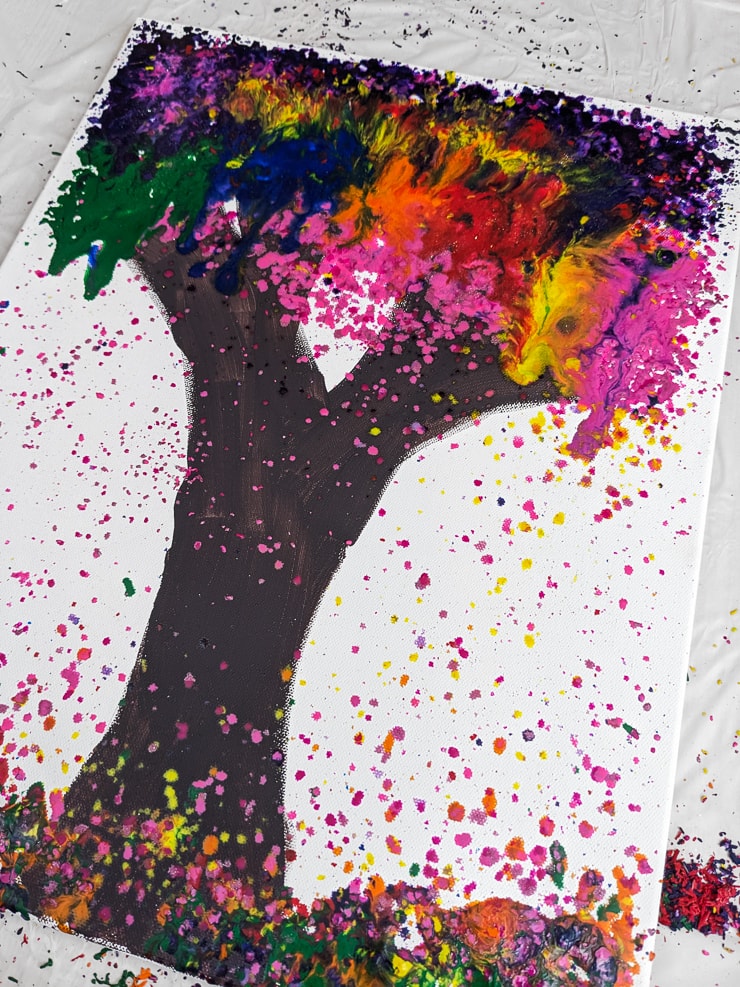
I decided to make some art with my 5 year old using the broken crayons. She had an assignment at school this month to make a family tree. So we decided to make a rainbow melted crayon tree on canvas and add family photos.

What is the best way to melt crayons?
There are a bunch of different ways to melt crayons. For melted crayon art, I recommend using a heat gun or a hair dryer. There are pros and cons to each method.
For a heat gun, which is the method I am using, the pro is that you can get a higher level of heat with more control over the hot air you’re using to melt the crayons. My heat gun comes with two different fan settings and five different heat settings.
The con of a heat gun, though, is that you have to buy one. Most people don’t have a heat gun laying around unless you’re a crafter or maybe just a general handy-type person. They can be used for lots of different things around the house—not just crafts.
For a hair dryer, the pro is that it’s easy and most people have one. So, you don’t need to buy anything to melt your crayons. However, the con is that you have less control over the air and heat levels. Most hair dryers have two or so heat settings, which is probably enough for melting crayons.
But the big con is that hair dryers blow a lot of air. So it can be difficult to control where you want the air to flow. And even the lower setting on a hair dryer can be too much. It can be messy if you’re not careful.

So here’s what we used:
- Broken crayons
- Pencil sharpener and cheese grater
- Blank canvas
- Pencil and brown paint
- Heat gun or hair dryer
- Disposable table cloth
- Optional—glitter
- Family photos
- Hot glue
And here’s how we made our melted crayon art!
Remember to use the proper safety precautions for whichever crayon melting method you choose, including protecting yourself from burns and protecting your workspace from spilled wax. Never let children operate heat guns or similar tools.
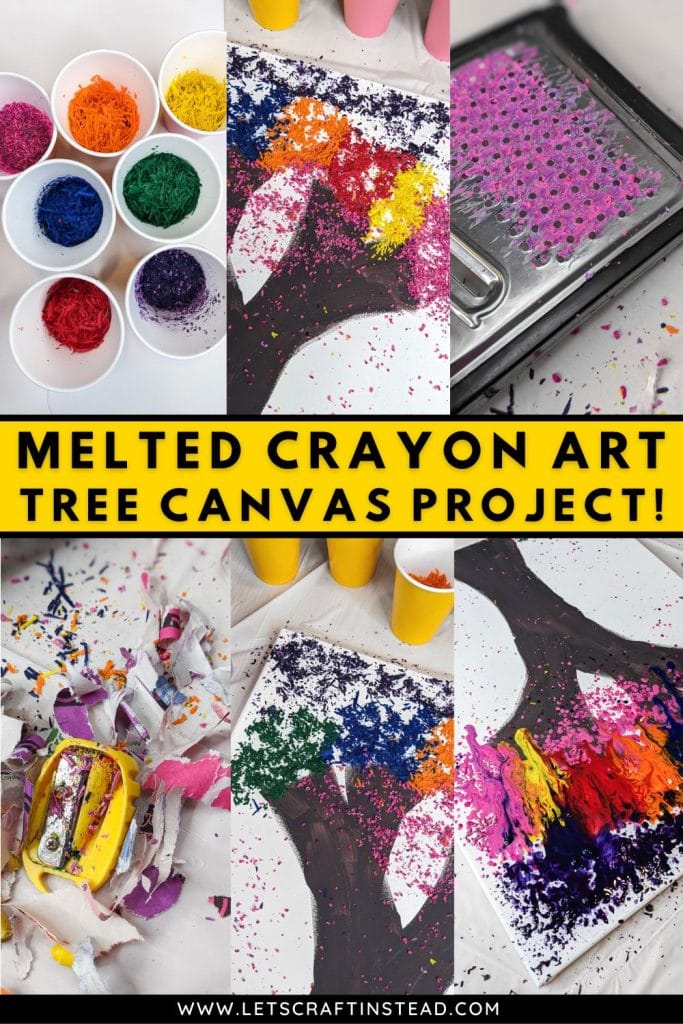
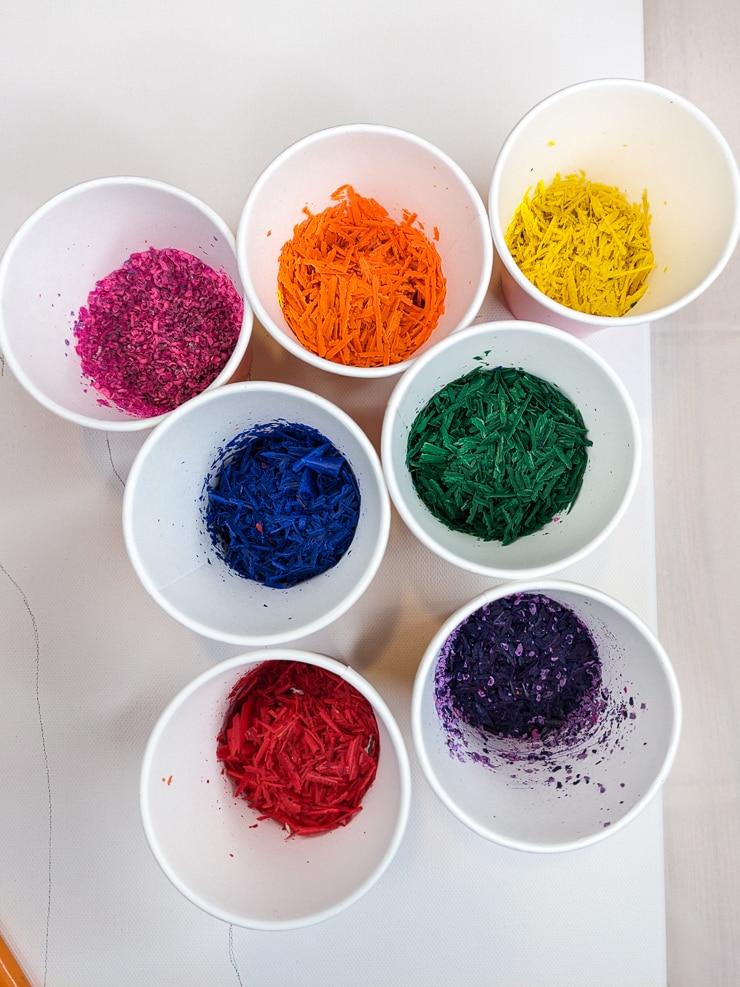
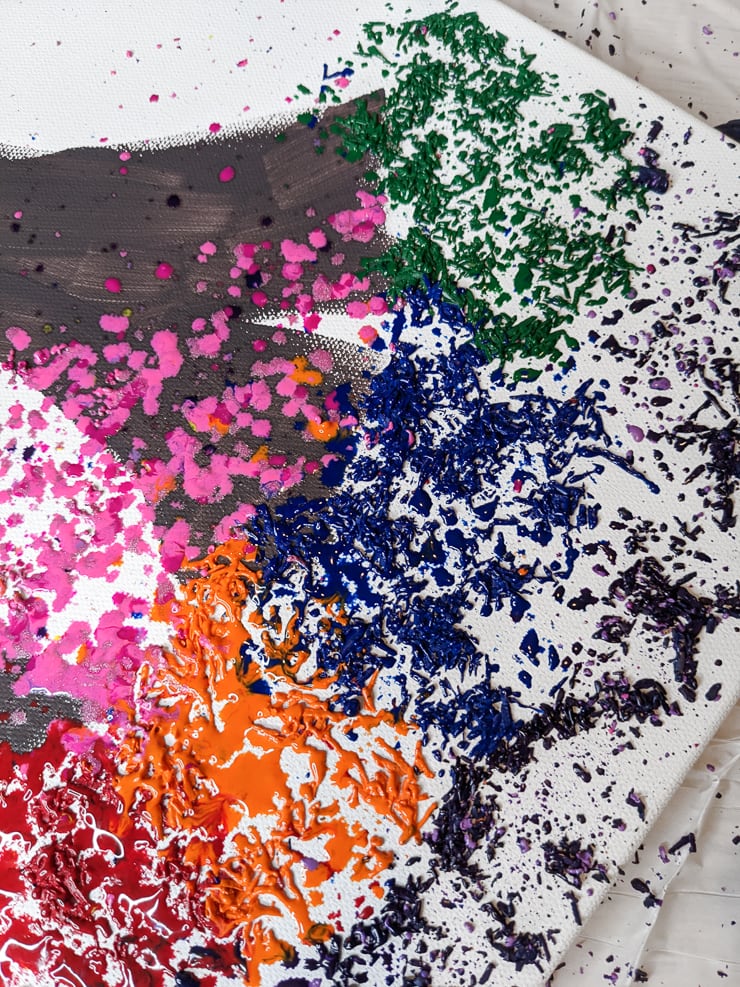
Step 1: Shave your crayons
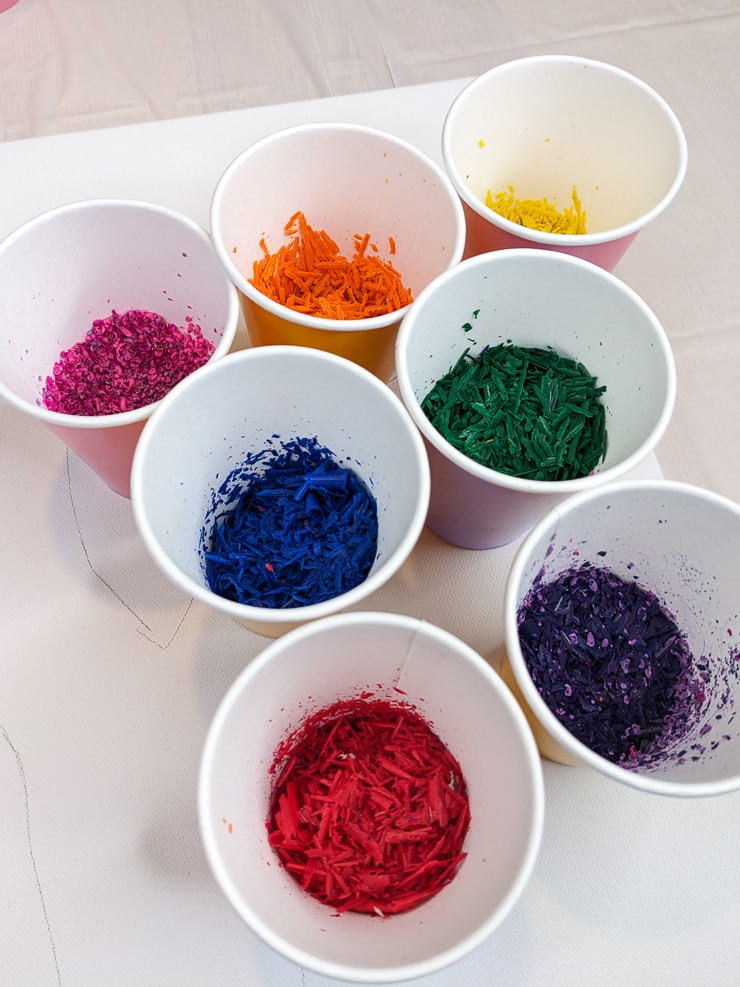
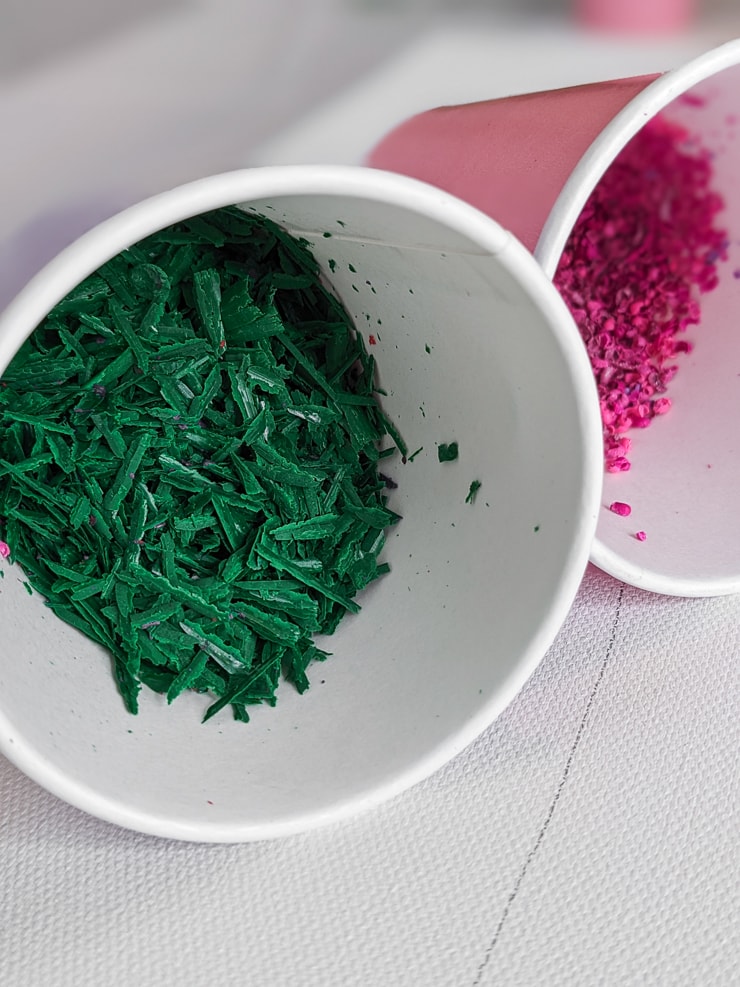
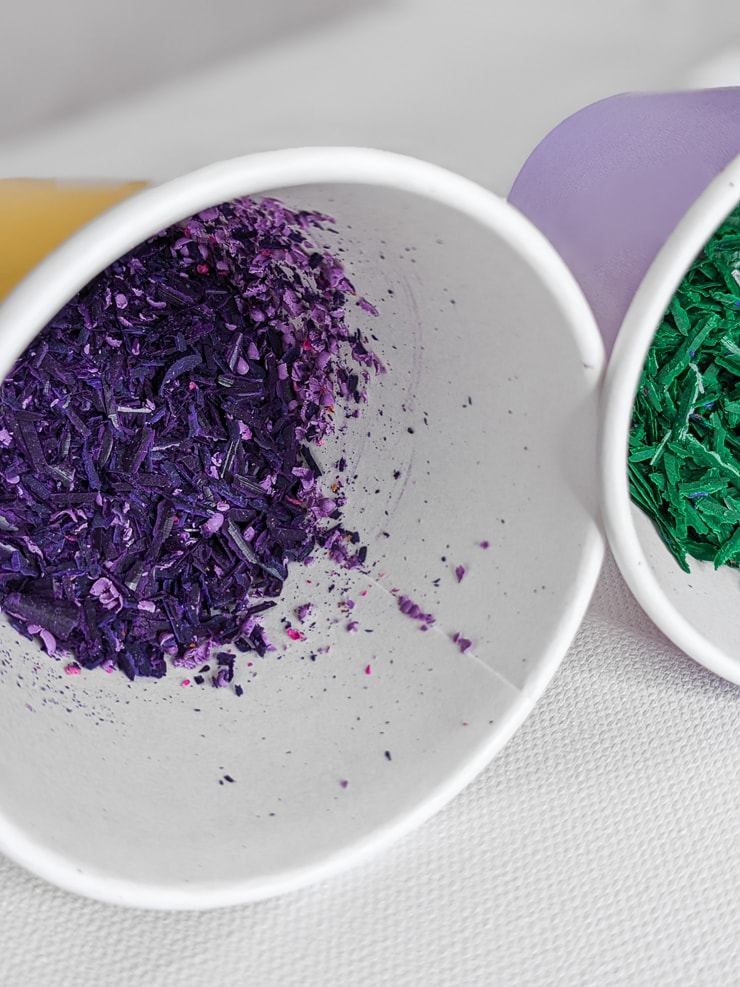
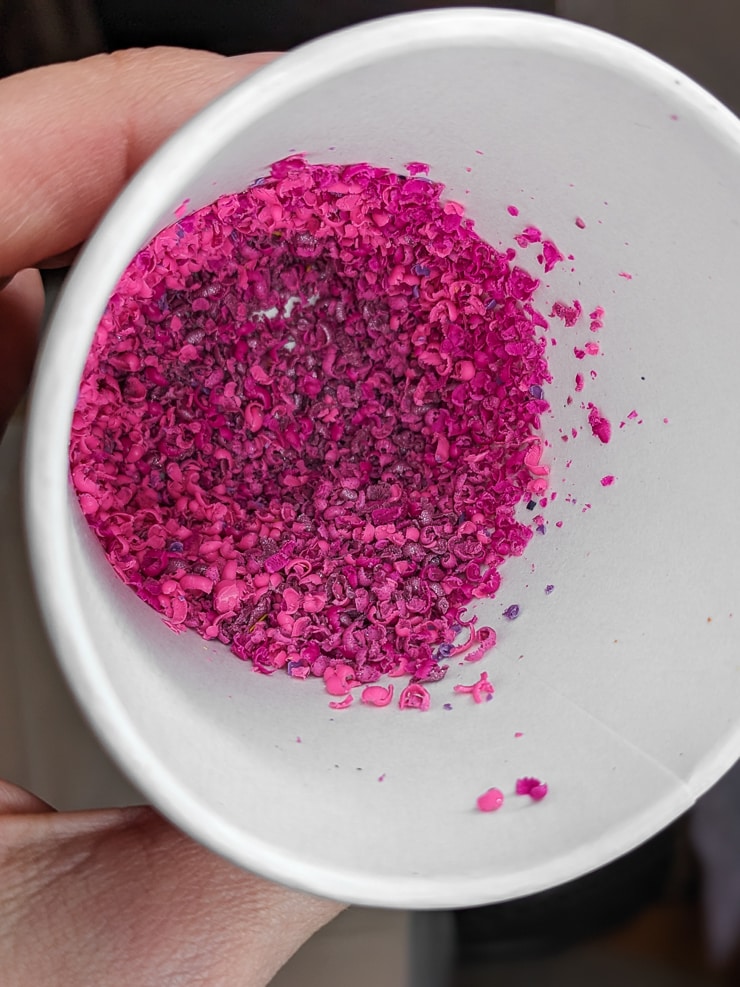
The first step is to shave your crayons. This is essential because it helps you create the design you want. You could just cut the crayons up and melt them that way, but it would be a bit clunkier and take longer to melt. Using shavings also helps melt the crayons faster.
Quick note—I would also recommend using a disposable table cloth under the whole project. The crayon shavings can blow everywhere, and it just makes cleanup super easy.

How do I shave crayons for melted crayon art?
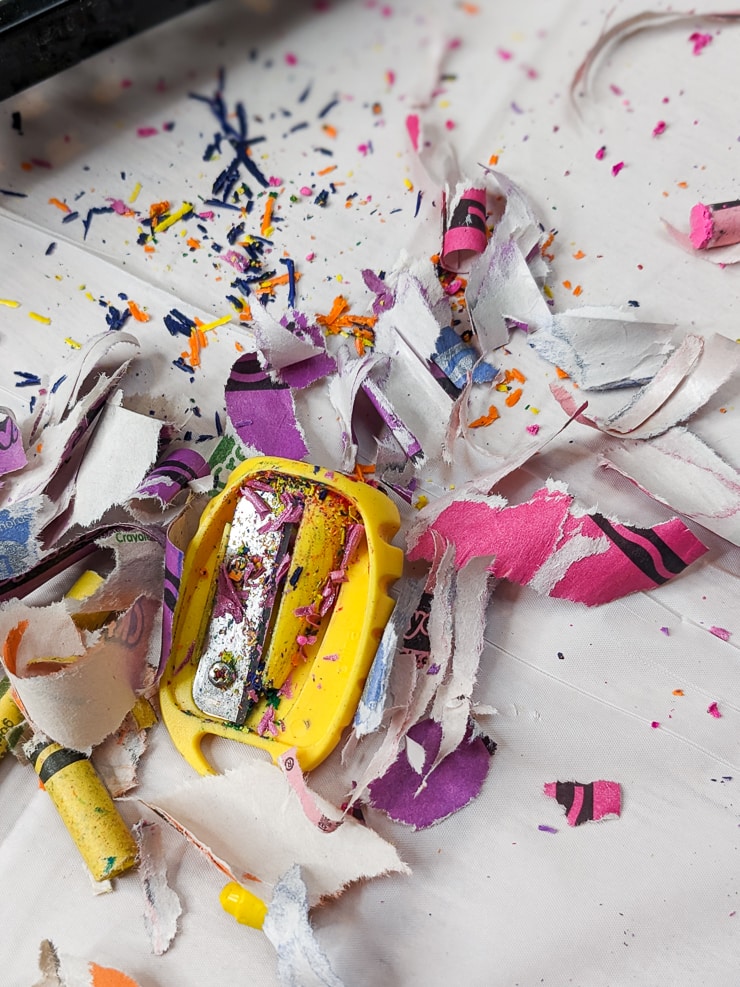
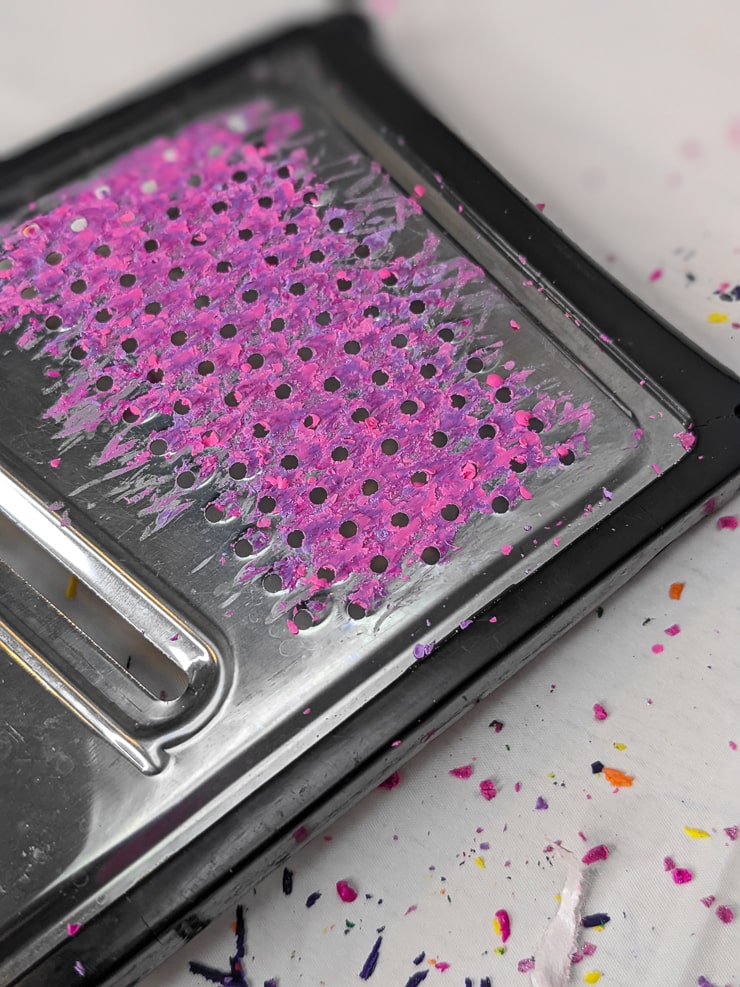
I used two methods to shave our crayons for our melted crayon art. First I started with a pencil sharpener, which worked great for the fat crayons.
The pencil sharpener helped to create nice shavings that were an easy size to manage. However, due to the size of the pencil sharpener, it was really hard to shred up the smaller, skinnier crayons.
For those, I had to use a cheese grater. This took longer, hurt my hand more, and was generally more annoying. Plus you have to be super careful you don’t nick your hand, so I stopped shaving when I got close to the bottom.
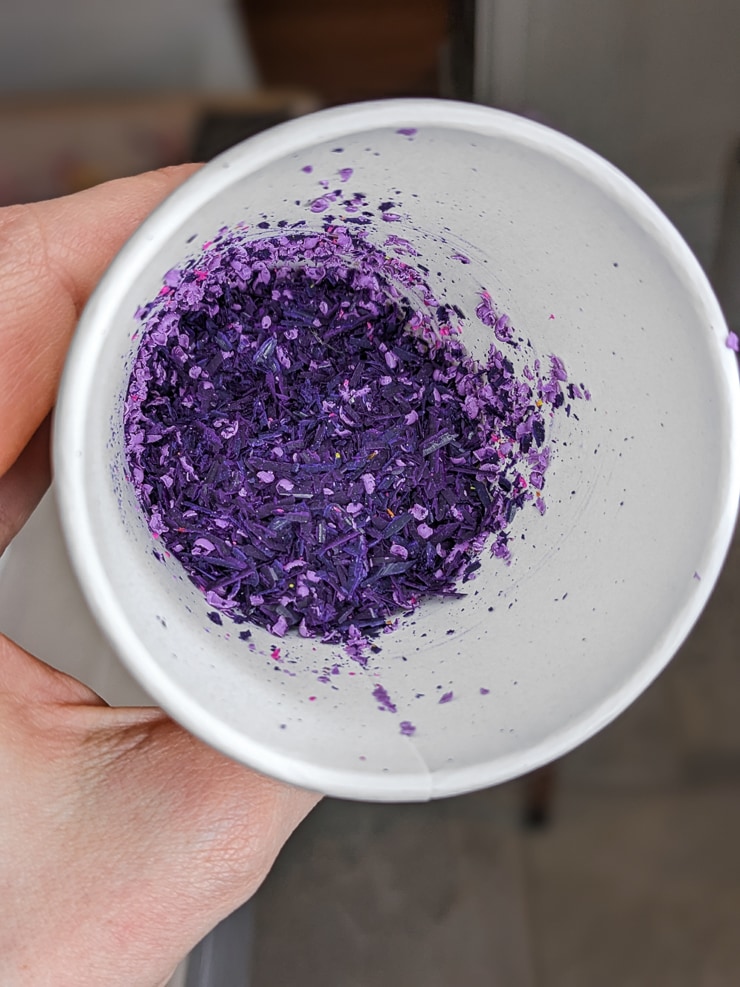
The cheese grater shavings were finer than the pencil sharpener ones. Both were totally fine for the project, though.


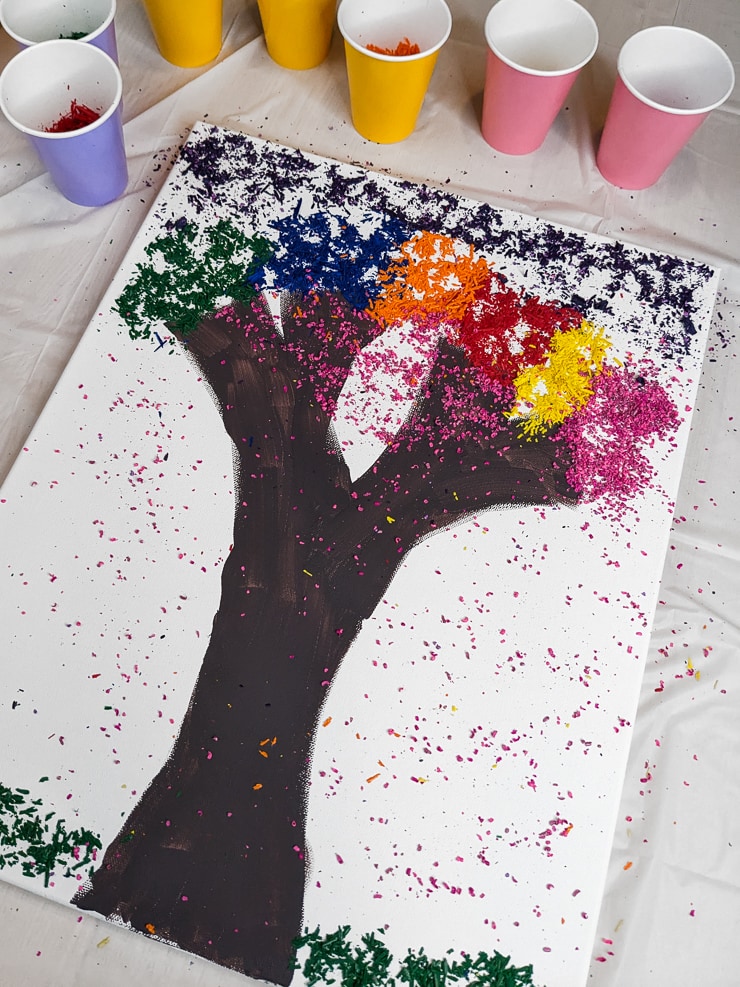
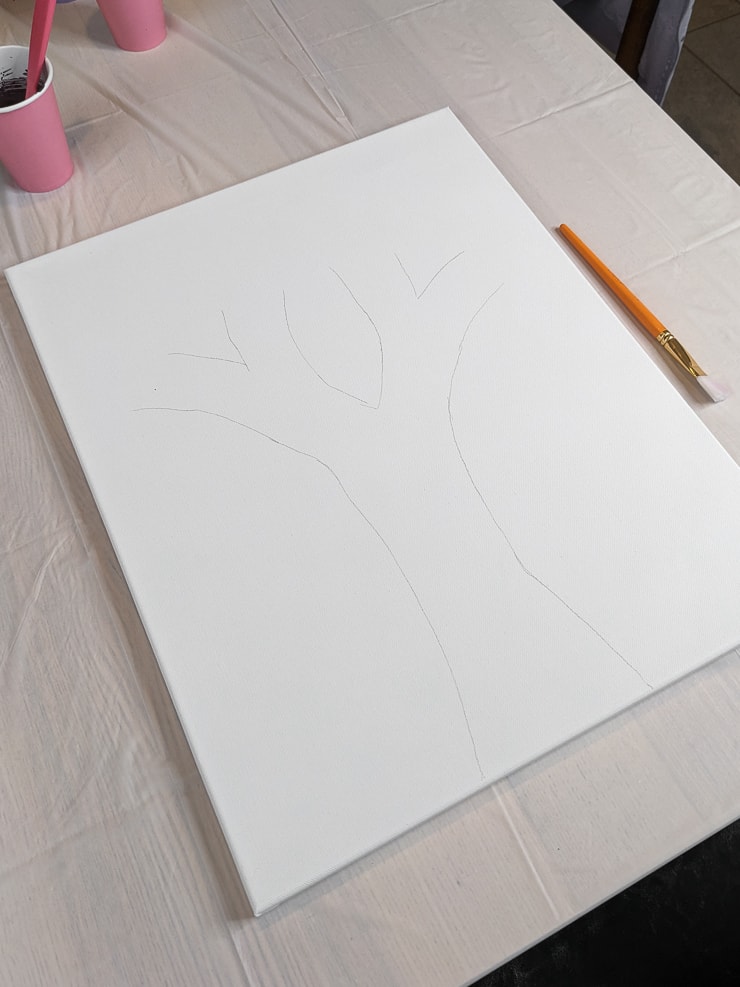
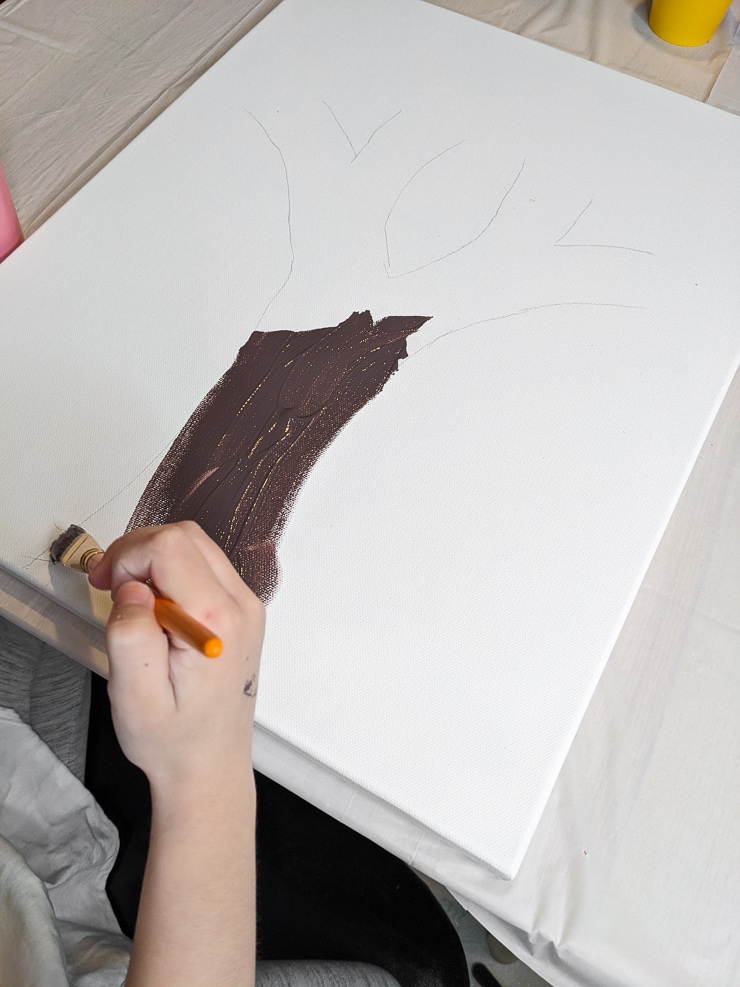
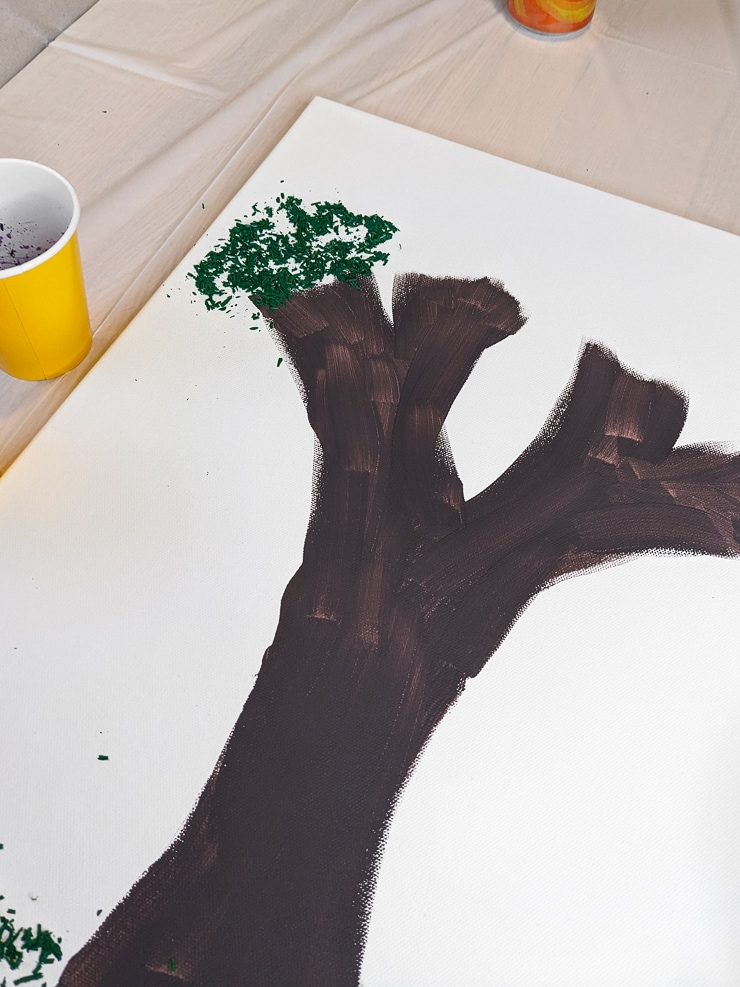
Step 2: Draw and paint outline of the tree
Next I started the project by drawing the outline of a tree. My daughter then painted this in using some brown paint. As a tip—if you’re painting the tree base and immediately melting crayons, you can speed up the tree base drying by using your hair dryer or heat gun.


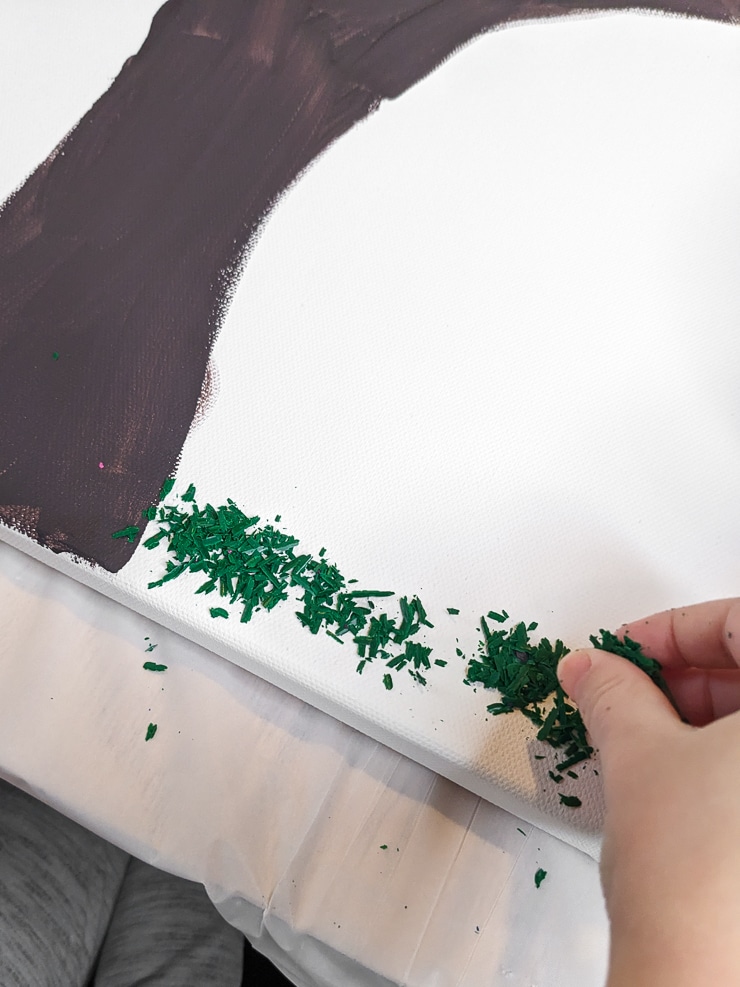
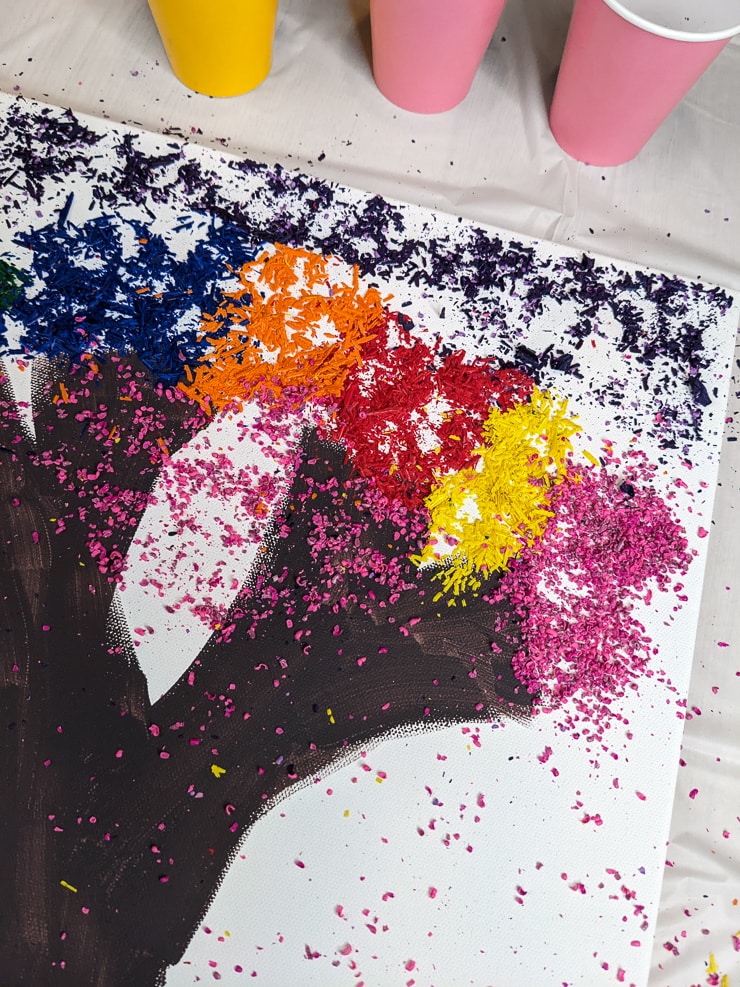
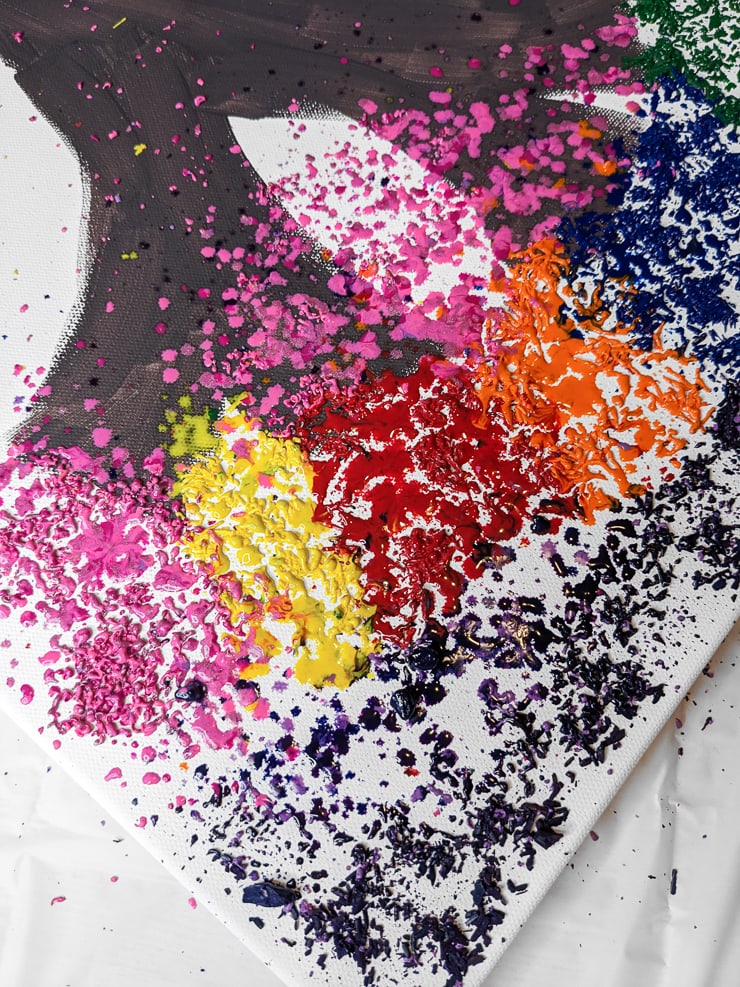
Step 3: Add crayon shavings to the canvas
Next it’s time to add the crayon shavings! I decided to let go of my type A control freak side and let my 5 year old take creative control. I did give some gentle suggestions and reminders to not sprinkle the crayons on too thick.
She also decided to add some pink “snow” in the space between the tree canopy and the grass. It ended up looking pretty cool 🙂


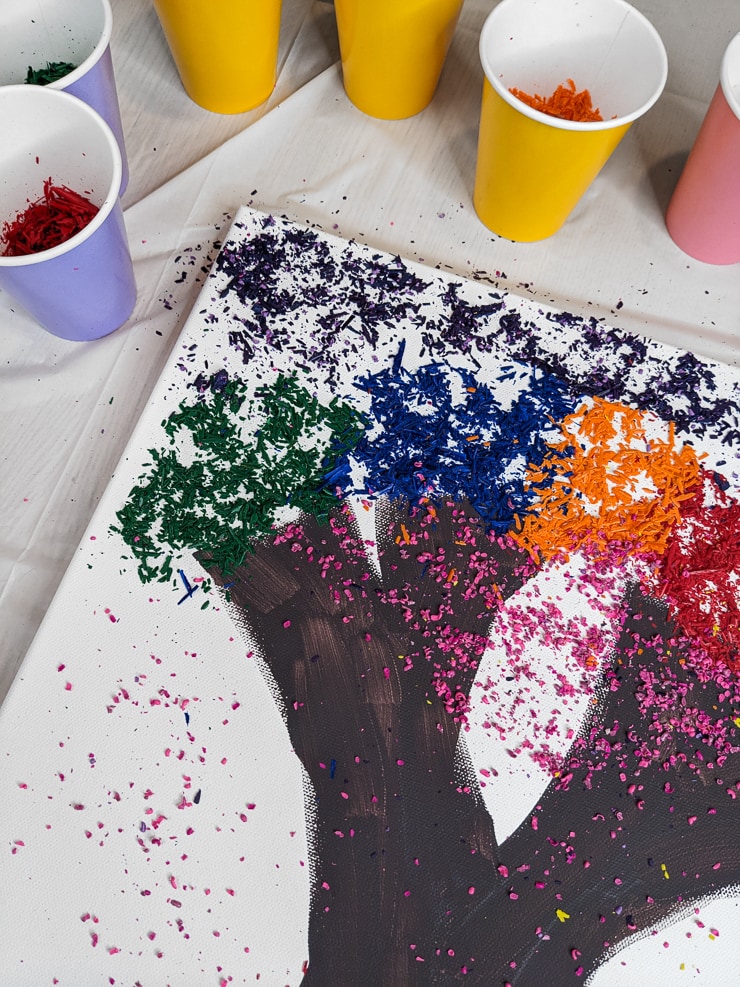


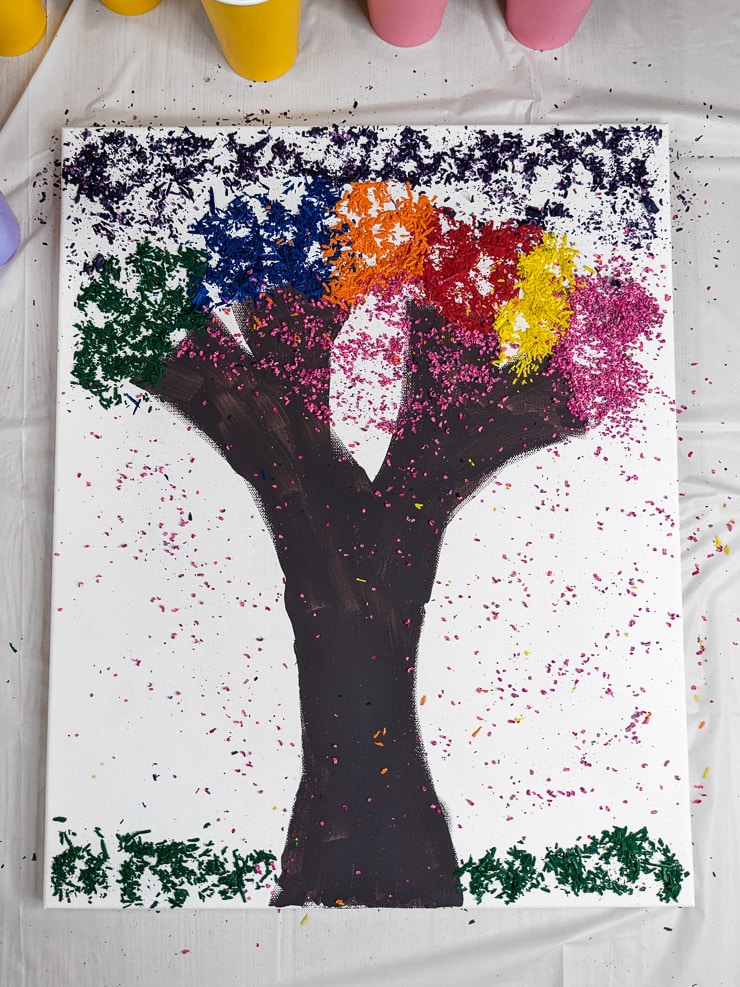


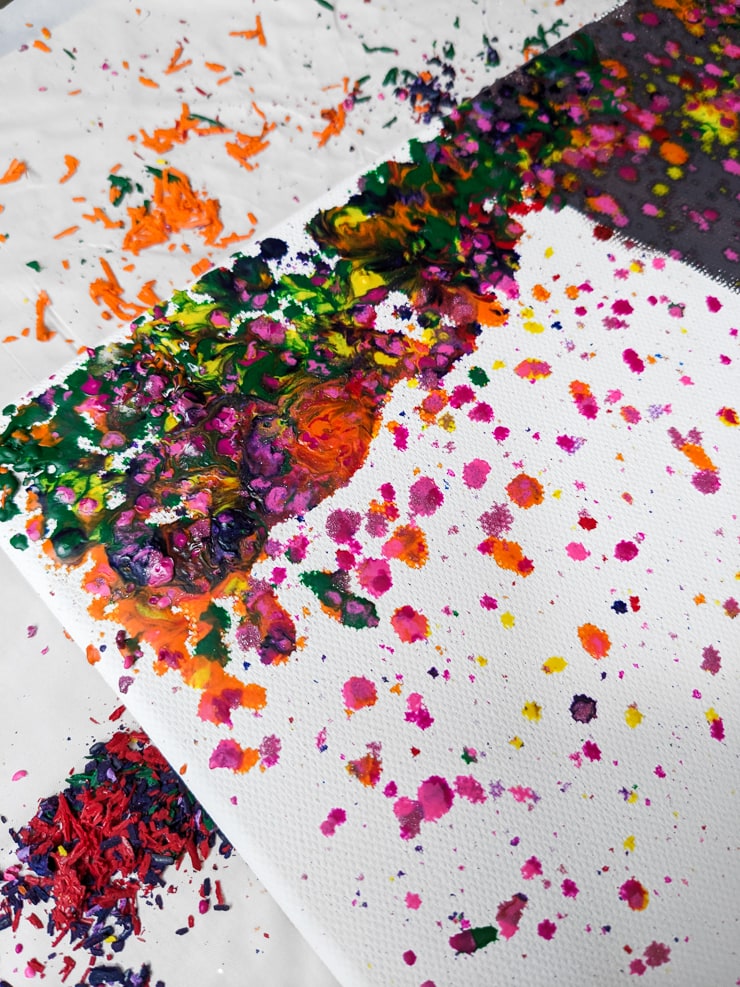
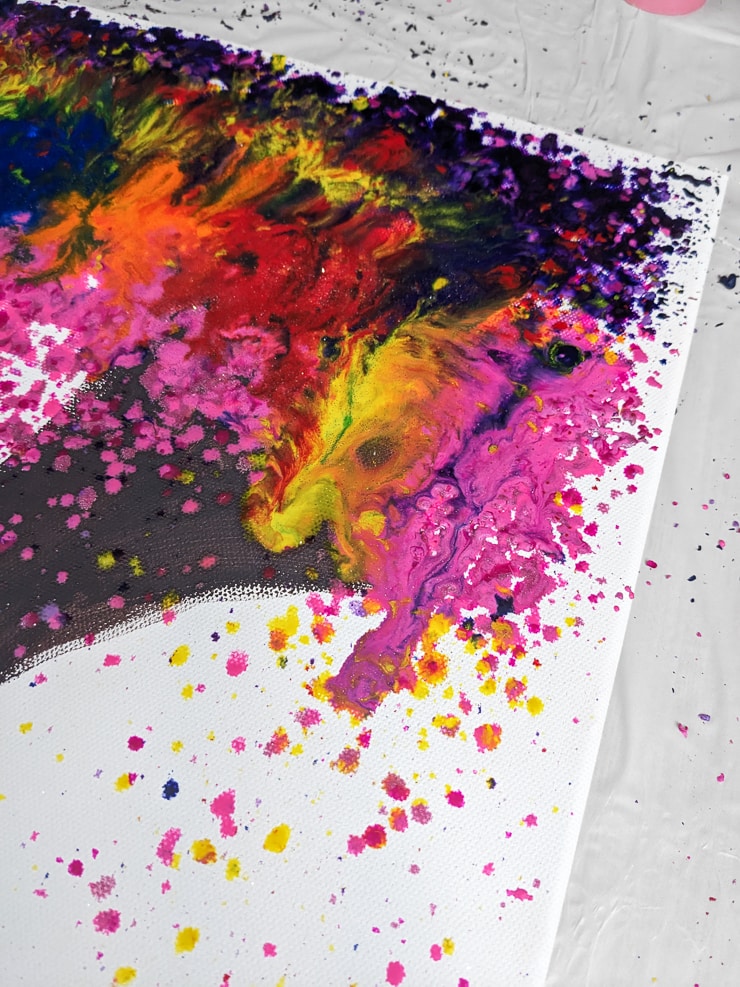
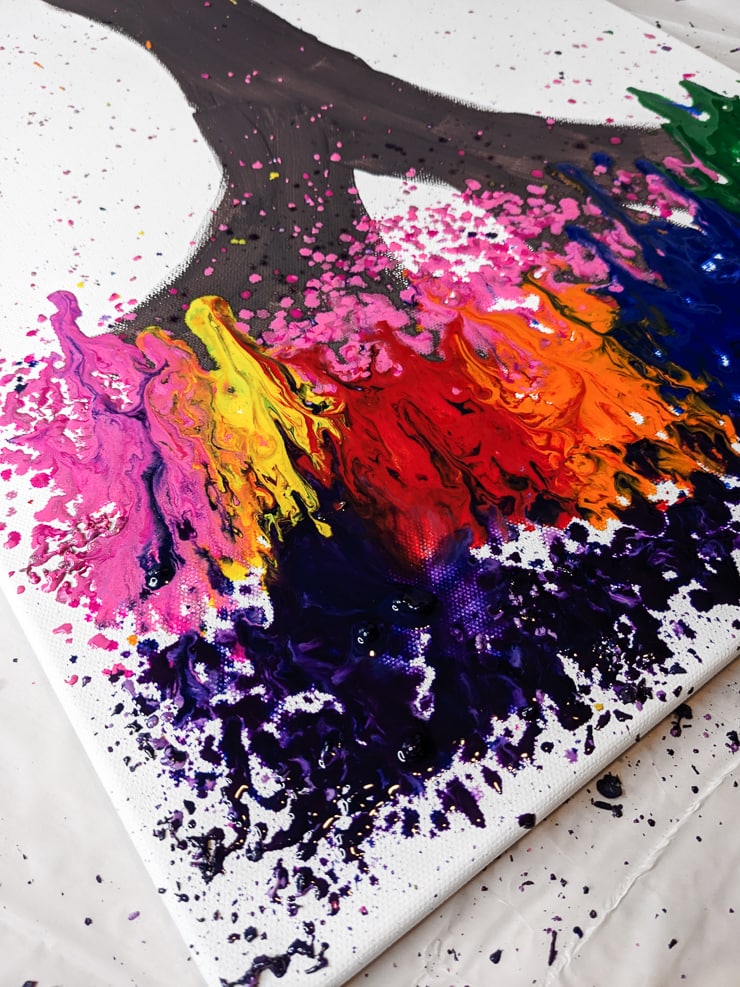
Step 4: Melt the crayons to make your art!
Next I had my daughter step aside, and I grabbed the heat gun. She loved watching this process. Using the heat gun made it much easier to control how much the crayon shavings blew around.
Make sure to start from far away, though. Especially if you’re using a hair dryer. You don’t want to blow the crayons everywhere. They are super hard to clean up.


How do you melt crayons to drip?
There are a lot of different methods you can use to get melted crayons to drip on canvas. Some people tape or glue crayons to the top of a canvas, stand it up, and use a heat gun or hair dryer to melt the crayons and let gravity do the rest.
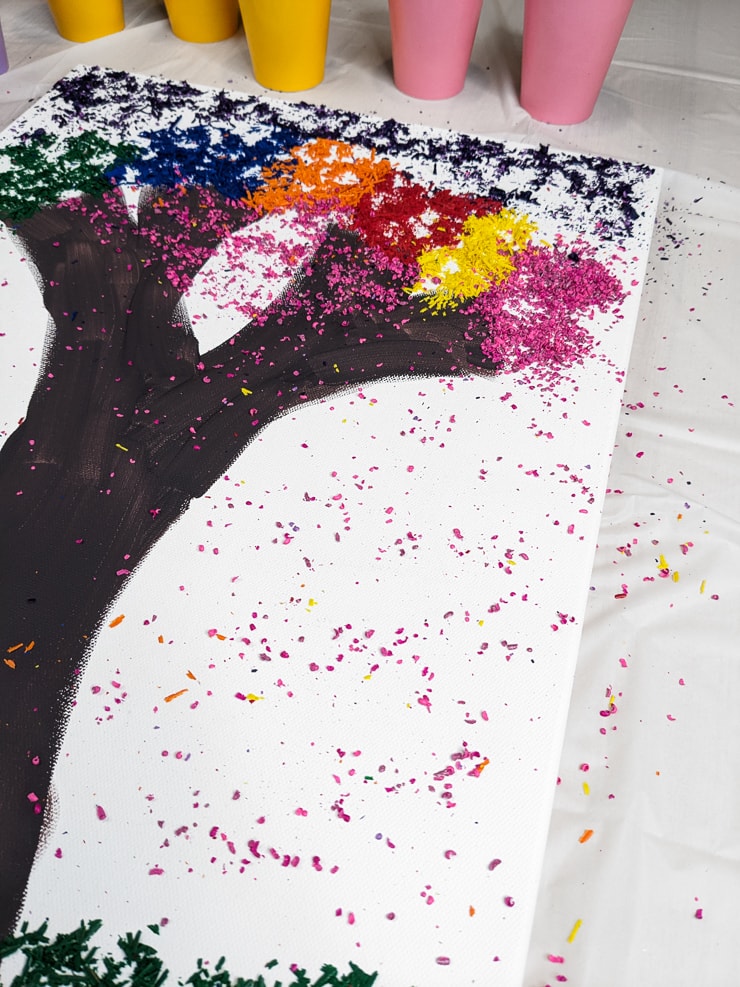
For this project, I melted the majority of the shavings in place. If I hadn’t gotten the melting process started, the pieces would have fallen as soon as I tipped the canvas.
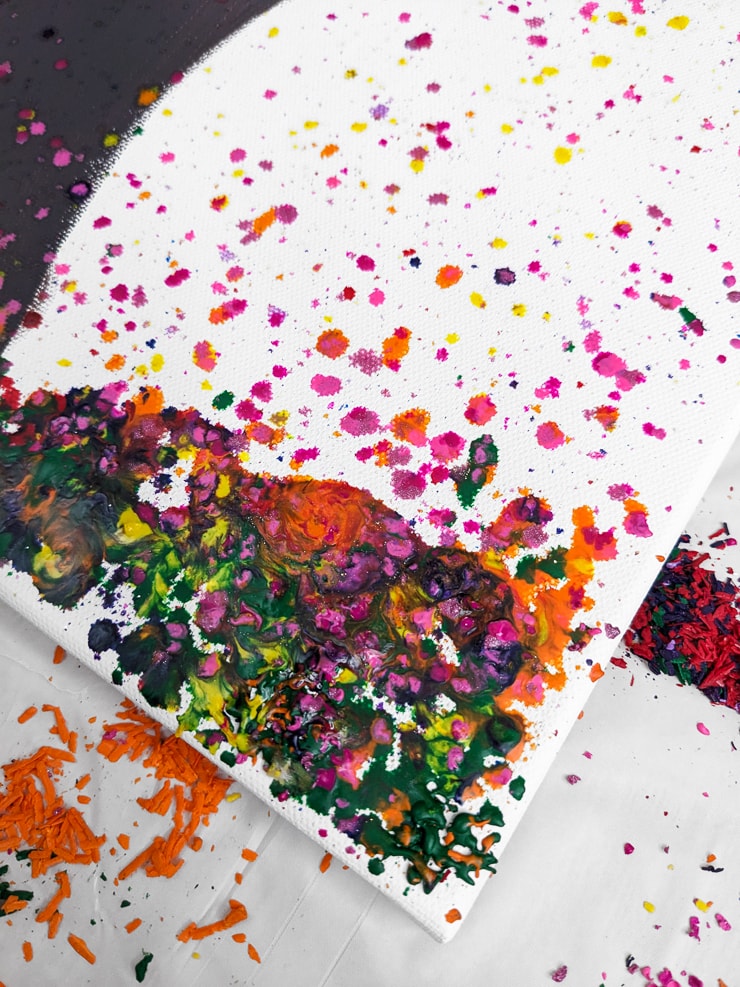
However, once I’d gotten most of the pieces melted, I had my daughter tip the canvas up and let the melted wax begin to drip. I wanted a cool drippy effect, but I didn’t want the colors to mix too much.
And then, because she’s 5, she wanted to add glitter. I ran into the closet to grab some fine light silver glitter and let her go to town. It’s kind of hard to see, but it’s a nice touch.
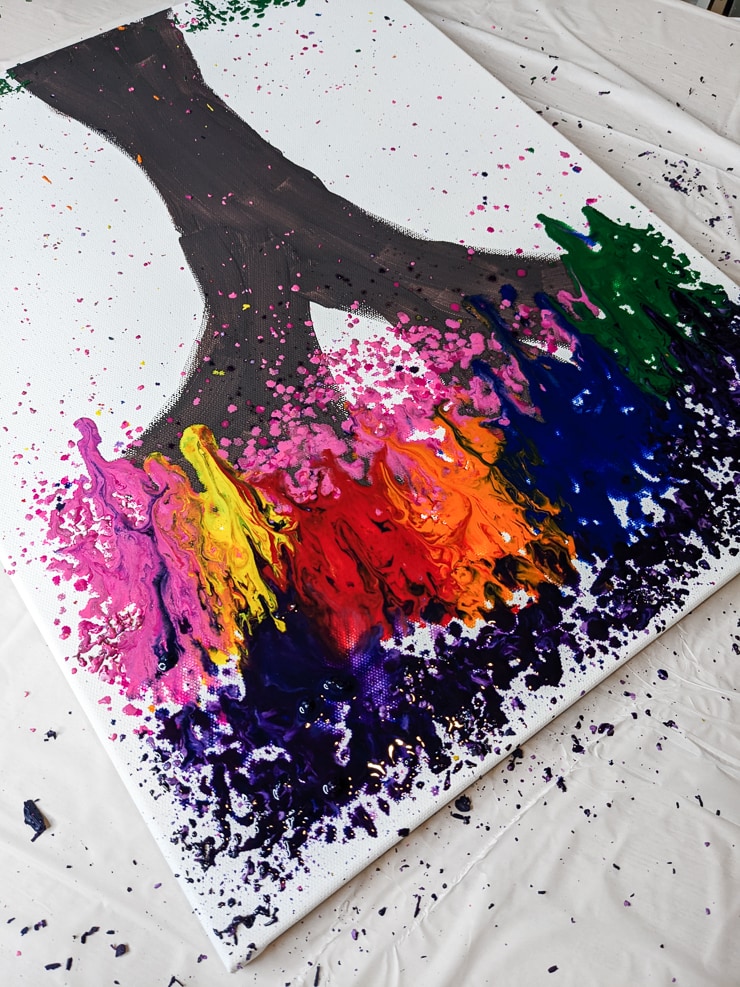


Step 5: Add family photos
And after all of the wax had dried, we cut out family photos and glued them on. My daughter at the bottom, then my husband and me above her. We only went as far as grandparents on both sides to keep things simple.
She was ECSTATIC with the tree! Obviously—it’s a rainbow glitter tree. And I loved trying my hand at melting crayons to help her make art. We didn’t use all of the shavings I worked so hard to make, either—so I am thinking we’ll make another piece sometime soon! 🙂
Like this? Check out my post about How to Splatter Paint With Kids, my tutorial on How to Paint a Rainbow Striped Wall, and my DIY Abstract Art for Kids Using Stencils!
Pin my melted crayon art tutorial!