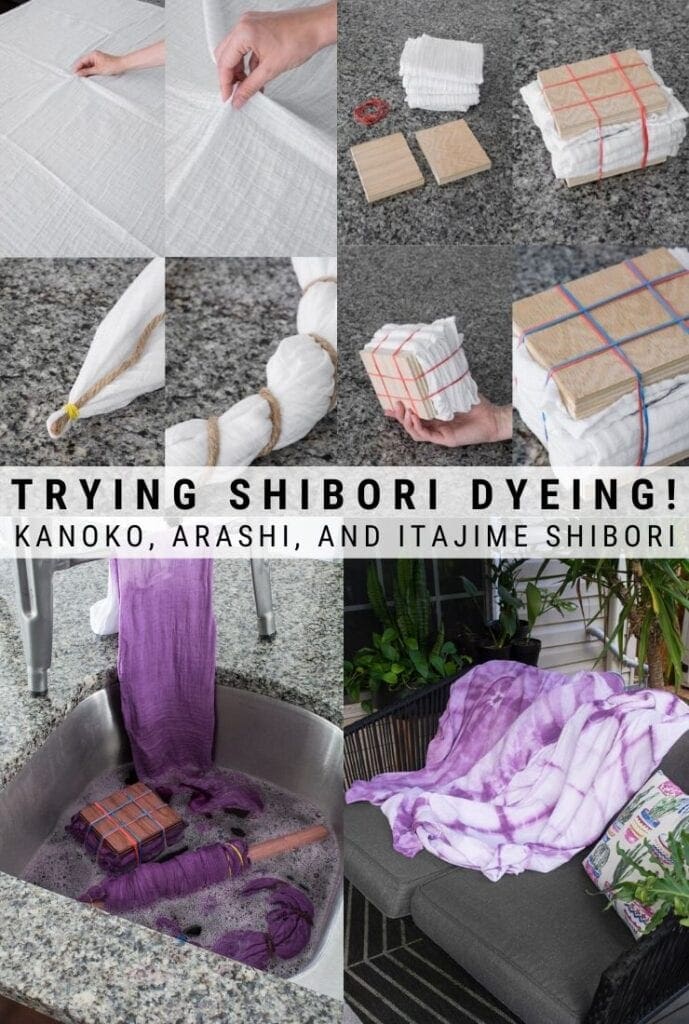
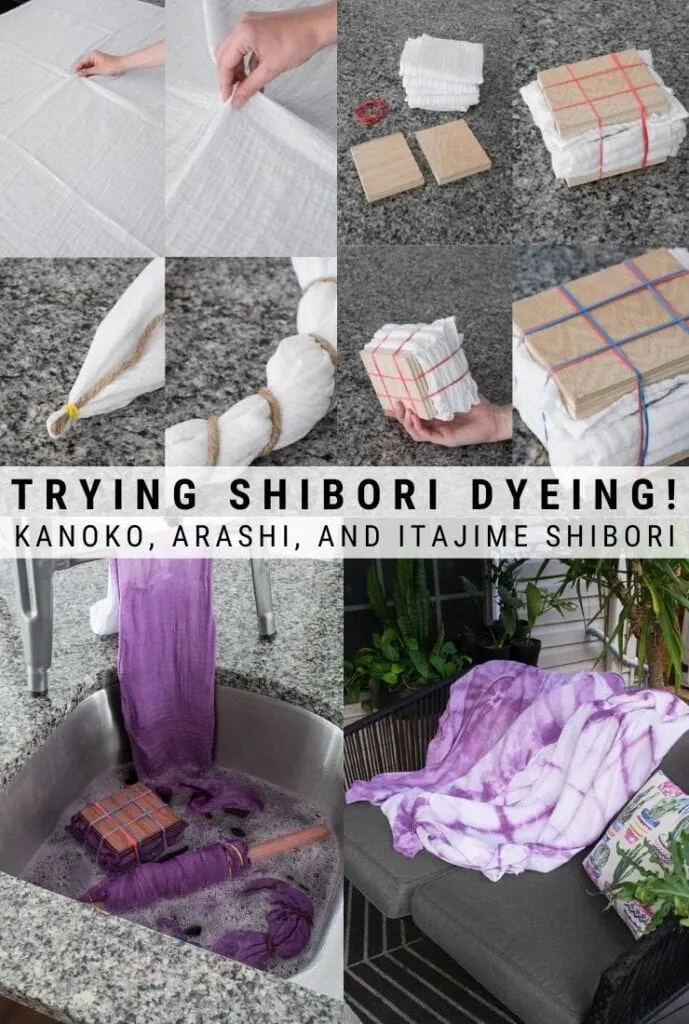
What is Shibori dyeing? I’m attempting the Kanoko, Arashi, and Itajime Shibori techniques from this beautiful traditional Japanese dyeing art.
Want to try Shibori? Learn from my mistakes with this tutorial!
I’ve had the instructions for this tutorial written for months and months. I often do that before I try something new so I can plan out what I’m doing and make sure I understand everything. But time has gotten away from me, and it’s just been sitting there in my Google Drive…waiting.
But it’s finally time! I am finally trying some Shibori dyeing techniques. I have wanted to try Shibori dyeing techniques for a while because they are so beautiful. I love trying new crafting and DIY techniques…and I’m really pleased with how I did with my first attempt at Shibori!
What is Shibori? Trying Kanoko, Arashi, & Itajime Shibori Techniques
So what is shibori? Shibori is a Japanese dyeing technique traditionally done using Indigo. Shibori originated during the early Edo period in Japan (1603 to 1868) when lower-class Japanese could not wear silk. It is a predecessor to tie-dyeing (obviously), but tie-dye did borrow some techniques from Shibori. You’ll notice these similarities in each of the tutorials.
Although Shibori is traditionally done using indigo (or dark blue) colors. I’m doing Earth tones on some cotton Muslin blankets to experiment. The indigo hues are gorgeous, but I’m feeling something a bit different for this tutorial.

Types of Shibori Techniques
There are six major Shibori techniques: Itajime, Arashi, Kanoko, Miura, Nui, and Kumo. I’m going to experiment with the first three in this post because they are the easiest.
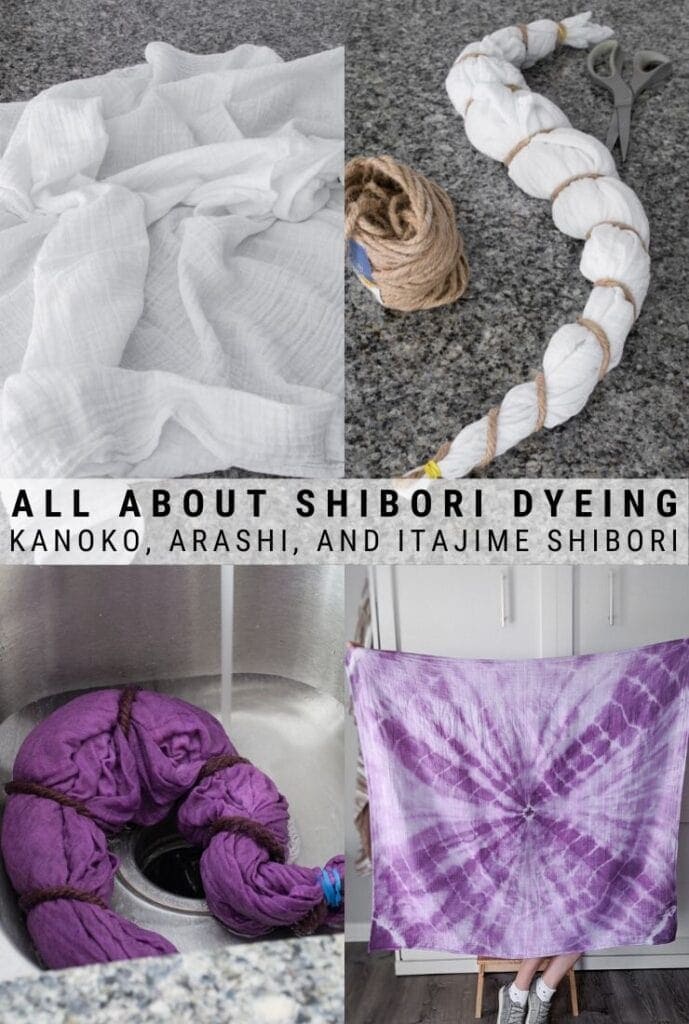
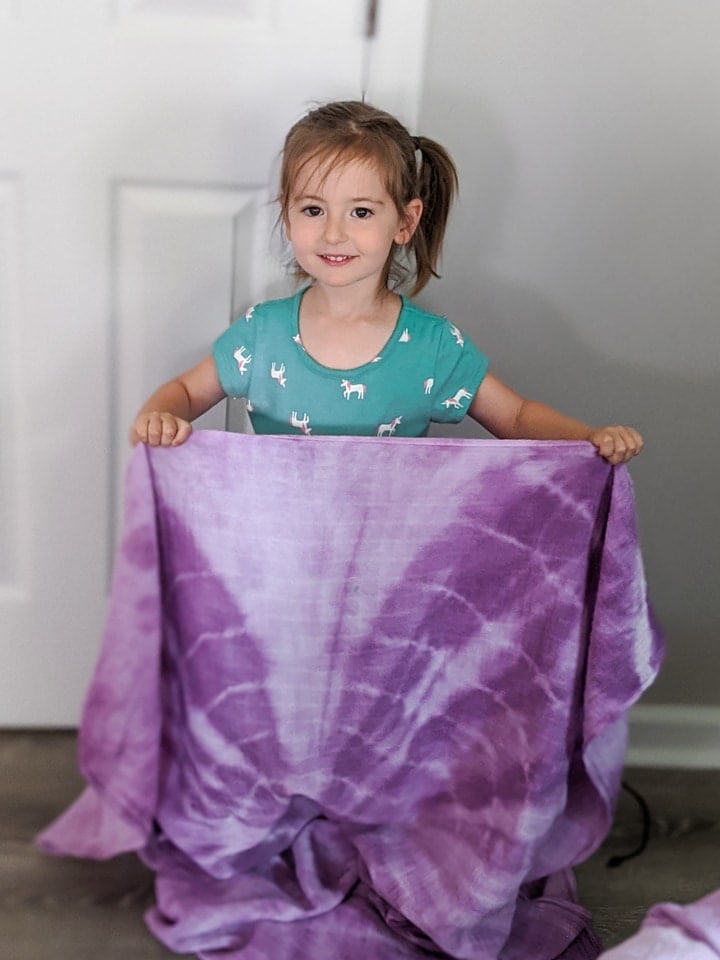
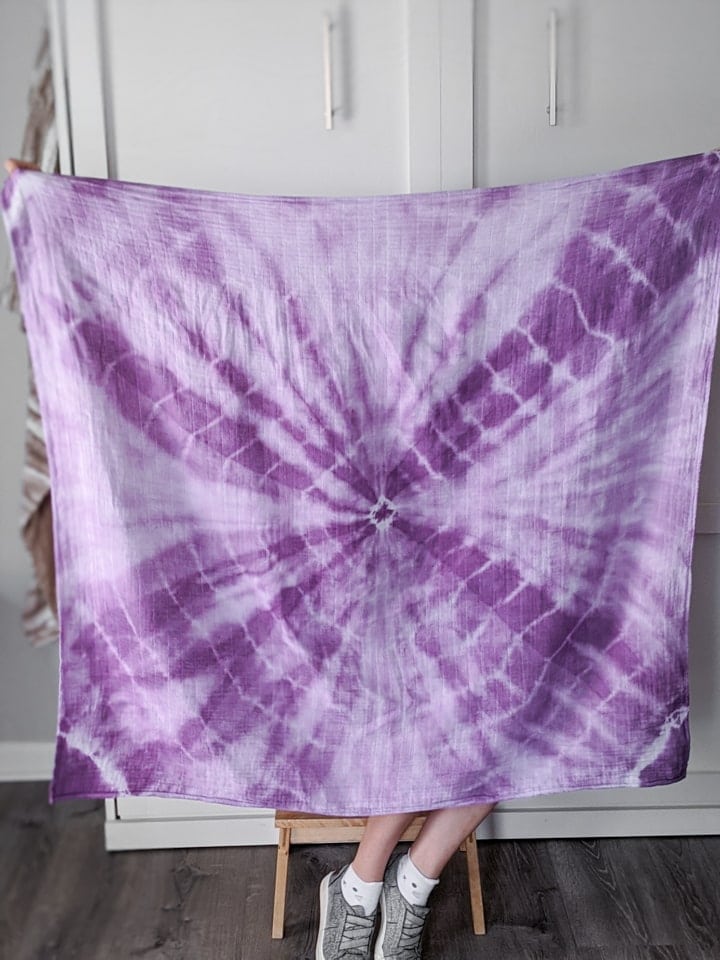
Kanoko is pretty similar to tie-dye because it is done by winding and twisting fabric and then binding it with string (or rubber bands) to block dye. The contrast between the blocked and dyed areas create beautiful swirl-like patterns.
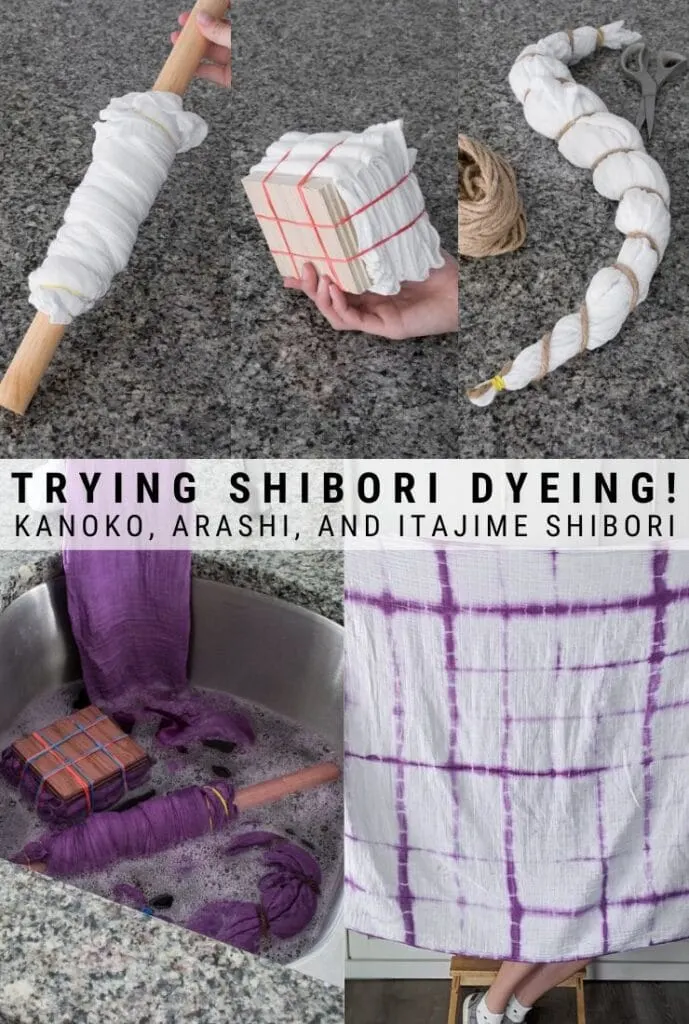
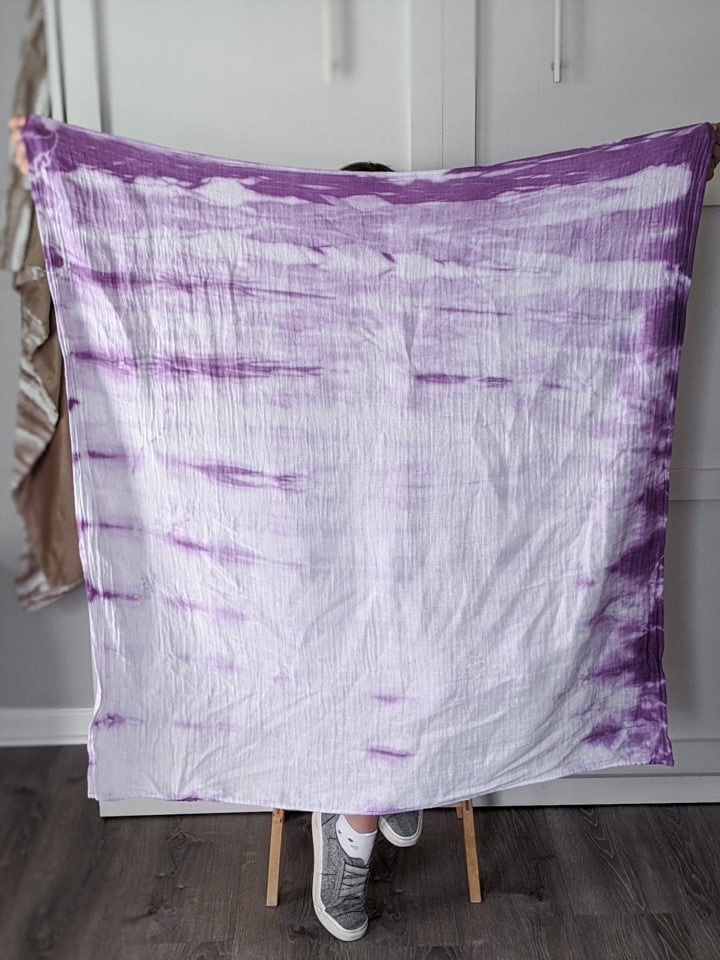
Arashi is done by twisting and wrapping fabric around a pole and then fixing it in place before dyeing. This approach creates a “storm-like” pattern when done with traditional indigo shades.
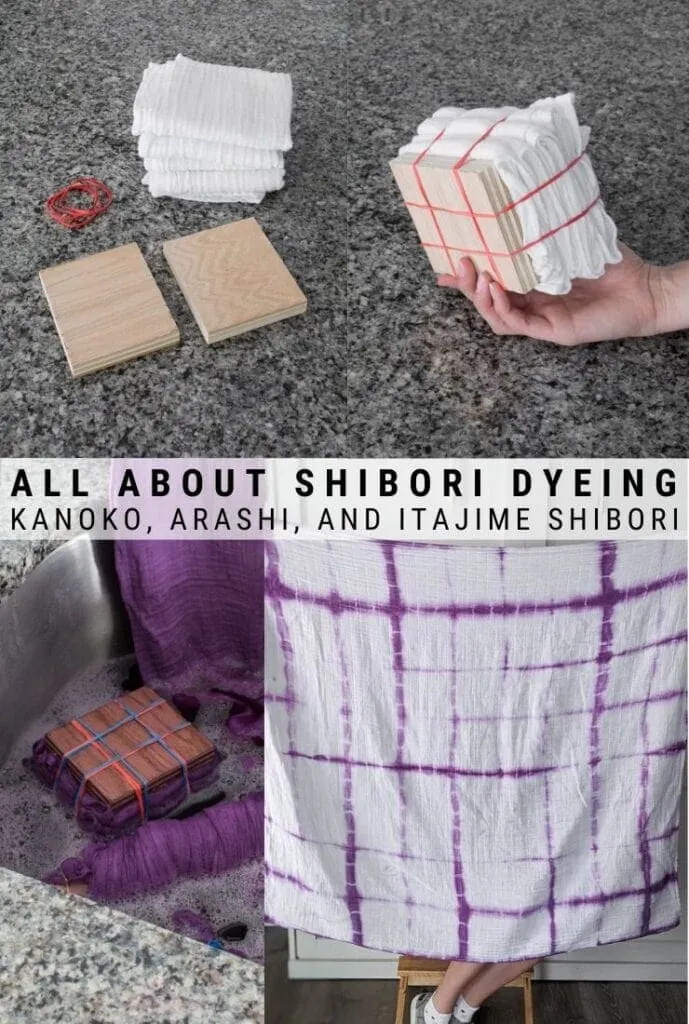
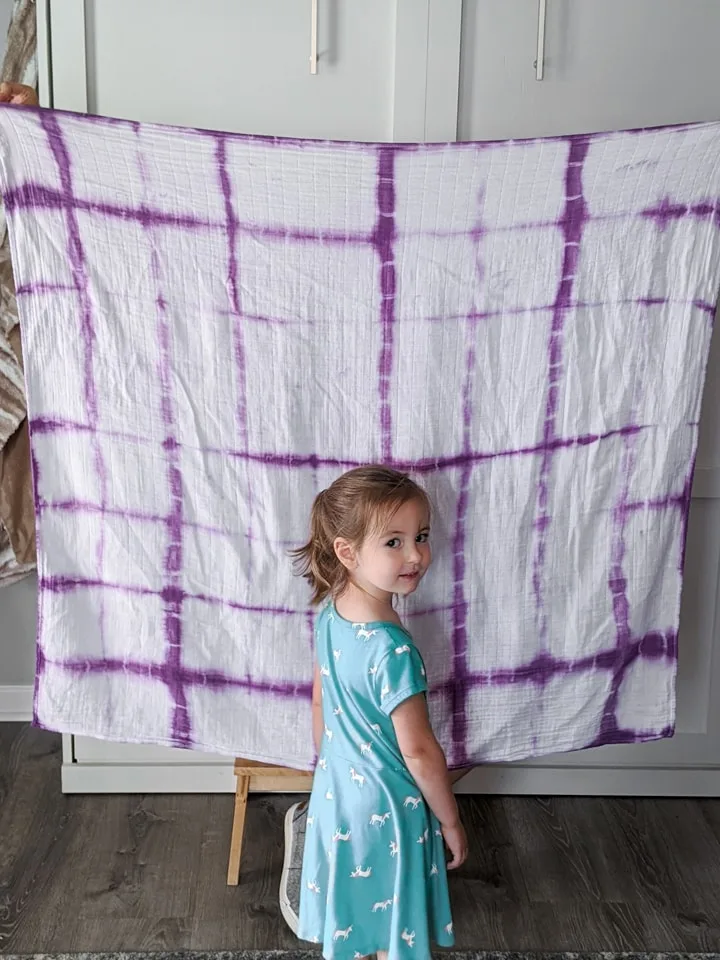
Itajime is done by sandwiching blockers—usually pieces of wood—on either side of a tightly folded piece of fabric. String or bands hold the blockers in place, and everything together creates an interesting repetitive square-ish pattern.

Here’s what you’ll need no matter which technique you use:
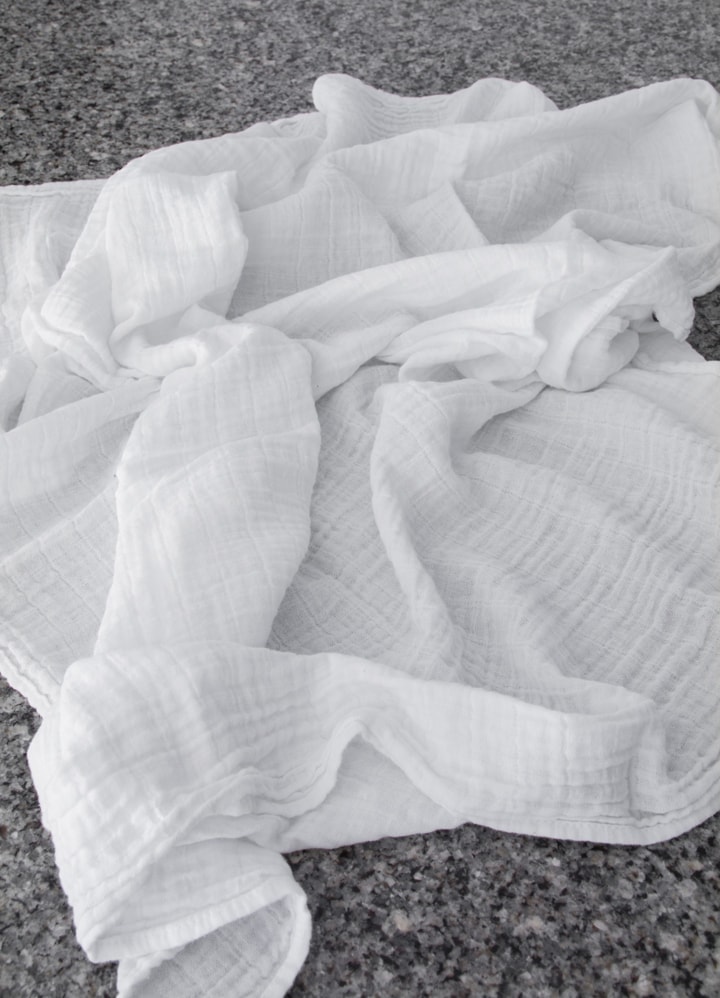
- Plain white cotton muslin blankets
- Rit All-Purpose Dye (I used Fuchsia and Purple mixed)
- Rubber bands
- Salt (If you’re dyeing nylon, silk, or wool, use vinegar. Salt is for cotton, rayon, ramie, or linen.)
- Stainless steel sink or plastic container
- Hot water (ideally 140 degrees Fahrenheit)
- Dishwashing liquid
- Measuring cups and spoons
- Plastic gloves
- Workspace protection
- Paper towels—good to have on hand just in case

And here’s my attempt at the Kanoko, Arashi, & Itajime Shibori Techniques!
Note: Before getting started, try to remove any stains from your blanket. If your blankets are new, they should not have any stains. Then prewash the item to remove anything the blanket might have been treated with. Treatments could interfere with the dyeing process.
Shibori Dyeing Techniques: Kanoko Technique
Note: In addition to the supplies listed above, you’ll need twine to complete the Kanoko Shibori dyeing technique.
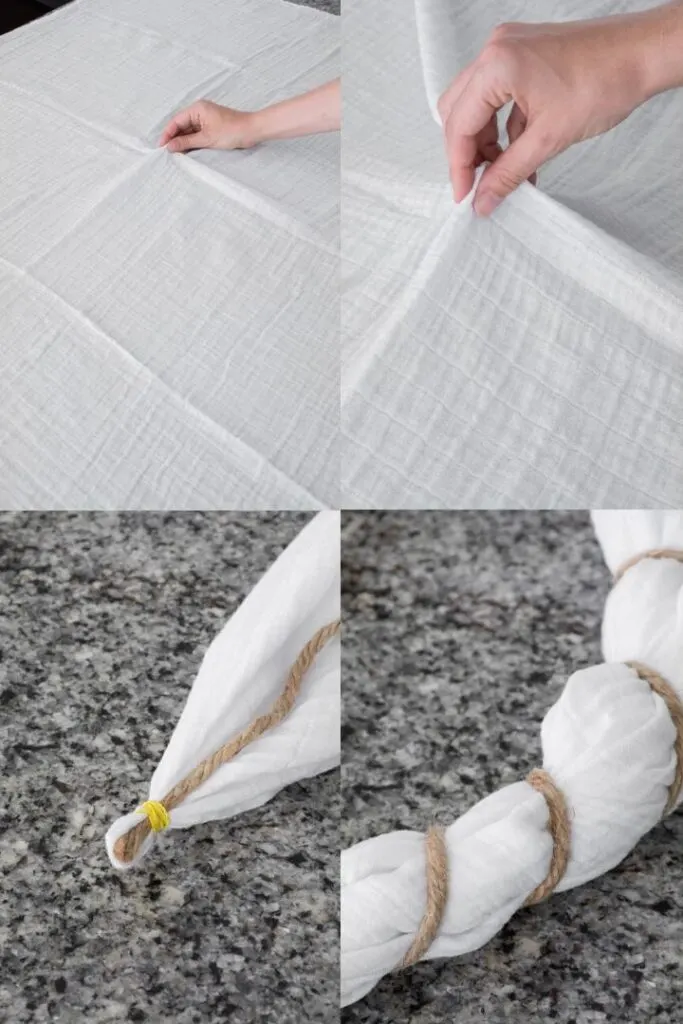
Step 1: Prep blanket with twine
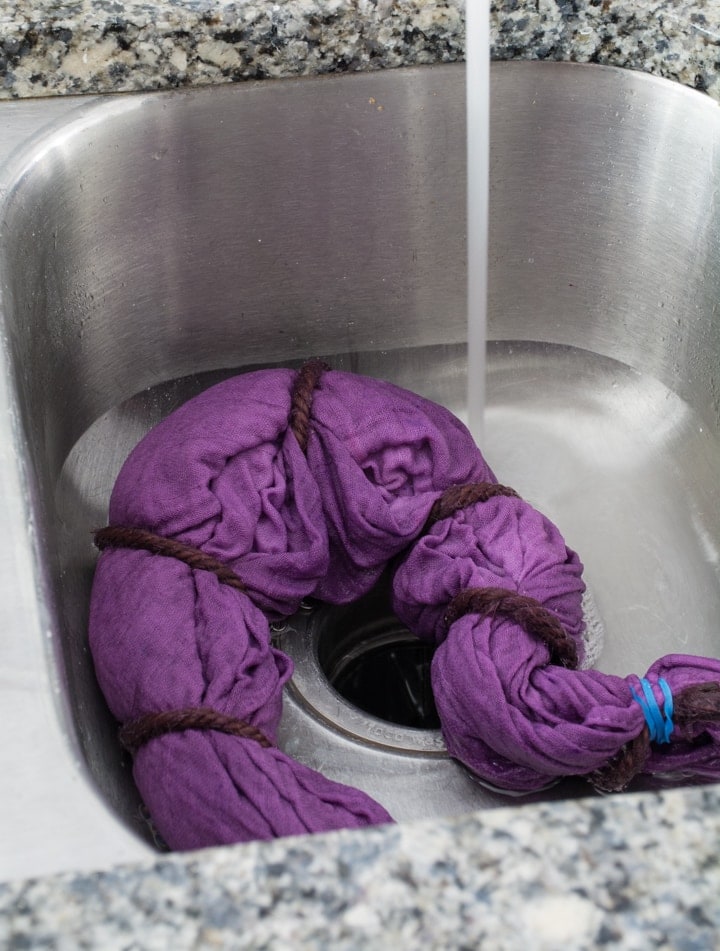
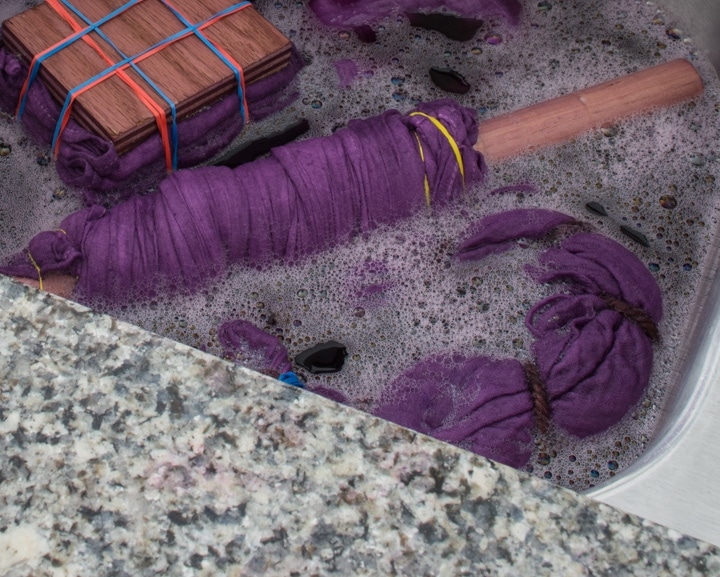
Wet your muslin blanket. Then spread it out over your work surface. Find the center, pinch the fabric, and pull it up in the air. Secure the pinched area using a rubber band.
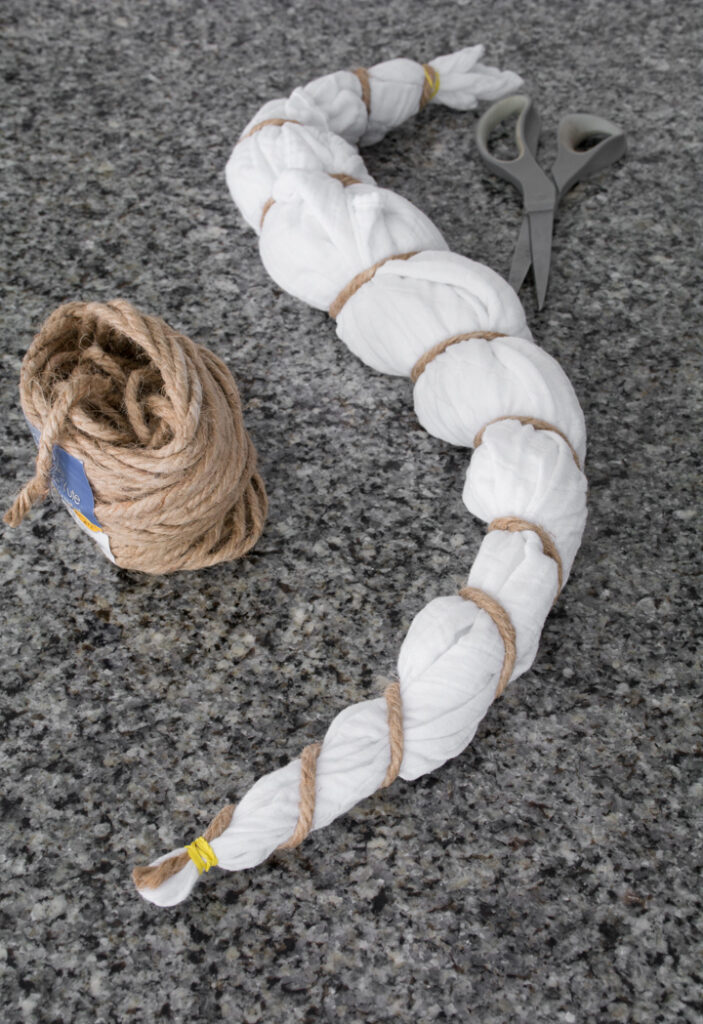
Cut a long piece of twine and secure one end in place under the rubber band. Wrap the twine around the blanket from top to bottom, binding the blanket tightly as you wind. At the bottom of the blanket, secure the twine in place with another small rubber band.
I used jute/sisal rope because that’s what I had, but it’s thicker, so that meant I couldn’t get a super tight bind on the blanket. I would recommend using a thiner rope if you want to get a tighter bind, therefore leaving you with a higher contrast and more white space.

Step 2: Prep Dye Bath
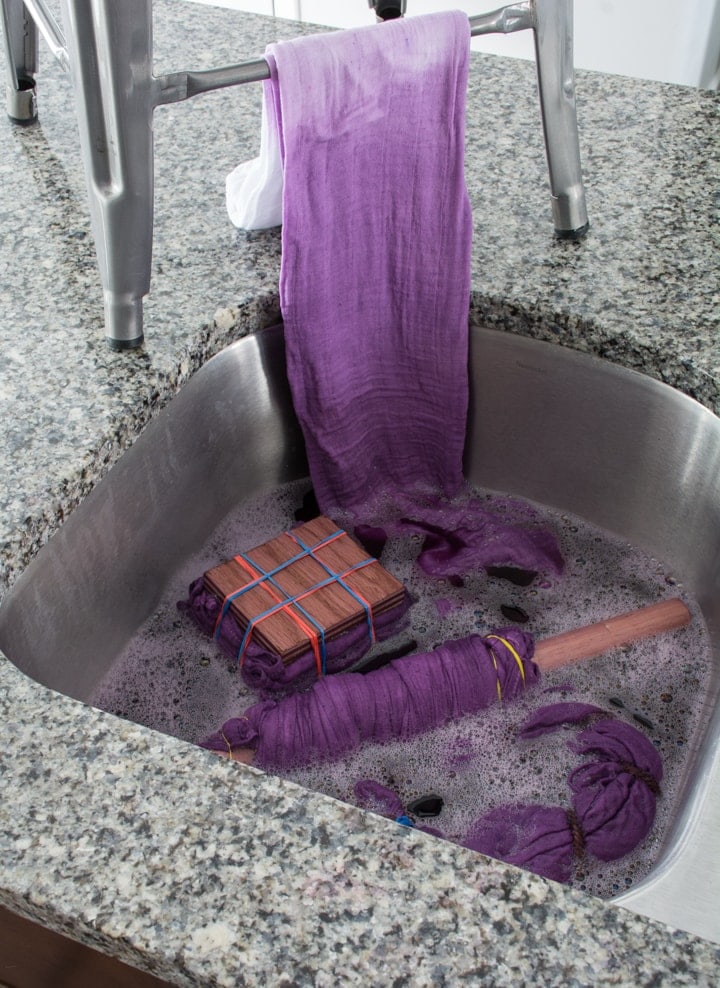
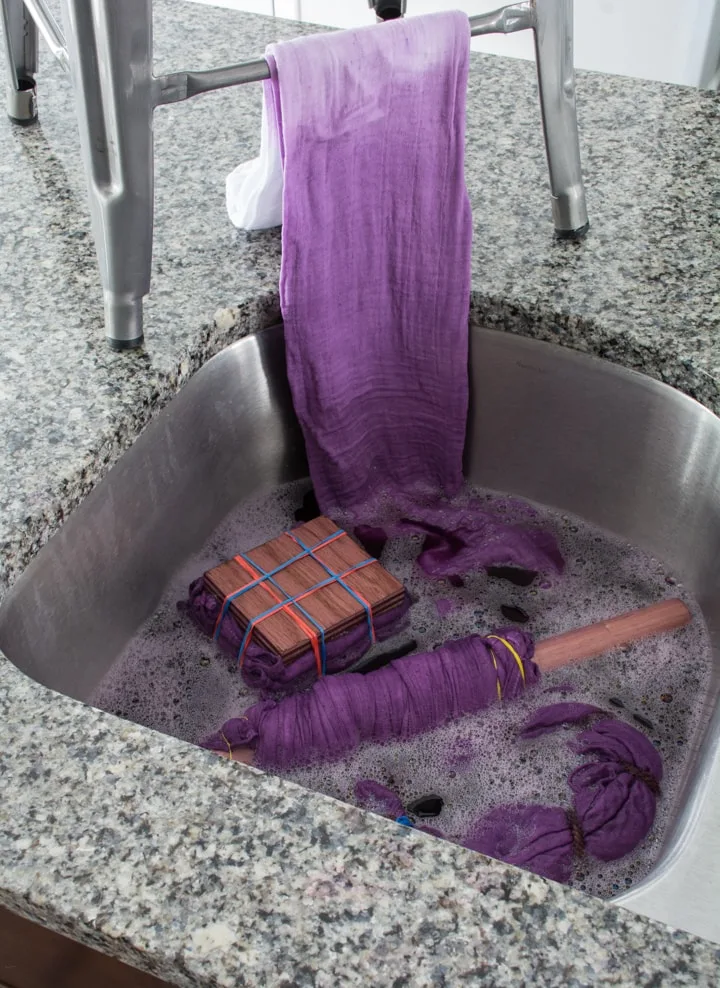
Fill a plastic container or stainless steel sink with an amount of hot water (ideally 140 degrees Fahrenheit) appropriate for the amount of dye you’re using. See your container for instructions. You can also check out Rit’s website.
To enhance your color and encourage even dyeing, add one cup of salt and one teaspoon of dish soap. Stir to mix and dissolve everything. Then put on gloves and add the appropriate amount of dye. Stir to mix.

Step 3: Dye Blanket!
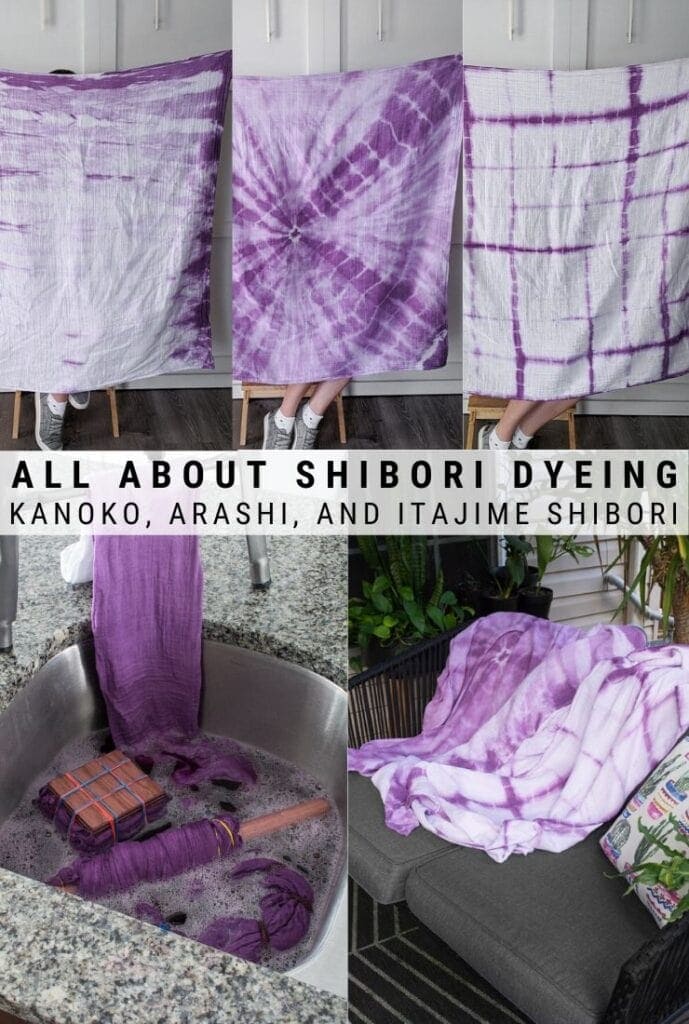
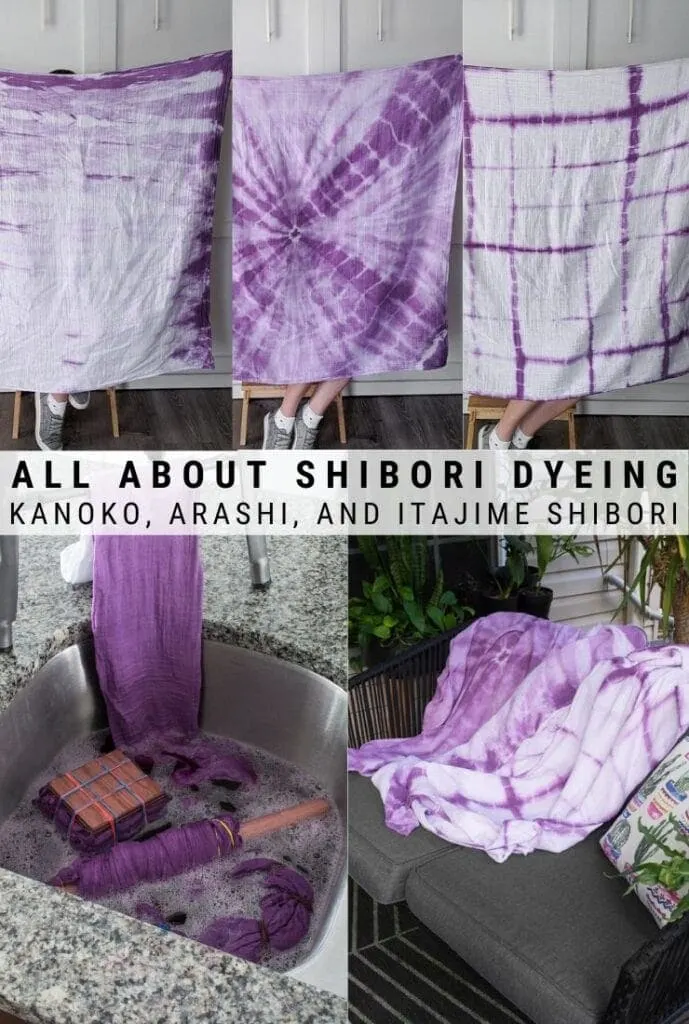
Now it’s time to dye the first blanket! Add your wrapped blanket to the dye bath. Keep it in for no more than 5 minutes if you’d like to keep the “blocked” parts white. For more blending, leave the blanket in the dye bath for up to 20-30 minutes.
The longer the blanket sits in the bath, the more the dye will begin to permeate the blocked areas. When you’re done dyeing, remove the blanket but keep the twine on and set the blanket aside.

Step 4: Rinse, Reveal, and Wash
Rinse the bound blanket in cold water until it runs completely clear. I like using the sink for this. Remove the twine to reveal your dyed Kanoko Shibori pattern! Wash your dyed blanket in water with a mild detergent and dry.
Shibori Folding Techniques: Arashi Shibori
Note: In addition to the supplies at the beginning of this post, you’ll need some sort of pole. You can use a wooden dowel, a pipe (PVC is cheapest), an old thicker curtain rod…whatever you can get your hands on.
Want more dyeing projects? Check out my dyed and personalized kids aprons, my ice dye reusable napkin tutorial, how to dye a rug black, and how to refresh old black clothes using dye.
Step 1: Prep blanket and pole
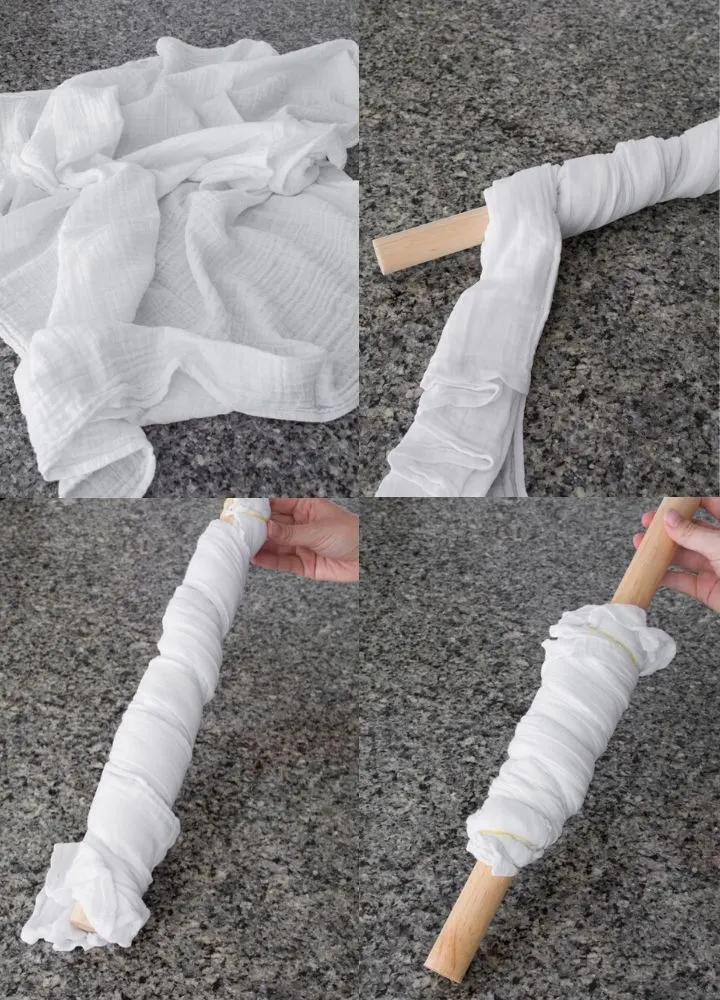
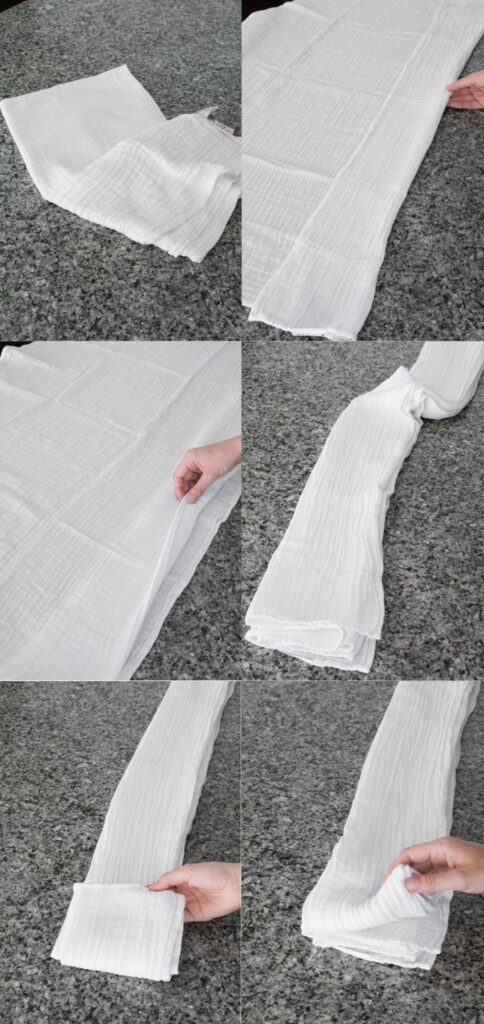
To achieve the Arashi Shibori technique, begin by wetting your muslin blanket and lay it out on your workspace. Then fold the fabric lengthwise in an accordion style. Each fold should be about 3 to 4 inches. Don’t overthink this—it doesn’t need to be precise.
When you’re done folding, use a rubber band to secure the top of your folded blanket to your pole. Then wrap the blanket really tightly around the pole. Do not overlap when wrapping. Secure the bottom of the blanket with a rubber band as well. Then use your hands to push the secured bottom end up, scrunching everything up.
I scrunched mine up really tight, and it blocked off a lot of the blanket. This left me with a lot of white space when I was done dyeing. So keep that in mind—the tighter the scrunch, the more white space and higher contrast you’ll have.

Step 2: Prep Dye Bath
Fill a plastic container or stainless steel sink with an amount of hot water (ideally 140 degrees Fahrenheit) appropriate for the amount of dye you’re using. To enhance color and encourage even dyeing, add one cup of salt and one teaspoon of dish soap. Then put on gloves and stir in the appropriate amount of dye.
Step 3: Dye Blanket!
Blanket dyeing time again! Since you scrunched the blanket up, it should be able to fit in your dye bath. If it is still too big or is a weird angle, you can use a cup to pour dye over the fabric. Same as before—5-10 minutes will be a higher contrast pattern. Up to 30 minutes will increase dye bleed into the blocked white areas.

Step 4: Rinse, Reveal, and Wash
Rinse the blanket while still on the pole in cold water. Once the water is running clear, gently remove the blanket from the pole. Wash in mild detergent and dry. Admire your beautiful Arashi Shibori patterned blanket!
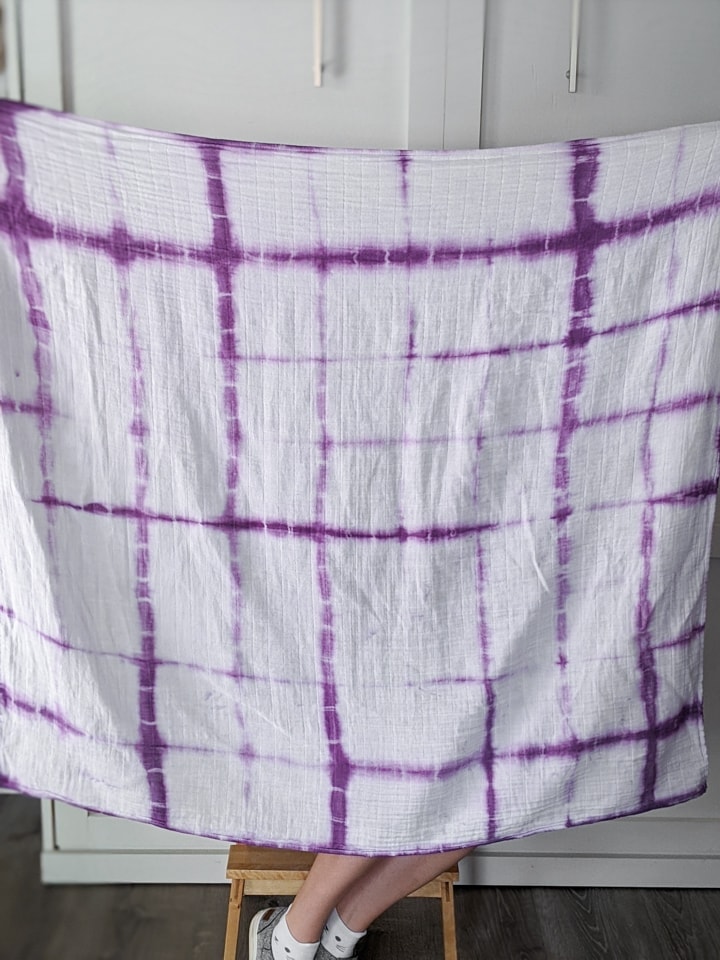
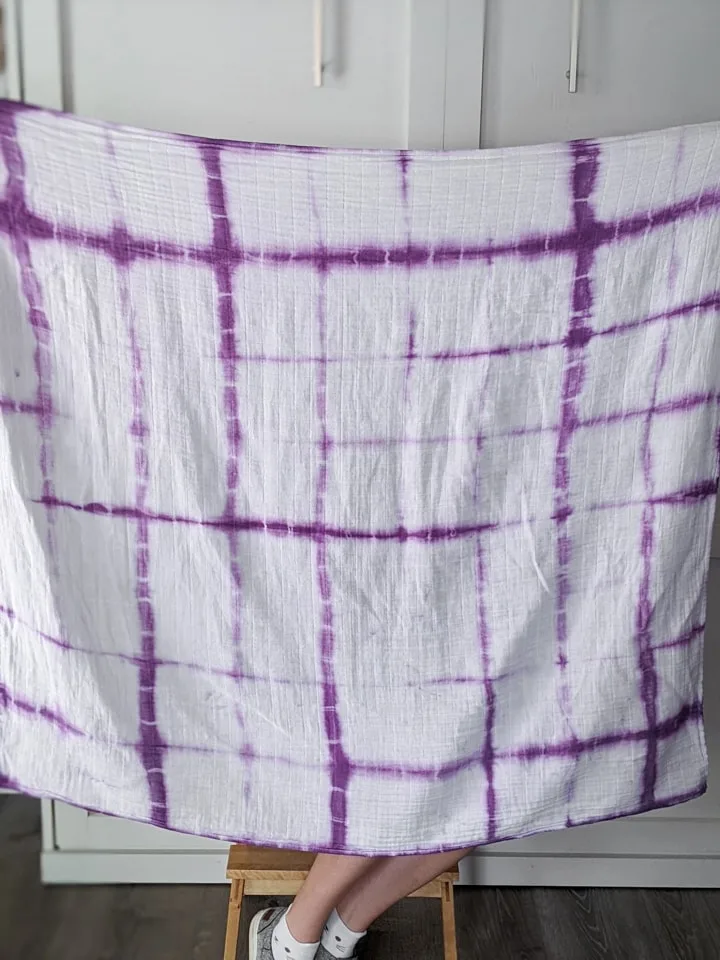
Geometric Tie-Dye Patterns: Itajime Shibori
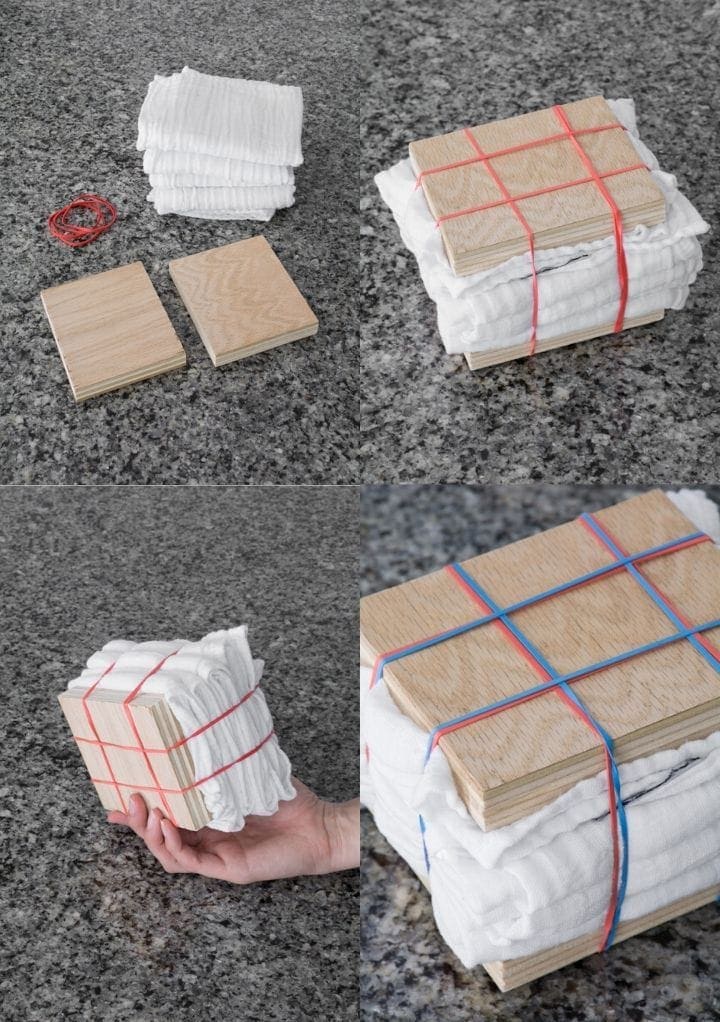
Note: In addition to the supplies list at the beginning of this post, you’ll need two 4-inch pieces of wood to complete the Itajime Shibori technique.
Step 1: Prep blanket
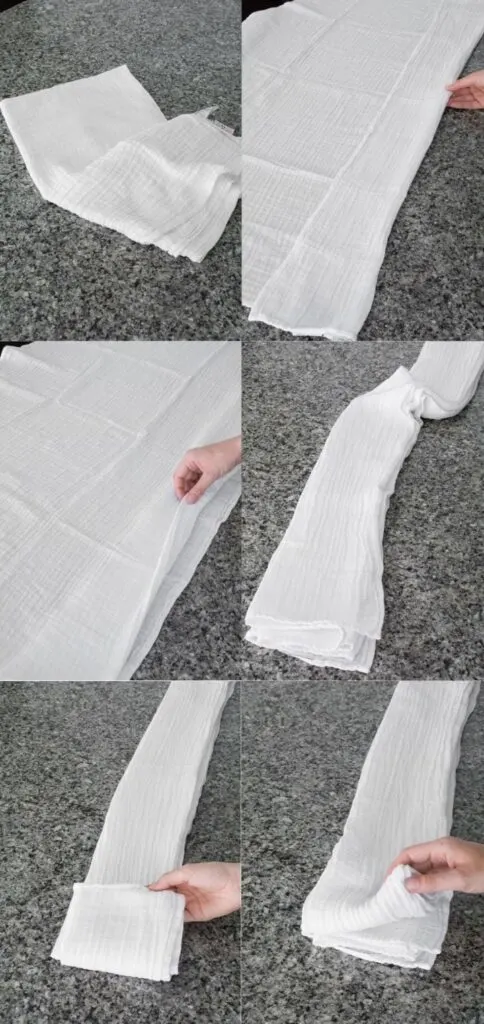
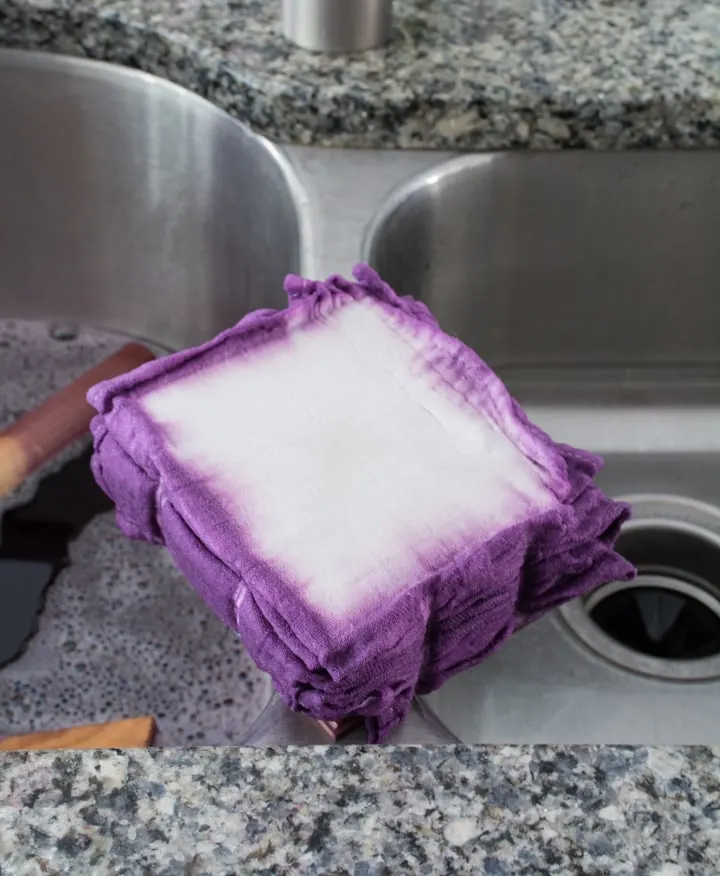
Wet your muslin blanket and lay it out on your workspace. Creating the Itajime pattern is a bit more involved than the Kanoko and Arashi techniques, but it’s not difficult. First, fold the blanket just as you did in the Arashi tutorial: a fan-style fold lengthwise.
You can switch up the width of your folds to get more pattern variation, or you can stick to one uniform width for all of the folds. That’s what I’m going with. Then fan fold again width-wise until you have a square of fabric.
Step 2: Sandwich the blanket between blockers
If you’re into woodworking at all, you probably have scrap wood laying around that you can use. The size of the wood blockers should be the size of your folded square. Use rubber bands to sandwich the folded blanket between the two wood blockers.
Everything should be reasonably tight. Keep in mind that the tighter the sandwich, the more contrast you’ll have and more white space. Mine was pretty tight, and I’m happy with the result. Just keep that in mind.

What to use for Shibori Resist Shapes
If you aren’t into woodworking and don’t have any scrap wood lying around, here are a few ideas for where to get two wood blockers:
- Check out the pre-cut unfinished wood area at your local craft store. They might have something roughly the size you need.
- Visit the trim and moldings section of your local hardware store. They probably have some sort of decorative wood piece that is roughly the size you can use.
- If all else fails, you can grab some binder clips and try this contemporary take on Itajime Shibori.
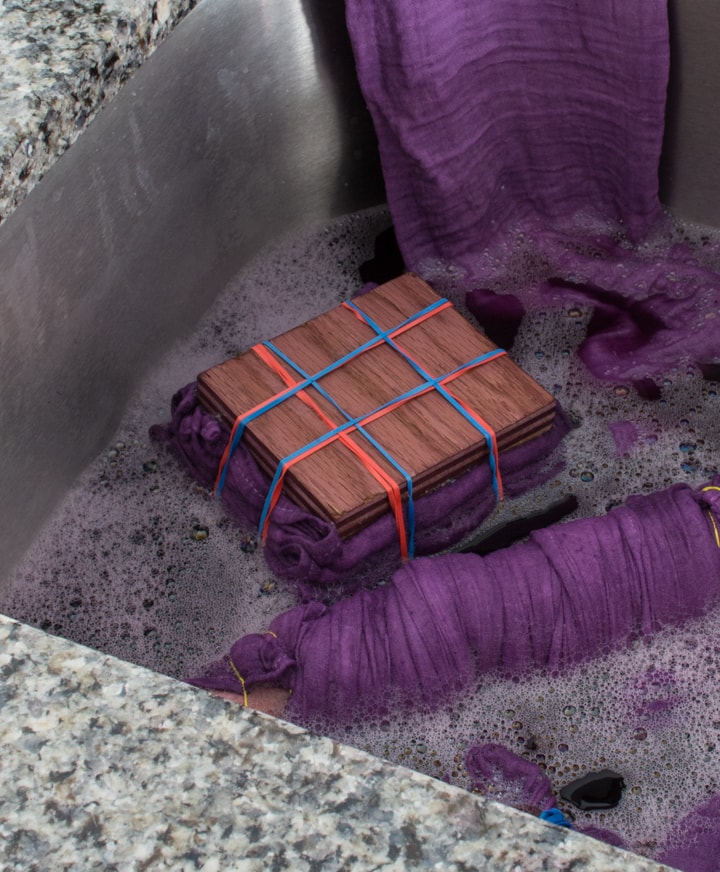
Step 3: Prep Dye Bath
As in the previous two tutorials, fill a plastic container or stainless steel sink with an amount of hot water (ideally 140 degrees Fahrenheit) appropriate for the amount of dye you’re using.
To enhance color and encourage even dyeing, add one cup of salt and one teaspoon of dish soap. Then put on gloves and stir in the appropriate amount of dye.

Step 4: Dye the Sandwiched Blanket!
Time to dye the last blanket. Add your sandwich to the dye bath. Same as before—leaving it in for only 5-10minutes will result in a higher contrast pattern. Leaving it in for up to 30 minutes will increase dye bleed into the blocked white areas.
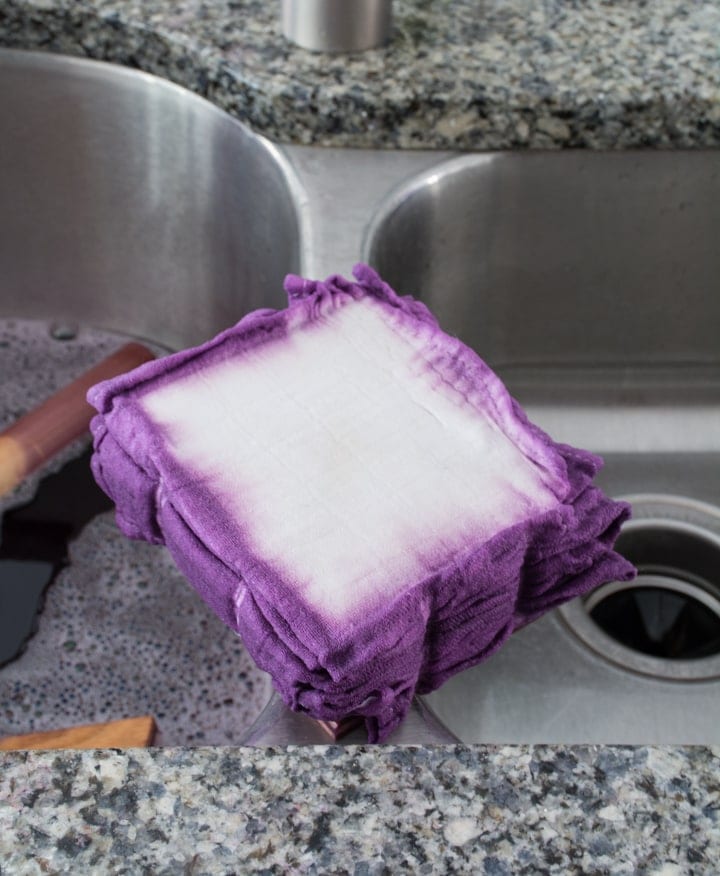
When you’re done dyeing, take the blanket out, but leave everything sandwiched. Then drain that bath and rinse your sandwich in cool water until it begins to run clear.
Step 4: Reveal and Wash
Remove the rubber bands and wood blockers to reveal your beautiful Itajime Shibori pattern. Same as the others—you can then wash and dry the blanket as normal for use.
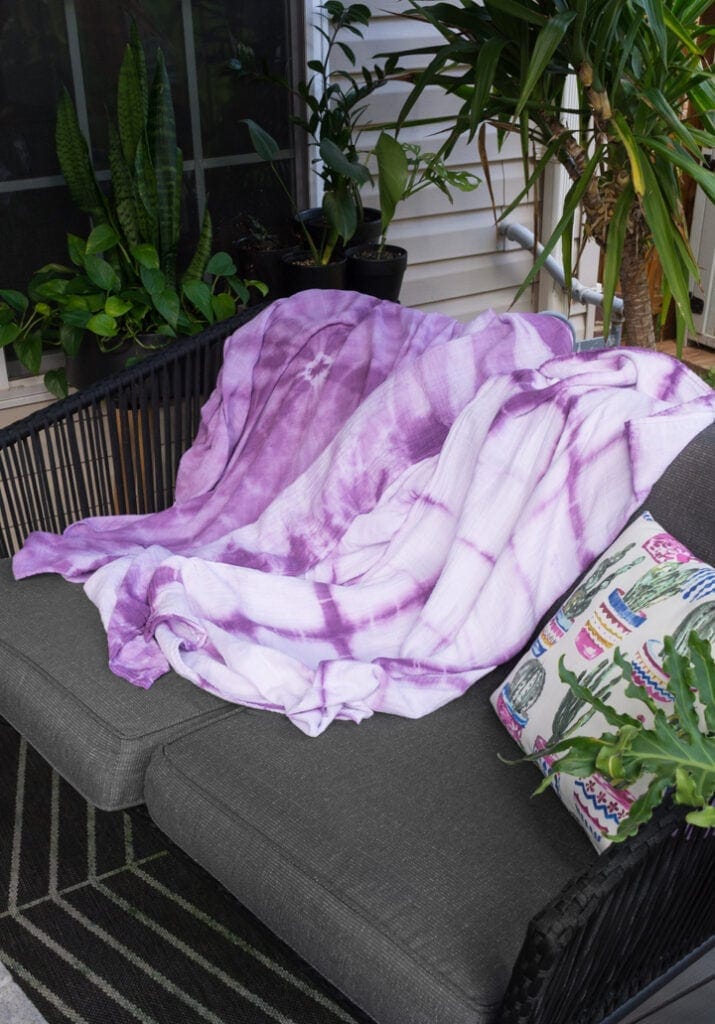
This was a very fun experiment to do. I really like these techniques because they are so forgiving. Have you ever dyed using a Shibori technique before? What are your tips?
Pin my DIYs using Kanoko, Arashi, & Itajime Shibori Techniques!