This article walks you through the steps to unbox a Cricut machine and set it up using a Cricut Maker 3 as an example. Cricut sponsored this post.
Sometimes one of the hardest parts of getting a new crafting machine is just getting it out of the box. When you ordered it, you probably spent hours reading reviews and building your confidence. But then the machine arrived, and unboxing it and getting started all of the sudden felt daunting.
You just want to get started making! And once you open the box, the setup instructions and new-to-you verbiage can be intimidating. I know how you feel. I recently ordered my very first serger machine, and it is sitting in a box in my closet.
Yes. I know I can do it, but I have had a hard time conquering the mental barriers that come with learning a new machine. This is a common feeling among those shopping for a Cricut cutting machine. Trust me—I have been there!
Trying to decide which Cricut machine is right for you? See my detailed post Which Cricut Should I Buy? to help you decide!
But now that I have experience with all of Cricut’s machines, I know that they truly are easy to master. There will be a learning curve if this is your first Cricut machine—and especially if this is your first crafting or cutting machine.
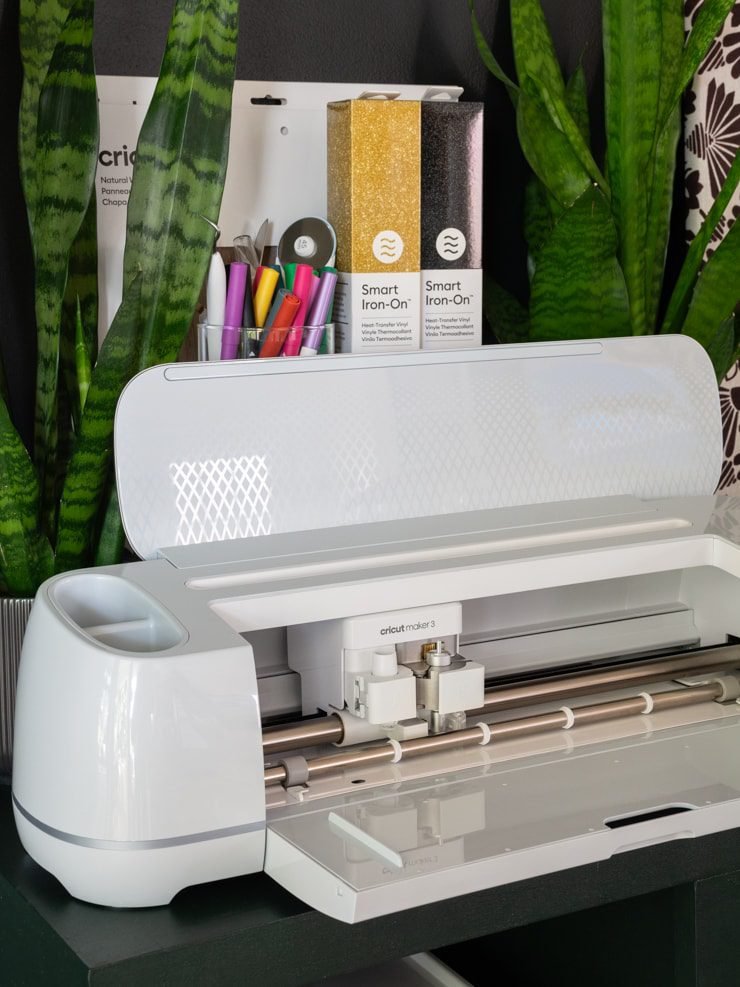
But there are many things you can do before you even receive your machine to set yourself up for success! In this article, I’ll walk you through the process of unboxing and setting up your Cricut machine using the Cricut Maker 3 as an example.
We’ll start from the very beginning, and I’ll also talk about some of the common questions you might have about investing in a Cricut machine. Are they easy to learn? Do you have to be an advanced crafter to use them? What do I need to purchase with my machine? I’ll answer all of these and more.
Whether your machine is a Cricut Maker 3 or another Cricut machine, there are a few things I recommend doing before you even receive your machine. You will be able to learn how to use it without these resources…but trust me, doing a little research beforehand will set you up for quick success.
You do not need to be an advanced crafter to use Cricut machine. In fact, the machines and Cricut’s Design Space software are very straightforward. They are great machines for beginners. Here’s what I recommend.
There are a lot of things you can do with a Cricut machine, but you don’t need to know everything just to get started. I recommend reading through Cricut’s Guide to Cricut crafting terminology as a good primer.
This resource walks you through some of the general Cricut terminology you’ll encounter when setting up your machine and making your first project. It also provides a brief introduction to Design Space, Cricut’s free-to-use design software.
I also recommend reading through the Cricut Learn articles. If you are like me, you would also benefit from watching the free Cricut 101 workshop recording before even receiving your machine—and then again after you set your machine up.
I also recommend getting your feet wet with Design Space before making your first project. You can download Design Space and set up your Cricut account before receiving your machine here: design.cricut.com. Cricut also has a guide about installing Design Space.
You can also watch Cricut’s Design Space tour to get to know the software. When you receive your machine, you will already have Design Space ready to go—and you’ll be familiar with its interface. You’ll be able to hit the ground running setting up and linking your new machine to your account.

Cricut has a user-friendly, robust troubleshooting and help page. I also like how you can search the help library using key terms. Bookmark this page so you can easily refer back to it.
Now it’s time to walk through the actual unboxing process. Make sure you have a space near your computer (or device you’ll be using Design Space on) with plenty of space.
After opening the box, you’ll see the instructional envelope (second photo below). Cricut includes a straightforward setup guide that will walk you through initial setup of your machine (third photo below).
Remove the power cord—that’s the one with the plug. Plug this power cord in to your machine and into a power source and turn the machine on. You’ll also notice a different cord in the box. That’s a USB cord—more on that in a second.
 Cricut Maker 3 in its box
  Instructional envelope in the box
  “Let’s get started” guide in the envelope
  Two cords that come with your Cricut Maker 3
Remove your machine and set it on your workspace. You can connect your machine to your computer using the other cord in the box (the USB cord), or you can do it via Bluetooth. I like using Bluetooth because it’s one less cord to worry about.
Keep in mind that you may have to add your Cricut to your computer’s recognized Bluetooth devices before it will show up in Design Space. I am on an iMac, and I have to do that the first time I try to connect any Cricut device.

Once you’re logged in to Design Space and your computer has picked up your machine, you can proceed with setup. Follow the onscreen instructions; you will know the setup process is complete when Design Space prompts you to make a test cut.
Note: You must complete the setup process to register and activate your machine. If you do not complete the setup process when you connect your machine to your computer for the first time, you can reconnect your machine, and select “New Machine Setup” in Design Space to go through the process.

Now that you’ve set up your machine, it’s time to get started making. Your test cut will be the first cut that you make. Cricut includes the material you’ll use for your test cut in the box—it’s a smaller piece of black vinyl.
Follow the instructions in Design Space to complete this cut. You’ll be prompted to load your material and use some of the buttons on your machine for the first time. Then you’ll be “weed” the vinyl (which means remove it) to make sure your machine is cutting as it should.


Next I recommend completing some pre-made projects. Your Cricut Maker 3 also comes with a few sheets of basic materials, including some sticker cardstock. This material doesn’t require a mat, which makes loading and using it super fast.
Below you’ll see that when I navigated back to Design Space, it prompted me to complete a few basic projects. I chose one—cutting dolphin shapes out of the smart paper sticker cardstock. When you do these projects, Design Space also shows you a little window that walks you through the entire process (see the third photo below for an example).


Congrats! You’ve unboxed your machine, completed a test cut, and made your first project. But you probably also have other questions about your machine. I’ll answer a few of those here with some personal anecdotes.
The world of Cricut is a welcoming place, and you can spend as much or as little as you want to enhance your crafting capabilities. Here are a few things to know right off the bat about purchases in Design Space.
The required Design Space software is free to download and use. But let’s talk about Cricut Access—this is what you’ll often hear people refer to when they say they have to “pay to use their Cricut machine.” It is untrue that you have to pay to use your Cricut machine.
A Cricut Access membership is a monthly subscription that has two tiers, Standard and Premium. Both have a fee.
- With a Standard Cricut Access membership, you get access to 200,000+ images, 700+ fonts, thousands of ready-to-make projects, 10% off cricut.com purchases, and more.
- With a premium membership, you get all of those things plus 20% off materials and free economy shipping on $50+ orders.
I recommend taking advantage of the 30-day free trial your new machine gives you. But you don’t have to purchase either of these memberships if you decide they aren’t right for you. Your machine comes with a free Cricut Access membership that includes 1,000+ free images, 15+ fonts, 250+ ready-to-make projects, and more. And you can purchase things in Design Space individually if they aren’t free.
You can also use your own designs in Design Space. That means you can import images and fonts into Design Space using the upload feature. I craft using a combination of items already in Design Space and items I either design myself or download elsewhere.
There are TONS of free SVG cut files, fonts, and images online that you can download to your computer and then upload to Design Space. Read more about that process here on Cricut’s website. I also have a post about How to Convert a JPG to an SVG file for Cricut Crafts that explains the difference between the types of images and uses my logo as an example.
Below is an example of a Dolly Parton file I designed and uploaded into Design Space to cut. I cut this out of Infusible Ink transfer sheets and used my Cricut Mug Press to put it on a mug.
 A Dolly Parton image I made
If you just buy a machine, it will come with only the premium fine-point blade and materials for a test cut. I do recommend checking out the bundles on Cricut’s website to get you started. They include a lot of stuff—vinyl, iron-on, some of the tools you’ll likely use, some mats, and more.
If you run the numbers, these bundles are actually a really good deal. The prices on Cricut’s website fluctuate, but I will give you an example using the prices as of writing this. The Cricut Maker 3 is listed for $429. However, if you choose the essentials bundle instead, it is $499. That’s $70 more, and here’s what it gets you:
- Everyday Iron-On Sampler
- Premium Vinyl Sampler Removable
- Transfer Tape
- True Control Knife
- Cutting Mat Variety 3-Pack
- Tools Basic Set
- Portable Trimmer
I’ll give you an idea on the value of this bundle using current prices on the website. Even using current sale prices, the value of this is about $130. So that’s a $60 savings.
But before choosing a bundle, you’ll want to make sure you’ll actually use the products that come with it. If you’re planning to work mostly with iron-on or heat-transfer vinyl (like you’d use making shirts), then that lowers the value of a bundle that includes only adhesive vinyl (which is like what you’d use for making decals).

Are there machine maintenance things to worry about?
One of the best things about Cricut machines is that they are extremely easy to maintain. Unlike some other crafting machines, they don’t require a lot of upkeep. Keep an eye out for any buildup of dust or cutting scraps that you might accidentally leave in the machine’s working area.
I regularly wipe down all visible parts of my machine using a microfiber cleaning cloth and a multi-surface cleaning spray. Don’t spray directly on the machine. Spray on the cloth and then wipe down the machine. You don’t need to worry about opening and oiling or cleaning anything inside your machine.
I hope this article gives you the confidence you need to order and unbox a Cricut machine! It’s an easy process, and if you take steps to prepare for your machine and educate yourself beforehand, you’ll be able to jump right in.
If you have questions, drop them below! Otherwise, be on the lookout for a full review of the Cricut Maker 3 as my next post. And then I’ll cover the similarities and differences between the Maker 3 and the Cricut Explore 3.


0 Comments