This content may contain affiliate links. See my full disclosure here.
Learn how to sew a simple knit skirt; this is the perfect easy sewing project for someone who wants to start sewing clothing!
I had some leftover fabric from my DIY wrap cardigan project, so I decided to make a simple knit skirt with a wide elastic waistband. It was so easy that I finished it in about 1.5 hours. If you don’t have any knit fabric on hand, you really can make this with any type of fabric. You can also customize your skirt based on your desired length–I’m making a short skirt, but you could make a mini or maxi skirt using this same approach.

Like easy sewing projects? Check out my tutorials for how to sew an easy wrap shawl, how to sew an envelope laptop sleep, and how to sew an easy bridal veil!
Before getting started, take your measurements. Measure around the largest part of your hips and the smallest part of your waist. Then, from the smallest part of your waist, measure how long you’d like the skirt to be. My numbers in inches were 36 (hips), 25 (waist), and 19 (length).
- Hip: First take your hip measurement, add 10 inches, and then divide by 4. (You’ll be working with 2 pieces for the skirt, but you’ll cut them from a folded piece of fabric. For example, my hip measurement was 36, so adding 10 and dividing by 4 left me with 11.5.)
- Length: Next, take your length measurement and add 4.5, which will account for a 2-inch piece of elastic and hemming. For example, my length was 19, so adding 4.5 left me with 23.5.
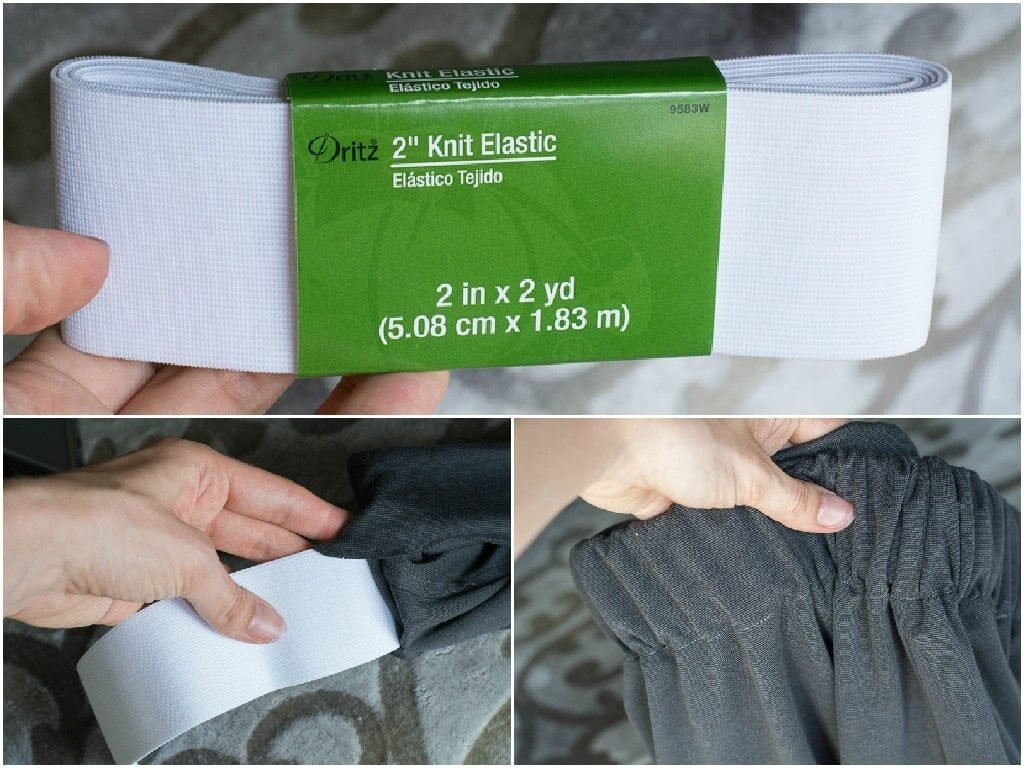
- Waist: Finally, cut a piece of elastic that’s the same length at your waist measurement. Mine was 25.
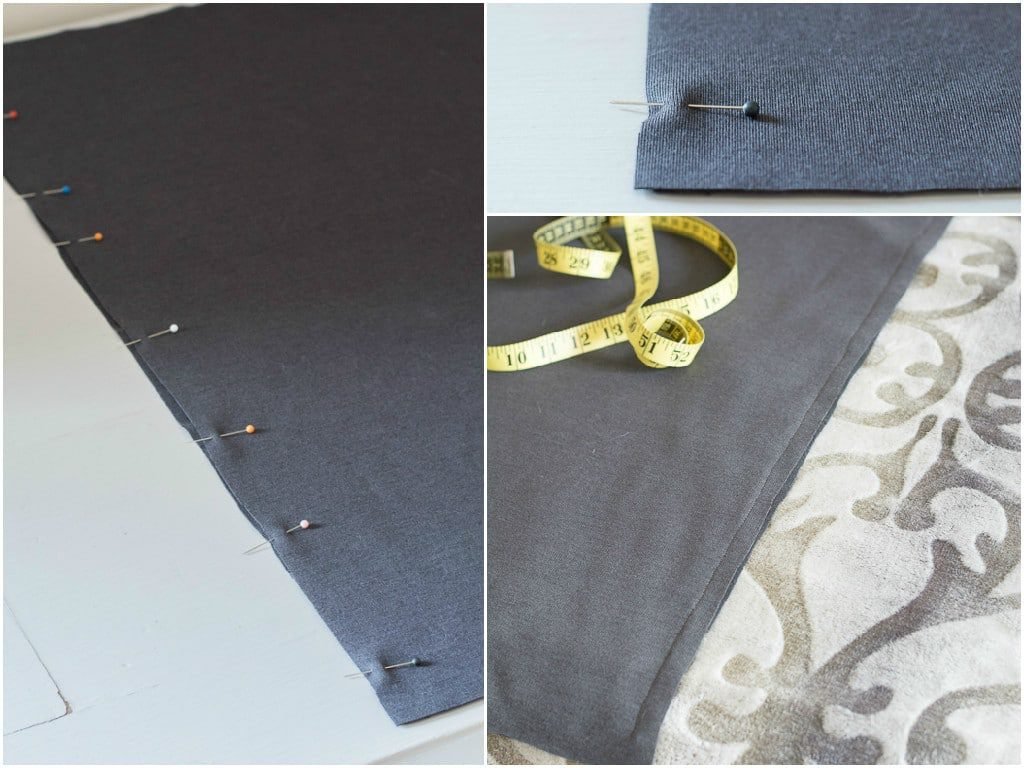
Then measure and mark your final length number (mine was 23.5) along the side that’s folded. Then, to create a rectangle pattern, measure your final hip number (mine was 11.5) on both sides of the mark you make for your final length number. Cut the piece and then do it once more, leaving you with two rectangles.

With the right sides of the fabric facing each other, pin the two pieces together along each of the two length measurement sides of the rectangles. Then sew a seam up each length of pins, removing the pins as you sew.
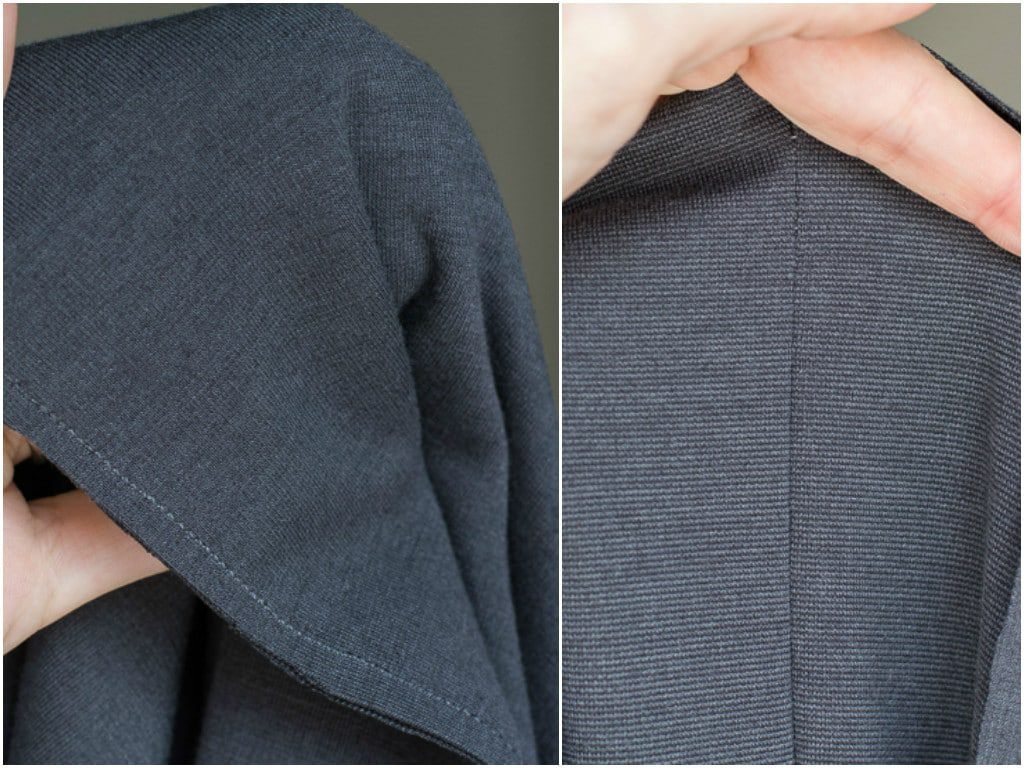
Press the seams to one side. Since I used a jersey-like knit that doesn’t fray, I just trimmed the excess fabric from the seams before pressing. If you are working with a fabric that frays, get yourself a pair of pinking shears, which produce a fray-resistant zigzag cut on seams. Here is what mine looked like before pressing (left) and after pressing from the outside (right).
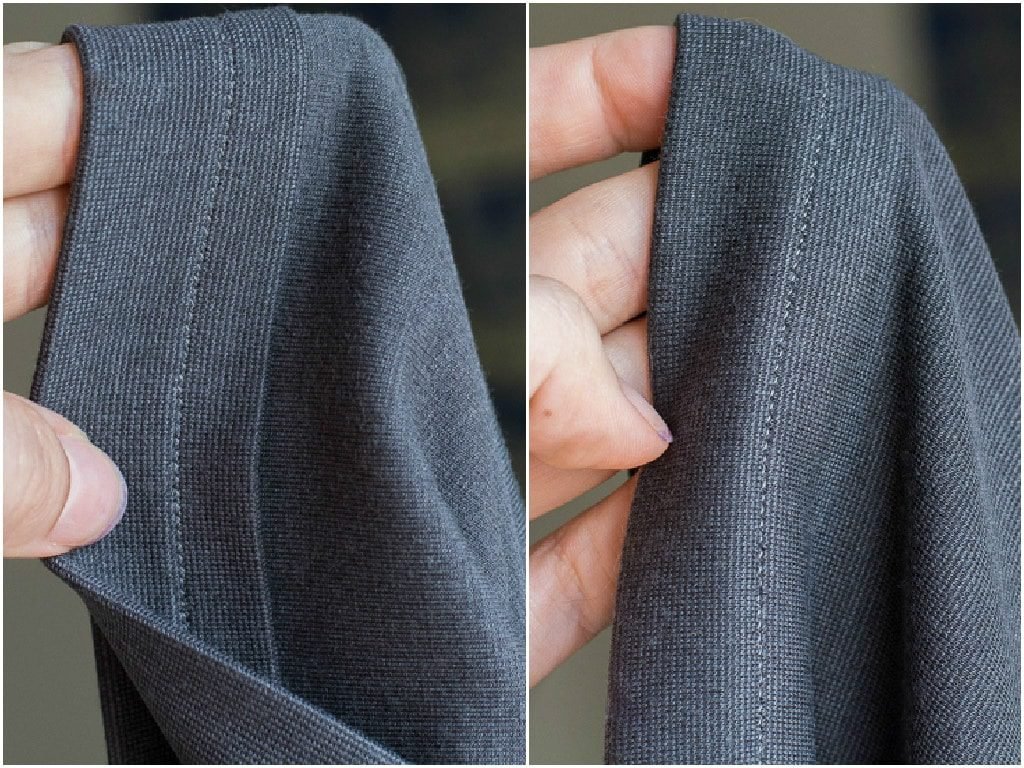
Now it’s time to hem the bottom of the skirt. To do so, fold the fabric up a 1/2 inch all around the hem, pinning as you go. When you’re done, press. Then fold and pin the hem a second time, but this time fold it up about 1 1/4 inches. Folding it up twice encases the fabric’s raw edge and creates a clean-looking hem. Press all the way around and hem. This is what it will look like from the inside (left) and the outside (right).
At the top of the skirt, create the casing for your elastic. Fold the fabric over (with wrong sides touching each other) and lay the elastic on top. Ensure that the casing will be big enough. Then pin, press, and sew the folded fabric over, but make sure you leave an opening of about 3 or 4 inches (bottom left photo). You’ll use this opening to feed your elastic through.
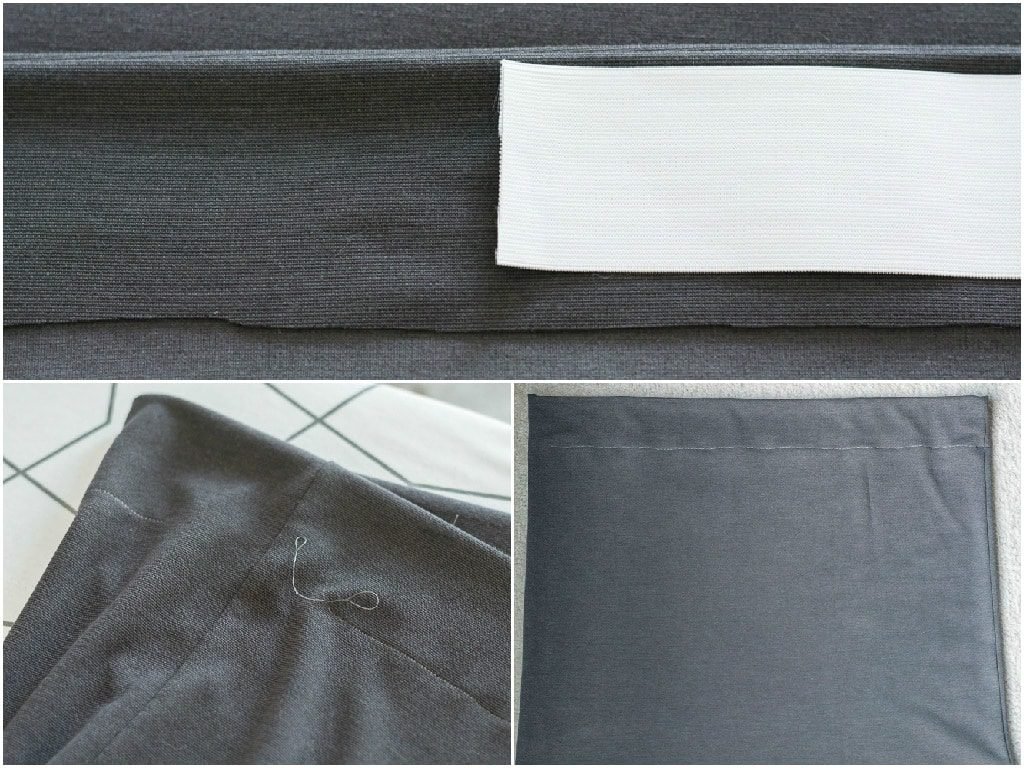
To make feeding your elastic through the casing, you can attach a safety pin on the end of the elastic and pull it through. I just bunched up the skirt and wiggled it through.
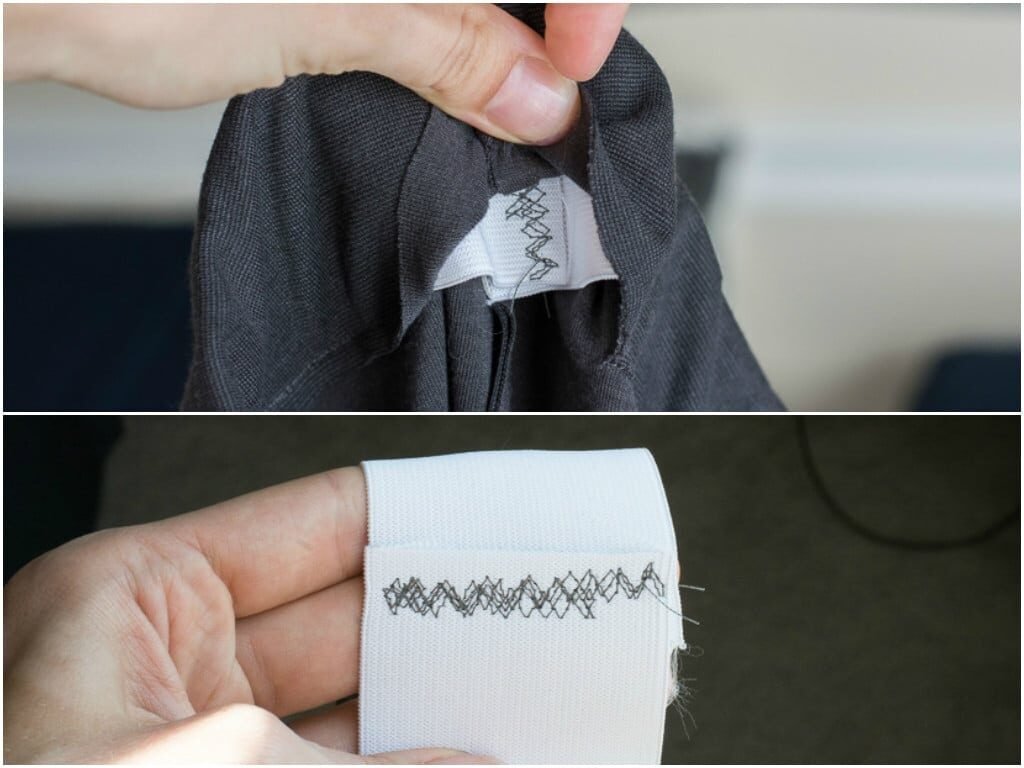
Once you’ve pulled the elastic through entirely, sew the ends together on top of one another. I went over it multiple times with a zigzag stitch because I wanted it to be very sturdy. It doesn’t have to be pretty; you’re about to sew the casing shut. (The elastic is actually fed through the skirt’s casing in the bottom photo. I just pulled it up out of the skirt for a picture. Don’t sew the elastic shut before you feed it through the skirt!)
Sew the opening shut on the same seam you made in step 6.
You’re done! Here is the final product:


Pin my post about how to sew a simple knit skirt!


0 Comments