How to Make a Polymer Clay Pot (With Tie-Dye Effect!)
Making your own polymer clay pot is easier than you think—even if you haven’t touched clay since high school. In this comprehensive step-by-step guide, I’ll show you exactly how to create a beautiful, tie-dye-style polymer clay pot using Sculpey. From prepping the clay to baking and troubleshooting, this is the only guide you need to start sculpting with confidence.
📅 What You Need to Get Started
Materials:
- Polymer clay (e.g., Sculpey)
- Oven-safe ceramic pot (used as a mold)
- Rolling pin or substitute (a smooth bottle works)
- Small knife or blade
- Clean surface for working
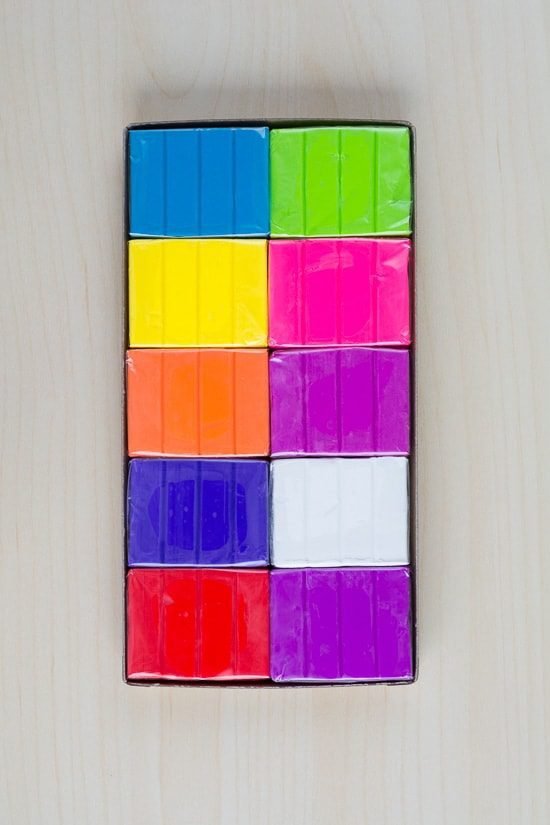
Tip: Use a variety pack of Sculpey for color options. Be mindful of the color order to avoid staining.
🌿 Step 1: Choose and Condition Your Colors
Pick your palette. I used dark purple, red, orange, yellow, and (almost) white.
- Begin with the lightest color first to avoid staining.
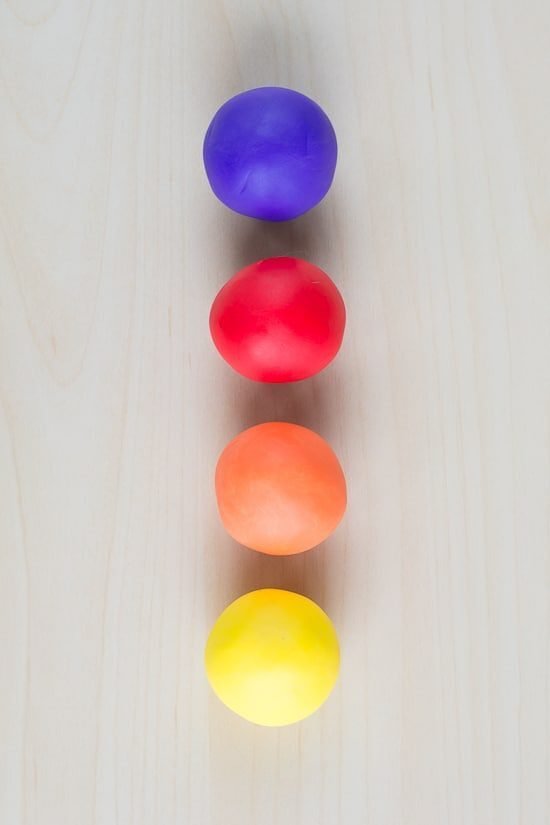
- Knead each color until it forms a smooth, pliable ball.
- Wash your hands between colors—especially before handling white.
⬆️ Step 2: Roll Clay Into Strings
Roll each ball of clay into a long string or rope:
- Thicker ropes = more distinct color patches
- Thinner ropes = more blended, marble-like patterns
🧱 Step 3: Twist and Blend
- Pair ropes together and twist them tightly.
- Roll the twists out to elongate.
- Repeat until you have one large, swirled rope.
- Fold the final rope, twist, and roll again.
This builds up layers of color for that signature tie-dye or marble effect.
🛀 Step 4: Flatten Your Clay
Roll the rope into a flat sheet using a rolling pin (or bottle):
- Aim for uniform thickness
- The more you roll, the more the colors blend
- Press gently to avoid tearing the design
🛁 Step 5: Mold Around the Pot
Use the outside of your ceramic pot as the mold:
- Drape the sheet of clay around the pot
- Smooth it using your hands or rolling tool
- Cut a hole in the base for air escape during baking
- Trim the top lip evenly with a small knife
Note: Clay inside the pot is harder to work with and may stick. Outside is safer.
🔥 Step 6: Bake the Clay
Follow the clay manufacturer’s directions carefully. For Sculpey:
- Bake at 275°F (135°C)
- 15 minutes per 1/4 inch of thickness
- Place the pot (with clay wrapped around it) in the oven
Let cool completely before removing the clay.
Caution: Overbaking can cause cracks. Use an oven thermometer for accuracy.
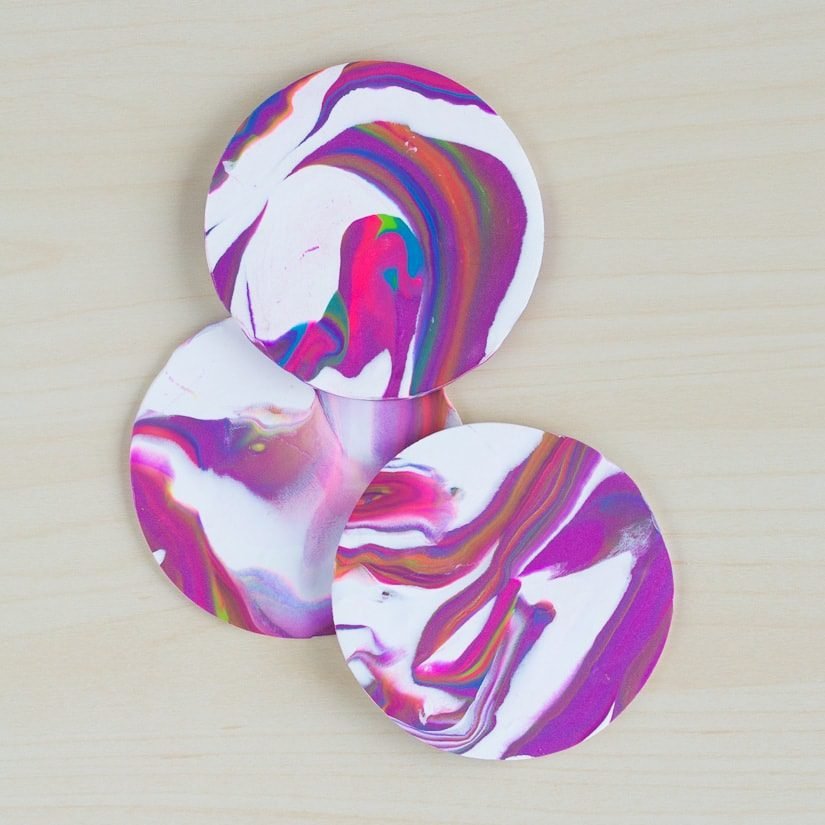
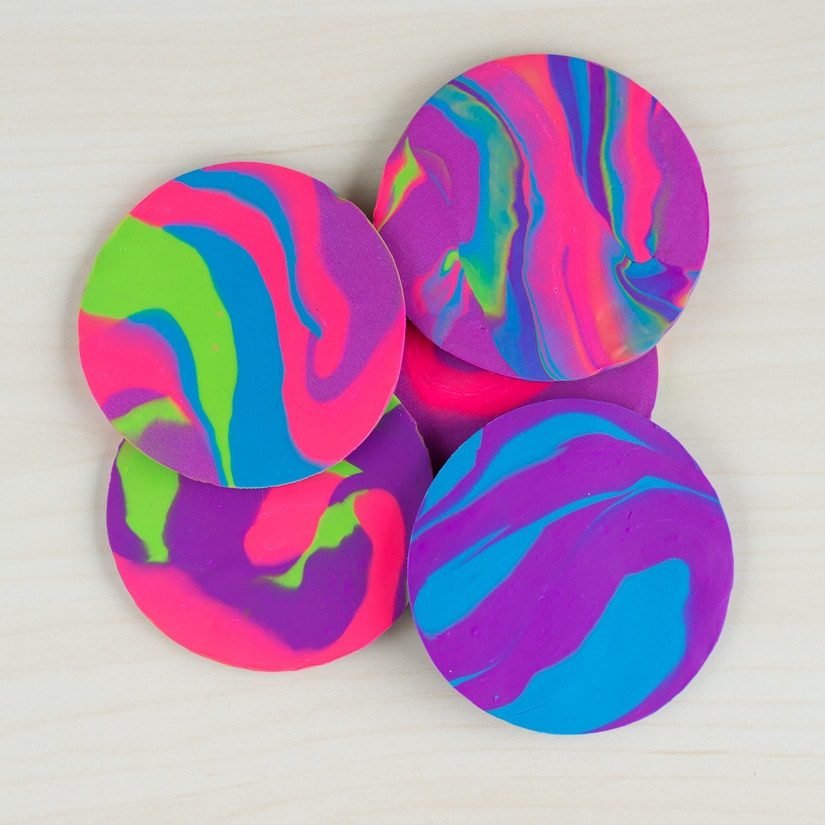
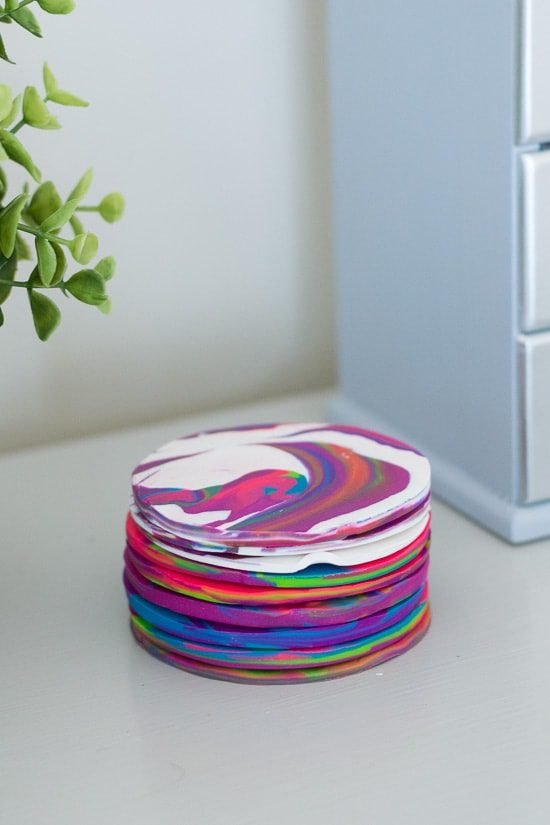
🌺 Bonus Project: Make Coasters With Leftover Clay
Use extra clay to make matching coasters:
- Roll out and cut with a circular object (e.g., cup rim)
- Bake on a flat tray
- These make excellent beginner projects
⚠️ Troubleshooting Tips
- Cracks after baking? Possibly overbaked. Use glue to seal small cracks.
- Ran out of clay? Estimate generously—you can always trim, but adding more disrupts patterns.
- Stray fibers or pet hair? Double-check hands, workspace, and clothes before starting.
- Color contamination? Always start with lighter colors and clean tools thoroughly.
🌿 Final Thoughts
This project is a fantastic way to ease into polymer clay crafting. With just a few basic tools and some Sculpey, you can create a colorful, tie-dye-inspired pot to add personality to any space. It’s low-cost, customizable, and once you get the hang of it—super fun.
Get creative with your colors, and don’t be afraid to experiment with extra clay. Happy sculpting!
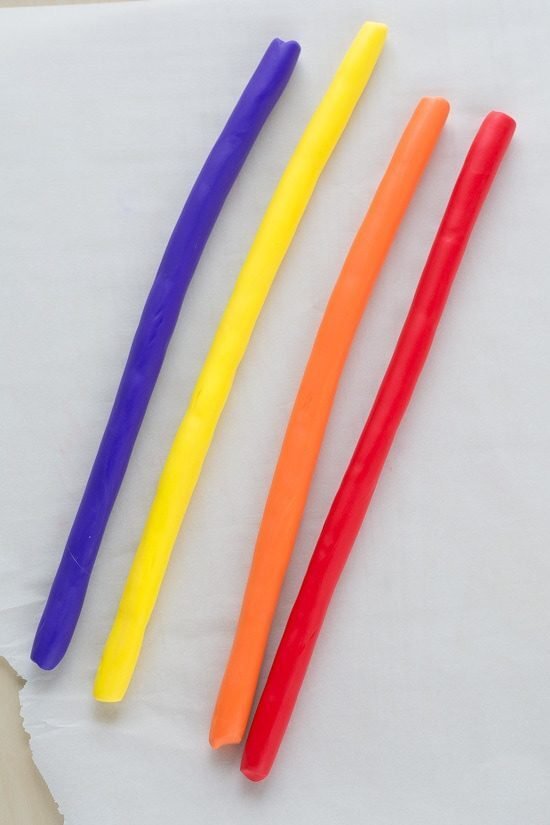
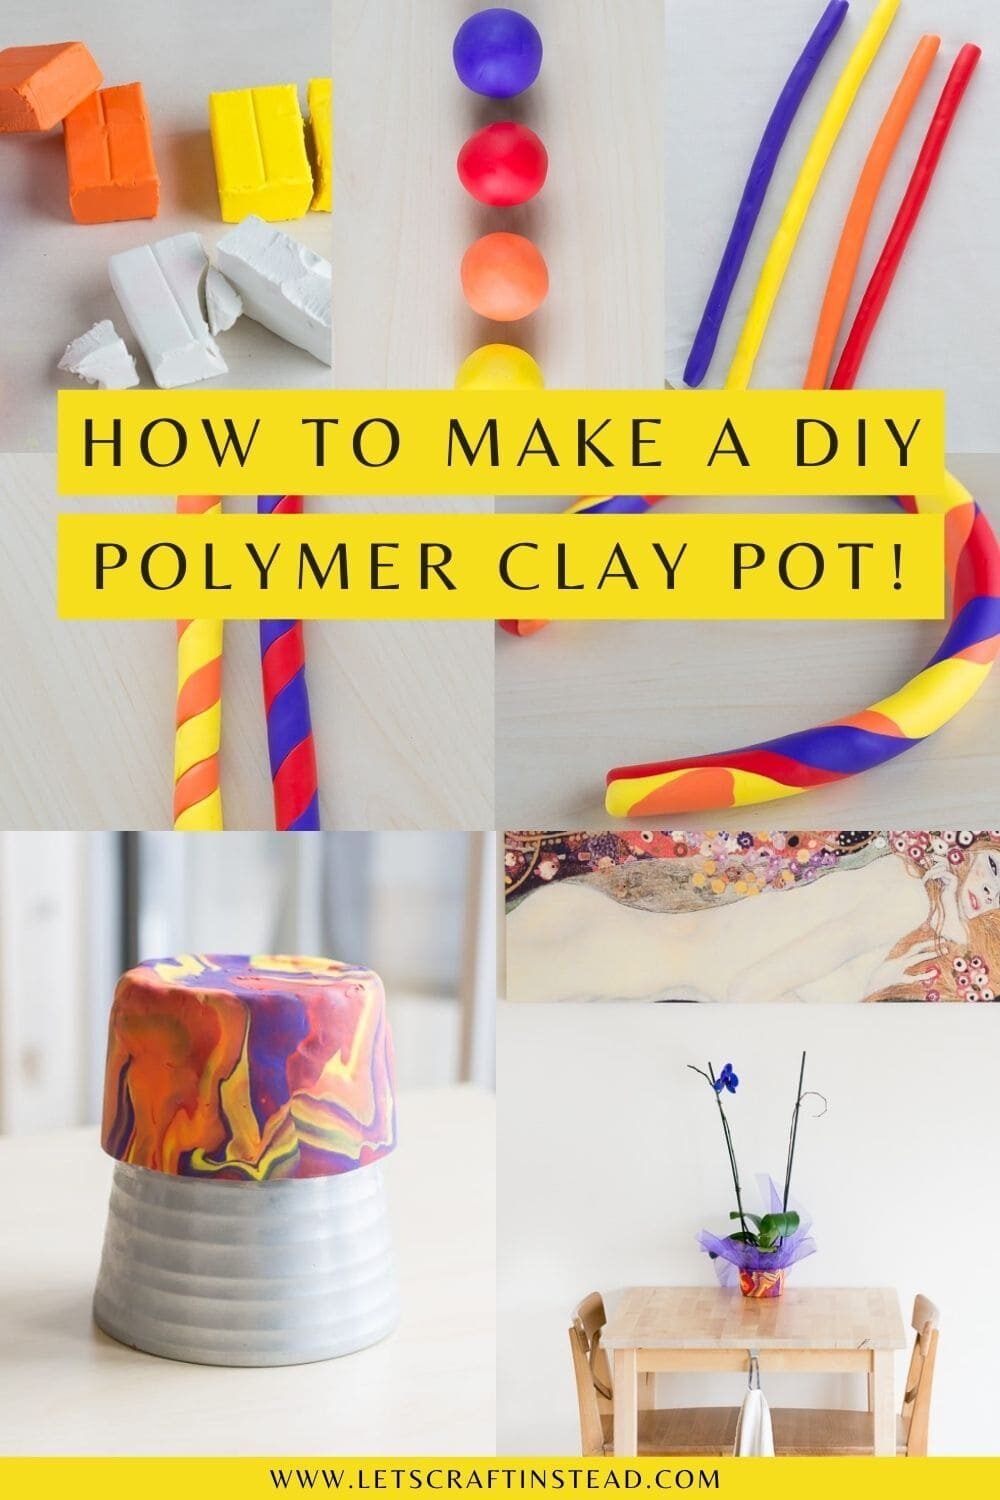
Step 1: Choose your colors. From my variety pack, I chose dark purple, red, orange, yellow, and white. Each block of Sculpey has four bars; I used all four bars of each color. Beginning with the lightest color, kneed and roll each color until you end up with a smooth ball.
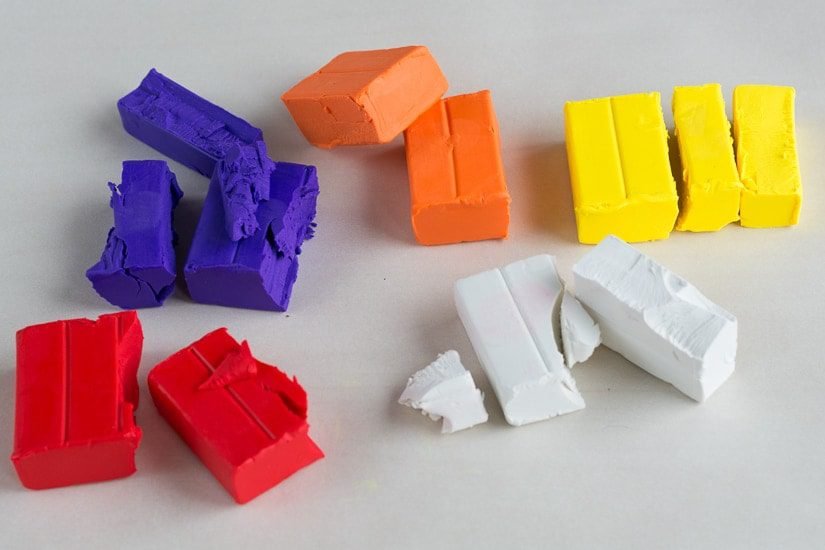
Tip: Why don’t I have a white ball in this picture? My white clay didn’t make the final cut because I worked with the white right after working with the red. I’m an idiot. The red completely stained my hands and turned the white pink. So, if you’re using white, make sure to work with it first or thoroughly wash your hands before touching it.
Step 2: Roll each ball into a long string. If you want your colors to remain fairly bold, keep the strings pretty thick. If you want your colors to blend more with one another, make them thinner. I wanted mine to stay pretty bold.
Step 3: Pair each string up and twist them together to go from four strings down to two. It doesn’t really matter which ones you choose to twist together. Then, roll them out so they’ll look more like this:

Step 4: Do the same thing again to go from two strings down to one.
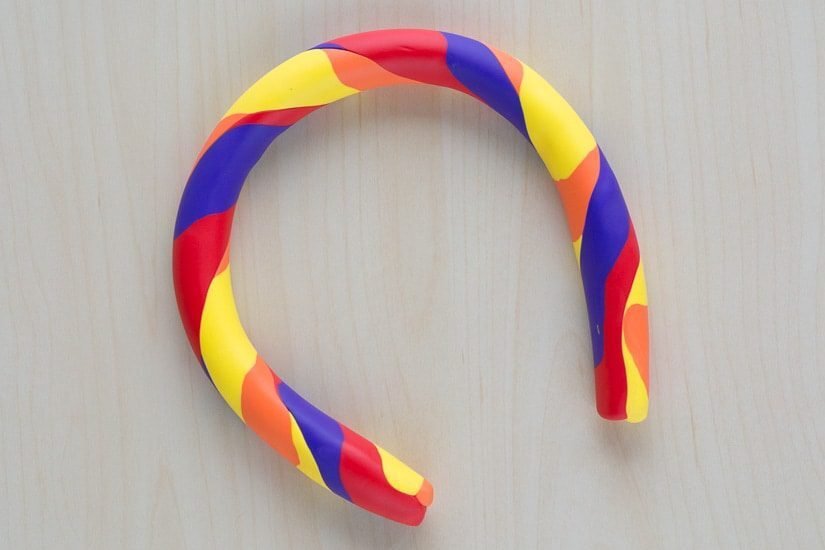
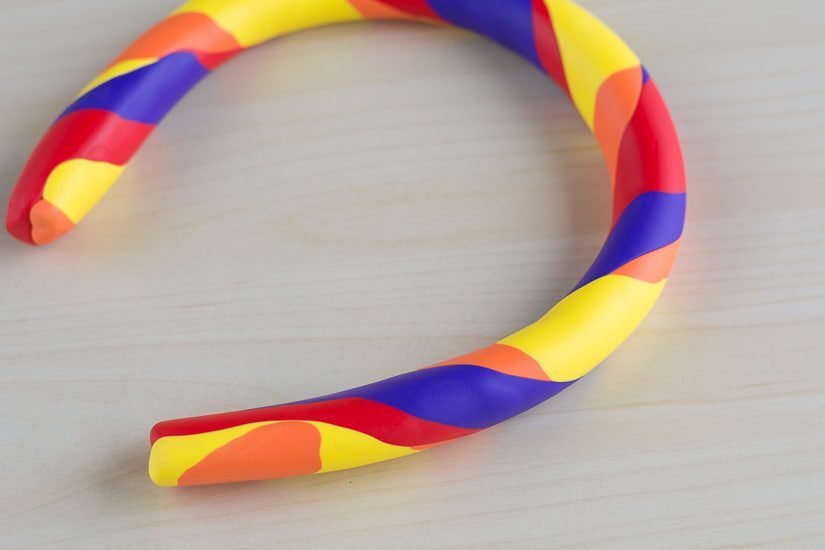
Step 5: Fold your long piece of clay in half and twist it together; then, roll it until it’s smooth. Do this once more to ensure the colors create some interesting patterns. Then, mash the clay down into a flat circle using a rolling pin. (I used a round bottle of vinegar because we don’t own a rolling pin.) The colors will bleed more as you do this.
Step 6: Mold your clay to your pot. Here’s where things got significantly less fun. I’d wanted to use my ceramic pot as a mold by putting the clay on the inside of the pot and baking it. But, that wasn’t working out very well.
So I used the outside of the pot as a mold instead. To ensure there weren’t any air pockets, I cut a small hole in the bottom of the pot (top of the pot in the below picture).
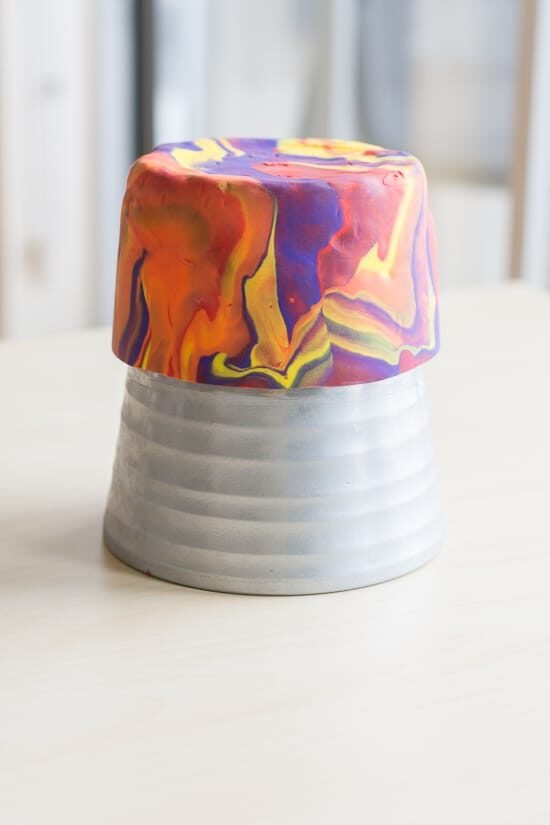
Step 7: Smooth out the exterior by rolling out the clay while it’s on the pot. Remember, you’re going to bake the clay on the pot. Using a small knife, trim the top to make the lip of the pot even.
Step 8: Just as pictured in step #6, set your pot and clay in your oven and bake according to your clay’s instructions. I baked my Sculpey clay at 275 degrees Fahrenheit for 15 minutes per 1/4 inch thickness. When it’s done, pull it out, let it cool, and gently wiggle the clay off of your pot mold.
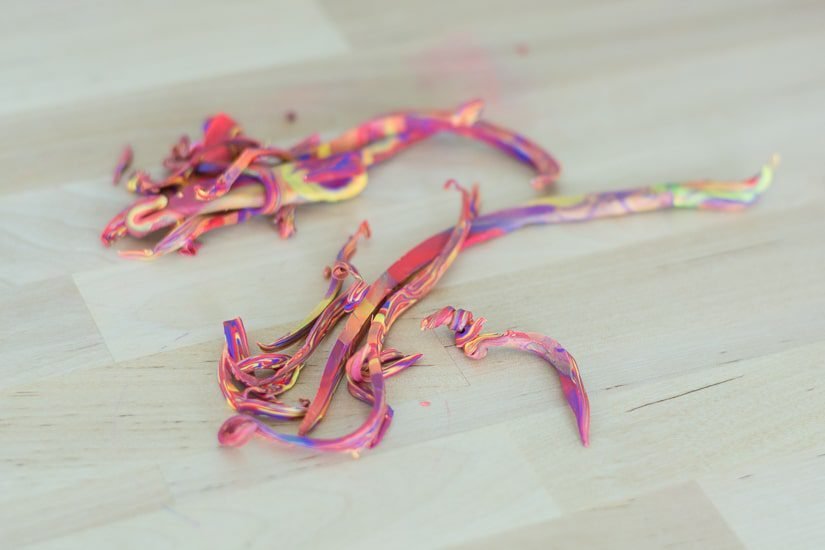
And with the remainder of the clay, I made the coasters! They seemed much easier after battling the pot mold. I used the top of a cup as a “cookie cutter” so I didn’t have to hassle with cutting them in a perfect circle.
- They aren’t kidding when they say not to bake for longer than the recommended time. I think I did, because I ended up with a crack on the side of my pot that I’ll have to seal with some glue.
- I really underestimated the amount of clay I’d need, so my pot ended up being a lot shorter than I’d hoped it would be. Remember, it’s much easier to cut excess clay off than it is to add more clay while also keeping the tie-dye pattern.
- If you have a pet, check your workstation, hands, and clothes even after verifying that all are clean. You don’t want to bake a pet hair into a visible spot. Also, make sure you don’t have any towel residue on your hands after washing and drying them. Those little bits will make their way into the clay and are impossible to get out.


0 Comments